What a new editor on Instagram. Effects on Instagram. Let's look at all the filters
If you are working under Windows systems and would like to be able to process Instagram-style photos on your computer, you will encounter difficulties. But there are no programs. There is Aperture, which has many styles (paid and free) that allow you to give an image a certain effect in one click, but it is not for Windows. You can install Photoshop and, with considerable effort, turn it into “Instagram for the computer,” but then you will have to learn how to work in this monster, which is also not at all free. The knowledgeable reader will notice that image styles similar to Instagram are found in Picasa and Capture One. Have you seen the results of their work? And you don't need it for free. These difficulties for owners of Windows computers have led to the fact that some serious photographers upload their photos to their mobile phones and then do Instagram-style processing there. As my mother says: “quiet horror.” Or maybe these Instagrams? If this thought came to you, then you have taken the path of a retrograde, an opponent of progress, and you will no longer become a fashion photographer. This photography lesson will get you back on track.
After several attempts to find an acceptable Instagram-style processing method, search engines led me to the only solution that is available to owners of computers running Windows control: to use free service http://pixlr.com, which gives you the opportunity to get Instagram effects online. True, the online editor imposes some restrictions on the photo editing process: you need a reliable Internet and a browser, you also cannot save an intermediate processing option and continue working in the next session, that is, it is advisable to do all the work in one go.
- Once on home page Pixlr.com ( photo 1) we are informed that we can process photographs:
- By installing the program on your mobile phone (we don’t need this).
- By opening the advanced photo editor (Open Pixlr editor Advanced). We need this, but not now.
- Using an express photo editor (Open Pixlr express Efficient). That's what we need.
- Edit playfully in Open Pixlr-o-matic Playful. This is completely for children's level.
Click on “Open Pixlr express Efficient” and start turning the photo into Instagram on your computer.
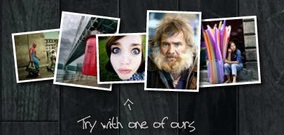
First you need to load the photo into the editor ( photo 2). To do this, we can open a file from a computer (Browse), download it from the Internet (Open URL) or take a picture with a webcam (Webcam). The Collage link takes us to a collage tool (more on that later). Mobile will allow you to download free program for a mobile phone, in which you can also process photos in Instagram style. Since we want to run Instagram on a computer, I assume the photo is already on your hard drive. Therefore, click on Browse and select the file for processing. The editor accepted the photo big size V JPG format(21 megapixels with Canon 5D), which was nice. After loading the image, a panel appears with buttons for selecting the type of processing ( photo 3: Adjustment, Effect, Overlay, Border, Stiker and Text. Since there are more than six hundred effects hidden behind these six buttons, I will only talk about those that will give your photos the most fashionable (from my point of view) Instagram style.
We start by searching for suitable color effects (Effect section), since this is the most important decision when searching for a style for future Instagram. Special attention I recommend checking out the Default collection of basic color effects ( photo 3, item 1). Look for the color scheme, or combination thereof, that you like. I checked all the styles and collected the most interesting ones in the photo below. If you have decided on the color style of the future Instagram-we, then click Apply and continue processing the photo.
Instagram color styles that I liked. You will find the name of the style under the large photo.
- Some tips:
- To remember your favorite processing styles and quickly find them in the future, click on the “heart”( photo 4, item 1). These styles will be noted and placed in separate folder your favorite styles (Favorites) ( photo 3, item 2). If you don't like the style of the photo, click on the bottom heart again.
- If after selecting a style the style preview bar disappears, you can call it up by clicking on the picture of the last style you selected ( photo 4, item 2). Then “pin” the style samples with the button ( photo 4, item 3).
- If the applied style turns out to be too strong, you can weaken its effect with the Amount slider ( photo 4, item 4).
- You can sum overlay multiple styles. To do this, after selecting a style, you need to click Apply and continue selecting the next style( photo 4, item 5).
- If you want to cancel one or more actions, or even return to the state of the photo before processing, then use the Undo button located in the upper right corner of the page. Redo will take you back in the opposite direction.
Blurring a photo. In the next step of editing an Instagram-style photo, we will use the Focal Blur tool (focus blur) ( photo 5). To find it, choose Adjusment > Focal blur. The inner circle indicates the area where blur will not occur. Outside the outer circle, the blur will be maximum, and its strength depends on the Blurring value (blurring, photo 5, item 1). Between the circles, accordingly, there will be a zone smooth increase blur. All zones are edited by moving the center point or point on the circle. Please note that you can blur the image not only in a circle, but also in a straight line ( photo 5, item 2). This type of blur works well when you need to simulate the blur of a shallow depth of field shot.
An interesting effect that simulates soft-focus blur of a lens can be obtained by increasing the Glow boost value (increase the glow, photo 5, item 3). For the final image I used it too. This is the end of the blur. You can compare how much more difficult and how long it takes to blur in Photoshop.
Texture, vignette and frame. Next, I want to apply some kind of texture that will imitate the surface old photograph. To do this, go to the Overlay > Dafault collection and I selected Worn with a weakening (Amount) to 40. The vignette is applied in Overlay > Vignette, and the frame is in the Border section. Note that some effects, such as overlays and frames, can be rotated or mirrored ( photo 6). For added beauty, I added a postmark (Stiker > Vintage), and finished processing my first Instagramm by clicking Save ( photo 9).
Collage from Instagram. If you have several photos united by one theme, or several Instagram-style processing options, you can make a collage. After saving the last photo, exit the editor (Close) and go to the Collage section. Choose a template (Layout) that suits you ( photo 7, item 1), and fill it with the previously created Instagrams. If you have not yet processed photos, you can do this from the collage creation mode. To do this, click on the “brush” icon ( photo 7, item 2), and when you finish stylizing the photo, click Save. The processed photo will automatically return to your collage. The result of a collage of three Instagrams on photo 8.
You can get a fashionable Instagram-style image from an ordinary photo easily, quickly, for free, on a Windows computer and without Photoshop. Of course, all these manipulations can be done in Photoshop, even with best quality. But the main beauty of Instagram processing is the ease of getting beautiful and complex effects. It took me 2-3 minutes to give an ordinary photo an Instagram style. The range of capabilities of this online editor is much wider than what I showed you, but even this is enough to get an effective result of photo processing.
PS: if you use this tutorial to successfully edit a photo in Instagram style, please share your success with us using the form below.
PPS: beautiful girl Lara asked a question: how to write an inscription on a photo? I answer. Press the Text button, then select a text style, for example Dotted (dots), then enter the text itself in the “Type your text here..” field, then we can select a different font style (in the Font menu)... and then bam!, it doesn’t work! The problem is that most of the fonts used in online editor, does not support the Cyrillic alphabet, and instead of the entered text on the photo you will see an empty editing field. If you write the text in Latin, then such a problem, naturally, will not arise. What to do? Find the font style that supports the Cyrillic alphabet. For example, in the sans-serif font style (Sans), the font “Hattori Hanzo” will allow you to write text in Russian. Of course, there are other fonts that understand Cyrillic, however, than more beautiful font you see, the less likely it is to work. Alas.
Online and make unique masterpieces of photographic art from your photos, you just need to get acquainted with this photo editor. Pixlr-o-matic will help you edit pictures on your PC in a couple of clicks.
You no longer need to master complex photo editors. This program is a kind of online webcam with Instagram effects, which will allow you to surprise your friends and acquaintances with your original photos.
The application has an unusual interface design that creates the effect of being in a real darkroom. By moving the cursor over the loaded image, you will see circular waves on the surface of the developer. This unusual interface can be called the “highlight” of the program.
When you start the program, the main menu opens, in which the user can select a photo from the library of existing photos on the computer or take a photo with the camera and edit it. A button will appear in the lower right corner after the first photo has been processed. quick transition to the last edited image.
At the bottom left, the user has the opportunity to try out the functionality of the photo editor on 5 standard photographs of the program. Click on any one, and after a second the photo is imported into the laboratory, ready for editing.
By selecting a photo from the library, it opens in the main application window. At the bottom there is an access panel to the main actions. At any time during the editing process, the user can switch from one type of editing to another and change the already selected effect or frame.
An online photo editor with effects will provide a wide range of transformations for your not-yet-masterpiece. In the application, effects from Instagram online are divided into 2 categories:
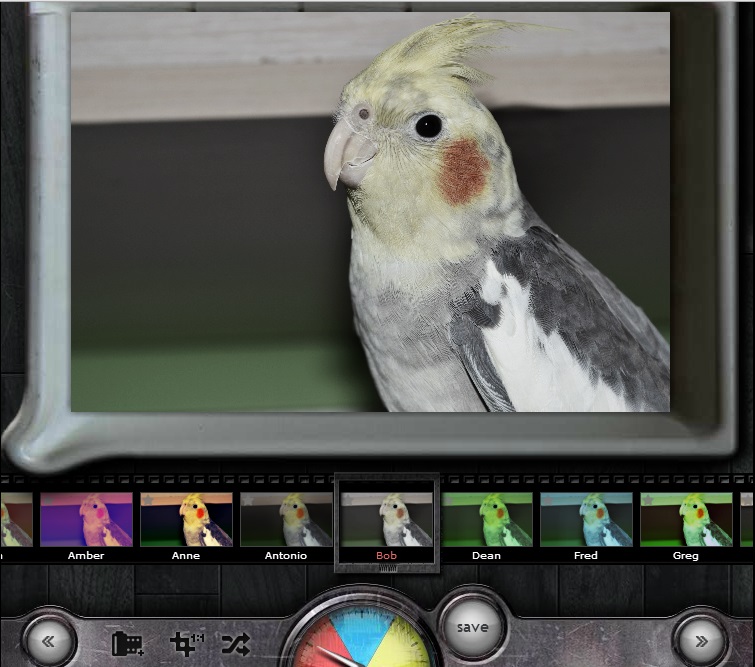
Add any effect to a photo by simply clicking on it in the program and admire the result. So, for example, the Jean effect will make the photo black and white, Karen will shift the color spectrum to brown tones, and the Melissa effect will blur the edges of the photo and add purple tints.
The program also has a “Frames” section, with which you can place an image in an original frame. There are a huge number of frameworks in the program. You can choose to take a picture rounded corners, classic smooth frames or cute frames with stars and curls, or you can take a photo from an old album or in the style of Polaroid photo cards.

By clicking “Save” the program will prompt the user to save the processed photo in the selected folder on the computer. In this window, the processed photo is “dried” on clothespins - the program’s unusualness lies in the details. You can save the result in original quality or select the desired size.

So, in the previous article we examined in detail the question - how to mobile device, so with personal computer. Now it's time to talk about the work itself in the program.
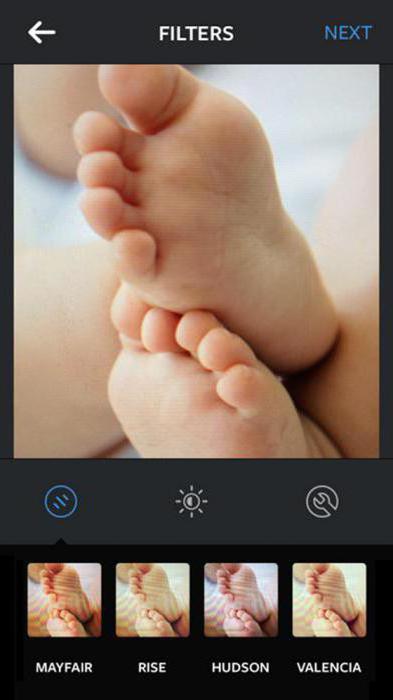
The main thing that exists is, of course, filters. All the “magic” of Instagram, without which it is now difficult to imagine mobile photography, lies precisely in the ability to apply to images various effects. And not like in advanced photo editors, but as simply and quickly as possible - with one click on the screen.
What are these filters?
Total represented on Instagram 20 filters(although one of them can only be partially called such, but more on that later). Each of them is a fixed preset from a whole series graphic effects. As a rule, no matter what the photo is (dark, light, taken in daylight or artificial lighting), several options fit well with it.
At the same time, in addition to any filter, you can apply additional effects - blur, frame (one for each filter), cropping, changing contrast. But these are already details. The main thing is the filters themselves. They create a special style of Instagram photographs that is so well recognized. Let's take a closer look at these Instagram effects on specific example. We will apply each Instagram effect with a frame to show their differences.
There is one more important caveat: on the screen of an Apple mobile device, photos look slightly different than on a computer monitor.
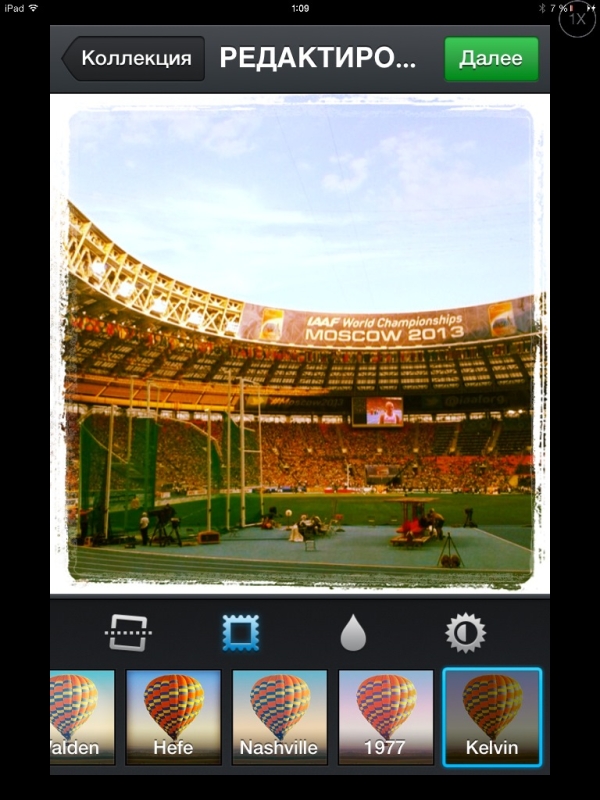
As an example, let’s take this photo taken by the author on an iPad. Here the effects of all filters will be visible very clearly: it is “light”, taken during the day, at sunlight, there are different objects and many colors in the frame.
So, let's start studying the effects of Instagram!
1st Instagram effect – Normal
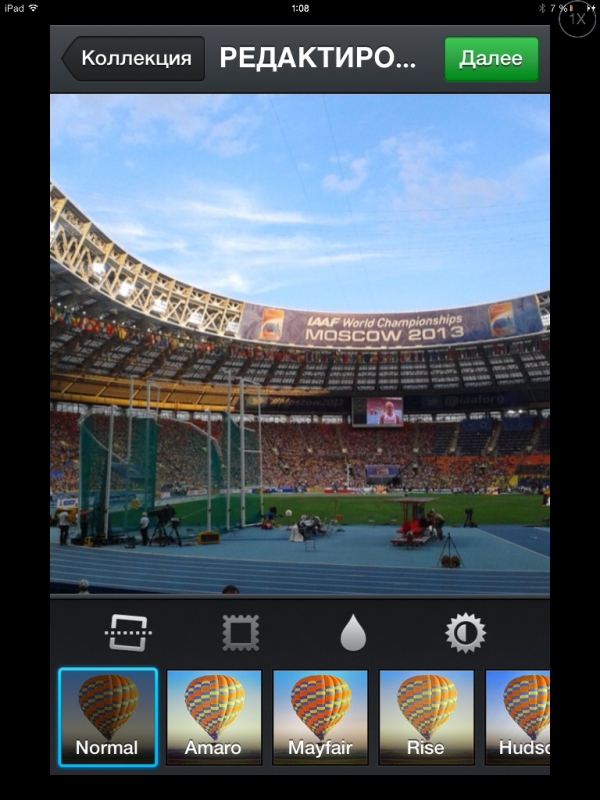
Strictly speaking, this is not a completely full-fledged filter. As you can see, the image has not changed at all. And yet, something happened. Firstly, the signature “square” cropping is applied - the feature by which any Instagram photo is easily recognized. Secondly, it is possible to apply a blur effect and change the contrast.
In any case, you cannot upload a photo to the system without at least applying Normal.
2nd Instagram effect – Amaro
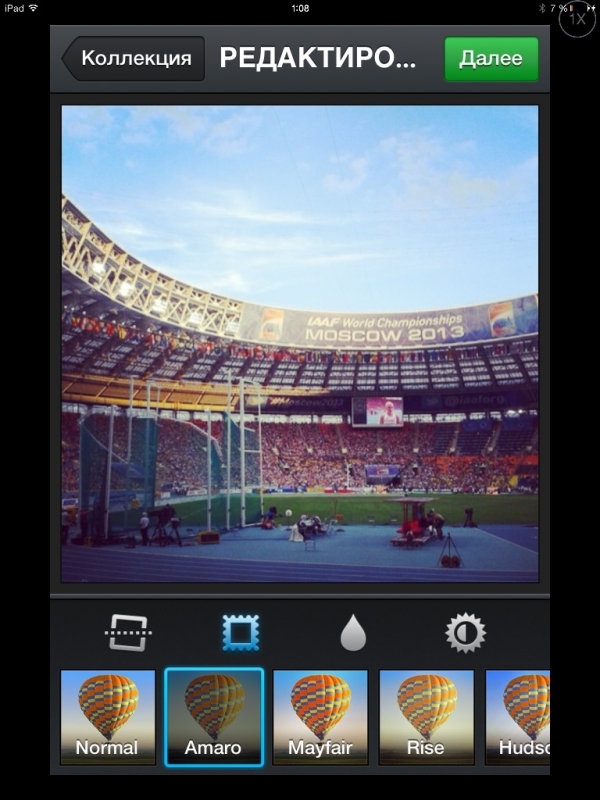
Amaro is a “cool” and “light” filter with noticeable vignetting (the so-called darkening at the edges). It's great when you want to highlight the subject in the center of a photo, brighten it, and bring out cool tones (especially blues). Its frame is wide, but discreet – gray in color.
3rd Instagram effect – Mayfair

Mayfair – generally similar to the previous one, but more “even” effect. It doesn't place as much emphasis on the center of the frame, and suits a wider range of photographs. Its frame is much thinner, which can be quite important for framing reasons.
4th Instagram effect – Rise

Rise is a “light” filter that raises and equalizes the exposure (lighting) of the image. The frame is wide, light gray. There is no vignetting, but some residual from the original can still be observed - as can be seen in the example. If you want to lighten the entire photo, this is a good option.
5th Instagram effect – Willow
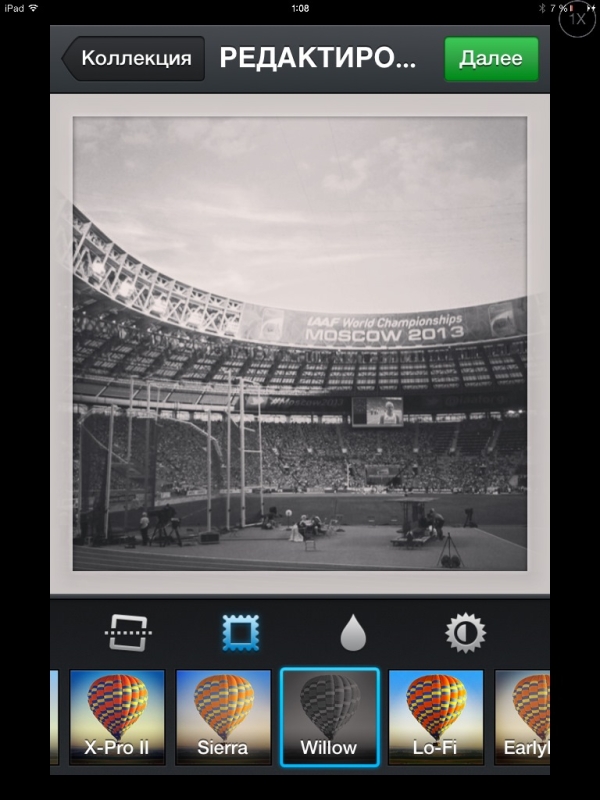
Willow is one of two black and white Instagram filters. They differ little. Basically, Willow simply makes the image monochrome and adds a slight vignetting. The frame is wide, light gray. Instagram, of course, is mostly filled with color photos—black and white filters aren't very popular. But there is a use for Willow.
6th Instagram effect - Lo-Fi

But Lo-Fi is, on the contrary, one of the most popular effects on Instagram. It slightly darkens the image, but makes it bright and rich, and highlights the center. Almost anything that gets enough light looks better with this filter. The frame is also stylish.
7th Instagram effect – X-Pro II
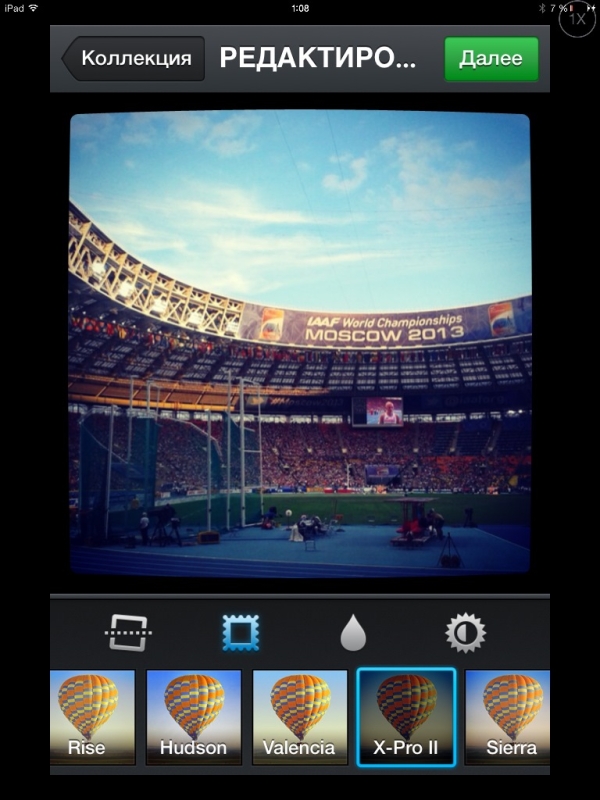
X-Pro II is also one of the most successful Instagram effects. In general it is similar to Lo-Fi, but even darker, with pronounced vignetting, and an interesting “bulge” effect that appears when applying a frame. Be sure to try it!
8th Instagram effect – Sierra

Sierra is a fairly simple "light" filter with noticeable vignetting and has a simple wide white border. Interesting for photographs, taken in good lighting, otherwise it will hardly find use.
9th Instagram effect – Hudson
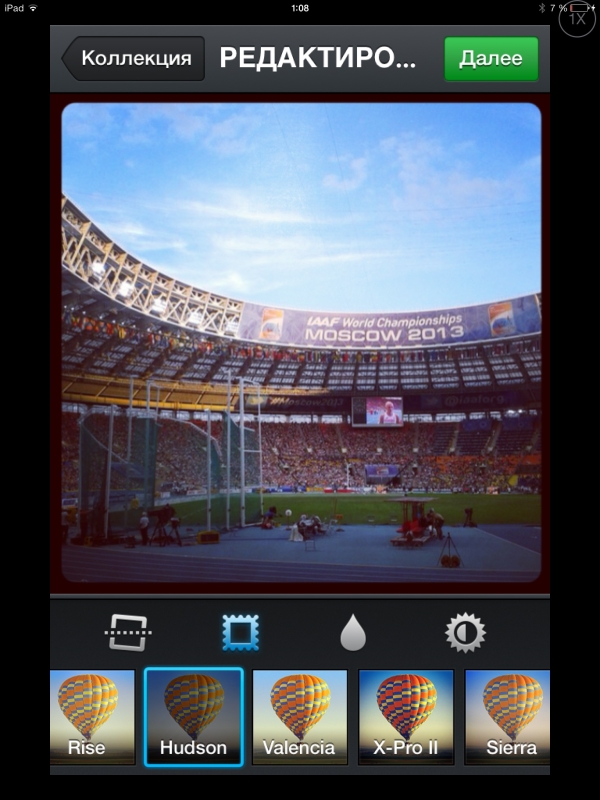
Hudson is a filter similar to Lo-Fi and X-Pro II, but with a less pronounced effect. It's slightly lighter and doesn't enhance colors as much. But it is equipped with a black frame with rounded edges, which looks very good.
10th Instagram effect – Valencia
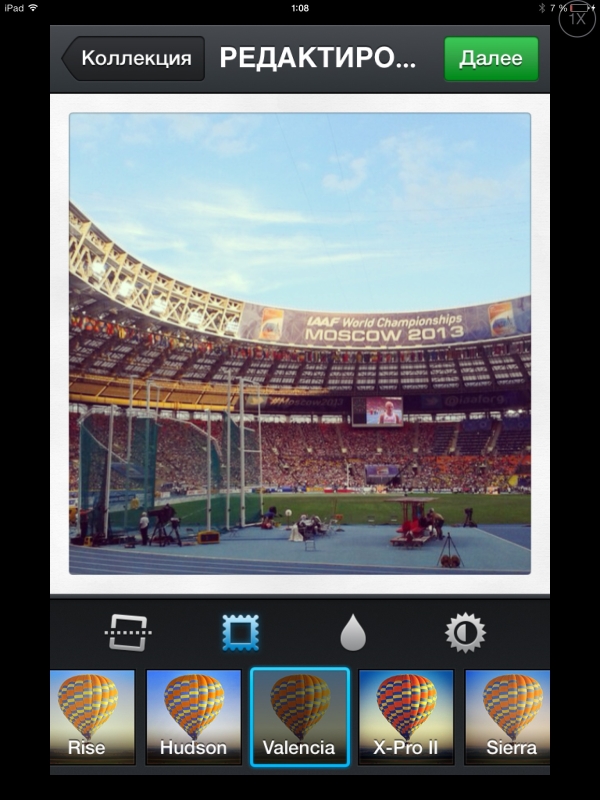
Valencia is a very simple but widely applicable Instagram filter. It brightens and evens out the image, giving it a stylish, slightly “faded” tint. The frame is simple - light and wide.
11th Instagram effect – Earlybird

“Early Bird” is probably the most popular effect on Instagram. He cheats quite a lot original image: both shades and light - everything is aimed at making the photo expressive. The white frame with strongly rounded corners is another touch.
12th Instagram effect – Sutro

Sutro is a very “dark” filter with strong vignetting, but at the same time it does not change the shades of the photo too much. It affects mainly light. The frame is black, the corners are slightly rounded. Good for very light photos that place the main subject in the center.
13th Instagram effect – Toaster

Everything is clear with the Toaster filter - it is a natural “toaster”. The color temperature of the photo increases greatly - sometimes it is inappropriate, and sometimes it looks very stylish. This effect is the whole point of the filter. The frame is nothing special.
14th Instagram effect – Brannan
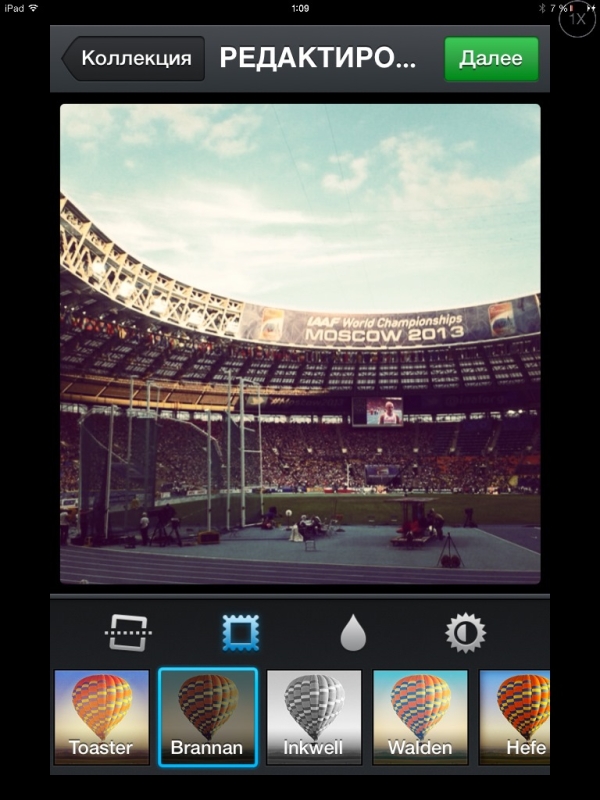
Brannan is also a simple Instagram effect, the exact opposite of the previous one. It simply makes the image very “cold” without making any other significant changes. The frame is simple black. In a word, the filter is not particularly “highly artistic” - you need it if you just want to lower the color temperature.
15th Instagram effect – Inkwell

Inkwell is Instragram's second black-and-white filter, slightly more contrasty than Willow. There's not much more to say about him. Instagram users aren't too fond of monochrome filters, but maybe you'll find them useful?
16th Instagram effect – Walden

Walden is not the most popular filter as it doesn't have much to offer. The image with it becomes significantly colder, acquires a bluish-greenish tint, and there is no vignetting. However, such a simple effect is quite appropriate for many photographs.
17th Instagram effect – Hefe
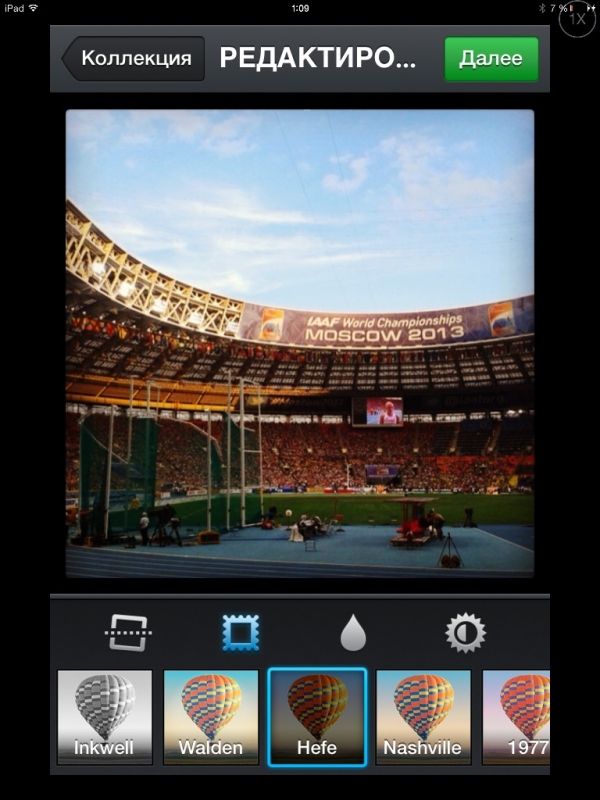
But Hefe is quite popular among Instagram users. Bright and “warm” filters are generally the most popular in the application, and Hefe is one of those. The photo may have darkened slightly, but it has added expressiveness and color saturation. The frame here is the most common one. It is desirable that the lighting in the photo was uniform (and not as we see in the example).
18th Instagram effect - Nashville
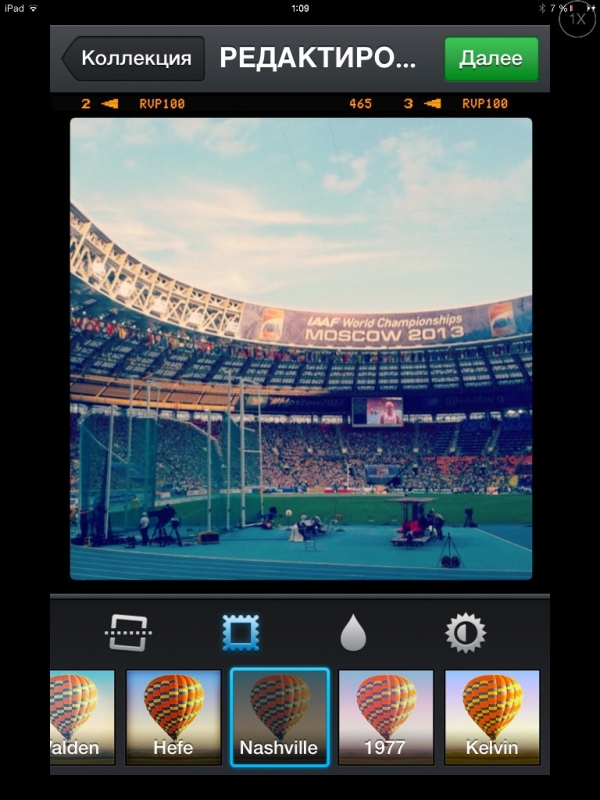
The filter, probably named after a large American city, is one of those that makes photos “cool” in color terms. It affects lighting and contrast weakly - so if you have successfully lined up the frame in terms of light, this effect will not make your efforts in vain. An important advantage of Nashville is its unusual frame, thanks to which we see it so often on Instagram.
19th Instagram effect - 1977
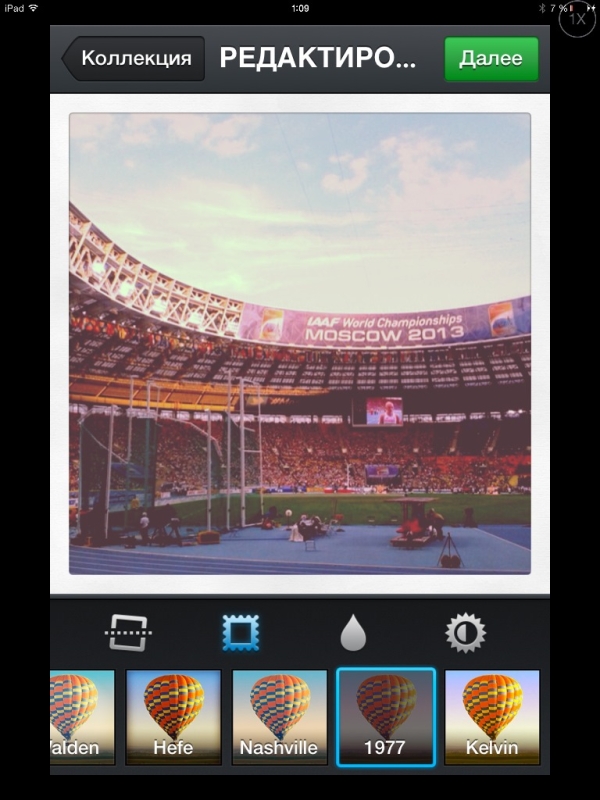
Probably, the name 1977 should reflect the “vintage” nature of this effect - the photograph looks like it was taken with an old film “soap box” and is quite faded. Many people find aesthetic appeal in this style - why not? Moreover, apart from the color shades and saturation ratio, little changes in the photo.
20th Instagram effect – Kelvin
Kelvin is the latest Instagram filter, and quite an unusual one. Like many of the others offered, it makes the image more saturated and increases the color temperature. But what makes Kelvin especially interesting is how it highlights shades of green in photos, and generally makes everything slightly greenish. And the frame is quite unusual. Kelvin is one of the most popular effects in the application, although it is placed at the very end.
Feel free to experiment with Instagram effects!
As you can see, 20 Instagram filters give you a lot of room for imagination. Of course, you cannot learn to apply them correctly just by reading the article. One piece of advice - don’t be afraid to experiment! Moreover, Instagram is an opportunity to work with photos as quickly and simply as possible.
Free Instagram program was born in San Francisco. The project has been operating and thriving since 2010. On this moment Instagram is admired by many users social networks. It has become easier to share various events from your life with friends. And Instagram filters help make them brighter.
Beautiful photo without photoshop
An interesting photo editor with a lot of filters is the highlight thanks to which Instagram is developing. Today, millions of users use this application daily. Terabytes of photographs of a wide variety of content pass through it: from pictures of users’ feet and food to professional nature photos. And even the most ordinary frame can be turned into a masterpiece of photography using built-in filters. Not everyone knows how to use them correctly. Each filter has its own shade of color and options for its use. You can make any photo unique by adding more light, distributing shadows, or simply correcting a bad photo.
Frequently used filters
This is not a filter at all. The natural colors of your photo are shown. If you've tried popular Instagram filters, but none of the effects are to your liking, then Normal is exactly what you were looking for.
Black and white are favorite colors. Well, together they give a great picture of what is happening in the picture. Plus, the combination of light and shadows gives big advantage in use this effect. The picture becomes clearer and more contrast.
Often Instagram users try to hide the edges of photos. Hefe is great for this. It darkens them, drawing attention to the center and giving it richness by intensifying the color.
The filter is pretty standard. It also deals with shadows and saturates the photo with light. Works especially well with portrait photographs, because it highlights the center.
Nashville
Not everyone needs sharpness in their pictures. A popular filter on Instagram reduces it and veils it with pink tones. The picture becomes expressive, but not too contrasty. It is used to add a romantic mood to photos and looks very natural in nature photographs.
Tenderness and warmth delight the eye, shadows and light give birth to new ones. original effects. The saturation and yellowness of the tone are suitable for both portraits and landscapes.
Purple has always paired beautifully with other colors and tones. And with this filter, the picture looks a little “outdated”; it becomes bright in the center and darkens at the edges.
Game of colors
Guaranteed brownish tints in the photograph, smooth transitions colors, bronze flashes. The image looks vintage, well aged.
This filter adds blue tints to the photo and defocuses the central part. The range of colors changes, with cool tones predominating. Photo processing in this way is applied to cityscapes.
Aggressive red tones enhance the contrast of the photo and artificially age it. Instagram filters help achieve the desired effect, in in this case- vintage.
Notes of bright life
Valencia
Sometimes old photos look very beautiful. So, this filter “ages” the photo a little and softens the colors with warm shades. Architecture and various unusual objects look much better in the photo after such processing.
X-pro II
Saturation and excessive brightness make this filter special. It stands out for its high contrast and vintage feel. Streets, people, landscapes - it will all look juicy and catchy.
For a photo with too much contrast, you can choose this effect. Thanks to it, the contrast is reduced, but at the same time the exposure of the frame increases, and the center stands out. Are there not enough clouds in the sky? Instagram filters to help. Sierra makes the photo appear slightly washed out, as if it was taken on a cloudy day. The processing is suitable for nature photos, as it immediately creates an atmosphere of peace and warm, soft shades.
The black and white effect is a fashion trend. However, instead of bringing out the shadows and highlights, it makes the picture more matte. Our grandmothers had the same photographs. The only difference is that they couldn't apply any effect to it.
Favorite photo effects
Allows you to create photos in a “foggy” style. Adds haze and blur, highlights the foreground and works with light shades. Evening landscapes with such an effect are mesmerizing.
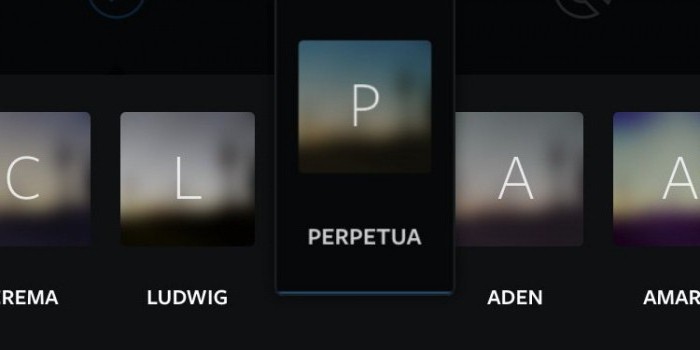
Perpetua
Enhances green tones and brightens shadows. Light green tones will look interesting in spring photographs or in photos of the summer sea surf.
The photo effect makes the photo especially, the shades shift to yellow color. A soft golden glow spreads across the picture, literally enveloping every corner. These Instagram filters help hide minor skin imperfections. This filter is recommended for processing close-up photos.
The most popular Instagram filter. It adds bright light to the photo. Gives a festive mood to the photo, the image becomes more contrasting, but the colors in the center are better visible. If you want to stylize the photo “in the 90s,” you should pay attention to Amaro. By the way, the darker the photo itself, the more visible the effect will be.
New filters for Instagram
Earlybird
Many people are familiar with the sepia effect, but you can check out the improved look on Instagram. The picture “fades” before our eyes. Retro lovers may be interested in the effect of darkened edges and imitation gold.
“Contrast” is the word that most accurately describes this filter. The soft gray color enhances this powerful effect and gives the image a metallic sheen. In the 80s they would have appreciated the beautiful deep colors of the photo.
Gloominess may not always decorate a photograph, but if you need to achieve such an effect, this filter exists. It complements the purple and brown shadows, allowing the picture to reveal its dark essence. Looks great in a Halloween photo, for example.
The softness of the photo is achieved by fading and adding a purple glow. If there are a lot of important small elements in the photo, that's great. The effect will emphasize their significance and highlight their brightness.
For lovers of yellow and bright. A two-in-one filter, sunny tones create joyful contrasts in summer photos.
Filter "Prism" - Instagram introduces beauty
Prisma is an attempt to touch art, and to make your own photography with this art. Surely many have dreamed of such a function, and now new filters have appeared that work quickly and efficiently. Every second person has already uploaded a photo with this effect to Instagram and is getting a lot of likes.
The Prism filter requires careful selection of photos. Instagram allows you to edit any photo, but to achieve best effect, you'll have to try. An abundance of light or, conversely, a lack of it will not make your photo beautiful, and even more so it will not be able to attract the attention of subscribers.
Conclusion
So, as you can see, the Instagram application offers huge selection filters for a variety of purposes. Each user will probably decide on a set of their favorites. The great thing is that with new program updates, developers add fresh, interesting filters. The main thing is to understand how best to use them.