Installing Apache MSI: Step by step installation of Apache. Installing Apache on Windows (7)
Here he is - great and terrible. In its lifetime, it has ruined many novice web developers who lost their lives setting up its configuration files. 🙂 But you and I are people with strong nerves and stomachs of steel - so let’s go.
Initial installation and setup
Unpack the distribution archive into the C:\Apache2 directory.
Open in text editor the file “C:\Apache2\conf\httpd.conf”, which is the main configuration file of the Apache server.
Well, now hold on. Women, elderly people and children are asked not to read further. The authors are not responsible for the mental state of people who read the article to the end. 🙂
Editing the httpd.conf file
- To load the mod_rewrite module, find and uncomment (remove the “#” symbol at the beginning of the line) this line:
LoadModule rewrite_module modules/mod_rewrite.so - For loading PHP interpreter, at the end of the module loading block you need to add the line:
LoadModule php5_module "C:/php/php5apache2_2.dll" - Define the directory containing the configuration PHP file by adding the following line below:
PHPIniDir "C:/php" - Find and uncomment the line:
ServerName www.example.com:80
Edit it as follows, setting the original server name:
ServerName localhost:80 - Find the line:
DocumentRoot "c:/Apache2/htdocs"
Assign a root site management directory (we'll create one a little later):
DocumentRoot "C:/apache" - Find this block:
Options FollowSymLinks
AllowOverride None
Order deny,allow
Deny from all
And replace it with the following:
Options Includes Indexes FollowSymLinks
AllowOverride All
Allow from all
- Remove or comment out the original directory control block (we won't need it), which without comments looks something like this:
Options Indexes FollowSymLinks
AllowOverride None
Order allow,deny
Allow from all
- Find the block:
DirectoryIndex index.html
Replace it with:
DirectoryIndex index.html index.htm index.shtml index.php
- Find the line:
ErrorLog "logs/error.log"
Replace with the following (in this case it will be more convenient to view the global server error file):
ErrorLog "C:/apache/error.log" - Find the line:
CustomLog "logs/access.log" common
Change to:
CustomLog "C:/apache/access.log" common - For SSI operation (server side enablement) following lines, located in the block
, you need to find and uncomment:
AddType text/html .shtml
AddOutputFilter INCLUDES .shtml - Add below in the same block
, two lines:
AddType application/x-httpd-php .php
AddType application/x-httpd-php-source .phps - Finally, find and uncomment the lines:
Include conf/extra/httpd-mpm.conf
Include conf/extra/httpd-autoindex.conf
Include conf/extra/httpd-vhosts.conf
Include conf/extra/httpd-manual.conf
Include conf/extra/httpd-default.conf
Save the changes and close the "httpd.conf" file
Now open the file “C:\Apache2\conf\extra\httpd-vhosts.conf” and make the following changes in it.
Existing example blocks virtual hosts you need to delete and insert only the following:
NameVirtualHost *:80
DocumentRoot "C:/apache/localhost/www"
ServerName localhost
ErrorLog "C:/apache/localhost/error.log"
CustomLog "C:/apache/localhost/access.log" common
Save the changes and close the "httpd-vhosts.conf" file
Setting up the configuration files is complete, now you need to install the Apache2.2 service.
Installing the Apache2.2 service in pictures
Launch the command line and enter “C:\Apache2\bin\httpd.exe -k install”

This is what we should see when the Apache2.2 service is successfully installed.
If everything went well, we move on - install manual start Apache2.2 service, for which we go through the path: “Start” → “ Control Panel"("Control Panel") → "Administrative Tools" ("Administration") → "Services", in the service management window that opens, select the line "Apache2.2" and do it on it double click, then in the “General” tab, select manual start of the service - “Startup type: Manual”. This must be done in order to unnecessary services did not boot the system. Considering that home computer used not only for web development, but also for many other needs, manually starting and stopping intermittently used services is the most acceptable.
Creating a virtual host directory structure
In the root of the disk you need to create the “apache” directory - it will contain your virtual hosts (domains), the global error log file “error.log” (created by the program when you first start it, automatically), the global access file “access.log” (created automatically). In the “apache” directory we create another empty folder - “localhost”, in which, in turn, we create the “www” folder, it is in the latter that we will need to keep our stuff in the form of local scripts. This seemingly strange directory structure is dictated by a similar directory construction scheme in Unix systems, and is intended to simplify its further understanding and use.
Example of creating a virtual host
If you need to install your own virtual hosts, do the following:
Open the file “httpd-vhosts.conf” and create a block in it with approximately the following content:
# The folder where your host's root will be.
DocumentRoot "C:/apache/test.ru/www"
# The domain by which you can access the virtual host.
ServerName test.ru
# Alias (additional name) of the domain.
ServerAlias www.test.ru
# The file where errors will be written.
ErrorLog "C:/apache/test.ru/error.log"
# Host access log file.
CustomLog "C:/apache/test.ru/access.log" common
Then, in the “apache” directory, create the “test.ru” folder (just like that, with a dot), in which, in turn, create the “www” folder.
The next step in creating a virtual host is to change the file C:\WINDOWS\system32\drivers\etc\hosts operating system. Open this file and add two lines to it:
127.0.0.1 test.ru
127.0.0.1 www.test.ru
Now start the Apache server by executing command line“C:\Apache2\bin\httpd.exe -k start”, open the browser, enter in address bar“test.ru” or “www.test.ru” and you will find yourself in your virtual host. Just be careful, now you can get to the original site with the name of the virtual host (“www.test.ru”, if one exists) only by commenting out or deleting the line: “127.0.0.1 www.test.ru” in the above-mentioned file “ hosts".
Apache documentation, when running server, available at http://localhost/manual/
You can stop Apache by running “C:\Apache2\bin\httpd.exe -k stop” on the command line. If you need to restart Apache, run “C:\Apache2\bin\httpd.exe -k restart” at the command line.
Installation and configuration Apache web server– completed.
Creating batch files to start and stop services
Agree that manually editing the “hosts” file every time you start services is not convenient, so for a more convenient, simultaneous start of Apache, MySQL services, and changing the “hosts” file, we will create two batch files: for starting and stopping, which will perform all routine work automatically.
When using virtual hosts, you need to create two files in the C:\apache directory: vhosts-off.txt – containing the initial contents of the “hosts” file and vhosts-on.txt – containing all virtual hosts. Please note that when creating new virtual hosts you will need to add them to the vhosts-on.txt file and not to C:\WINDOWS\system32\drivers\etc\hosts. Look at the examples below.
File vhosts-off.txt (can contain one single line):
127.0.0.1 localhost
Example of a vhosts-on.txt file with virtual hosts www.test.ru and test.ru:
127.0.0.1 localhost
127.0.0.1 www.test.ru
127.0.0.1 test.ru
In the same directory C:\apache, create two batch files: start-webserver.bat – to start services and replace the “hosts” file, and stop-webserver.bat – to stop services and clear the “hosts” file.
Launch file start-webserver.bat:
@echo off echo. if not exist C:\apache\vhosts-on.txt goto no_vhosts echo Create virtual hosts: copy /v /y C:\apache\vhosts-on.txt C:\WINDOWS\system32\drivers\etc\hosts echo. :no_vhosts NET start Apache2.2 NET start MySQL
Stop file stop-webserver.bat:
@echo off echo. if not exist C:\apache\vhosts-off.txt goto no_vhosts echo Restore hosts file: copy /v /y C:\apache\vhosts-off.txt C:\WINDOWS\system32\drivers\etc\hosts echo. :no_vhosts NET stop Apache2.2 NET stop MySQL
If you do not use virtual hosts or want to start services without replacing the “hosts” file, simply remove the files vhosts-on.txt and vhosts-off.txt from the C:\apache directory.
Simultaneously with the services, it is convenient to run the Apache Monitor program, which displays the status of the Apache server in the system tray, for which you can create another batch file“start-webserver-monitor.bat”, the contents of which are similar to the file “start-webserver.bat” with the following line added at the very end:
start "" "C:\Apache2\bin\ApacheMonitor.exe"
Now to run the entire toolkit you will need to run the file “start-webserver-monitor.bat”, or “start-webserver.bat”, and to stop it “stop-webserver.bat”. If you wish, you can rename these files, move them to any other location from the “C:\apache” folder, or create shortcuts to these files, for example, to the desktop.
Original article: http://php-myadmin.ru/learning/instrument-apache.html
In this article I will talk about how to set up a local development environment with your own hands. Of course, you can use ready-made solutions, for example, and others like it. But, look at the comments to and. Either Denver is not installed, or Apache does not start, or it is not known where Denver hid the databases.
In addition, the hosting provider’s server does not have a development package, but native distributions of Apache, MySQL and PHP. Just the other day, I was faced with a situation where the site being created worked normally in an installed and manually configured development environment, but under Denver it did not work at all.
A ready-made development environment often lacks flexibility in settings. Configuration files famous places hidden in Denver alone.
Personally, I have some kind of schizophrenic fear that the package collector local development I climbed into the distribution kit with my own hands, corrected something there at my own discretion, picked it up, and maybe even inserted a virus (that’s why I don’t use various tweaked Windows builds and set up the local development environment myself).
I will describe the process in detail installing and configuring Apache server to your local computer. This will allow you to get rid of the magical awe of the principles of operation of the site from the hosting provider’s server.
Besides, install and configure PHP. When manual loading distribution from the developer’s website, I can be sure that I’m downloading full version package, the one that I need. And a situation with the need to additionally install modules discarded by the author of the distribution kit of a ready-made development environment cannot arise. From now on, I myself am the author of the development environment.
Installation and MySQL setup . Exactly the same situation. The author is myself.
A few words for beginners. Why do we need a local development environment at all? If you are developing a site that will consist of several static HTML pages, then the development environment is just a convenience when viewing the site in a browser while debugging. It is convenient to access the site being developed using a domain name. That seems to be all the advantages.
In the case of developing a dynamic website (using PHP scripts and MySQL databases), as well as when working with engines, a local development environment is a necessity. Because, in this case, you need a tool that processes PHP scripts and SQL queries.
Well, let's go!
Installing Apache
I promised to save you from the magical awe of the principles of loading a site from a hosting provider's server in your browser. I'll do it now.
The server is nothing more than powerful computer, on the hard drive of which your website files are stored. Typically such a computer runs Unix-like systems. This computer is running a program called Apache. When accessing the server port 80, the Apache program will issue the HTML code to the accessing computer and graphic files, stored on the hard drive. The user's computer browser will accept the received data and format it into a familiar site page.
The server's hard drive can contain several sites at once. All of them are distributed into folders with unique names (in this case, the sites are called virtual hosts). Apache is configured in such a way that when accessing port 80 with a specific site URL, it knows exactly what data and from which folder it needs to be sent to the requesting computer.
That's all the magic. When I just started to understand Internet technologies, such an answer to my question “how do websites really work,” which I read in one of the books, put everything in its place in my head, which I was very happy about. I hope some of our respected readers were no less delighted now than I was at one time.
Now I'll tell you how to install and configure Apache on your local computer.
After installing and configuring Apache, you can enter your idea into the browser Domain name, which will be matched to the site being developed on the local computer, and local server will give the browser the requested HTML.
Step 1. Download Apache.
On the next screen, be sure to check the box Include Bin Directory in Windows PATH:

If you don't do this, PHP won't be able to find the file it needs and will complain.
Click Next. In the next window we need to specify the database administrator password. Indicate something easy to remember. Then, when connecting to databases, you will need to enter this password:

At this point, the process of setting directives for configuration is completed and you can begin to apply them:

Now our local development environment can be considered installed. All that remains is to configure it.
Apache Setup and PHP Setup
First, somewhere on your hard drive you need to create a folder in which all projects will be stored.
This is my folder www at the root of the disk " WITH».
Step 1: Allow Apache access to dad www on your hard drive.
Now in Apache settings I need to specify the path to this folder and allow access.
To do this, open the main file in any text editor Apache configurations. This is a file .
In the file we look for a block of instructions:
Below this block we insert following instructions:
Thus we allowed Apache access to folder www fundamentally hard drive.
Step 2. Create a place to store site files.
In folder www you need to create a folder with the name of our site (for example mysite). In folder mysite create two more folders: www- for storing site files and logs- here Apache will automatically record errors related to server operation and information about connections to the site.
Since work is usually carried out with several sites (i.e. in the folder www the root of the hard drive, there may be several projects: mysite, mysite1, noviysite etc.) available at different local URLs, then you need configure Apache to work with virtual hosts.
To do this, in the configuration file C:\Program Files\Apache Software Foundation\Apache2.2\conf\httpd.conf need to connect additional virtual host configuration file.
Looking in the file httpd.conf line #Include conf/extra/httpd-vhosts.conf. The process of including an additional virtual hosts configuration file is to remove the hash (#) character before this line.
#Include conf/extra/httpd-vhosts.conf
Include conf/extra/httpd-vhosts.conf
The fact is that in the Apache settings, the hash symbol (#) indicates a commented out line that is not involved in the server configuration.
The additional configuration file is now connected. Here is the file: . Again, open this file in any text editor and describe access to the site being developed.
At the end of the file you need to add next block:
Paragraph ServerName specifies the URL to be accessed from the browser local computer to the site being developed, the files of which are located in the folder C:/www/moysite/www. File C:/www/moysite/logs/error.log will contain information about errors in the operation of the site, and the file C:/www/moysite/logs/access.log- information about connections.
Step 3: Redirect requests to the local server.
The last step is to redirect requests to the local server. We need to tell Windows that when the browser requests the URL mysite.loc it must be processed by our local Apache. To do this, open the file C:\WINDOWS\system32\drivers\etc\host in any text editor and add one line at the end: 127.0.0.1 moysite.loc.
That's all, now we restart Apache by left-clicking on the icon next to the clock and selecting Restart.
![]()
I draw your attention, dear reader, to the fact that it is necessary to restart Apache with any changes in its configuration and in the PHP configuration in order for the changes to be applied.
Let's shine
If during project development you are using CNC, then you need to enable the mod_rewrite.so module in the main Apache configuration file C:\Program Files\Apache Software Foundation\Apache2.2\conf\httpd.conf.
Enabling the module is done by simply uncommenting the line LoadModule rewrite_module modules/mod_rewrite.so
#LoadModule rewrite_module modules/mod_rewrite.so
LoadModule rewrite_module modules/mod_rewrite.so
Using shortened tags. Some lazy programmers instead of complete code ..., at the beginning of the PHP script, use the shortened form ... To enable shortened tags, you need to configure the PHP configuration file C:\Program Files\PHP\php.ini:
Short_open_tag = Off
Short_open_tag = On
I draw your attention, dear reader, to the fact that in the PHP settings the symbol; is intended for commenting a line.
That's it for setting up your local development environment. Now, to create a new virtual host(For example noviysite.loc) you just need to take four simple steps:
1. In a folder C:\www\ create a new folder noviysite, inside which create a folder www And logs.
2. In the Apache virtual hosts configuration file C:\Program Files\Apache Software Foundation\Apache2.2\conf\extra\httpd-vhosts.conf specify settings for the new virtual host noviysite.loc:
3. On file C:\WINDOWS\system32\drivers\etc\hosts specify redirection for the new virtual host to the local server: 127.0.0.1 noviysite.loc
4. Restart Apache by left-clicking on the icon next to the clock and selecting Restart.
P.S.: Naturally in a folder C:\www\noviysite\www there should be site files that will be displayed in the browser when you enter the URL noviysite.loc/....
If only the domain name is entered noviysite.loc from folder C:\www\noviysite\www the file will be downloaded index.html(Apache is configured this way by default and it is this file that is automatically launched when you enter only the domain name).
Since dynamic sites written in PHP have recently become widespread, the start file will not be named index.html, A index.php. In order to, along with index.html when you entered only the domain name, it also automatically launched index.php need to make some minor changes to the file C:\Program Files\Apache Software Foundation\Apache2.2\conf\httpd.conf:
Finding a block of directives DirectoryIndex index.html. After the directive DirectoryIndex index.html you need to add a space index.php so that it turns out like this: DirectoryIndex index.html index.php.
I would like to note that in this case Apache will first look for the file index.html and try to launch it, and then index.php.
If the site folder does not contain a file index.html or index.php(and it contains a file called kakoeto_imya.html), then set the URL noviysite.loc it won't end well in the browser (Apache won't find the files it wants to run by default). To run a file from a site folder named kakoeto_imya.html you need to type URL noviysite.loc/kakoeto_imya.html.
A legitimate question arises: How to administer MySQL databases if there is no phpMyAdmin?
The answer to this question is the HeidiSQL program and .
For dessert
After reading this article, I hope you have clarity on the question of “how a website works from a hosting provider’s server,” as well as “how to install and configure Apache, PHP and MySQL yourself.” Now it’s not a sin to drink a cup of coffee and watch a funny video.
I express my gratitude to the excellent programmer Pavel Krasko
for assistance in writing this article.
I devoted myself to the problem of installing a local development environment on a computer running Windows. If, after reading the article, you were unable to start the local environment, I highly recommend watching the video tutorial.
Apache is the most popular free web server. As of 2016, it is used on 33% of all Internet sites, which is approximately 304 billion sites. This web server was developed back in 1995 as a replacement for the popular NCSA that server and fixed many of its problems. Rumor has it that his name comes from a patchy, as he was fixing NCSA errors. Now, it is a cross-platform program that supports Windows, Linux and MacOS and provides sufficient flexibility, customization and functionality. The program has a modular structure, which allows you to expand its functionality almost indefinitely using modules.
You can install Apache on Linux using a few commands, but the program provides a very large number of settings that can be changed, as well as modules that, when enabled, will work better. This article will cover installing and configuring Apache, we will use Ubuntu as the main system, but you can repeat these steps in any other distribution. We will look at not only installing the program itself, but also how to configure it, setting up apache virtual hosts, as well as the most useful modules.
At the moment, the newest version of the program is 2.4, so setting up apache 2.4 will be considered. As I already said, on Linux the program is installed in literally a couple of commands. To install on Ubuntu, first update the system to the latest version:
sudo apt update
$ sudo apt upgrade
Then install apache2:
sudo apt install apache2
In other distributions, the program package is called either this or httpd and installing it will not cause you any difficulties.
After installation is complete, you need to add the web server to startup so as not to start it manually after turning on the computer:
sudo systemctl enable apache2
Apache setup
Gone are the days when Apache configuration was stored in a single file. But it’s correct: when everything is distributed in its own directories, it’s easier to navigate the configuration files.
All settings are contained in the /etc/apache/ folder:
- File /etc/apache2/apache2.conf responsible for basic settings
- /etc/apache2/conf-available/*- additional web server settings
- /etc/apache2/mods-available/*- module settings
- /etc/apache2/sites-available/*- virtual host settings
- /etc/apache2/ports.conf- ports on which apache runs
- /etc/apache2/envvars
As you noticed, there are two folders for conf, mods and site. These are available and enabled. When you enable a module or host, a symbolic link is created from the available folder to the enable folder. Therefore, it is better to perform settings in the available folders. Generally speaking, you could do without these folders, take everything and dump everything into one file the old fashioned way, and everything would work, but no one does that now.
First let's look at the main configuration file:
vi /eta/apache2/apache2.conf
Timeout- indicates how long the server will try to continue the interrupted transmission or reception of data. 160 seconds will be enough.
Keep Alive On- a very useful parameter, it allows you to transfer several files in one connection, for example, not only the html page itself, but also images and css files.
MaxKeepAliveRequests 100- maximum number of requests per connection, the more, the better.
KeepAliveTimeout 5- connection timeout, usually 5-10 seconds are enough to load a page, so you don’t need to set any more, but you also don’t need to break the connection before all the data has loaded.
User, Group- user and group on behalf of which the program will run.
HostnameLookups- record domain names in logs instead of IP addresses, it is better to disable it to speed up work.
LogLevel- level of error logging. By default, warn is used, but to make the logs fill out more slowly, just enable error
Include- all include directives are responsible for connecting the configuration files discussed above.

Directory directives are responsible for setting access rights to a particular directory in the file system. The syntax here is:
Parameter value
The following basic options are available here:
AllowOverride- indicates whether .htaccess files should be read from this directory; these are the same settings files and have the same syntax. All - allow everything, None - do not read these files.
DocumentRoot- sets from which folder documents should be taken to be displayed to the user
Options- indicates which web server features should be allowed in this folder. For example, All - allow everything, FollowSymLinks - follow symbolic links, Indexes - display the contents of the directory if there is no index file.
Require- sets which users have access to this directory. Require all denied - deny everyone, Require all granted - allow everyone. You can use the user or group directive instead of all to explicitly specify the user.
Order- allows you to control access to the directory. Accepts two values: Allow,Deny - allow for everyone except those specified or Deny,Allow - deny for everyone except those specified..ru.
All these directives are not used here, since we are happy with the default values, but in .htaccess files they can be very useful.
We are left with the /etc/apache2/ports.conf file:

It contains only one directive, Listen, which tells the program which port it should work on.
The last file is /etc/apache2/envvars, you are unlikely to use it, it contains variables that can be used in other configuration files.

Setting up an Apache server via htaccess
.htaccess files allow you to configure your Ubuntu web server to behave in a specific directory. All instructions specified in this file are executed as if they were wrapped in a tag
It is important to note that in order for the server to read instructions from .htaccess, the settings for this folder in the main or virtual host file must not contain AllowOverride None for all settings to work you need AllowOverride All.
Otherwise, any configuration of the Apache server can be done here, from enabling modules to simply changing folder access. Since we have already considered all the parameters, let’s just give a couple of examples:
Order Deny,Allow
Deny from all
Denies everyone access to this folder, important to apply for configuration folders. Most often, .htaccess is used to work with the mod_rewrite module, which allows you to change requests on the fly:
RewriteEngine on
RewriteRule ^product/([^/\.]+)/?$ product.php?id=$1 [L]
But this is a very broad topic and is beyond the scope of this article.
Configuring Apache Modules
As I already said, Apache is a modular program, its functionality can be extended using modules. All available loader modules and module configuration files are located in the /etc/apache/mods-available folder. And activated in /etc/apache/mods-enable.
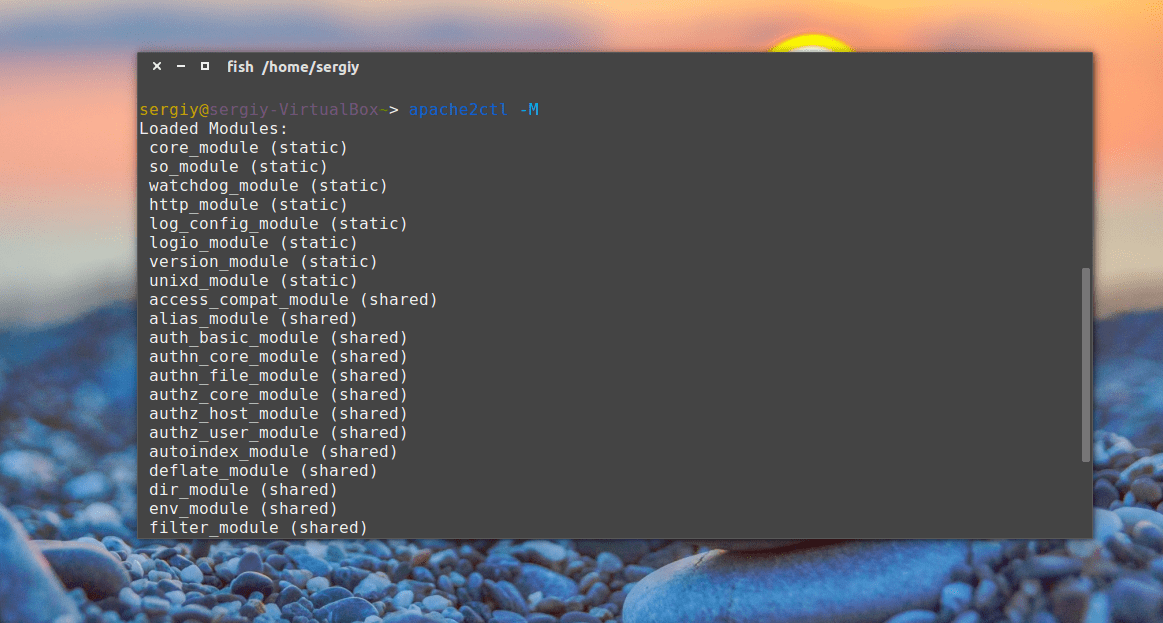
But you don't have to analyze the contents of these folders. Configuring Apache 2.4 by adding modules is done using special commands. You can view all running modules with the command:
You can enable the module with the command:
sudo a2enmod module_name
And disable:
sudo a2dismod module_name
After enabling or disabling modules, you need to restart apache:
sudo systemctl restart apache2
When one of these commands is executed, a symbolic link to a module file with the extension load is created or deleted in the mods-available directory. You can look at the contents of this file, there is only one line. For example:
vi /etc/apache2/mods-available/deflate.load

This means that the module could be activated simply by adding this line to the apache2.conf file. But it is customary to do just that to avoid confusion.
The module settings are located in the same folder, only in a file with the .conf extension instead of load. For example, let's look at the settings of the same module for deflate compression:
vi /etc/apache2/mods-available/deflate.conf

The files in the conf-available folder are the same modules, only they are installed separately from apache, these can be configuration files to enable the php module or any other programming language. Everything works exactly the same here, only the commands for enabling and disabling these modules are slightly different:
a2enconf module_name
a2disconf module name
As you have seen, enabling modules is very simple. Let's enable a few necessary but not enabled by default modules:
sudo a2enmod expires
$ sudo a2enmod headers
$ sudo a2enmod rewrite
$ sudo a2enmod ssl
The expires and headers modules reduce the load on the server. They return a Not Modified header if the document has not changed since the last request. The expiries module allows you to set the time for which the browser should cache the received document. Rewrite allows you to change requested addresses on the fly, very useful when creating CNC links, etc. And the last one to enable support for SSL encryption. Don't forget to restart apache2 after completing the settings.
Configuring Apache Virtual Hosts
It would not be entirely convenient if only one website could be hosted on one physical machine. Apache can support hundreds of sites on a single computer and serve the correct content for each one. Virtual hosts are used for this. The server determines which domain the request is coming to and serves the required content from the folder of this domain.
Apache hosts settings are located in the /etc/apache2/hosts-available/ folder. To create a new host, just create a file with any name (it’s better to end with the host name) and fill it with the necessary data. You need to wrap all these parameters in a directive VirtualHost. In addition to the parameters discussed here, the following will be used:
- ServerName- primary domain name
- ServerAlias- additional name by which the site will be accessible
- ServerAdmin- administrator email
- DocumentRoot- folder with documents for this domain
For example:
vi /etc/apache2/sites-available/test.site.conf

Below I have written instructions on how to set up an Apache server on a local computer with Windows 7 and install PHP, MySql and phpMyAdmin on it.
Installing Apache
Download the distribution kit with the Apache server from the site http://httpd.apache.org/download.cgi. Select version 2.2.22 and download the installer for windows. On your home computer you are unlikely to need SSL, select “ Win32 Binary without crypto (no mod_ssl) (MSI Installer)«.
Before installation, turn off Skype, or disable the use of port 80 in the Skype settings, as this will interfere with the installation.
Install Apache by running the installation file. All installation steps are standard.
Click Next.

We agree with the license.


Enter data into all three text fields. You can enter a non-existent domain like test.test or example.com. This data is needed to create a basic configuration file. Under the text fields, one of the most important settings is to install Apache as a service or as a regular program. Select “for All Users, on port 80, as a Service - Recommended” - install as a service.

Select Custom (custom installation).

Selecting components and installation location. You can leave all the default values.

Click Install.

We complete the installation.

Installation completed. An Apache icon will appear in the tray, with which you can quickly stop/start.

We check the functionality. Go to your browser at http://localhost/ If everything is done correctly, you will see the inscription “It Works!” Congratulations, the first step has been completed successfully.
Note.
I recommend immediately enabling support for CNC links; to do this, uncomment the line LoadModule rewrite_module modules/mod_rewrite.so in file httpd.conf. It is in the folder conf in the place where you installed Apache.
It was like this:
(codecitation)#LoadModule rewrite_module modules/mod_rewrite.so(/codecitation)
It should look like this:
(codecitation)LoadModule rewrite_module modules/mod_rewrite.so(/codecitation)
Here and henceforth, uncommenting means removing the comment sign - #, which is located at the beginning of the line.
To be continued.
Last update: 10/20/2017
Let's download the Apache web server package from http://www.apachelounge.com/. Let's select the latest version of the server. On the downloads page we can find two versions of the Apache package - for 64-bit systems and for 32-bit.
Before installing Apache, it should be noted that if our OS is Windows, then the package for C++ must be installed on the system, which can be found at the address for 64-bit and 32-bit.
After downloading the package from Apache, unpack the downloaded archive. In it we will find the folder directly with the web server files - the Apache24 directory. Let's move this directory to drive C so that the full path to the directory is C:/Apache24.
Now we need to install Apache as a Windows service. To do this, launch the Windows command line as an administrator and go to the web server directory using the command
httpd.exe -k install
If the installation is successful, the command line will display the message "The Apache2.4 service is successfully installed". The server will also be tested:
In my case, as shown in the picture above, Apache was unable to connect to port 80, which is the default in the configuration, since I have port 80 listening on another web server - IIS. This is one of the common problems when running Apache. To solve this, we need to either disable the IIS service or specify a new port for Apache. I will choose the second path.
After installation, we will configure the server to connect it with the previously installed PHP interpreter. To do this in the folder C:\Apache24\conf Let's find the httpd.conf file and open it in a text editor.
The httpd.conf file configures the behavior of the web server. We will not touch upon its descriptions, but will only make small changes that we will need to work with PHP.
First, let's find the line
Listen 80
This line indicates the listening port. The default is port 80. If there are no conflicts with ports, you can leave it as it is. I'll change the port to 8080.
#ServerName www.example.com:80
and change to
ServerName localhost:8080
Now let's connect PHP. To do this, find the end of the module loading block in the httpd.conf file LoadModule
//...................... #LoadModule watchdog_module modules/mod_watchdog.so #LoadModule xml2enc_module modules/mod_xml2enc.soAnd at the end of this block we will add the lines
LoadModule php7_module "C:/php/php7apache2_4.dll" PHPIniDir "C:/php"
DocumentRoot "c:/Apache24/htdocs"
By default, the directory "c:/Apache24/htdocs" is used as the document storage. Let's replace this line with the following:
DocumentRoot "c:/localhost"
Let's change the paths of the files in which information about errors or site visits will be recorded. To do this, find the line
ErrorLog "logs/error.log"
And let's replace it with
ErrorLog "c:/localhost/error.log"
CustomLog "logs/access.log" common
And let's replace it with
CustomLog "c:/localhost/access.log" common
And we will also find the block
AddType application/x-httpd-php .php AddType application/x-httpd-php-source .phps
And at the end we will find the block
And replace it with the following:
This is the minimum required configuration needed to work with PHP. To manage the server (start, stop, restart), we can use the utility that comes with the kit - . This utility can be found in the directory C:\Apache24\bin
Let's launch the utility. The ApacheMonitor icon will appear in the tray. Click on it and select Start in the context menu that appears.
If everything is configured correctly, the web server should start.
Now our task is to make sure that php is connected and working correctly. To do this, let's go to the c:/localhost folder, which we created to store documents, and add a regular text file to it. Let's rename it index.php and add the following content to it:
IN in this case we created simple script which outputs general information about PHP. Now let's access this script by typing the address in the browser bar http://localhost:8080/index.php
What happened here? When accessing the site on local machine the address is http://localhost. Since we specified 8080 as the port, the port is also indicated in the address via a colon. If we used port 80, which is the default, then it would not need to be specified.
Then the name of the resource being accessed is indicated. In this case, the file index.php is used as a resource. And since the httpd.conf file specifies the directory as the web server document storage C:\localhost, then it is in this directory that the web server will search for the necessary files.
And since we indicated above during configuration that as home page file can be used index.php, then we can also access this resource simply http://localhost:8080/
This completes the installation and configuration of the Apache web server, and we can create our websites.