Download the program to reinstall your computer. Quickly reinstall Windows without losing data
Most laptop users are faced with situations where they need to reinstall the operating system, often while keeping the licensed Windows. This publication discusses several methods of how to reinstall Windows 7 on a laptop, and also talks about the nuances of the process of installing the OS on laptops different manufacturers.
Restoring the system using a Windows 7 backup
Most of the manufacturers mobile computers create backup storage for 7 distributions or any other OS. Reinstalling Windows 7 on a laptop from these memory areas is done using built-in utilities.
To start the reinstallation, reboot your laptop and press:
- for Windows on an HP laptop on F11;
- on ASUS laptop on F9 immediately at the start of loading;
- for Windows 7 on Lenovo laptop to F11;
- on acer laptop a combination will do Alt keys+ F10 ;
- for Windows 7 on SAMSUNG laptop to F4.
After clicking on the desired key instead of standard Windows downloads 7 the OS recovery interface will open:
After downloading the program, follow the instructions to restore Windows.
But remember that all settings will be reset, and data from the previous copy of the system may be deleted.
Reinstalling from disk
When reinstalling from disk, remember that to restore the license you need to use a distribution kit with exactly the same OS as was installed previously. Find out the version installed system possible on a sticker, which is usually located on back side laptop. By the way, it’s also located there license key your copy of Windows.

Remember that when you reinstall, a new operating system is deployed from the disk, and to avoid problems in the future, you should delete the data from the previous Windows.
This is achieved using formatting system partition, so take care in advance to transfer all the necessary data from the selected hard drive volume to install Windows. It is not advisable to transfer installed programs, since this will lose connection with the registry, and many of them may not start. Don't be lazy, install them again after replacing the OS.
Distribution installation disk does not include drivers for all laptops, so download the drivers for your device in advance from official resource manufacturer. If this is not done, then after installation there is a high probability of the following problems occurring:
- The network card does not work;
- Wi-Fi does not work;
- Applications do not launch.
If you reinstalled the OS without this, then for troubleshooting network equipment you will have to download the driver distribution kit using another computer and transfer them using removable media, so before reinstalling, do not forget to play it safe and download the drivers for network card and Wi-Fi module.
To begin the installation process, insert the disc into the drive and restart your laptop. After your computer starts, open boot menu, where you should choose to boot from DVD.

This dialog is called up on most laptops using the F12 key, and on HP devices the combination F9 + Esc is used.
Often on older computers this function is missing, so you will need to open the BIOS and edit the boot priority yourself. To go to the BIOS on laptops, manufacturers use the following keys:
- Acer, Asus, Samsung, Lenovo - F2;
- hp - F10 + Esc .
If the brand of your device is not in this list, then find out the actual key for it on the window that loads when you turn on the PC.
The BIOS interface from different manufacturers is not similar in appearance, but the sequence of actions for changing the boot priority is almost identical. Navigation through the windows of a running BIOS of all versions is carried out using the arrows on the keyboard and Enter keys, Esc , + , — .
Sequence of actions for BIOS AMI:

Sequence of action for BIOS Phoenix-Award:

Windows installation
After making a change to the BIOS and rebooting, a dialog will appear with the message: “Press any key to boot from CD or DVD.”

Further installation of Windows 7 is not difficult, do the following:
- Press any keyboard key.
- Wait until the file unpacker completes; a screen with the entry “Windows is loading files...” is displayed.

- In the dialogue " Windows installation
» Specify the language and click on the Next button.

- In the window that appears, click on the large Install button.

- Select the version of the system to install that has a license code. You will need to enter it after reinstalling Windows 7.

- Agree to the licensing terms.

- Select installation method - " Full installation
».

- Select the drive volume on which you are going to install the OS and prepare it by clicking on the item " Disk setup».
 There are situations when the list contains reserved section drive, be sure to select a different volume.
  If you have disks with a capacity of more than 250 GB, it is worth splitting them into several. Typically, the area allocated for system installation is separate section up to 100 GB in size.
- Format the selected drive partition. A warning will appear that all information on it will be deleted. Confirm your consent, because you have previously saved all the necessary data. Wait for the installation to complete and click on Next.

- Wait for the installation process to complete; on average, it lasts from fifteen to twenty-five minutes, the duration depends on the configuration of the laptop.

- Fill in the fields provided with your username and PC name.

- Protect account password, or you can skip this step.

- Enter the key copied from the sticker on your laptop.

- Select your security options.

- Set the date and time.

- If you have a network connection, specify the connection type.

Reinstalled Windows is ready to go. If you changed boot priorities in the BIOS, return them to first place in the list HDD, otherwise the computer will constantly try to start from the DVD.
Reinstallation from a flash drive
Many compact PCs, such as netbooks, do not have a DVD drive. Therefore, the question arises of how to properly reinstall Windows 7 on them. The answer is simple - use removable media.
To reinstall from a flash drive, you need to download the Windows 7 distribution image in ISO format and write it to this media using special utility. Remember, in order to properly reinstall a licensed Windows system, you need to download a container with the same OS version. The flash drive itself must have a capacity of at least four gigabytes.
Burning Windows to media using the most popular utility among analogues Ultra ISO is performed according to the following algorithm:

The installation flash drive is ready, but to start the installation, you need to select " USB-HDD" How to set up the BIOS is described above, all steps are similar, you just need to select another entry from the available list. Further installation is no different from Windows installations 7 from DVD.
Often after reinstalling Windows does not work. To solve this problem, take another OS distribution and repeat the installation process. In addition, many users ignore the need to format the partition and reinstall the seven on a disk that already has an installed copy of the system. Avoid this as it can also cause problems.
Conclusion
This article discussed reinstalling Windows 7 in several ways. If missing backup copy, then this procedure should be carried out from a disk on which exactly the same version of the OS is recorded. Some laptops do not have a CD-ROM, so reinstallation can only be done using external media, for example, from a flash drive.
Video on the topic
For a long time known fact: The Windows operating system loses its stability over time. Regular freezes, many useless functions, garbage in the registry. Experts recommend reinstalling Windows from scratch at least once a year. Most users associate reinstalling Windows as a lengthy, routine process, usually accompanied by formatting the hard drive. In general, this is true - if you do everything manually and the old fashioned way. But it’s already the 21st century, and it’s time to forget about manual routine work and data loss! Delegate the reinstallation of Windows to a professional in the field of automation of program installation work - Almeza MultiSet!
There are two modes for reinstalling Windows: Windows OS recovery (installation over current version OS (repair reinstall)) or complete reinstallation. When restoring, the current settings are saved, but when completely reinstalling, it turns out to be truly a new version Windows. Almeza MultiSet can reinstall Windows in both modes. Moreover, in complete reinstallation mode, the MultiSet program is capable of, after auto-installing the OS itself, independently, in automatic mode install all the required software: drivers, service packs, localizations for programs, server software, etc. After installing the applications themselves, each program is automatically configured, and if desired, you can immediately perform auto-tuning of the Windows OS.
Thus, regardless of the Windows reinstallation mode, the end result of Almeza MultiSet will be the same: latest version OS + installed drivers + set of programs configured in the way you need. No formatting of the hard drive is required. There is no data loss.
The product of the Almeza MultiSet program is a ready-made distribution kit for automatic installation Windows and programs. Almeza MultiSet can also make bootable CD/DVD disks; such disks can be used as a lifeline after another system crash. To completely restore the system, you only need to insert such a disk into the CD/DVD drive and configure the BIOS to boot from this device. The system will recover in less than 40 minutes!
Almeza MultiSet will be very useful for system administrators who serve a large number of computers. MultiSet can automatically install program sets - remotely via local network. Thus, to update any software, there is no need to go “personally” to each computer; this can be completely delegated to Almeza MultiSet!
With Almeza MultiSet, reinstalling Windows will no longer be a scary event for you. Do your interesting things during auto-installation and enjoy automation!
Rest more often, work less, live interestingly!
17.02.2017
The Windows 7 operating system has been and remains the leader among installed operating systems around the world, despite the growing popularity of the new “Ten”. The coverage of everyone's favorite operating system is more than 55% of all computers on the planet. And users often wonder how to learn how to install Seven on their own.
The OS itself is nothing more than just a program, complex, but it is a program that can be susceptible to various types of hacks and hacker attacks. Computer hardware also does not last forever even when upgraded or replaced. faulty equipment Reinstallation of the operating system is often required.
In the period from the summer of 2015 - during the year there was an update to “ten”, and at the end of the period this update was already forced. Users could not refuse it. And many forced owners of a new product want to return their favorite, stable Windows 7, but, unfortunately, they don’t know how to do it.
Features of reinstalling Windows
This article is devoted to reinstalling Windows 7 on computers and laptops, for everyone who does not know how to do this, or is afraid to reinstall Windows 7 on their own for the first time.
In the article you will find:
- Detailed description the installation itself - step-by-step instructions;
- Images of the installation progress and subsequent settings;
- Tips and tricks during installation.
Preparing to reinstall Windows
Let's get started:
First of all, you need to take care of the safety of important data: copy all photos, videos and documents to secure storage, it could be removable media or cloud. And if your OS does not boot, you can try booting from a Live CD to copy the data. Or connect external hard disk and remove necessary files from your disk.
Reinstall Windows in in this case Let's talk about the "Seven", very simply.
You will need a Windows 7 image. You can download it online or purchase the boxed version. For those who don’t know, this is the version of the OS on a disk or flash drive that you can buy in a store.

If everything is clear with boxed versions: you pay money - you get it finished image, then in the case of an online purchase, this downloaded image must first be prepared, that is, written to a USB flash drive or disk.
The most common program for burning images is UltraISO. The utility is free and easy to use, and the network is full of information on how to prepare bootable media for installation on computers.

Set boot priority in BIOS
Conventionally, we have prepared the image, now you need to install it on your computer.


In more modern motherboards The interface is usually graphical, but it is not difficult to understand. Just look for partitions (boot priority).
Loading a USB flash drive or disk with an image via the Boot menu
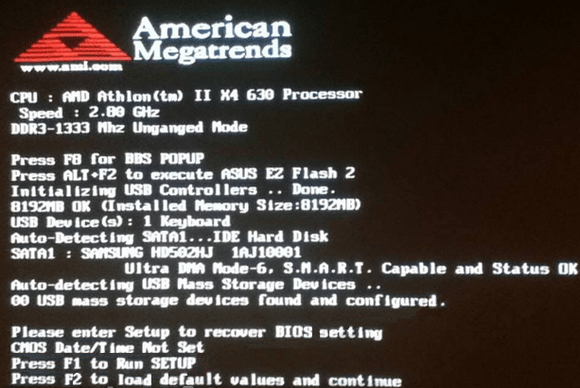
This manipulation is needed only once, and after installing Windows, everything will need to be returned to its place. Instead, you can simply reboot, at the moment when information about installed memory press the enter key Boot menu. Usually these are keys "F11", "F12" or "Esc", but not always. Again, there is a hint on the initial loading screen. In the window "Boot menu" select your storage medium (disc or flash drive) and click "Enter".
Start installing Windows 7


It is advisable to read more detailed information about the installation progress and hardware requirements - click on the link with a description of more detailed information at the bottom of the window. The system recovery button is needed for specific cases when it is necessary to restore damaged files. We don’t need to go there now, so we just click "Install".
Which OS bit size to choose: 64 or 86

Tip: if you have on your computer random access memory installed up to 3 GB, then you should choose the 32-bit (x86) version, if from 3 and above then 64. This choice determines how stable and fast Windows will work. With 1 GB of RAM - Maximum 64-bit, the operating system will of course be installed, but working on it will be simply painful. It will slow down and hang terribly.
- In the next window you should read the license agreement, it’s not easy to scroll through and agree, but read, you never know what kind of data you will entrust to Microsoft under this license agreement? What if you don’t like it and in that case it would be better for you to stop using it? of this product. Check the box "I accept the terms license agreement» and click "Further".
- We are interested in the complete installation, so we select the second tile (Full installation of new version).


Formatting a hard drive when reinstalling Windows 7

When reinstalling Windows 7, you need to format the “Local Disk” on which you installed Windows. Otherwise the OS will be installed on top old system, and the files of the previous OS will be placed in the Window old folder and will only take up space on your hard drive.

For example: you have a 100 GB disk, and you need to create a 50 GB installation partition. We write in the window the required size of the future system disk and press "Apply". For the remaining space, create a second or more Local disks. When creating a new partition, the system will warn you about the creation of additional reserved partitions.

Clean installation of Windows on your computer


Completing the installation - activating and setting parameters
Beware of fakes and the use of pirated assemblies. Believe me, this will not bring anything good.

How to reinstall Windows 7. A detailed description of reinstalling Windows 7 from start to finish.
To reinstall Windows 7 for dummies we will need:
- Download Windows 7
- Burn Windows 7 to a disk or flash drive with Windows 7
- Set to bios First Boot Device - Cd-Rom or USB
- Install Windows 7
Step No. 1 Reinstalling Windows 7. Burning a Windows 7 disc
So, let's say you bought a laptop with Windows 7 or just want to try it out and then buy it. First, you need to download Windows image 7. Look carefully at which Windows 7 you need to download so that the key located on the laptop will work. Usually the key is located either on the laptop or under it. For example, like this: Windows 7 basic OEM 32-bit(x86). Search the Internet for Windows 7 basic OEM 32-bit so that your key will fit! Because Windows distribution is illegal, we do not have the right to post original iso images from Windows 7 here. (Or - (Google search for MD5))
After downloading ISO image and Windows 7, it must be written to disk.
To do this, download the program for burning our image to disk Portable ImgBurn
After the ISO image of Windows 7 and our ImgBurn program successfully loaded:
- Take a blank DVD +-R | RW and insert into DVD rom
- ImgBurn -> click Browse-> choose our Windows ISO image, press Open
- We put minimum speed and start recording
- After the disc is burned, a window will pop up indicating that the disc was successfully burned, click OK. And your DVD rom will automatically open with Windows 7 written on it
Step No. 2 Reinstall Windows 7. Set First boot device CD-Rom in BIOS
So, after Step No. 1, we have a disk with Windows 7. On at this stage, our task is to get into the BIOS and set it to initially boot the disk with installed Windows 7. To do this: Reboot or turn on the computer and click delete key(there are other options, for example F1, F2, F8, Ins.)
The initial splash screen should usually show you which key to press to enter the BIOS
As a result, we must get to blue screen BIOS, in our case it looks like this
We set the first download from Disk, for this we go (with the usual arrows) to Advanced Bios Features -> First Boot Device select CD-Rom, press Enter, then Esc, go to Save&Exit Setup Press Enter, then Y and Enter again.
Note: if you have a different BIOS, the essence does not change. The main thing is to find First Boot Device and select CD-Rom
After step 2, the computer reboots itself and if you did everything correctly, then when you reboot, the message Boot from Cd/Dvd will appear on a black background:
And after a while Press any key to boot from Cd..
(press any key on the keyboard to boot from the disk), press the key. If a black screen appears with a Windows 7 installation bar, then at this stage you have done everything correctly
Step No. 3 Reinstall Windows 7. Formatting the partition. Installing Windows 7
After the window popped up. We wait 5-7 minutes until the language selection window appears. Select the language settings as you wish, then click Further
Click “Install”
We wait 5-7 minutes, after which a window will pop up, check the box with “License Terms”, click Further
Select “Full installation”
Select our disk, then click “Disk Setup”
Select an item "Format"
Attention! (warning about deleting data from drive C. Everything will remain on D):
This action will delete all your files from this partition, disk C:/
After "Copy" appears Windows files“We can safely go drink coffee, since no action will be required from us for 10-20 minutes
We wait until a window appears where we will be asked to enter a username. Then enter the name
Password (we don’t have to enter it, just click next)
Enter the product key (if you want to enter it later, you can click “Next”)
We choose one of three update points if desired! We recommend the first one!
All that remains is to select the time zone, which is what we do.
We wait 2 minutes, then a magic window with Windows 7 appears. Congratulations, Windows 7 has been successfully installed!
How to reinstall windows 7 for dummies. Additional articles
- Automatic driver installation
- Is it possible to put Windows 7 64bit Ultimate on a 2 GB flash drive?
- Which Windows to choose: 32-bit or 64-bit
- Where to download Windows 7 32 ⁄ 64-bit? Which Windows version 7 install?
- How to install/reinstall Windows Xp from disk
- How to install/reinstall Windows Xp without a disk (from a flash drive)
- How to install/reinstall Windows 7 without a disk (from a flash drive) +UEFI
- How to install/reinstall Windows 8 from disk
- How to install/reinstall Windows 8 from a +UEFI flash drive
- How to install/reinstall Windows 10 from a +UEFI flash drive
- How to install/reinstall Windows 10 from disk
To reinstall the operating system Windows systems 7 uses one program with which you can install a new OS if it was DOS, or reinstall it if the computer has a different operating system. This is very convenient, because there is no need to scour the entire Internet in search of necessary programs. Moreover, it often happens that these programs are paid, so the problem with this has already been solved. The program for reinstalling Windows 7 is available to every user and can be successfully used regardless of the user’s level of computer knowledge.
So how do you reinstall the operating system? Very simple! First, check whether you have enough RAM on your computer (minimum 1 GB), and at the same time find out what kind of processor you have (32 and 64-bit). Next, decide what kind of 7 you want, the most basic ones are Basic version, Home and Maximum. The latter provides absolutely everything, but there is also a lot of unnecessary stuff. We chose it as an example.
Reinstalling Windows 7
So, insert the disk with operating system, wait a little while it downloads, and in the window that appears, click “Install”.
After this, the system will prompt you to select the required Windows edition 7, then read the rules, and finally accept them.

After this, the installation of the OS will begin, which will take place in several stages. The first is copying files, then unpacking, installing components, updates and completing the installation.
Don't be alarmed that your PC will restart several times during the installation process. The installation itself will take 25-35 minutes, so be prepared to wait. After completing the process, you will need to enter some data, for example, select a language, keyboard layout, computer name, password (if desired), time, date. Next, a window will appear asking you to select or not to select. automatic updates(if you haven't activated yours yet) Windows version– postpone this decision). You can learn how to set up updates after the OS has already been installed.