How to upload documents to the cloud. Pros and benefits of cloud storage
IN Lately not only computer technologies are rapidly developing, but also mobile technologies. In this regard, a very pressing question arose safe storage relatively large amounts of information. And it is for this purpose that many IT corporations offer users of any type of device the use of so-called cloud services. How to use the cloud and services included in basic set any developer will now be considered.
What is cloud storage?
First, let’s define what kind of service this is. Roughly speaking, this is file storage in the form of allocated disk space on remote server company providing such services.
In other words, in a sense, it can be called a kind of virtual flash drive on which a certain amount of data is placed. However, if you need to constantly carry a USB device with you to access downloaded information, then such a service (for example, the Mail.Ru cloud or the corresponding Google service) can be accessed from both a computer and a mobile device. That is, the files are synchronized in the cloud itself, and you can view or download them simply by entering your registration data (although in some cases this is not required).
Quite a lot has already been written about how to use the cloud. Now let’s pay attention to some main points, and also consider the simplest principles of its use, explaining the situation in detail.
Most popular services
It goes without saying that initially, to use such storage facilities, you need to decide on a service provider, that is, choose the most suitable information storage service for yourself.

Today you can find quite a lot of such services. The most popular are the following:
- Dropbox.
- SkyDrive.
- Cloud Mail.Ru.
- "Yandex.Disk".
- Google Drive(Google Drive).
- Apple iCloud and iCloud Drive.
- OneDrive, etc.
Before we figure out how to use each type of cloud, it should be noted that these services are somewhat uneven when compared to each other. The fact is that some repositories can be accessed exclusively from a computer terminal, while others require synchronization of both computers and mobile devices. Sometimes you may need a specialized application that plays the role of a kind of conductor, sometimes just an Internet browser is enough.
The same applies to freely allocated disk space for storing your files, as well as payment for additional space on a remote server. In any case, most services are very similar to each other.
What should you pay attention to before starting work?
Now let's look at some important points, without which the use of cloud services is out of the question.

The very first and most important thing is pre-registration, and in some cases it does not matter at all whether it will be done via the Internet using a regular browser or a special computer or mobile application. The whole process takes a few minutes.
Benefit from stationary systems Mobile devices with operating systems installed on them differ. The fact is that when you turn it on for the first time, to access some advanced functions or stores like AppStore or Google Play (Play Market) the system initially prompts you to create an account (registered email address and password). Moreover, your smartphone or tablet already has pre-installed application for working with cloud services. For convenience, you can install their desktop counterparts on a computer or laptop (although access can also be obtained through a browser).
Allocable disk space
Another important point– the amount of disk space that the user initially receives in free version. Typically, the volume is different services ranges from 5 to 50 GB. If this is not enough, you will have to increase the storage capacity and pay a certain amount for it, which includes the cost of purchasing more volume and maintenance for a certain period of use, which, by the way, can also vary.
General principles
As for how to use the cloud in the broadest sense, everything is quite simple. After registration, the user only needs to add folders and files, contacts and much more to the storage.

At the same time, in the settings section, he can add friends who, like him, will upload files to the server or edit them (the simplest example is Dropbox). Often new users can use own passwords to login.
But here's what's interesting. When installing special program On a computer, access to files in the cloud is much faster than when launching the same Internet browser. The same can be said about synchronization. It is enough to place the files in the application folder, and synchronization will be performed instantly for all users who have access rights to the service. Let's look at the most popular storage facilities.
Cloud Mail.Ru
So, as mentioned above, you will first need to create an email account, after entering which the cloud service will be displayed in the panel at the top in the projects tab. This is the Mile cloud. How to use it? As easy as pie.

Initially, 25 GB of disk space is offered. Uploading files is carried out using the corresponding button, which can be used to add several objects at once. The limitation concerns only the size of the uploaded file - it should not exceed 2 GB. Before starting the download, you can use additional functions, for example, create new folder, after which files can be moved and deleted just as easily. Please note: it does not have a “Trash”, as in the same Yandex service, so restore deleted information will not work.
The function of creating, viewing or editing files can be very useful. Let's say we have Word document(or it is created directly in the repository). Changing it directly in the cloud can be as easy as if the user were launching the editor on a computer. Upon completion of work, we save the changes, after which synchronization occurs again.
Yandex cloud: how to use?
With the Yandex service, in principle, things are almost identical. The functional set, in general, does not differ much.

But the developers of this service thought that the user could delete files completely by accident. This is where the so-called “Trash” comes to the rescue, into which information is placed when deleted. It works like a standard computer service. True, data recovery tools are not applicable to it if they have already been deleted from the Recycle Bin. Nevertheless, the function is very useful.
Google Drive storage
Now let's move on to one more powerful service called Google Cloud. How to use Google Drive? Fundamental differences compared to other services, no. But here access can be obtained both from a mobile device (built-in service) and using a utility installed on a computer (not to mention logging in via an Internet browser). With a phone or tablet everything is simple, let’s look at the computer program.

We assume that the account has already been created. After activation, the user receives 5 GB of storage. An increase to 25 GB will cost approximately 2.5 USD. We install the application on the computer, after which the service folder appears on the Desktop (it is also displayed in Explorer).
As is already clear, just place the files in this directory and synchronization will occur. During operation, the program “hangs” in the system tray as an icon. Right click calls extra menu, where you can view the available space for downloading files, make personalized settings, expand storage space, shut down, etc.
One point is especially worth noting here. As it turns out, copying files to the program folder on your computer and then downloading them from the cloud to your mobile device turns out to be much faster than connecting the gadget to your computer and then copying them using Windows.
iCloud and iCloud Drive services
Finally, let's look at how to use the Apple cloud. There are two services (iCloud and iCloud Drive) that are pre-installed on the iPhone or iPad in accordance with the version of the operating system installed on the device. Essentially, iCloud Drive is updated version iCloud, and for it correct operation I should take into account that mobile gadget must correspond to the stated technical requirements: iOS 8 on the device itself. Computer - Windows 7 or higher with iCloud extension for Windows or a computer terminal running Mac OS X 10.10 or OS X Yosemite.

Initially, after logging into the service, folders created by default will be displayed there. Their number may vary depending on the settings of the computer and the client on the mobile device. How to use the cloud on iPhone? In principle, there is nothing supernatural about this. It is enough to launch the application on the gadget (switch the launch slider to the on state) and log in using your account. It's another matter when the input is supposed to be from a computer. Here you will need to use the settings menu of the program itself and select enable there.
Another minus - enough low speed synchronization (this is recognized by everyone). And one more, most unpleasant moment. If you switch from iCloud to iCloud Drive without updating all devices to required configuration, data in the old cloud will simply be inaccessible, so be vigilant.
Conclusion
That’s briefly all that concerns the question of how to use the Cloud application or services of the same name. Of course, not all the possibilities of such services are considered here, but, so to speak, only general principles(basics) of work. However, even with such minimal knowledge, any newly registered user will be able to carry out basic operations within 5-10 minutes.
fb.ru
cloud file storage


All your photos, documents and any files are securely stored in the Cloud and are always at hand. You can free up your phone and not worry
about the safety of your files.
Your files are always with you
No more need to transfer files or run around with a flash drive!
Access from a smartphone or computer - no matter what happens
at your fingertips.
Has your hard drive burned out? - Lost your phone or tablet?
Moved to another computer?
Store any files and documents
Online viewing of major file types
Full integration with mail
You don't have to download the file again, and your recipient will receive a regular attachment
You will have access to the usual folder structure and search within them.

Sharing files is now easy
cloud.mail.ru
Victoria Karpova's blog
Hello friends! Today's article is about Mail.Ru cloud storage. Let's look at how to use the cloud via the web interface:
And other subtleties of use.
The beauty of any cloud storage is what it gives extra bed to store files online.
No need to clutter up your computer again.
It’s convenient to share files with other people (just open access via a link).
And since I have a mailbox on Mile, I decided to use this storage as well. Moreover, 25 GB of memory is available for free here.

In general, this is all theory. And we will move on to practice.
Watch my video instructions for working with the Mail.Ru cloud below:
So, as you already understand, to gain access to the cloud on Mail.Ru you need to register a mailbox here. By doing this, you create your account through which you can use other Mail services, including cloud storage.
Although it is not necessary to register a mailbox, you can use Mail to log into your mail located on another service. I showed this in the video (watch from the 11th minute 46th second). Thus, your mailbox, for example on Yandex, will open in the Mail.ru interface and you will also be able to use the cloud.
To go to the cloud while on home page Mail.Ru, you need to click on the “All projects” tab and select “Cloud”.
Initially, pictures and a video file are already loaded there, which you can delete. There are several ways to delete files. If you need to delete several files at once, mark them with a checkmark and click on the “Delete” button at the top.

Or right click Click on the file and select “Delete”. Again, if you have marked several files, they will all be deleted.

And one nuance - in the Mail.ru cloud there is no basket into which deleted files, as on the same Yandex disk. From there we can restore them. We delete it from the cloud immediately!
To add files from your computer to the cloud, use the “Upload” button on the left top corner.

You can upload using the “Select files on your computer” button, or drag them into the upload window with the mouse. There is a limitation - the uploaded file size is up to 2 GB.

Next to the “Download” button we see the “Create” button. We use it to create folders, documents (Word), tables (Excel) or presentations (power point) directly in the cloud.

If you want to organize your files in the cloud, then create a special folders. To move a file to a folder, select it with a checkmark, right-click, and select “Move.”

A window will open in which you can select a folder to move or immediately create a new one.

In general, we can use the right mouse button to different actions above files - delete, move, copy, download, generate a link for other people or send by mail. It is very comfortable.

By the way, if you need to download several files from the cloud at once. You select them with checkmarks and they will be automatically packed into one archive for downloading.


If you share a file temporarily and then want to remove this link, select required file mouse, right-click and select “Delete link”.

All your files to which you have shared access can also be found in the “Sharing” section.

If a link to a file from the Mail.Ru cloud was shared with you, then you can download it immediately or save it to your cloud. You will have the option to specify a folder (where you want to save this file) or you can create a new folder for it.

Now a few words about setting up access to folders. You can share any folder with editing capabilities. That is, other users will also be able to add files to this folder.
To set up access to a folder, check the box and click on the “Set up access” tab.

Editing access can only be granted to individual members you invite via e-mail.

If you are going to send an invitation to a user with a mailbox other than Mail.ru, then he will receive the invitation only if he logs into his mail via Mail. Read more about this here.
This user will see the following invitation in their mailbox:

Having accepted it in his cloud, in the “Sharing” section, he will find the folder that you opened for him and will be able to add his files to it. You, in turn, will see all the changes he made in your folder.
And yet, you can change the display of files in the cloud. And instead of large icons, you will have this compact list:

Friends, if this is your first time getting acquainted with Mail.Ru cloud storage, I hope that the instructions were clear to you. In any case, I'm always happy to answer your questions in the comments.
I wish you success!
Sincerely, Victoria
o-zarabotkeonline.ru
Victoria Karpova's blog
Greetings, friends! Cloud storage is very popular now. Their main purpose is to store and access information from any device at any time, as well as the ability to share this information (documents, photographs, and other files) with other people. In addition, popular cloud services provide a number of other useful functions for users – creating and working with documents online, sharing, etc.
On my blog I have already posted instructions on two large cloud services - Cloud Mail and Yandex.Disk. And I dedicate today’s article to one more thing – Google Drive. Until recently, I didn’t use it so actively - I mainly relied on Yandex.Disk. But, due to the recent blocking of Mail and Yandex services in Ukraine, I started thinking about backup options.
I suggest you understand the interface and main functions of Google Drive. Let's talk about how to use it - upload and provide access to files and folders, perform other actions on files, work with documents and applications online.
If you prefer the video format, you can watch my detailed tutorial below:
How to log into Google Drive?
The disk is linked to your Google account, and to get inside the cloud, you need to log in to your account - enter your login (gmail) and password.
You can access Drive from this page www.google.com/intl/ru/drive/


Or go from mail by clicking on the “Google Apps” icon at the top right.

How much disk space?
15 GB are provided for free. This space is divided into files on the disk itself, files and letters in Gmail, and Google Photos. By the way, the latter automatically includes images that you upload to posts on the Google Plus social network. You can remove them from Google Photos so that they don’t take up space, but they remain in your posts.
If you need more space, it can be purchased for money. There are several tariff plans with monthly or annual payment for up to 30 TB of memory.
You can also have several Google accounts and each will have its own disk with free space.
Cloud storage interface
Let's go over the main sections, buttons and Google settings Disk.
Using the “Create” button in the upper left corner, you can upload files and folders from your computer to your disk. And also create folders and documents directly in the cloud. You can create text documents, tables, presentations with slides, Google Forms (for surveys, questionnaires, recording Skype consultations), drawings, maps and websites.

Under this button there is a panel with the main Disk partitions.

The “My Drive” section contains all files and folders uploaded to the cloud, as well as documents and folders that you created in the cloud.
By selecting a particular file/folder with the mouse, you can perform actions on them various actions, I’ll tell you more about this later. To select multiple files at once, hold Ctrl key on the keyboard and click on the desired files.
The display of files on Disk can be sorted by name, by date of modification, by date of viewing.

The “Shared with me” section displays files from Google Drives of other users that you have access to - for example, you followed a link to this file, or you were sent an invitation with access. To open a file, double-click on it.
The “Recent” section displays files that you have recently worked with (opened, downloaded, edited, etc.).
Google Photos section - This is where images you've uploaded to the Google Photos app appear. Also, pictures uploaded to posts on Google Plus are automatically saved here. You can get into the application itself by clicking on the Google applications icon from disk, mail, home page Google Chrome browser.

In the application settings, you can put a useful checkbox so that photos and videos do not take up extra space in storage.
To do this, go to Google Photos, click on three vertical stripes top left, go to settings.
And check the appropriate box:

“Marked” section – files and folders that you mark as important to you go here. Marking is very simple - select the file, right-click, and select “Add mark” from the list that opens. To remove a file from “Marked”, right-click again and select “Unmark”.
Recycle Bin – files that you delete from your Google Drive go into it. The Recycle Bin can be emptied, then the files are permanently deleted. You can also restore any file from the Recycle Bin by selecting it with the mouse and clicking “Recover from Recycle Bin”.
There are several more useful icons in the upper right corner of Google Drive.
You can configure the display of files in the cloud as a list or grid. By clicking on the letter “i” in the circle, you can view the history of your actions on the disk, as well as the properties of any file by selecting it with the mouse. Clicking on the gear will open additional list tabs.

In the “Settings” tab:
You can change the interface language. Enable offline access (saving Google documents to your computer to work with them without an Internet connection). On this issue you can read separate instructions. Disable automatic download photos from Google Photos to a folder on disk.
Choose an interface option – spacious, regular or compact.

There are also alert settings.
And the ability to connect different Google apps to your disk.

By clicking on the “Install disk on computer” tab, you can download the application for PC, as well as for smartphones on Android or iPhone. Here, keep in mind that the PC application is synchronized with the online cloud and all files end up on your computer, taking up space. Since this does not suit me, I prefer to use only the web interface. The only advantage of synchronization is the ability to quickly send a file big size to the cloud or save all files from the cloud to your computer at once, and then disable synchronization.
Actions on files and folders in Google Drive
To upload files and folders from your computer to the cloud, use the “Create” button. You click on it and select the corresponding menu item - a window for selecting files on your computer will open. To select multiple files at once, hold down the Ctrl key.

When the file is selected, click on the “Open” button, and it will begin downloading to Disk. Information about the process will appear in the lower right corner.
Alternative option downloads - minimize the Google Drive tab to a smaller window and drag files from your computer to the “My Drive” section with the mouse.
You can do a number of things with files, folders, and documents on the drive. To do this, select the desired file (or several) with the mouse and right-click. A list of available actions appears. The same actions are duplicated on the panel above.

The contents of the file can be viewed by clicking " Preview" If you want to edit the document, then select "Open with". The drive will offer you an application through which you can open the file.
To open the contents of a folder, double-click on it. You can perform all the same actions on files and documents in a folder.
You can give access to any file, folder or document on the disk to another person. To set up sharing, click on the appropriate menu item.
In the window that opens, you need to enter the gmail email of the person to whom you want to give access. Click on the pencil icon to indicate the access type. This can be commenting, viewing and editing.

If you have granted commenting or viewing access, you can prevent the user from downloading, copying, or printing the file. Just tick the boxes you need. Don't forget to save your changes.

Then click "Submit". The user will receive a letter informing them that you have granted them access to the files. He will see this file on his disk in the “Available to me” section.
To close access, you again need to right-click on this file and select “Sharing”. In the window that opens, click on the user name.


Access is denied, the user will see this message:
You can also configure access settings. The default is view. Also, using the link, the user will be able to download the file or save it to his disk. You can also enable commenting or editing.

If you click “More”, you will see other settings. For example, you can enable access for absolutely any user on the Internet, that is, the file will be available through search. Or disable access via the link and send an invitation to sharing specific user by email (we discussed this process above).

The next action item for files is “Move”. It can be used to move files into folders. This is convenient if you have a lot of files and want to organize them. You can also move files by dragging them with the mouse.

Creating folders on disk is easy. Click on the “Create” – “New Folder” button.
By the way, you can change the color of the folders.

The “Add Starring” item is useful if you want to add your favorite files to the “Starred” section for quick access to them.
The “Rename” item will allow you to change the name of the file or folder.
“Show properties” item – to view the properties of a file and the history of actions on it.

The “Versions” item – it is available for those files that you upload to Disk.

Let's say you downloaded an archive of materials from your computer and shared a link to it with subscribers. Then you needed to make edits to this archive, you downloaded it to your computer again and edited it. Then we re-uploaded it to Disk with the same name so that the link to the archive did not change. By the way, when downloading again, you can choose how to save this file - separately (the link to it will change), or as new version, which will replace the previous one.
However, the previous version will not be deleted immediately (by default, it is saved on disk for another 30 days). But, you can delete it manually or check the box to previous versions were not deleted. This is done precisely through this “Versions” item.

The remaining actions on the files: create a copy, download it to your computer and delete it in the trash. By the way, to delete the file in the trash, you can drag it with the mouse to this section on Google Drive.
So, we figured out the main points of the Google Drive web interface. Now a few words on how to download to your computer or save to disk a file that was shared with you via a link from another Google Drive.
If you followed the link and are logged in to your Google account, then you will see a Google Drive icon at the top, by clicking on which you can save this file to your disk. Nearby there is an arrow for downloading the file to your computer.
Well, I hope my Google Drive instructions will help you navigate the settings and functionality of this cloud service. Well, if you still have questions, I will be happy to answer them in the comments.
I wish you success!
Best regards, Victoria Karpova
o-zarabotkeonline.ru
Cloud storage Cloud Mail.Ru
The Mail.Ru group of companies has released its cloud storage called “Mail.Ru Cloud”. During the beta testing period of the cloud service, Mail.Ru Cloud provided everyone who took part in testing cloud storage with 100 GB of disk space free of charge.
This entire large amount of disk storage remained forever with all users who registered with the file service during its beta testing. IN this moment, the amount of space provided to users is 25 GB.
Size free space in cloud storage for those who managed to receive a volume of 100 GB, comparable to the size of a small hard drive. Other cloud storage providers provide smaller amounts of data storage for free.
Yandex.Disk provides 10 GB for free, Google Drive provides 15 GB (including mail) of space on its disk, OneDrive - 5 GB, Dropbox - 2 GB (can be increased to 16 GB for free), and cloud Mega storage provides 50 GB of disk space for free.
You can store your data in the Mail.Ru Cloud: documents, photos, videos and any other files. To log into the cloud storage, you can use the web interface or a client application that will need to be installed on your computer or smartphone. Client applications are developed for Windows, Mac OS X, Linux, as well as for mobile devices: Android and iOS. In this case, “mail.ru satellite” and “mail.ru defender” will not be installed.
Data uploaded to [email protected] will be automatically synchronized with other devices. Files placed on your computer in the Mail.Ru Cloud folder (Mail.Ru Cloud) will immediately be synchronized and become accessible from other devices.
In order to use a cloud drive on Mail.Ru, you must have an email account in Mail.Ru. If you don't have it yet mailbox on this service, then you should create an email account in postal service Mail.Ru.
After logging in via email, a cloud disk window will open - “Mail.Ru Cloud”. The user receives 25 GB for free free space in cloud storage.
In order to increase your free disk space, you will be prompted to purchase additional disk space.
Installing the Mail.Ru Cloud application
To install the Mail.Ru Cloud application on your computer, you will need to click on the “Install on computer” button. In the window that opens, select the client application for your operating system: Windows, Mac or Linux.
After downloading the Mail.Ru Cloud client program (Mail.Ru Cloud) to your computer, this application will need to be installed on your computer.
In the first window of the installation wizard, click on the “Next” button.

In the “Select installation folder” window, you can leave the default folder for installing the Mail.Ru Cloud client program, or select a different location to install the program. Then you need to click on the “Next” button.


In the “Everything is ready to install” window, click on the “Install” button.

After installing the Mail.Ru Cloud client on your computer, the final window of the installation wizard opens, in which you need to click on the “Finish” button.

In the Mail.Ru Cloud program window, you will need to enter your account information: your email address and password. Then you must agree to the terms license agreement, and then click on the “Login” button.

In the next window of the Mail.Ru Cloud program you will need to select a folder on your computer to synchronize with cloud disk, and then click on the “Continue” button.

Review Cloud Mail.Ru
At the very top of the web page window there are buttons “Download”, “Create”, “Delete”, “Get link”, “Configure access”, “More”. Using the “Download” button, files are uploaded to cloud storage. When uploading via the web interface, the file size should not exceed 2 GB.
After clicking on the “Configure access” button, a window will open with folders that can be opened for public access.
On the left are the sections: “Connect a tariff” with information about the amount of used disk space, “Cloud”, “Help Desk”, Offer for downloading applications for various devices.
In the central part of the window, files placed in the file storage are located. Above is the control panel with buttons.

After clicking on the “Create” button, you can create a new folder, document, table, presentation.
If you mark a file in the storage and then click on the “Download” button, then the downloading of this file to your computer will immediately begin.
You can delete files using the “Delete” button.
Using the "More" button you can copy, rename, or move the file.
On the right side of the panel there are two buttons: to change appearance storage, and to set parameters for sorting files.
In order to provide general access, or vice versa, to block access to a file, you must first select the file, and then perform the necessary actions on the right side of the storage window.

If you want to stop other users from accessing this file, then to do this, you will need to click on the “Remove link” link.
In order for the “Delete”, “Get link” and “More” buttons to become active, you will need to select the file with which you need to perform some action.
You can manage the Mail.Ru Cloud application from the notification area (tray), where the client program icon is located.
Conclusion
Cloud storage The Mail.Ru cloud is offered to all users of the Mail.Ru service disk space in your “cloud”.
Hello dear visitors! If you have come to this page, then most likely you are interested in the question of storing files in the cloud. I’ll write now and, as is already customary on this site, I’ll show you in pictures, how to install and configure Google Drive. But I think it wouldn’t hurt to write a few words about what cloud storage is, why they are needed, and tell a little about Google Drive, also known as Google Drive.
In simple words, cloud storage is a service that provides you with a specific place on the Internet to store your files. One of such services is. He appeared on the market almost simultaneously and began providing his services. There are many more similar services, among which Dropbox is worth highlighting; perhaps there will be a separate article about it.
Why am I writing today about Google Drive? As you probably already guessed, I myself am using it now, and just yesterday I reinstalled the systems and I need to install this program on my computer again, I’ll just take screenshots :).
The convenience of such services, in particular Google Drive, is that you get a “flash drive” on the Internet on which you can store information, and most importantly, have access to it from anywhere where there is Internet and the ability to access service website. All you need is to know your username and password to access. Of course Google company created applications for computers, tablets and smartphones on different platforms. All this is for the convenience of using the Google Drive service.
Immediately after registration, you will be given 5 GB of file storage for free. For 2.5 dollars you can increase it to 25 GB, and this is not a limit.
I think this useless theory is enough :), let's get down to business.
To use Google Drive, you need to create a Google account.
Of course, you need to register with Google in order to receive a username and password. You can read about how to create an account on Google in the article. Or if you are already using at least one of Google services, for example Gmail, then to log into Google Drive you can use the login and password that you already have.
To register with Google Drive, or to learn more about its capabilities, go to the page. Click the button on the right “Go to Google Drive”.


After registration, log into the site using your details.
How to install Google Drive on your computer?
Now we have come to the most important part of this article; now we will install a program that will allow you to conveniently work with Google Drive.
Let's go to . Let's go to the page.

Select the version for computers and click “Download”.

A window will appear in which you simply click “Accept the terms and install”.
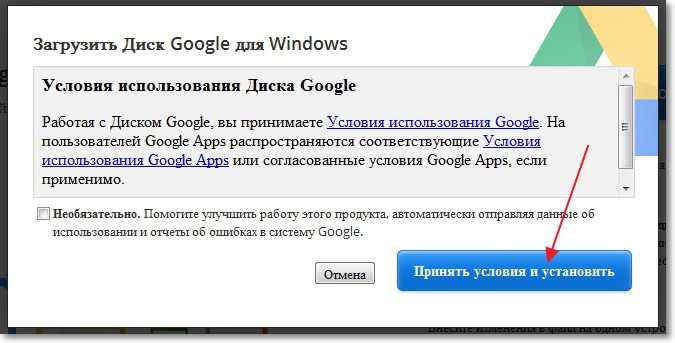
A message will immediately appear that Google Drive is loading. Then the installation will begin.

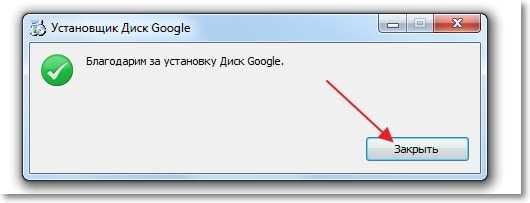
When installation is complete, click “Close”.
That's it, the installation is complete. The program will launch itself, click the “Login” button. Enter your email address and password, and click “Login” again.

A window will appear in which we click “Forward”.

In the next window, the program will inform you that all files that are already on Google Drive will be synchronized with a specially created folder on your computer. For additional settings click "Advanced settings", but you won’t see anything interesting there, you can change the location of this very folder, and indicate whether Google Drive can be launched when you turn on the computer, and that’s essentially all. Click the button "Synchronize".

That's all.
How to use Google Drive on a computer?
A Google Drive folder will appear on your desktop, and it will also appear in Explorer. Once you move your files to this folder, they will automatically be uploaded to the cloud and you can access them from any device. Or, when adding files from another device, say a tablet, they will automatically appear in this folder.
For example, when I need to transfer photos from my phone to my computer, I simply upload them to Google Drive, then go to Google folder Disk and copy them from there. It's even faster than connecting your phone via cable.
Also, a program icon will appear on the taskbar (in the tray), by right-clicking on it, you can see how much you still have left free memory to Google Drive, you can also go to the program settings.
In this article I would like to write about how to use basic functions. In 2013, the well-known Russian Internet service mail.ru launched its own cloud data storage. Store all your important files in a personal cloud; the cloud allows you to access each file from absolutely anywhere globe. All you need is access to the Internet.
Download options
Cloud storage from mail.ru has specialized applications for all of today's most popular mobile platforms and PC operating systems. The service does not limit the speed of uploading files to the cloud, thereby providing users with the opportunity to use the service as comfortably as possible.

I would like to note that in the cloud from mail.ru you get 25 Gigabytes of free free space on your personal virtual disk. The storage allows users to upload photos, videos, text files, folders, archives and many other types of files.
Cloud capabilities from mail.ru:
- high download speed user files any size;
- ability to create backup copies important files and folders;
- the user can configure auto-download of files from the phone camera;
- function to create shared custom folders And public access to files;
- the ability to quickly share files on a social network;
- synchronization with mail.ru mail;
- built-in security system. Regular check cloud files for viruses.
Let's look at how to get started basic work with storage and how to upload files to [email protected].
Uploading photos to the cloud
In order to start working with the mail.ru cloud, follow the link cloud.mail.ru and using the login and password for your mailbox. Now you've arrived at home page Your cloud storage.

To upload a photo to [email protected], click on the “+ Upload” button in the upper left corner and drag the photo you want to upload onto the pop-up window. You can also click on the “Select file” button and find the desired photo through the computer explorer. The selected photo will be uploaded to the storage automatically.

Uploading a folder
Now let's look at uploading folders to [email protected]. You cannot directly upload a folder to the cloud through a browser; you can only create a folder on the cloud and add to it all the files from your folder located on your computer. To quickly transfer a folder from your device to the cloud, follow the steps below:

There is another way to upload a folder to the cloud, which is faster. On your PC, create an archive of the folder and upload this archive to the cloud. You will not be able to open the folder in the storage, but only the ability to download the archive will be available.
Important! I would like to note that when loading large file there are limitations to the cloud. The file size cannot be more than 2 Gigabytes.

In the article, I briefly described the methods of uploading to [email protected], and also listed all the main features of this service. I believe that 25 Gigabytes of free free space, ease of use and user-friendly interface are good reasons to start using this.
We all use cloud storage, and some of us even pay subscription fee for the ability to store files in excess of the allocated limit. This is convenient - if we have the Internet, we can access all the files that we have copied to the cloud at any time. But such services also have disadvantages: they can be hacked by hackers, files can get to strangers, and if the cloud owners are not satisfied with the content you store with them, your account can be blocked, and then all the files will be lost. Creation own cloud - perfect solution, although it also has its drawbacks.
Advantages of a personal cloud:
No limits. You can store as many files as fit on the drives on your computer.
- No fees, everything is free (except electricity).
- Complete privacy. Files are copied from your computer to other devices without using a third-party server.
- Ability to share an unlimited number of folders and files with other users.
- Manage access levels to files and folders.
Disadvantages of a personal cloud:
You will have to keep the computer turned on all the time, otherwise remote access to the files will be lost.
- It will not be possible to connect your cloud to most applications that work with popular storages.
- The risk of losing files due to a computer failure.
How to create your own cloud:
1. Go to the website and create an account.

2. Download the Tonido Server program. Install it, run it and allow it access to the network (if the firewall dialog box pops up). This program creates a server from a computer, so that files stored on it can be accessed from anywhere in the world via the Internet.
3. The Tonido Server icon hangs in the notification panel. By clicking on it in the browser it opens local address http://127.0.0.1:10001 with a service interface where you can specify which folders will be added to the cloud.

4. Download the Tonido mobile or desktop app. Launch it and log into your account. If you see files in the application that are stored on your computer, then the cloud is ready and you can use it. Now you will always have all the files you need with you.

The app can open several types of files, including videos, music and texts. Any file can be downloaded to your device or sent to a friend (by email or with direct access via a link in the Tonido service).

Strictly speaking, a server running on home computer, cannot be considered a full-fledged cloud service. Cloud - professional solution, which uses the technology of distributing files across several servers, making the risk of their loss almost eliminated. The likelihood of data corruption can be minimized at home - for this, for example, you can create a RAID array. But even then, other risks remain, e.g. physical damage computer or its theft. It's harder to protect yourself from this.
Users and businesses will continue to move away from bulky and expensive servers and instead choose the cloud to store files. Given the variety of storage options available, you should choose carefully.
Lifehacker suggests paying attention to services that provide maximum free space with reliable protection data and quality service. Prices shown are for starter plans only.
- Price: 2GB free, 1TB for $8.25 per month. The standard Dropbox Business subscription costs $12.50 per month per user.
- Applications:
- Russian language support: There is.
Initially, this cloud storage giant only gives you access to 2 GB of free space. But it can be expanded up to 16 GB without much difficulty: just link your accounts to in social networks and offer a referral link to several friends.
With a Dropbox Business subscription, you can use your business account to collaboration, and also gives unlimited space for personal account. Moreover, you get a number of advanced features like file recovery and customization of access levels.

- Price: 15 GB free, 100 GB for 139 rubles per month.
- Applications: Windows, macOS, iOS, Android.
- Russian language support: There is.
One of the most obvious options for owners of devices running Android control, since the application is initially installed on smartphones and tablets based on Google OS. However, due to the considerable volume free storage The service may also be attractive to owners of other devices.
Among the disadvantages is that the interface of the browser version is not the simplest. But Windows and macOS users can download a much more convenient application.
3. Mega

- Price: 50 GB free, 200 GB for 4.99 euros per month.
- Applications:
- Russian language support: There is.
Another service with a generous free plan and an interface that supports drag-and-drop files. Mega has a convenient mobile app for downloading files, as well as desktop clients for synchronizing them.
According to the company, all data is encrypted on your device before it ends up on the servers. Source Mega client is available on GitHub and can be reviewed by any expert. Therefore, the statement inspires confidence.

- Price: 10 GB free, another 10 GB for 30 rubles per month.
- Applications: Windows, macOS, Linux, iOS, Android, LG Smart TV.
- Russian language support: There is.
The cloud from Yandex works quickly and stably, and is constantly acquiring new functions. The service has high speed synchronization The platform's capabilities are built into some third-party applications.
Despite the presence of clients for all popular desktop and mobile platforms, the Yandex.Disk browser interface is also very practical. The service also has very good opportunities to expand space through partnerships with companies. For example, if you are a Muscovite and use the OnLime tariff plan from Rostelecom, then the disk capacity increases by 100 GB.

- Price: 5 GB free, 50 GB for 140 rubles per month, 1 TB for 269 or 339 rubles when registering for a personal or family subscription on Office 365 respectively.
- Applications: Windows, macOS, iOS, Android, Windows Phone, Xbox.
- Russian language support: There is.
The former SkyDrive is built into the standard Windows Explorer 10. There is no need to download the application - everything is already downloaded for you.
Built in operating system The Photos app can use OneDrive to sync all your pictures between devices.
When installing a client for macOS, there are some things to consider: positive reviews about him.
In addition to the regular pricing plans, Microsoft has Office 365 Personal and Office 365 Home. Both subscriptions include 1 TB of cloud storage, full versions Office applications for Windows and macOS and a whole range of other benefits. The second option gives 1 TB to five users at once.

- Price: 8 GB free, 64 GB for 69 rubles per month.
- Applications: Windows, macOS, Linux, iOS, Android, Windows Phone.
- Russian language support: There is.
The closest analogue of Yandex.Disk in terms of available opportunities, web version interface and supported platforms. Loses to its main competitor due to its extensive referral program. Among the advantages - larger volume free storage.
Among other things, the service has a tool for quick creation and saving screenshots to the cloud.

- Price: 5 GB free, 50 GB for 59 rubles per month.
- Applications: Windows.
- Russian language support: There is.
5GB of free space may not be enough, but iCloud is the most convenient way create backups photos from iPhone.
The service is integrated into Finder on macOS - the desktop of all MacBooks. Documents created through the iWork office suite are also saved in iCloud and can be synchronized between devices. The platform also has an official client for Windows, with which you can keep files on your PC up to date.
8.Box

- Price: 10 GB free, 100 GB for 8 euros per month. Business subscription costs 12 euros per month.
- Applications: Windows, macOS, iOS, Android.
- Russian language support: There is.
The platform quickly gained popularity and is supported by a number of popular services for work, such as " Google Docs” and Office 365. Box desktop clients allow you not only to synchronize, but also to edit files.
The company is actively promoting business subscriptions. It is the one that appears in the center of the screen when you click on the registration button. Tariff plan Gives you access to advanced collaboration features and unlimited cloud space.

- Price: free setup and usage, space prices vary by hosting providers. Nextcloud Box costs 70 euros.
- Applications: Windows, macOS, Linux, iOS, Android.
- Russian language support: No.
The company itself is not a cloud storage provider, but offers free software to configure the cloud on your own server. The main advantage of this option is speed. You can also enable encryption and not worry about files leaving your home network.
If you do not have experience in setting up servers, you can buy a pre-configured option - Nextcloud Box. Inside the device - HDD for 1 TB. It easily connects to an inexpensive single board computer. True, in order to get a mini-server in your hands, you will have to use the services third party companies: There is no direct delivery to Russia and CIS countries.

- Price: 2 GB free, 250 GB for $9 per month.
- Applications: Windows, macOS, Linux, iOS, Android.
- Russian language support: No.
Another English-language platform that has long operated under a zero-knowledge protocol. It was implied that the company interacts with user data without disclosing its content in any way. It was recently revealed that there are some caveats here and SpiderOak has abandoned its main feature. But this did not stop us from striving to provide files.
The repository has clients for all popular desktop and mobile platforms. You can use the web client, but for privacy advocates this is the least preferred option because it gives away your password to SpiderOak employees.

- Price: 5 GB free, 2 TB for $52.12 per year special offer, then - 69.5 dollars.
- Applications: Windows, macOS, Linux, iOS, Android, Windows Phone.
- Russian language support: No.
The product keeps all your files in constant sync - even those stored on network drives. The web interface allows you to share data by mail, Facebook and Twitter.
The advantage of IDrive is that files deleted from the computer from the cloud do not automatically disappear. The company also has a service called IDrive Express: if you lose all your data, they will deliver a hard drive to you for quick recovery.

- Price: 10 GB free, 500 GB for $3.99 per month, pCloud Crypto encryption price: $3.99 per month.
- Applications: Windows, macOS, Linux, iOS, Android.
- Russian language support: There is.
The service has restrictions on the speed of downloading files, but there is no limit on their size. The storage can be used from any platform - through an application or website.
The company is registered in Switzerland, a country known for its strict privacy laws. For an additional amount, you can use the pCloud Crypto service to encrypt individual files.