How to create your own server in the main. Creating a good server for Minecraft
So, today I will tell you how to create a minecraft server. To begin with, I will tell you about a regular server, and in the next article we will look at running a server on bukkit. That is, today's server will not support mods, but it is quite enough for playing with friends, and its installation is simpler.
In fact, there is nothing difficult here, but many beginners have a lot of questions related to the process of starting a server, which I will try to answer today in a form that will be accessible even to those who are not particularly computer friendly.
We will install a server for Windows, since I have not met a single person with Linux who could not set up a server :)
In order to create a server on your home computer (or not on it), we will need software available at the link. This version is best for beginners, as it is the most visual, if you just want to play with friends online, then this is a great solution.
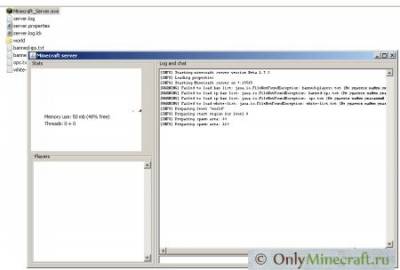
And so, we place this file in a separate folder to make it more convenient, and run it. We are waiting for a line like “ Done (10,146s)! For help, type “help” or “?”". It took me about 10 seconds. Let's stop the server; to do this, enter “stop” in the input window at the bottom right and press the Enter key. Let's now look at setting up the server, because this is the only way we can create a minecraft server exactly the way we need it. Let's look at what appears in our server folder:
- banned-ips.txt - list of players banned by ip
- banned-players.txt - list of banned players
- ops.txt - list of ops or, more simply put, list of admins
- server.log — server log. Any information that you are unlikely to need is recorded here.
- server.properties - server settings
- white-list.txt - list of players who have access to the server
Let's take a closer look. The banned-ips, banned-players, ops and whitelist files are a list of players. There should be one nickname on each line. If you want, you can enter your nickname in ops.txt, but I recommend using the command that I will talk about towards the end of the article. Let's take a closer look at the server.properties file and consider all its points. Most items can only accept the values “true” (“allow”) or “false” (“deny”). Here is a list of all commands:
- allow-nether=true — whether to allow the nether world on the server
- level-name=world — world name. Defines the name of the folder in which your world will be stored
- enable-query=false — whether to allow server statistics queries. Leave it as is.
- allow-flight=false - should cheaters be allowed to fly? This does not apply to creative flight
- server-port=25565 — server port, in most cases there is no need to change it
- level-type=DEFAULT - server type, if you put “FLAT”, you will get a flat map
- enable-rcon=false - allows you to gain remote access to the console. Don't ask, I don't know how.
- level-seed= - level seed, for it to take effect, you will have to wipe (delete the “World” folder)
- server-ip= - in most cases should be left empty
- max-build-height=256 — maximum construction height (one of: 64, 80, 96, 112, 128, 144, 160, 176, 192, 208, 224, 240, 256)
- spawn-npcs=true - whether to spawn villagers
- white-list=false — whether to enable the white list
- spawn-animals=true — whether to spawn animals
- online-mode=true - if false, then pirates will be able to enter
- pvp=true — whether to allow pvp
- difficulty=1 difficulty level (0 - Peaceful, 1 - Easy, 2 - Normal, 3 - Hard)
- gamemode=0 - if you set “1”, then all players will be creative
- max-players=20 — number of slots on the server
- spawn-monsters=true - whether to spawn hostile monsters
- generate-structures=true - whether to generate villages, treasuries, fortresses...
- view-distance=10 — visibility range in chunks, I recommend not changing it
- motd=A Minecraft Server - a message that is displayed in the list of servers. Must be no more than 60 characters
Actually, after changing the settings and saving them, you can start the server and enjoy the game. Oh yes, here is a list of commands that is available from the server application itself (where we wrote “stop”). These commands are also available from the game if you are Op. In this case, you should add a “/” character before the command. Here is the list itself:
- help - displays a list of available commands
- kick<ник>— kicks the player (disconnects from the server)
- ban<ник>- bans the player
- pardon<ник>- unbans a player
- ban-ip
— adds an IP address to the list of banned ones - pardon-ip
— removes the IP address from the list of banned ones - op<ник>- makes the player Op
- deop<ник>- demotes Opa to a regular player
- tp<ник1> <ник2>- transfers the first player to the second
- give<ник>
[quantity] - gives the player an item with the specified id. The quantity is not required. - tell<игрок> <сообщение>— sends a private message to the player
- stop - stops the server
- save-all - saves the map
- save-off - disables landscape saving, usually not used
- save-on - enables saving the landscape
- list - displays a list of players
- say<сообщение>— displays a message in the chat on behalf of the server
- time set<количество>— sets the time. A game day lasts 24,000. If we set the time to 0 (time set 0), we get morning. And if you put 12,000, then evening
- time add<количество>— adds a certain amount to the current time
- gamemode<ник> <значение>- changes the player's game type. The value can be 0 (survival) or 1 (creative)
- toggledownfall - enables or disables precipitation
- xp<ник> <количестве>— gives the player a specified amount of experience (0-5000)
That's all, now you know how to create a server in Minecraft, have a good game on your server!
If you want to open your own server, but don’t know how to do it, then this article will be of interest to you. Creating a server in Minecraft will allow you to play with friends or with other players in your own world. There is also a collection of mods that will decorate your world for the better. The assembly is carried out without any difficulties. Use various commands, they will allow you to control the game in your world: ban players, change the weather in Minecraft and much more.
You can find many videos on YouTube on how to have fun. And also, if you are interested, you can create your own channel and make a video of all your adventures. By creating your own server, you will have complete control over it. Minecraft is a game where imagination is given free rein, so you can appreciate not only your imagination, but also your friends. Assembling various modifications for the game will fill it with more opportunities. Also, the assembly for the game can be made by the players themselves and distributed on sites. An assembly can be created by combining several mods in Minecraft.
You can also put various maps on the server, which you can play with friends. You can install them on our website in the Maps section. You can install them and have fun, or you can make them yourself, creating your own world. And if you are planning to create something really cool, you can put them up for public download if you wish. If players wish, they can create a map of incredible beauty that will justify your efforts when looking at a beautiful map in minecraft.
Commands on the server also play an important role, as was already written above, they allow you to “hold the control panel in your hands.” Commands are written to ensure that the server is under your control.
The commands are shown in the screenshot below (CLICK ON THEM):

Creating a server in Minecraft
First, you need to open the page http://www.minecraft.net/download.jsp and you will need to download a file called Minecraft_Server.exe. This is the official website, hence it has all the latest versions.The file that you downloaded Minecraft_Server.exe (or otherwise called minecraft_server.jar) needs to be opened and transferred to the folder in which you will have the server.
Now let's move on to the ports, you need to open it, but if you have it open 25565, then you will see the following message:

Now, keep calm and wait until the process for the minecraft game reaches the end. After completion, you will need to close the window.
Another case will be if your port for minecraft is closed, or the operation of Minecraft_Server.exe or Java is blocked by some program, for example a firewall, as shown in the picture below. If this happens, try uninstalling java and installing it again, a message will appear from the firewall and you will need to allow the application access.
How to open port 25565. In any case, first you must allow java access, unless of course such a window appears. Of course you grant java these rights. The screenshot shows an example of blocking.


If everything goes well, new files will appear in the folder, and the world.
We definitely need a file called server.properties. You need to open this file with notepad. Now you should take note of the information below. In order to find out your IP address, you need to go to sites that will show it to you. For example, I can cite the site 2ip.ru, where you can freely view your IP address, as shown in the screenshot.

If your IP changes, and most people do, then you need to enter an update to the server-ip= line before each server startup.
Sites that show IP should be bookmarked to make searching easier.
Launch and log into your server (with video)
The information is relevant for Minecraft versions 1.2.5, 1.5.2, 1.6.1, 1.6.2, 1.6.4. Next, you need to run Minecraft_Server.exe and wait for the download to complete. Go to minecraft (it is not necessary to enter your username and password).Click on Multiplayer, then Add Server, as shown in the picture below.

Next you need to enter the server name (this name will be shown in the list) and server ip
Next, click Done, and your server will appear in the list. Green stripes on the right indicate that it is working and is also shown online. Next you need to click Join Server.


Done, now you play on your own server.
As fun as Minecraft's single-player mode is, multiplayer, where you can play with friends, is much more fun. There are several ways to play Minecraft in multiplayer. One of them is to create a Minecraft server that you and your friends can connect to. Of course, existing servers can also be used for this purpose.
In this guide, we'll show you how to create a Minecraft server for you and your friends on your home PC.
First you need to download the .jar version of the server
Place the downloaded jar file in a folder. It doesn't matter where she is. Next, you need to prepare the file that will launch your server.

Creating a Batch File
Create a new text document and add the following lines to it:
@echo off
title run-minecraft
java -Xms1024M -Xmx2048M -jar minecraft_server.jar nogui
pause
This means we want java to run our server "minecraft_server.jar" with 1024 megabytes (1 gigabyte) of RAM. If an error appears, reduce the RAM values to 512 MB, it helped me and the server started!
To run the server with more memory, simply change the -xms and -xmx values. Moreover, they must be equal to the numbers 64, 128, 256, 512, and so on.
To save a file in .bat format, click the File button in the upper left corner of the screen, select Save As, then under the “File name” field, select All files. It is very important. Name your file start or start server and click Save. Then change the file extension from .txt to .bat
Or you can download my bat file here: (to change it, right-click on the file and select “Edit”).
User agreement and server launch
After completing the previous step, start your server. First, it will close instantly as you need to accept the user agreement. To do this, open the text document with the agreement that appears in the folder, change the line eula=false to eula=true, save it and start the server again.

Your server should start normally and start generating the world and creating other important files like server.properties, whitelist, banned-players and so on.

Connecting to the server
To connect to the server we just created, you, as the owner, just need to go to multiplayer and add a server, specifying “localhost” as the IP address.
As for your friends, you can give them your external IP address, to find it out, go to the website 2ip.ru. In addition, your router should have ports 25565 through 25566 forwarded. An excellent video on port forwarding can be found below.
I hope this quick guide will help you create a Minecraft 1.8 server for you and your friends, and then have a good time together! If you still have any questions, ask them in the comments below!
Minecraft is a popular gaming product, which, according to various estimates, has the largest number of sales around the world. The game attracts with its rich functionality and available opportunities for potential players. Among the attractive opportunities for players there is such a feature as a personal Minecraft server. Setting up your own server to play Minecraft takes time. The result is worth it, for example, to play with friends. However, how to make a server in Minecraft and configure it for Mac, Windows, Linux? Let's try to figure it out.
To cope with the task, first of all, you need to acquire the basic components of the node organization:
- Software for Minecraft server.
- Powerful desktop computer (laptop).
- Cable connection to the Internet.
- Web hosting.
The configuration of the personal computer at your disposal determines the admissibility of installing a personal Minecraft server. Meanwhile, it is recommended to use a remote hosting service as a more effective option for organizing a gaming node.
Again, the official Minecraft dealership offers a number of hosting services free of charge. As a last resort, it is always possible to find a host at reasonable rates.
Attention! A personal hosting device is fraught with attacks on your computer. Using hosting from an external provider eliminates such risks.
Setting up port forwarding
If you plan to play directly in the company of friends via a local network, you can skip the information below.
If you organize a Minecraft server via the Internet, to provide access to the node you will have to use port forwarding on the router.
 An example of one of many options for configuring port forwarding on a specific router. In each specific case, you should refer to the equipment documentation
 Since each individual router has a unique design, you should refer to the device's setup manual, in particular, on the issue of setting up port forwarding.
This is usually done as follows:
- you enter the router settings page,
- the port forwarding section opens,
- indicate the IP address of the computer in the appropriate field,
- UDP and TCP ports for Minecraft are indicated in the appropriate fields.
The incoming ports that need to be forwarded in the case of Minecraft are the following:
TCP: 19132, 25565
UDP: 19132, 25565
You may need to specify a protocol for working with ports. After entering all the information, the router (router) must reboot.
How to create a Minecraft server on Windows?
Initially, it is recommended to download and update your Java version to the latest release. Then the software for Minecraft server is downloaded directly (file with the extension “*.jar”).
Next, an empty folder is created in any convenient location on the computer, named arbitrarily (for example, “server-minecraft”). The previously downloaded “*.jar” file is transferred to this folder and launched in the standard way.
The first launch of the Minecraft server is often accompanied by error messages and automatic shutdown of the node. These messages can be ignored. The first launch creates configuration files in the previously created folder.
There, in the folder, you should find a text file named “eula” and open this file with the classic text editor “Notepad” or similar. The content needs to be edited, in particular, the line “ eula = false" on " eula = true».
 The first attempt to start is often accompanied by a message about unsuccessful completion. This is a purely technical situation that can be corrected with some manipulations
 This edition prevents automatic shutdown of the Minecraft server. With this configuration, running as administrator runs without errors.
You should re-run the “*.jar” file for execution (required from the administrator) and wait for the “Done” message.
To stop the operation of the node, use the “stop” command in the server window with the “Enter” confirmation.
Technically, the owner is free to run his own host directly. However, it is more convenient to do this by setting the default parameters, and then creating a launch file if you plan to play with other users.
It is enough to create a new launch file “run.bat” using Notepad, and add the line “ java -Xmx3G -Xms1G -jar server.jar" After this operation, the Minecraft server will be launched through the “run.bat” file in the folder or via a shortcut on the desktop.
This is the final stage of the process. All that remains is to invite other Minecraft players by providing a public IP address or a local IP address, depending on the nature of the network.
You can check access to your personal Minecraft server by entering the IP address in Minecraft Server Status Checker. Access to the host is only possible if port forwarding is previously configured.
The public IP address can be determined through various services, found by Google or in another way.
How to set up a personal Minecraft server for Mac?
Setting up a Minecraft server on Mac traditionally starts with making sure your system is up to version macOS 10.8 or later. Operating system updates are available through Apple Support.
 The procedure for downloading the Minecraft server distribution for the MAC operating system. After this process, simple settings and the long-awaited launch
 Through the Apple menu, “System Preferences” opens, where you need to find the Java logo. Clicking on the logo launches the Java control panel.
Here you need to go to the “Update” tab and activate the “Update now” option. Go through the OS update procedure.
#!/bin/bash
cd "$(dirname "$0″)"
exec java -Xms1G -Xmx1G -jar (server file name) nogui
where: server file name is the name of the downloaded Minecraft server file.
Edited containing a server-side ".jar" file named "start.command". Next, the Mac terminal opens, the “Applications - Utilities” transition is performed, and “Terminal” is launched.
The terminal window line is filled with the command “ chmod a+x" followed by a space. The enter key starts the command for execution.
The “start.command” file is dragged to the next window with the mouse. “Enter” is reactivated. After this operation, the Minecraft server will be launched via “start.command” in the usual way.
Minecraft server testing is carried out similarly to the Windows version.
How to set up a personal Minecraft server on Linux?
Any Linux distribution allows you to organize a Minecraft server. Let's look at the technological steps that allow you to create a Minecraft server for Ubuntu 16.04. Configuration is performed via the command terminal.
Connect to the hosting via SSH using the terminal command: “ ssh username@ipaddress", where username is the user name, ipadress is the IP address on the hosting.
 Autostart screen of a server program on a computer system running the Linux operating shell. The Linux command terminal allows you to perform advanced settings for the Minecraft server
 sudo apt-get update
sudo apt-get install default-jdk
If you are prompted to confirm installation, confirm. Activate the screen to ensure the operation of the node when there is no network connection with the command:
sudo apt-get install screen
Create a directory for personal server files and open with the commands:
mkdir minecraft
cd minecraft
Install wget
sudo apt-get install wget
Download the Minecraft server distribution using the wget command:
wget -O minecraft_server.jar https://s3.amazonaws.com/Minecraft.Download/versions/1.12.2/minecraft_server.1.12.2.jar
echo "eula=true" > eula.txt
screen -S "Minecraft server 1"
java -Xmx512M -Xms512M -jar minecraft_server.jar nogui
Testing is carried out in the manner described above.
How to connect to a personal Minecraft server
When using a personal Minecraft server, the program window must remain active to allow access. Open and log into your personal Minecraft account.
Select "Multiplayer" from the menu and then "Add Server" in the lower right corner of the screen. Give the game node a name. Specify the hosting IP address in the “Server Address” line.
Please note that for a personal Minecraft server, a private IP address is entered, which is different from the public IP address. At the bottom of the window, activate the “Done” option.
Potential players will only have to select the node name at the top of the screen and activate the “Join Server” option. If the router is configured correctly, the connection is successful.
You may need to disable your computer's firewall to remove the blocker on connecting to the gaming site locally. However, it is worth remembering that this action will make the computer vulnerable to hacker attacks.
Every Minecraft player wants to play with his friends on servers, but it is very difficult to find a decent server, and you want to be the admin yourself, so you can create your own Minecraft server. We wrote this article and filmed a video in which we sorted out everything that relates to the server and after it, you are unlikely to ask the question how to create a Minecraft server on Windows.
Video instruction:
There are many Minecraft server cores, we will tell you about the four most popular ones.

Vanilla- official core from the developers. Pros: Released immediately after the release of the new version; Cons: Not many plugins; Low optimization of resource use; You will have to install Forge separately if mods are needed.

Bukkit- Core based on Vanilla. Pros: Highly optimized compared to the standard kernel; Lots of written plugins from third party developers. Cons: You will have to install Forge separately if mods are needed; The project was completely closed at version 1.6.4, there is no support on the official website. Exists now along with Spigot.
![]()
Spigot- More optimized core based on Bukkit. Pros: Many improvements over bakkit; All plugins written in Bakkit work smoothly on this kernel. Cons: For a beginner, installation may seem complicated; You will have to install Forge separately if mods are needed.
![]()
Cauldron(previously MCPC+) - A core based on Spigot that includes Forge pre-installed. Pros: Since Forge is already pre-installed, if you want to install mods, you don’t need to install it yourself; All plugins written in Bakkit work smoothly on this kernel. Cons: New versions of Minecraft have to wait quite a long time for the build, since first the developers are waiting for the release of the updated Spigot.
Now you need to decide for what purposes you need a server and, based on this, choose the kernel on which you will develop the server. We will show the creation of a server using the example of each core.
1) First, download the server itself of the version you need:
(downloads: 17663)
(downloads: 9507)
(downloads: 44339)
(downloads: 360)
(downloads: 20517)
(downloads: 14585)
(downloads: 947)
(downloads: 16886)
(downloads: 236)
(downloads: 741)
(downloads: 388)
(downloads: 114)
(downloads: 216)
(downloads: 123)
(downloads: 9626)
(downloads: 7944)
(downloads: 12156)
(downloads: 341)
(downloads: 190)
(downloads: 179)
(downloads: 187)
(downloads: 552)
(downloads: 225)
(downloads: 505)
(downloads: 4320)
(downloads: 5321)
(downloads: 252)
(downloads: 293)
(downloads: 251)
(downloads: 1419)
(downloads: 1075)
(downloads: 257)
(downloads: 180)
(downloads: 1715)
2) Create a separate folder for the server and copy the downloaded file.

3) Launch the server file (for a file with the *.jar extension, you need to right-click on the file -> Open with -> Java) and the console window will immediately close (* for versions above 1.6), eula.txt false on true. Save the modified file.

4) We start the server again, wait a few seconds and see that many files have appeared in the folder, including the world folder, which means the server has started normally. But you won’t be able to log in yet (unless you have a license, of course), to log in from a pirated site, open the file " server.properties" and find the parameter " online-mode=" and change the value from true on false.

5) You can enter the game, into a network game, add a new server, you can use IP "127.0.0.1" (Without quotes) or "localhost".

1) Download the server version you need:
(downloads: 57021)
(downloads: 333)
(downloads: 18594)
(downloads: 14041)
(downloads: 799)
(downloads: 1444)
(downloads: 14973)
(downloads: 615)
(downloads: 236)
(downloads: 8522)
(downloads: 7143)
(downloads: 405)
(downloads: 185)
(downloads: 409)
(downloads: 190)
(downloads: 265)
(downloads: 6969)
(downloads: 7084)
(downloads: 249)
(downloads: 377)
(downloads: 1843)
(downloads: 1663)
(downloads: 162)
(downloads: 1770)
(downloads: 331)
(downloads: 289)
2) Create a separate folder for the server and copy the downloaded file there. Create a file start.bat(The simple .txt file must be renamed with the extension start.bat) with the following content:
@echo off
java-jar spigot.jar
pause
Download this file if you don’t understand how to create it:
(downloads: 109288)
2.1) Next, copy this file to the server folder.
Attention: Be sure to replace the line in the file spigot.jar to your server name, for example spigot-1.8.8-R0.1-SNAPSHOT-latest.jar !
To edit a file start.bat, you need to: right-click -> "Edit".

3) Launch our " start.bat", you should see the following (* for server versions higher than 1.6):

A couple of new files have appeared in the server folder, we are interested in " eula.txt", which you need to open and change the value false on true. Save the modified file.
What kind of file is this? This is a user agreement between Mojang and you, by setting the value to true you agree to all the terms of this agreement.

But you won’t be able to log in yet (unless you have a license, of course), to log in from a pirated site, open the file " server.properties" and find the parameter " online-mode=" and change the value from true to false.
What kind of online-mode parameter is this? He is responsible for checking the license of the player trying to connect to the server; if the player logs in from a pirated client, the server will not let him through.
5) Go to the game, to the network one, add a new server, entering as IP - " localhost" (Without using quotation marks).
1) Download the version of the server on which you want to play:
(downloads: 234904)
2) Unpack the downloaded archive into a separate folder.
3) Run the file start.bat and you will see the following (* for version above 1.6):

A couple of new files have appeared in the server folder, we are interested in " eula.txt", which you need to open and change the value false on true. Save the modified file.
What kind of file is this? This is a user agreement between Mojang and you, by setting the value to true you agree to all the terms of this agreement.
4) Start the server again. We wait for the launch to complete and see the word “Done” at the end, which means everything is ok.