How to copy a picture from Word. How to save pictures from a Word document in several ways
Every user of office programs for working with text has, in one way or another, encountered the problem of extracting an image from a document. Often this was not a problem, but it could happen that it was impossible to extract the picture. Right-clicking on it did not prompt us to save it as a picture.
Luckily, whether you use Microsoft Office or Google Docs, there is a great one-stop solution you can use to save any image in any document.
How to Save Images from Google Docs
If in Google Docs, when saving an image from a document, you tried the simplest option: clicked on it and did not find the “save image as” option, then you need to do the following:
- Go to menu " File»> « Download How> Web page (HTML)."
- Open ZIP file, which was saved on your computer.
- Inside this zip file you will find a folder called " Images" It contains all the images that were in your document.
How to Save Images from a Microsoft Word Document
In some versions of Microsoft Word, you won't be able to simply right-click an image and save it to your computer. If you happen to be using just this version of a text editor, then you should follow these steps to extract a picture from a Word document:
These simple steps can help you improve your skills in using office applications, increase your productivity and make many tasks easier.
Video: How to save a picture from a word document
When working with text documents, it is often necessary to save a picture from Word in JPG format. If you are also faced with this task, then this article should help you. Now we will describe several ways to save pictures from Word.
Method No. 1. Save the picture through the context menu.
After this, a window will open in which you need to select a folder to save the picture, the JPG file type and enter its picture name. After this, you need to click on the “Save” button.

As a result, the image you saved in JPG format will appear in the folder you selected.
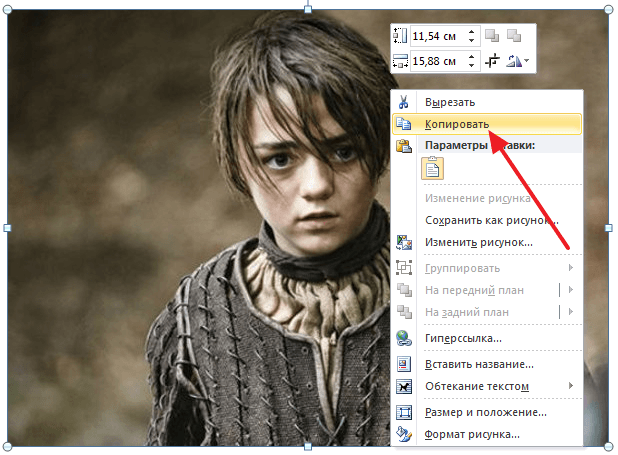
Method number 2. Copy the picture.
If you need to transfer a picture from a Word document to a graphics editor, for example . The easiest way is to simply copy the image and paste it into the desired program. To do this, right-click on the desired picture and select “Copy”. You can also simply select the picture and use the keyboard shortcut CTRL-C.
After the picture has been copied, you need to go to the graphic editor and paste it using the “Paste” command or the CTRL-V key combination. After inserting a picture, you can save it in JPG or any other format.
Method No. 3. Extract pictures from a DOCX file.
If you need to save a large number of pictures from one Word file, then the previous methods will not be very convenient, since they require a lot of manual work. But, there is another option. You can save your document in DOCX and . This is possible due to the fact that the DOCX format is a ZIP archive in which the text is saved as XML, and the pictures are saved as regular JPG files.
To open DOCX as an archive, you will need . For example, you can use the free 7zip archiver. After installing it, you need to right-click on the DOCX file and select the menu item “7-zip - Open archive”.
Please note that if you do not have the "Open Archive" menu item or you cannot install the archiver, then you can change the file extension from DOCX to ZIP and open the file manually. In this case, the file will open even without an archiver, since the Windows operating system can open ZIP files as regular folders.

After this, the 7zip program will open the DOCX file as an archive. In this archive you need to go to the folder /word/media/.

This folder will contain all the files from your document. They will be saved in JPG format.

In order to extract files from the archive, you just need to drag them from the 7zip program to any folder. For example, on the desktop. You can also use the "Extract" function. To do this, click on the “Extract” button and specify the folder where you want to transfer the JPG files.

After selecting a folder and clicking on the “Ok” button, the JPG files you need will be unpacked.
A ready-made Microsoft Word document may contain various images that may be needed for other purposes. Therefore, there is a need to extract such information into separate graphic files.
There are several options for solving the problem.
1. Taking a screenshot.
The easiest way to get a picture from a document is to take a screenshot of it.
You can copy the contents of the screen using the standard Print Screen key (the entire screen will be on the clipboard) or the combination Ctrl + C (only the image will be on the clipboard). Next, paste it into a new file in the Paint program, which allows you to trim off the excess and make some graphic adjustments. After formatting, the image is saved in *.bmp, *.gif, *.png, *.jpeg.

The latest versions of Windows have a built-in application for taking screenshots - Snipping Tool. This program allows you to select the contour tracing mode (rectangular, arbitrary).

When you click the “New” button, you need to select the desired part of the image. The application has simple functionality for editing images and saving in *.png, *.gif, *.jpeg formats.

There are other programs to achieve similar goals. There are free services and paid ones. Among the paid options, a fairly convenient application is FastStone Capture. Using this utility, you can make various screen capture options, followed by graphic editing and saving in different formats, including *.pdf.
2. Word functionality in the latest versions.
Versions of Microsoft Word 2010 and Microsoft Word 2013 provide standard saving of images through the “Save as Picture” context menu.

When you select this item, a standard file saving dialog box opens with a choice of format.

3. Saving a Word document as a WEB page.


4. Opening a Word document using an archiver.
A Microsoft Word document in *.docx format is very close in structure to a zipped file. If you open it using archiving programs (for example, WinRAR or 7-Zip), you can also get a separate graphic file.
Using the context menu, *.docx is unpacked into the specified directory, in which the necessary images will be in the word/media subdirectories.

5. Open a Word document using a file manager.
Applications such as Total Commander or Far allow you to open *.docx like an archive. Having selected the desired file, you must press the key combination Ctrl + PageDown. After this, the word/media subdirectories will be available.

6. Using the Picture Manager.
In the latest versions, another application has been added to the Office package - Picture Manager for working with images.
If you select a picture in a Word document and copy it using the Ctrl + C key combination, you can paste it from the clipboard into the Picture Manager program via the context menu or the Ctrl + V key combination.

To save the image, you need to use the “Export Pictures” menu. An additional menu will open to specify the file format and name, image size, and working directory.

How to extract pictures from Word into Paint
To save a picture in the Paint graphic editor, you will need to right-click on the picture, and then select the “Copy” context menu item, or press the keyboard keys “Ctrl” + “C”.
Open the Paint program.
Then right-click in the program window. Using the “Insert” context menu item, or using the keyboard keys “Ctrl” + “V”, paste the picture into the Paint program window.
Next, from the Paint program window, you can save the image in the required graphic format on your computer.
opening a picture in paint
Saving images from Word to Microsoft Office Picture Manager
To save images from Word, you can use the Microsoft Office Picture Manager program, which is part of the Microsoft Office suite.
Copy the picture in Word, and then paste it into the Microsoft Office Picture Manager window.
Next, click on the “Export drawings” link, which is located on the right side of the program window.
Select the format, name and folder to save the drawing, and then click on the "OK" button.
After this, the picture will be saved in a folder on your computer.
Save a drawing from Word to PowerPoint
Copy the image from the Word document.
Open PowerPoint, and then paste a picture into the program window.
Next, right-click on the image and select “Save as picture...” from the context menu.
save as picture
In the Explorer modal window, select a location to save the image on your computer.
MS Word documents are an extremely convenient “container” in which you can place not only text, but also a lot of other data - charts, tables, drawings. This is all great until you need to “take apart” the DOC file piece by piece. Let's assume that getting one or two photographs out of a hundred-page document is not a problem. But how to get ALL the images from it at once?
Fortunately, there is such a method, or rather there are even two methods, but each of them is applicable in its own niche.
Save all images from the DOC file
A fairly simple way to get all images at once from a MS Word text document of “old editions” (before version 2007) and having a file extension DOC, consists of saving the original document as a web page.
Open your document “with pictures” and do the following: in the menu “ File» select the item « Save as", and in the saving options change the file type to " Webpage"(as in the picture). Save and go to the folder with the saved “web page”.

As you can see, instead of one file in DOC format, we now have a file in HTML format (web page) and a Doc2.files folder. We don't need an HTML page; everything there remains the same as in the original document. But if you go to the folder...

Yes, among the pile of unnecessary Word service junk, the required image files will be found. You can safely copy them wherever you want - they are no longer tied to the original document. Please note - if you changed the size of the pictures after inserting them into the document, there will be several identical images in the folder - the original, and a modified copy that MS Word saved just in case.
Save all images from a DOCX file
If everything is clear with the “good old” DOC, then the new DOCX(the standard Word file format since version 2007) offers us not one, but two ways to simultaneously save all the images from the source document.
The first method is exactly the same as described above, that is, saving the document as a web page.
The second method is no less original, and will even make you feel a little like a real hacker.
Have you ever noticed that two identical files saved in DOC and DOCX formats differ sharply in “weight”? The "new" DOCX weighs significantly less than the old "DOC". This is caused by one simple feature - the fact is that DOCX is a real electronic archive, no different from any RAR or ZIP file you are used to. Accordingly, in order to extract all the contents from it, this pseudo-archive needs to be unpacked.

DOCX is just a ZIP in disguise!
We simply rename the file, erasing the DOCX extension and adding ZIP instead (don’t forget about the period, it should turn out to be a .zip file) and click “Ok” on the system warning about changing the extension. What's next? Anyway, let’s unpack our archive like any other!
Have you ever found an image or images in a Word document that you would like to save and use later? The desire to save a picture is, of course, good, the only question is how to do it?
Simple “CTRL+C”, “CTRL+V” does not always work and not everywhere, and in the context menu that opens by clicking on a file, there is also no “Save” item. In this article we will tell you about a simple and effective way by which you can save a picture from Word in JPG or any other format.

The best solution in a situation where you need to save a drawing from Word as a separate file is to change the format of the text document. More precisely, the DOCX (or DOC) extension needs to be changed to ZIP, that is, an archive should be made from a text document. Directly inside this archive you can find all the graphic files it contains and save all of them or only those you need.
Before proceeding with the manipulations described below, save the document containing graphic files and close it.
1. Open the folder with the Word document containing the pictures you need and click on it.

2. Click "F2" to rename it.

3. Remove the file extension.

Note: If the file extension is not displayed when you try to rename it, follow these steps:

4. Enter a new extension name ( ZIP) and press “ENTER”.
5. Confirm the action by pressing "Yes" in the window that appears.

6. The DOCX (or DOC) document will be changed to a ZIP archive, which we will continue to work with.

Extracting content from an archive
1. Open the archive you created.

2. Go to the folder "Word".

3. Open the folder "Media"- this is where your pictures will be contained.

4. Select these files and copy by clicking “CTRL+C”, paste them into any convenient place by pressing “CTRL+V”. Also, you can simply drag images from the archive into a folder.
If you still need the text document you converted to an archive for work, change its extension again to DOCX or DOC. To do this, use the instructions from the previous section of this article.
It's worth noting that images that were contained in a DOCX document and are now part of the archive are retained in their original quality. That is, even if a large image in a document has been reduced in size, it will be presented in full size in the archive.
That's all, now you know how to quickly and conveniently extract graphic files from Word. Using this simple method, you can extract a photo or any pictures it contains from a text document.