Creating a bootable USB flash drive for Windows 7. Instructions for creating a bootable USB flash drive for Windows
Write the Russian version of windows 7 maximum onto a flash drive so that you can install it later maximum Windows 7 via a USB flash drive to a laptop or PC, any user can do it. To do this, first you need to download the ISO image of Windows 7 maximum torrent for the flash drive. Windows 7 Ultimate is released in two versions, 32 bit and 64 bit depth. Very convenient, our images of Windows 7 ultimate 2017 with the most latest updates SP1 from microsoft, in addition, after our original image is installed maximum windows, on the desktop you will see an activator key for windows 7 64 maximum and plus a driver pack for updating and installing drivers for windows 7 in Russian for your device.
Windows 7 flash drive is a clean image operating system always at hand or in your pocket. Boot windows flash drive 7 maximum will replace calling an adjuster at any time hardware to your home or on a trip with a laptop to service center, and this is some kind of money and time.
Burning a maximum Windows 7 iso image to a bootable USB flash drive
To record iso image with Windows 7 maximum on a flash drive for further installation of the operating system on a laptop or PC computer, you need to download Windows 7 for installation from a flash drive using the links above. Images for installing Windows 7 on a USB flash drive are no different from images for installing via DVD.Of course, you need a flash drive with a size of at least 4 GB. And we need a program that will turn our image into your flash drive bootable USB flash drive with Windows 7 maximum. For these purposes, we recommend three programs to choose from.
Rufus is a program that will create a bootable USB flash drive, clear interface. There will be no problems with this softom.
WinNTSetup portable is one of the most popular programs of its kind to create bootloaders and installation USB carriers.
Ultra ISO - universal program to work with images, it will write your iso image both to a DVD and a flash drive.
Installing Windows 7 from a USB flash drive
Installing Windows 7 from a flash drive is no different from installing Windows 7 from an official DVD, you just need to specify the priority in the BIOS when booting the system from USB flash drives. Or, when you turn on your laptop or computer, call the BOOT menu. This is done literally immediately after pressing the power button on the laptop or PC, in the interval from 2 to 5 seconds.Most often, the F12 key is used to call up the boot device selection menu, but there are manufacturers who use their own key combinations. To get into boot menu For example Samsung laptop you need to press Esc (only once!). If you press Esc at least twice, the boot menu will close as soon as it opens. Therefore, you need to somehow calculate and clearly get into right time with key press call boot menu. For those who are not experienced, this may not be easy to do.
Calling the boot menu on HP laptops is also unusual. First you need to press the Esc key, then the service menu laptop. In it we select the desired item (by pressing hotkey). To call the boot menu on an HP laptop, press the F9 key.
Below is a table of hot buttons for calling the boot menu for different manufacturers and device types.

If you have questions, suggestions and wishes, write in the comments below. No one will be left unattended.
Load into Windows environment PE and roll back to a pre-created recovery point if Windows does not boot, or restore the computer from a pre-created image if it was not possible to resuscitate the system by returning to the recovery point. + creating a bootable USB flash drive is much easier than creating a disk. In general, I encourage everyone to use flash drives instead of disks.
Friends! In the previous article about creating installation disk I dwelled on this in detail. Here I will go over the main points.
- I go to http://idimm72.ucoz.net/ and see which version of the assembly is current at the moment
- I'm looking for this assembly on torrent trackers - for example. and I shake her.
After I have an ISO image on my hard drive that has converged checksums I’m moving on to creating a Windows 7 installation flash drive.
You can read and see how and where to download the original image of Windows 7. How to edit a Windows ISO image can be viewed and read in this article.
Windows 7 installation flash drive using UltraISO
WITH using UltraISO I manage to make fewer body movements and, accordingly, create bootable flash drives more efficiently. I hope you enjoy this method as much.
Download and install UltraISO

Choose additional functions. I don't need a desktop shortcut and an emulator. I uncheck these boxes and press Next >

Click Install

Click Complete

When starting UltraISO, select Trial period...

UltraISO launches. Click File > Open...


Click Format

We check that we want to format the flash drive. My default file system is set to NTFS. This suits me, since I can then add a movie or image larger than 4 GB. I leave the Quick checkbox and press Begin

Before clicking OK in the next window, it’s time to check and copy all important data from the flash drive. Once this is done, click OK

My flash drive is used for ReadyBoost technology, so another warning is issued. I press Yes

Wait for formatting to complete and click OK


We check that in the Disk Drive field the flash drive that we formatted is selected. Click Write down

A warning appears that all information that you can still try to recover will be deleted or overwritten. Click Yes

The process of creating a Windows 7 installation flash drive will begin.

Close the image recording window with the button Back or with a cross at the top right

Close UltraISO.
The Windows 7 installation flash drive has been successfully created.
Using UltraISO you can also create an installation disk.

If you inserted a DVD-RW, you can erase it first, then select the writing speed. Typically, high-quality discs are obtained when recording at a speed two times slower than what is written on the disc itself. I have 8x on my disk, so I set it to 4x. Click Write down

Must receive an installation disk.
Bootable Windows 7 USB Flash Drive Using Windows 7 USB/DVD Download Tool
Let's find and download this utility.

From the drop-down list, select the desired flash drive (if you have several inserted) and click Begin copying

Now is the time to check the flash drive for important data and copy it to a safe place (Dropbox for example). To erase the flash drive, click Erase USB Device

Another warning about data loss on the flash drive is displayed. Click Yes

Currently, CDs are increasingly losing their former popularity, giving way to other types of storage media. It is not surprising that now users are increasingly practicing installing (and in case of emergency, loading) the OS from a USB drive. But to do this, you need to write the system image or installer onto the installation flash drive. Let's figure out how to do this in relation to Windows 7.
Create bootable usb media, using only the built-in tools of Windows 7, it is impossible. For this you will need a special software, designed for working with images. In addition, you will need to create backup copy systems or download Windows distribution 7 to install, depending on your goals. In addition, it should be said that by the beginning of all the manipulations that will be described below, the USB device must already be connected to the corresponding connector on the computer. Next, we will look at a detailed algorithm for creating an installation flash drive using various software.
Method 1: UltraISO
First, let's consider the algorithm of actions using the most popular application for creating bootable flash drives– UltraISO.
- Launch UltraISO. Then on the menu bar click "File" and from the drop-down list select "Open" or use instead Ctrl+O.
- A file selection window will open. You will need to go to the directory where the pre-prepared OS image is located in ISO format. Select this object and click "Open".
- After the contents of the image are displayed in the UltraISO window, click and select the position “Burn Hard Disk Image...”.
- The recording settings window will open. Here in the drop down list "Disk Drive" select the name of the flash drive on which you want to burn Windows. Among other media, it can be identified by the letter of the section or by its volume. First you need to format the media to remove all data from it and bring it to the required standard. To do this, click "Format".
- A formatting window will open. In the dropdown list "File system" select "FAT32". Also make sure that in the block for selecting the formatting method, the checkbox next to the option is checked "Fast". After completing these steps, click "Begin".
- A dialog box will open warning that performing the procedure will destroy all data on the media. In order to start formatting, you need to take note of the warning by clicking "OK".
- After this, the above procedure will start. Its completion will be indicated by the corresponding information in the window that appears. To close it, click "OK".
- Next click "Close" in the formatting window.
- Returning to the settings window UltraISO recordings, from the drop-down list "Recording method" select "USB-HDD+". After that press "Record".
- Then a dialog box will appear where you again need to confirm your intentions by clicking "Yes".
- After this, the procedure for writing the operating system image to the USB flash drive will begin. You can monitor its dynamics using a green graphic indicator. Information about the stage of completion of the process in percentage and about the approximate time until its completion in minutes will also be displayed.
- After the procedure is completed, the following message will appear in the message area of the UltraISO window: “Recording complete!”. Now you can use a USB flash drive to install the OS on computer device or to boot a PC, depending on your purposes.


Method 2: Download Tool
Next, we will look at how to solve this problem using the Download Tool. The software not as popular as the previous one, but its advantage is that it was created by the same developer as the OS being installed - by Microsoft. In addition, it should be noted that it is less universal, that is, it is only suitable for creating bootable devices, while UltraISO can be used for many other purposes.
- After downloading, activate the installer file. In the utility installer welcome window that opens, click "Next".
- In the next window, to start installing the application directly, you need to click "Install".
- The application installation procedure will be performed.
- Once the process is complete, click to exit the installer. "Finish".
- After that on "Desktop" A shortcut to the utility will appear. To launch it, you need to click on it.
- A utility window will open. At the first stage, you need to specify the path to the file. To do this, click "Browse".
- A window will open "Open". Navigate to the directory where the OS image file is located, select it and click "Open".
- After displaying the path to the OS image in the field "Source file" click "Next".
- The next step requires you to select the type of media on which you plan to record. Since you need to create an installation flash drive, press the button "USB device".
- In the next window, from the drop-down list, select the name of the flash drive you want to record to. If it is not displayed in the list, then update the data by clicking on the button with the icon in the form of arrows forming a ring. This item located to the right of the field. After your selection is made, click "Begin copying".
- The procedure for formatting the flash drive will start, during which all data will be deleted from it, and then automatic mode recording of the image of the selected OS starts. The progress of this procedure will be displayed graphically and as a percentage in the same window.
- After the procedure is completed, the indicator will move to the 100% mark, and below it the status will appear: "Backup completed". Now you can use the flash drive to boot the system.


Cast aside doubts, believe in your abilities, making a bootable USB flash drive for Windows 7, 8.1 or 10 is as easy as shelling pears, and you will definitely be convinced of this. There are several ways to create a bootable USB flash drive from iso, using different programs- simple and smart, humpbacked and crooked, which one to choose is up to you.
In this article I will try to show you a fairly simple method with 100% efficiency. Whether you like it or not, soon the world of optical drives will sink into oblivion and will never return; everyone without exception will have to learn how to create a bootable flash drive, and in my opinion it is better to do this before than after the OS crash. The thousand-times proven program for a bootable flash drive, Rufus USB, will help you realize your need.
How to make a bootable USB flash drive for Windows 7-8.1 correctly - detailed instructions.
So, correct creation A bootable flash drive 7, 8.1 will require the following from you. Flash drive with a capacity from 4GB to 8GB (depending on the size of the iso image). Next you will need good ISO image of the operating system, and note that it’s not a shmurdyak rebuilt by some unknown person, with a set outdated programs, and 100% working official Windows version 7 or 8.1 (whatever you like). It is this image that will save you from surprises, ensure error-free operation and DirectX update, drivers, etc., will allow you to make a high-quality bootable USB flash drive 7, 8.1.
For those who have problems with Windows image iso – the disk is scratched or broken DVD drive, is missing from the laptop initially, too lazy to create an image, etc., I suggest using the largest Russian-language torrent tracker and filling this gap. Win 7 and Win 8.1 images are based on official releases Microsoft, with a small addition useful feature- for example, the Win 7 image contains all 32-bit and 64-bit versions from Starter to Ultimate, which, you see, is very convenient.
The second thing we really need is a program for creating a bootable Rufus flash drive. No installation required, just download and run. To avoid any surprises, the name of the folder with the program, the folder with the image and the path to them should not contain Russian letters; use the Latin alphabet - English.
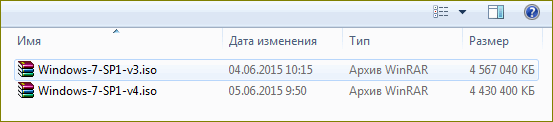
Next to the Rufus program folder, create another one with the intuitive name Windows-7 or Win-8. Opening file manager Total Commander(if you don’t know what this is, it’s time to learn how to operate files correctly) or an archiver WinRAR– unpack the archive with the program, transfer it Windows image from the downloads folder to the created folders.
It remains to voice the last cautionary phase - transferring and storing information that is important to you from USB Flash drive on HDD. The first step in the process of creating a bootable Windows 7 USB flash drive will be formatting - cleaning and repartitioning the media.
Step one. We turn our attention to the desktop, double click launch the “Computer” shortcut, right click Click on the flash drive shortcut with your mouse. In the menu that opens, left-click on “format”, then what to select and where to click is shown in the picture. We are waiting for completion, the preparatory process is complete, we are 100% ready to make a bootable Windows 7 USB flash drive correctly and the first time.
1. Open the folder with Rufus program– launch it, in the program window that opens, find “Device” and point to the flash drive, if it’s not picked up automatically.

2. The next item is “Partition scheme”, select “MBR for computers with BIOS or UEFI”. If you need to install an operating system on a hard drive with a capacity of more than 2000GB, use “GPT for computers with UEFI”.
3. “File system” - FAT32 can be used with images smaller than 4GB, images larger than 4GB require the use file system- NTFS.
4. We leave this item unchanged, the default “Cluster size” is 4096 bytes.
5. “ISO image” - click on the optical drive icon, select the ISO image of the required system in Explorer.
6. Raise your gaze a little higher, set a name that is clear to you for “ new label volumes" - in English letters, Win-7 - for example.
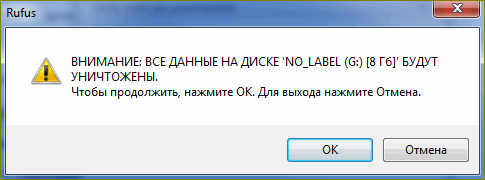
7. We check the correctness of the choice and next action we command Rufus to make a bootable USB flash drive 7, press the “Start” button. The program will issue a warning in Russian, click “OK” and leave the computer alone.
We take our playful hands and carry them to the kitchen, by force of will we force them to pour tea or coffee - we slowly enjoy the drink. This is a simple precaution; by not doing so, you will ensure the continuous creation of a bootable Windows flash drive; you will not be able to cause an error, overload the processor, stupefy the file subsystem, etc.

Depending on the speed characteristics of your PC, after 5-15 minutes you will see the inscription - 8 “Ready” - the bootable flash drive has been created, press nine - “Close”.
That’s actually the whole science, how to make an image of a bootable flash drive - you now know. As you can see, nothing extremely complicated or impossible, the main thing in this matter is to maintain a sequence of actions and you will definitely succeed.
How to make a flash drive bootable inBIOS.
To successfully install Windows from a flash drive, there is only one question left to answer - how to make a flash drive a boot disk in the BIOS? The question is important, because starting the installation differs from your usual order, with DVD disc, which leads to a common mistake and a surprised look.
For those who missed it, let me remind you that in the process of creating a flash drive, we selected the USB-HDD option. The bootable flash drive is recognized exactly as we called it, so there is no need to look for the usual DVD activation in the BIOS section - First Boot Device.
We place the installation flash drive in a free USB 2.0 connector, wait until the PC picks it up, and then reboot. During the system boot process, press Delete or F2 and enter the BIOS. Depending on the BIOS version, the name of the required Boot sector may differ, but the principle of operation will be the same. Open "Advanced BIOS Features".
Next, click on the “BootSeq & FloppySetup” section, find “Hard Disk Boot Priority”, go in and see the list of drives installed in your PC. Your bootable USB flash drive should be on an honorary last place– this is exactly what needs to be corrected. To make a flash drive a boot disk, we need to move it to the top of the list - using the keyboard arrows (up and down), select flash drive. Next, use the “+” keys, press — for now installation flash drive won't be first on the list. We complete the manipulations in the BIOS by pressing the “F10” (save) button.
In order to make the flash drive bootable in BIOS - UEFI, we find the same Boot sector – Loading, “Fixed Boot Order” opens before us and a sea of “Boot Option” under it - this is setting the system boot sequence. We look at “Boot Option #1” - as a rule, the hard drive or SSD is located there, the system queries it first and the operating system starts loading from there. Click on “Boot Option #1”, find and select the inscription “USB Key:” with the name of your flash drive.
Press “F10” - Windows installation 7 started from a flash drive, then we wait for the first reboot, go into the BIOS, return the hard drive to first place, save. After the reboot, the installation will continue, if you missed this moment, refuse reinstallation, The PC will start to reboot, go to the BIOS - return the HDD to its place.
How to make the image of a bootable flash drive active in the BIOS - and now you know this. The likelihood that you won’t succeed is practically zero - and these are not just words - this has already been proven by more than tens of thousands of users. A little attention plus a sequence of actions - nothing more is required from you. No. 2 - .
Before installing the OS, I advise you to take a look at - I’m sure you will find something interesting for yourself. Well, after successfully installing the operating system, do not forget to tell your friends how to make a bootable Windows 7 USB flash drive correctly - it will be useful for everyone. Good luck!
Best wishes
Denker.
In order to create a bootable USB flash drive with a specific operating system for subsequent installation on another device, we decided to use only a few programs. We will look at using programs like third party developer, and built into the operating system itself. Your task will be to determine the most convenient option for you, however, all the instructions and options have been tested by us, and if you follow them, you will be able to make a bootable USB flash drive from ISO. As you can already understand, each of the above methods will have its own specifics, but even if you have never had to deal with creating a bootable flash drive before, then by following the instructions you will be able to do it, the most important thing is to do everything in a certain sequence. Let's immediately look at all the options that can answer the question of how to make a bootable USB flash drive.
All options for creating a flash drive
Under the first option, we will consider creating a bootable flash drive with an operating system using command line, which is available in every operating system. As a second option, we will consider a way to create a bootable flash drive using a third-party, but very well-known program - UltraISO. The third option is almost identical to the first, and here we will look at how to make a bootable Windows USB flash drive using the Windows7 USB/DVD Download Tool. In this article, we decided not to consider the option of how to create a bootable USB flash drive with an operating Linux system, but if you wish, you can easily find the relevant information on third-party resources.
The solution of the problem

So, now it’s worth going directly to all the options that answer the question of how to make a bootable USB flash drive. We decided to analyze all the options strictly in order, as we described them above.
How to make a bootable USB flash drive 7 via CMD

The first way you can create a bootable USB flash drive is through the command line, and now we'll look at what you need to do there. First of all, as a rule, you will be required to open the command line; to do this, go to the Start menu and find the command line in the tabs.
Working with your hands

After opening the command line, a black window will appear in front of you, and the word “Run” will be entered in it, respectively, you need to enter the new value “cmd” there and then press the “Enter” key. Subsequently, you will only need to use special commands, which are required to create a bootable USB flash drive. You should definitely follow all the steps according to the instructions and not miss anything, since even one missed step can harm your build, which you want to make bootable. You will now learn how to make a flash drive a boot disk. The first step is to write the word diskpart, with the help of it it will be launched special program, which can also be called an interpreter, only it will work, as you can already understand, in text mode. This program is aimed at convenient control objects, or rather objects include partitions, disks, volumes, and so on.
Entering special commands

After you have written the first word, you will need to write next list disk, with this query you will be able to see all the hard drives that are currently on your computer. Next we enter new request- select disk 1, in this case the disk that is under the first number will be selected; naturally, your task is to select exactly the disk under which your drive is displayed.
The next step is to enter the clean request - it is necessary in order to erase all data from removable media, however, you can understand this from the name itself. If you want to learn how to make an image of a bootable USB flash drive, then you will first need to completely clean your drive, so if there is any important information, you definitely need to copy it and transfer it directly to your computer. After selecting the required partition, or rather the flash drive, you need to enter the request - create partition primary. Using it, you can create a primary partition on which the new operating system will be installed, and the disk itself will be bootable.
Next, enter select partition 1 in the line, only instead of one you need to select the number under which yours is located removable storage, however, everything is probably clear here. Now we enter a new request called active, this is necessary to create active partition, because when the computer boots, the flash drive must be active.
Ask for cleaning

Now your task is to format the active drive, to do this, enter the request format fs=NTFS, your flash drive must be formatted in NTFS system. If you want to specify the name and letter of your future bootable flash drive, then the assign letter=T request will help you with this. Of course, it is completely optional to indicate the name and assign a letter to the new volume, so decide here at your own discretion. At this stage, the creation of a bootable flash drive ends, and in order to exit the Dispart program, you simply need to enter the Exit request. Now you know how to make a bootable USB flash drive using the command line, and if you follow all the steps indicated, then you will eventually have a full-fledged bootable USB flash drive that will be usable.
Moving
It is important to remember that you have not yet transferred all the data to the bootable USB flash drive, but transferring all the files to this system will be very simple, and of course, for this you will need boot disk, although you can download a specific operating system using the Internet. By the way, there are currently a considerable number of excellent assemblies. If you plan to download the operating system using the Internet, then be sure to remember that all files on the flash drive must be in unpacked form, but under no circumstances add one boot file, which may have .iso permission, since in this case the installation of a new operating system will simply not begin. Naturally, in order for the download to begin, you will need BIOS system set the boot parameters from the primary device, or rather, set the parameters so that the boot starts from your flash drive.
How to make a bootable XP flash drive using special software
So, now it’s worth moving on to the second method, or rather, now we will create a bootable flash drive with the operating system using multifunctional program UltraISO. If you have read the article up to this point, then you can learn how to make a bootable Ultraiso USB flash drive.
If you have previously encountered the above program, then you probably know what it is intended for, or rather, the purpose of the program is aimed at creating and editing disk images, and it is with the help of it that we will create a bootable USB flash drive. In order to create a new bootable USB flash drive, we will use some built-in parameters of the given program. First you will need to open the program itself, just first set the administrator parameters. If you don't have it yet installed program on your computer, then you can download it either on the official one or on third party resource. I would like to immediately note that the program is not free, but all the functions will be available to you in the demo version.
After you have logged into the program with administrator rights, you should go to the “File” tab and select the “Open” button there; Now you need to select the required operating system image. It doesn’t matter what operating system you want to load onto a flash drive, the most important thing is to do it correctly. Once you have found the file, you will need to select it and go to the special “Bootboot” menu, and then just press record image of a tough disk. However, if you have previously used this program, then you should not have any problems at all, but still we will continue to solve the question of how to make a bootable Ultraiso flash drive.
Before recording

After the transition, you should see a pop-up window, and in it you will need to make sure that you have indeed selected the correct media on which you want to burn the image.
Naturally, your flash drive must be in USB-HDD+ mode; you can install a similar function directly in the program itself. Next, you just need to click on the “Record” button and wait a while while the files are transferred. You should definitely see a prompt in which you will be asked to clean the removable drive; you definitely need to pre-format the flash drive, or rather, we simply agree to this prompt.
Cleaning
Formatting, as a rule, occurs quickly, although if you have not previously deleted the data from the flash drive being written, the formatting function may take a little longer, it all also depends on the parameters of the flash drive. Immediately after formatting, data recording should begin, or rather, an operating system image, which you can then launch in boot mode. Now you know two options on how to make a bootable USB flash drive. As for the third method, we will not consider it in detail, since it is based on the use of applications similar in function to Ultraiso. You can download any of these programs for free and then follow the instructions we provide.