System geolocation services ios 9. Limit ad tracking
Let's figure out how to enable a standard pedometer from the Health app on the iPhone, calibrate it, and see what available pedometer apps are in the App Store.
This article is suitable for all iPhone Xs/Xr/X/8/7/6/5 and Plus models running iOS 12. Older versions may have different or missing menu items and hardware support listed in the article.
Turn on the pedometer on iPhone
First you need to enable the tracking option, which is enabled by default. Many users turn it off to save battery power.
We follow the instructions:

Increase
Using a pedometer in the Health app on iPhone
Launch the “Health” application. In the “Meddata” menu, click on the “Activity” card. This section contains all user activity for the month, week and day. If you scroll down a little, you can see the Walking and Running Distance menu.

Increase
It displays detailed statistics on the steps taken. To get a detailed report by day, click on a special calendar chart, which is orange.
In order not to search for this or that value every time in the entire tree, you need to display it in the “Favorites” menu in the form of a gadget. You can use the “Add to Favorites” switch for this.

Increase
In the “Sources” item, you can manage all connected devices.
Calibrating the iPhone pedometer
The built-in pedometer on your iPhone may require calibration. To do this, you need to use any free sports program.
Let's consider the process iPhone calibration using the example of the Runtastic application:


Increase
After calibrating the data, the gadget demonstrates more accurate activity indicators.
Best Third-Party Pedometer Apps for iPhone
Many users rely on pedometers during their daily walks. How accurate is step counting? Let's look at 6 best pedometers.
These applications were studied for several weeks. After the walk, the results were checked and the steps were counted manually. The screenshot below shows a diagram with the obtained data.

Increase
M7 - Steps
This pedometer attracts with its clear and minimalistic interface. The program shows in one of the tabs the number of steps taken per month, week or day.
The user can scroll left or right in the window to view previous days' results. By clicking on this data, you will not receive any other additional data.
You can view your activity for the month in the form of a list with different dates or a graph. The program runs in the background once a day to transfer data about the steps taken. There is almost no damage to the battery.
The experimental data obtained for M7 - Steps are quite accurate, they coincide with other applications that have an M7 coprocessor. After a day of use, the program's pleasant interface seems boring, and the lack additional options may disappoint users. The software is useful for those who do not need anything other than the actual counting of steps.
Stepz

Increase
The program relies on data received from M7. The difference with the previous application is additional features and bright design.
The program has a color scale that shows the number of steps you took per day, the distance traveled in miles, and your average for the week. On the bright green line at the top you can see the maximum number of steps taken.
Green Colored on the scale maximum amount steps, orange - average, and red - minimum. It turns out that the scale is a fairly clear and understandable guide.
If you click on the statistics, the bar graph will change from steps to miles traveled. If you wish, you can also study the number of steps taken per month, week or day.
Stepz pedometer is as accurate as any other pedometer best app. The development has a different design, but remains accessible and understandable for a beginner.
Walker M7
Free program Walker M7 relies on information from the M7 coprocessor. The app shows accurate data and provides more functionality, unlike the previous two pedometers.
Walker M7 not only counts steps, but is also able to distinguish between walking and running, tracks your route, monitors blood pressure, weight and calories burned. The resulting information can be shared on Evernote, Facebook or Twitter.
The application shows the number of steps in a circle on the main screen of the program. On the right, you can indicate whether you are going to run or walk, which will help the software track your steps more accurately. The distance traveled, your speed, calories burned and walking time are also displayed on the screen.
Using the buttons in the upper right corner you can open additional list options. They include the following:
- Ratings.
- Map.
- Statistics.
- Charts.
In the graphs you can switch between distance, steps and calories. If you swipe to the right, you can get information about the user's weight, blood pressure and amount of accumulated fat.
In statistics, user activity is demonstrated in the form of a color chart. If you swipe to the left, you will see data about a walk, and to the right - about running.
Walker M7 has advanced functionality and is capable of accurately displaying information. It is possible to independently enter data about your blood pressure or weight.
Pacer

Increase
In the application you can see recommendations that will help you conduct more active image life, and track some health indicators. The home screen shows your daily steps, calories burned, and activity time. The level of activity and progress during the day are also displayed here.
If you scroll to the right, you can see a graph of activity for the day. Another swipe will give you access to a button you should press when going on a long walk or run.
Pacer has three built-in fitness plans:
- Drawing up your plan (Build Your Own plan).
- Walk 4 Weight Loss.
- Reach 10 thousand steps (Couch To 10K Steps).
In the application you can compete with your friends in the results achieved.
Breeze
On the main screen of the application, the received data is shown in a circle, which is located on a rather pleasant background. A group of 7 small circles (the user's progress over the week) will be filled depending on the approach to the given goal. If you click on one of the circles, detailed information for the past day will be shown.
Quite often, Breeze does not display the route traveled and geolocation, but only shows a bubble with counted steps. The application also informs you about your progress and sends motivational messages too often. The program is functionally and visually pleasing.
Moves
On our list latest app became Moves, which shows movement graphs, steps, starting point of departure, final destination. The software is incredibly well developed, everything functions perfectly.
The number of steps taken while walking or running is published in colorful circles. The time spent on them is demonstrated. If you scroll down, it will show a graph that you can swipe left and right. This will allow you to view statistics for previous days.
Using the application, your stop locations are determined. This territory can be designated independently, for example, work, gym, home.
You can click on a line or any stop to view it on the map. Routes are indicated different lines:
- The bus or car is gray.
- Bicycle - blue.
- Walks are green.
If the application makes a mistake, each of the lines can be corrected. Of all the apps, only Moves was able to truly distinguish walking from cycling.
All of the programs listed have advantages and disadvantages. Each user chooses the software that is suitable for its functionality and design.
How to enable the built-in pedometer on iPhone X(s/r)/8/7/6
5 (100%) 3 people1. Turn off access to your geolocation
Go to Settings > Privacy > Location Services
And here we turn off access to geolocation for those programs that you think do not need to know your location, or set when using the program so that the program has access to your GPS only when you launch this program yourself. For example, I think there is no need for the Kinopoisk application to constantly know my location.

And Yandex Market generally knows my location, since I do not look for stores near me through this application.

Also standard application Weather doesn't have to constantly consult my GPS to show me the weather exactly where I am.

I’ll indicate my city once and that’s it.

And even more so, the VKontakte application does not need to constantly know where I am.
2. Disable content updates
Go to Settings > General > Content update and turn off the content update slider to automatically background programs did not update their content.


That is, so that these applications do not automatically download them new version when it comes out in the appstore.
3. Disable equalizer
Go to Settings > Music > Equalizer.


And set it to Off so as not to apply sound filters when listening to music.
4. Disable 3G
Go to Settings> cellular and disable the option to enable 3G to use only Edge and Wi-Fi Internet.


By turning off 3G, the Internet will become much slower, but the battery life will increase significantly. Since Edge or Wi-Fi consumes much less battery power.

When using cellular networks with more high speeds Data loads faster, but battery life may be reduced.
5. Put static wallpapers instead of moving (animated) ones
Go to Settings > Wallpaper > Select new wallpaper.

Here you can set dynamic wallpaper, or you can select pictures from your camera roll. Static wallpapers do not require energy consumption for display, but animation constantly consumes the resource of the video processor during display and, accordingly, the battery.
6. Disable notifications from unnecessary applications
Go to Settings > Notifications.


Here we disable notifications for those applications from which you do not need to receive Push notifications. For example, I don’t need notifications from the game Angry Birds, YouTube, KinoPoisk, Plants Vs. Zombies, Instagram, Maps, Tips, Podcasts and more.


Keep notifications only from the apps you need. For example messages, phone, mail, reminders. To see notifications about missed SMS, calls, mail, and so on.
By the way, you can choose the type of notification and the sound of this notification.
7. Disable cellular data for software
Settings > Cellular. Here we disable cellular data for those applications that you do not want to use 3G, Edge, LTE Internet.


For example, I don't need to Mobile Internet downloaded new data for the application stocks, maps, podcasts, FaceTime, Game Center, iTunes Store.
8. Disable automatic downloads
Go to Settings > iTunes Store, App Store.

Here we disable automatic downloads for music, programs, updates, so as not to automatically download new purchases (including free ones) made on other devices. That is, if you use one Apple ID on an iPhone and iPad (or use 1 Apple ID with your wife, for example), then downloading something on the iPad (or wife’s iPhone) with auto-downloads disabled, this application will not start downloading to your iPhone.
9. Enable do not disturb mode
Go to Settings > Do Not Disturb.


We turn on the scheduled slider and indicate the time when we sleep, so that the do not disturb mode starts at this time and lasts until a certain specified time.

This way there will be no vibration or sound and the screen will not turn on and show you that a notification has arrived from VKontakte or an SMS or call. Also turn on the repeat calls slider so that the person who calls you a second time appears and there is a ringing sound, because it could be some important call if a person calls you for the second time in a row.

You can also set call tolerance and specify those whose calls or messages will not be muted while do not disturb mode is on and will be shown to you and there will be a sound or vibration from them. So that you can hear when you receive a call or SMS.
Also at the very bottom you can set when incoming calls and notifications will be muted when the iPhone screen is locked.

When do not disturb mode is turned on, a crescent moon will appear on the top of the iPhone screen.
10. Enable motion reduction
Go to Settings > General > Universal access> Reduced movement.

Turn on the Reduce Motion item to disable the zoom animation when exiting the application and opening it.

This way you will also turn off the parallax effect, that is, there will be no movement background image on the iPhone screen.
11. Enable reduced transparency
Go to Settings > General > Accessibility > Increase Contrast.

Here we turn on lower transparency to turn off the window transparency effect. This effect is similar to the Aero effect on Windows and can consume CPU resources to create the transparency effect.
It will also increase contrast on some backgrounds to improve text readability.
12. Disable auto-update time
Go to Settings > General > Date and time.

Here we turn off the slider automatically so that the time does not automatically adjust to the time of the time zone in which we are now. That is, if you flew from one city to another with a different time zone, then the iPhone did not set the time of the city you are in now, but left the old time from the previous time zone. Change the time manually, or turn it on for a couple of minutes so that the iPhone scans the place you are in and sets the time, and then turn it off.
Geolocation is the process of finding the iPhone's location. Unfortunately, the importance of geolocation is usually underestimated, despite the fact that without it it will not be possible to use a navigator, attach geotags to a photo, or find an iPhone using the function of the same name. Users are more familiar with the negative characteristic of geolocation – “gluttony”: by disabling the function, you can significantly increase the duration battery life gadget.
Fortunately, the procedure for activating/deactivating geolocation is quite simple - you can turn it on while using the navigator, and keep it off the rest of the time.
The user encounters a request to activate geolocation when initial setup iPhone and, as a rule, unknowingly confirms it. Therefore, the issue of disabling geolocation is more pressing than turning it on. You need to deactivate the function like this:
Step 1. IN " Settings"find the section " Privacy" (on some versions of iOS - " Confidentiality") and go into it.
Step 2. Proceed to the subsection " Location services" - he comes first on the list.
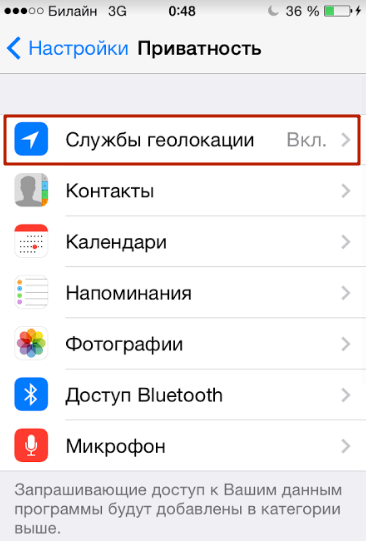
Step 3. Switch the toggle switch " Location services» to the inactive position.

Step 4. Confirm your intention to deactivate geolocation - click " Switch off».

Please note that the iPhone has flexible settings: you can allow some applications to use geolocation, and prohibit others. To do this, you need to adjust the sliders located in the block below.

For example, with the configuration as in the figure, you will be able to use navigation, but geotags will not be attached to your photos.
With flexible settings, the main toggle switch " Location services" must be enabled.
Do I need to disable geolocation of system services?
Subsection " System Services " is located at the very bottom of the block with a list of applications that require geolocation.

A user who visits this subsection will see the following:

Before deciding whether you need to disable geolocation for system services, you should understand what functions at least some of them are designed to perform.
The system services listed are common to most iOS versions. There is no need to describe all services - and it is clear that their main goal is to collect confidential data on consumer preferences and sending information to Apple. People who claim that Americans are spying on Russians through smartphones are not too far from the truth.
If you do not want Apple to replenish its statistical databases by tracking your movements and purchases, switch the toggle switches in the “ System Services» to the inactive position. It is recommended that all Yabloko members do this: benefits iPhone owner no from services, but the charge is consumed faster because of them.
How to enable geolocation on iPhone?
The algorithm for how to enable geolocation on an iPhone differs only slightly from the disabling method described above only slightly. The user also needs to follow the path " Settings» — « Privacy» — « Services geolocation" IN last section he will see that there is only one slider (the main one), and there is no list of applications that use geolocation.

You need to activate the toggle switch, then disable geolocation from those applications that do not really need this function.
Are geolocation and GPS the same thing?
Users who believe that geolocation and GPS are synonymous are mistaken. Geolocation- This general concept, related to determining the location of the device; GPS is a trademark of the American satellite system navigation. Most often, geolocation uses GPS technology – hence the misconception about the equivalence of concepts.
However, in order for geolocation to be available, it is not at all necessary to turn on GPS - other ways to calculate positional data are possible:
- Via Bluetooth. The location of the object is determined using special beacons Beacon, which are located in public buildings - airports, hypermarkets. In terms of accuracy, this technology is inferior to GPS, because it provides reliable results only if the object is stationary.
- Based on stations mobile communications . The smartphone knows from which station the GSM signal is sent to it and where this station is located. Therefore, using special application, which contains a database of stations, you can use geolocation without GPS. Reliable results using this method can be achieved in megacities where the network coverage density is high, but in small cities determining geolocation through stations is problematic.
- Based on the Earth's geomagnetic field. Navigation based on the planet’s geomagnetic field is the idea of Saratov scientists. Each point on Earth has a unique set of characteristics, which can be used to determine the location of an object (including an iPhone). The technology is only being tested, but large advances are already being given to it.
Despite the fact that geolocation and GPS are various concepts, and there are several ways to calculate positional data, on this moment quite accurately The location of an object can only be determined via GPS.
What to do if geolocation doesn't work?
If geolocation doesn't work, it's hardly a problem mechanical failure any iPhone part (for example, GPS module). Most likely the problem lies in program level. What to do if the function refuses to function?
Step 1. Proceed to the section " Location services"and make sure that for specific application geolocation is activated.
Step 2. Check if the Internet is turned on on your iPhone. The network makes it possible to more accurately position the device. Go to the section " cellular» Settings and make sure the Cellular Data slider is in the active position.

Step 3. If the above steps do not produce results, reset the settings after creating a backup copy (instructions for creating copies can be found). Follow the path " Settings» — « Basic» — « Reset" and select " Erase content and settings».

This reset will erase all data from your iPhone.
You need to check whether geolocation works on a “clean” smartphone, that is, before restoring from backup copy. If the function still does not work, you should contact the service.
More often than others, owners of a jailbroken iPhone encounter problems with geolocation. Such users are recommended to install from the store Cydia tweak called libLocation: It is completely free and helps in better positioning of the jailbroken gadget.
Conclusion
If you don't know what it is geotags for photos, and consider navigation on an iPhone unnecessary, most likely you don’t need the geolocation function at all. It is recommended to turn it off - thanks to this measure, you can ensure that your gadget “lives” in offline mode longer. Don't forget about deactivation system services, which do not bring any benefit to the owner of the gadget, but drain the battery faster.
Today we will look at how to enable geolocation on the iPhone 5s (for example) and related services that ensure the smooth operation of the device, as well as programs for collecting and processing confidential information.
To answer the question “Where to enable geolocation on an iPhone,” we will try to figure out what the meaning of this function is and who will find it useful.
Many of us don’t know how to turn on the location search service on the iPhone, and we also don’t know how to turn it off. There's nothing complicated about it. Read the table of contents in the instructions carefully and choose the most suitable solution to the problem for you.
Location services on iPhone. What are they and how are they useful?
Geolocations on iPhone are an integral part of your device. They allow you to track your location throughout the day. It all depends on the settings, which have a fairly flexible functional interface. One of the most striking examples is searching for the most convenient restaurant or cafe for you, the nearest taxi, car sharing car, as well as a free hotel room.
Most services that determine the location of you and your iPhone in particular are easily configured via standard settings. To set up geolocations on iPhone, Apple allocates an entire menu item in which you can enable or disable elements that use location data, including system services.
You must understand perfectly well. How more apps use your location data, the faster iPhone battery discharges and becomes unusable over time. This is why flexible configuration of geolocations on the iPhone is so important, which we will tell you in more detail later.
How to enable location service on iPhone?
To answer this question, we should find the location of geolocations in the iPhone settings. Go to Settings - Privacy - Location Services.
You can customize each application as you wish. We advise you to take a detailed look at the services and applications or games that you use most often. Flexible setup can significantly save your iPhone's battery life.
To enable the service for determining the approximate geoposition of the iPhone, check the slider moved to the right. If tracking is working properly, the slider will be green, as shown in the screenshot.
For reference! Enable geolocation on iPhone 6 or newer iPhone models 7 It won’t be difficult for you. Our instructions are universal and created on updated version software– iOS 11.
How to set up geolocation on iPhone?
The needs of the applications that users install on their devices are different from others. That's why we can't say exactly what you should turn on or off in your location data settings. But we will try to provide detailed information about system location data so you can make the most informed decision when turning features on or off.
To set up geolocation on your iPhone, go to the “Location Services” menu item, which you already know from the previous step of the instructions. Scroll to the bottom of the list of suggested options. Go to System Services. This will also allow you to answer one of the popular questions: “Geolocation on an iPhone, where can I find it?”
To determine the location of a person or iPhone, you should carefully prepare geolocation settings. This is necessary so that no one else but you can change GPS settings or turn off Find My iPhone tracking services altogether.
You should introduce restrictions on the use of settings in your iPhone menu. Go to “Settings” - “General” - “Restrictions”. Enter the preset passcode. Scroll through the restrictions settings to the “Privacy” - “Location Services” section.
Make sure location services are turned on and the restrictions checkbox is set to “Prohibit changes.” Also, before introducing restrictions to prohibit changes, we advise you to check the settings of the Find iPhone function. The settings should match those shown in the screenshot. Introducing such changes to geolocation settings will help answer the main question “How to determine the location of an iPhone.”
If you did everything correctly, now no one except you and the person who knows the access code will be able to disable geolocation services on the iPhone. They will simply be “Inactive”.
How to find a person by iPhone geolocation from a computer?
It's very easy to do. Go to the official Apple website.
If you are doing this for the first time, you will have to go through two-factor authentication on your computer and allow your account icloud records trust the browser. So, let's go to the site. Enter your login, i.e. mailing address and password. Information about two-factor authentication, as shown in the screenshot below.
At this time, a pop-up window with a city map on your iPhone asks you for permission to access your account. Click Allow and enter the six-digit authorization code (on PC) that appears on the iPhone display.
After passing two-factor authentication, the following question will appear on the computer: “Trust this browser?” If you are going to determine the location of the iPhone using home computer, feel free to click “Trust”
Then you will be taken to the main icloud menu. It looks like this:
To determine iPhone location from your computer, click Find iPhone. If you carefully read the previous settings item, you will see a map of the current location of you or your device.
Don't forget at the moment iPhone search, the device will display running service geolocation, unless you have disabled it in the settings. This way you can discreetly determine a person’s location using their iPhone or vice versa.
Find your iPhone through your computer if it is turned off. Is it possible?
This is possible, but the search system will give you a previously noticed address that was attached to your account. Ultimately, the Find My iPhone function will display the last registered address of your device's location on the map. If iCloud server will not communicate with the iPhone, the point on the map or geolocation mark will be gray.
If you have any questions, we will be happy to answer them in the comments. Our instructions for setting up and determining the location of the device are suitable for any iPhone on iOS >11.
Details Benks Created: September 03, 2017 Updated: November 18, 2017To extend operating time iPhone phone from the battery, make the following settings:
1. Configuring applications to run in the background (the settings do not affect push notifications, which will arrive in any case)
Settings --> General --> Content Update
iOS applications can load information in the background. However, this option consumes battery power no less than other functions; disable the use of services in the background. You can disable the feature completely or limit its use for certain applications. Here you need to carefully look at which applications work in the background you need.
Personally, I need the photos to be saved in OneDrive cloud, and also for the weather forecast to be updated in the background (push notifications for programs with background activity prohibited will arrive as normal).
2. Setting up location
Settings--> Privacy --> Location Services


Geolocation services (using a GPS receiver) iOS uses up battery power. If your main applications are not location-based, you can safely disable location services.For example, if you do not use a navigator or a tracker for cycling, then it is better to disable the location function.Deactivate the function completely or set individual settings for every application.
Scroll down to "System Services". Here, turn off the following services: Diagnostics and usage, Geolocation iAds, Popular nearby, Time zone, Traffic and Frequently visited places.
3. Setting up sending statistics about system operation
4. Setting up push notifications
Settings-->Notifications

Push notifications are definitely a useful thing. However, this feature is not needed for all applications. Turn off notifications from unnecessary programs
(for me this is a camera, TV remotes, wallet, games, navigators, etc.).
It is worth noting that the battery energy is in this case is consumed not so much because of the notifications themselves, but because of the activation of the display by them, so if for some applications you still need to leave notifications turned on, you should limit yourself to “stickers on the icon”, turning off other notification methods. N For example, if you received a message in VK or Avito, you will be able to see it immediately after unlocking the phone.
5. Setting up services wireless transmission data
Swipe across the screen from below -->
up
Settings--> Wi-Fi
Setupoyki --> Bluetooth

Turn off wireless data features that are not currently in use and that drain battery power.
If you are on a trip, it is advisable to turn off Wi-Fi, since the phone in the background independently tries to connect to available networks, consuming battery power. An easy way to extend your battery life iPhone work and iPad - disable background search for wireless networks.
Much the same thing happens with the Bluetooth function.
AirDrop - The function is convenient for transferring files between Apple devices and is available on all iPhone models starting from iPhone 5. Activate this option only when you need to exchange files with some other device. The rest of the time it is better to keep it off.
6. Configure account synchronization settings
Settings--> Mail --> Accounts
Settings--> Mail --> Accounts

Try to reduce the number of accounts and how often you check for new incoming emails in each of them.You can set up either manual mail retrieval or interval checking. How longer interval, the longer the battery will live.
It is also better to select one account to synchronize calendars and contacts, and disable these functions in the others, or remove them altogether.
For myself, I chose gmail.com, because the service allows you to save photos of contacts, which is not provided in outlook.com accounts.
7. Setting the baud rate for cellular network
Settings--> Cellular --> Data options --> Voice and data
Settings--> Modem mode

High speed cellular connection LTE networks(4G) is only needed to watch movies in high resolution and downloading large files. This mode consumes more battery power than 3G mode. 
I set 3G in my settings; the connection speed in this mode is quite sufficient for my needs.
Also remember to turn off tethering mode when you are not using it.
8. Display settings
Settings--> Screen and brightness
Settings -->
Screen and brightness--> Auto-lock

Maintaining work Retina display very energy-intensive. Tests have shown that at the maximum brightness level when viewing 720 p iPhone video 5 can withstand 6 hours 21 minutes of operation, and at half brightness - as much as 9 hours 48 minutes! The result is obvious.
Set the minimum comfortable level of display brightness, this will significantly extend your phone's battery life.
Reducing the phone's auto-lock time also has a positive effect on battery saving.
9. Setting up iCloud
Settings-->iCloud

If you want to long work devices without recharging, turn off all unnecessary synchronizations, both standard (for example, not everyone needs synchronization of Calendar or Reminders) and third party applications With iCloud service. Each such synchronization consumes its share of resources.
Synchronization can be enabled directly when you plan to replace your iOS device, so that the new device retains all the settings from the previous one.
10. Built-in communication services
Settings-->Messages
Settings-->FaceTime

Disable built-in services if you do not use them, as they operate in constant standby mode, consuming battery power.
11. Configuring synchronization settings between devices
Settings--> Basic-->Handoff
Settings-->iCloud-->iCloud Drive

The Handoff feature allows for easy transfer of work context between mobile and desktop environments ( for example, when entering a password for a Wi-Fi network on a phone, a tablet with the same account connected to the same WI-Fi network without re-enter password), as well as the ability to receive calls and send SMS from a computer. If you only have one Apple devicewith your account,or you don't use this feature, be sure to disable it.
12. Setting up battery saving
Settings--> Battery

Use the battery saver option.
In iOS, you can clearly see which apps are using up a lot of battery ( you may have to spend time in them additional settings
). Go to Settings and identify the main energy hogs. Often they are games and browsers. If you need to save energy, just don't run them. Remove unused applications, eating up the battery in the background.
After removing the third party mail client I noticed that the phone began to work longer.
13. Updates
Settings --> iTunes Store and App Store
Settings--> Basic --> Software update

Despite the obvious convenience, using the automatic content download feature consumes battery power. Under the item " Automatic downloads"Deactivate the Updates item, as well as Music, Applications and Books, if you do not want to synchronize content between your devices.
Apps from the store and off-line cards can easily be updated once a week manual mode, this will further save battery power.
Update your phone software to latest version, often fixed in new versions software errors, leading to fast discharge battery
Example: Recently it turned out that in a number of versions of the eighth firmware, for example 8.1.3, there was a bug due to which the iPhone 5S (and possibly other models) could periodically lose connection with Wi-Fi network and connect to it again, including in sleep mode. This served as one of the additional reasons to rapid battery consumption.
This problem has been resolved in iOS update 8.2.
14. Setting up phone search mode
Settings--> Update and security --> Find your phone

If you are not going to lose your phone, disable this battery-consuming feature (a password will be required).
15. Configuring Keyboard Input and Date Options
Settings--> Basic --> Keyboard
Settings--> Basic --> Date and time

Turning off predictive dialing will help reduce battery consumption a little if you chat a lot.
Also, if you don’t go anywhere, it’s better to turn it off automatic detection time zone.
16. Customize the theme in applications (for future iPhone models)


If you are the happy owner of a phone with an OLED display, then change color scheme to dark will significantly extend the battery life of your phone if you use it frequently.
17. Motion sensors
Settings--> Basic --> Universal Access--> Reduce motion
Settings--> Basic--> Universal Access--> Shake to cancel

Parallax effect on home screen and the lock screen continuously uses data from motion sensors, which, of course, affects the battery life of the iOS device. Enable Motion Reduction to prevent the processor from wasting its resources on animations.
Do you often shake your phone to undo the last word you typed? If not, disable this feature while gyroscope is active.
18. Secondary functions alerts
Settings--> Basic--> Universal Access--> Vibration
Settings--> Basic--> Universal Access--> Flash alerts
