Program for external drive. Simple programs for quickly checking HDD
If the HDD makes strange sounds or there are problems with writing and reading information, you should use one of the programs to check hard drive for errors. Depending on the task (checking the disk surface for damage, searching for bad sectors, correcting errors, etc.), different software may be useful.
You can quickly check the disk for errors using standard system tools, but to restore the hard drive you will need special third-party programs. Having learned how to check the health of a hard drive using various utilities, a user of any level will be able to cope with any problems that may arise.
The CheckDisk system service is the simplest program for diagnosing a hard drive that is unable to find complex errors and fix bad sectors, but is useful for fixing basic problems. It is available on all versions of Windows OS and can be used to check drives of any type. All users need to know how to check HDD errors with this tool.
The graphical interface version of the utility is most convenient for novice users. You can launch it through the disk management menu, which can be accessed in two ways:
- in Windows XP/Vista/7 - select “Management” in context menu“My computer”, then go to the desired menu;
- in Windows 8/10 - press the Win+X combination and select the appropriate item.
In the window that opens, select the device that needs analysis and click on it right click mouse and select “Properties” from the drop-down menu. By going to the “Service” tab, you need to run the hard drive diagnostic program.
The system will check and automatically correct errors if the disk is in this moment not busy with reading or writing processes. Otherwise, the program will offer to test after rebooting the PC. If necessary, in the scan results window you can see detailed information about the HDD status.
The GUI version does not always help, since checking the status of the hard drive is sometimes required from safe mode or without starting the operating system at all. In such cases, the console comes to the rescue; you can launch it before the system starts using a boot disk.
Once you open the recovery console, you need to run the chkdsk /f command, which will check all connected drives. In some cases, this will help fix the error. However, in most situations, if a HDD failure has made it impossible to start the system, a more in-depth check will be required hard state disk.
To use the console command from inside the system you need to:
- launch the command line (via Win+X or by entering cmd in the “Run” window);
- enter the chkdsk command indicating the letter of the partition being checked and additional flags;
- Confirm the operation by pressing Y.
Checking the HDD via the command line will be a little faster than using the GUI version of the program; the results will be shown here in the console.
The Linux system also has standard tools - hdparm and smartctl, launched from the console.
Simple programs for quickly checking HDD
If standard utilities are not suitable, hard drive diagnostics can be carried out using simple third-party programs. They allow you to get more information about the health status of the HDD, but in case of serious problems they will not be suitable, since they cannot be used to correct the damage.
HDDScan is a free program that performs analysis in two modes:
- according to S.M.A.R.T. indicators;
- linear processing.
The tool evaluates the read and write speed of various sectors, marking the “slow” cells. During the analysis, the program ensures that the tested hard drives do not overheat; at the end of processing, the user is presented with a full report.
HDDScan good versatility. The utility allows you to check disks for errors, regardless of the type of device: you can use it to check how external hard disk, and analyze a RAID array, SSD drive or memory card.
Crystal Disk Mark has only one function - it evaluates the read and write speed. Despite this, it is often used, since it is still possible to check the hard drive for serviceability using just two indicators.
The test uses different algorithms, one of which is sequential recording mode. The program gradually fills all the space on the drive with blocks of a size specified by the user, after which it cleans the HDD. The same technique is used by hard drive manufacturers to check product quality. Its disadvantage is that it accelerates the wear of SSD drives.
CrystalDiskInfo And DiskCheckup They are similar in their set of functions, differing only in the interface. They check the status of the hard drive using S.M.A.R.T. algorithms and compile a history of checks, which allows you to track the dynamics of changes. CrystalDiskInfo has more options for visualizing history. For example, you can create a graph, not just get a written report.
Another feature of these programs is a convenient notification system. Deep hard tests disks usually take a long time. If the user needs to step away from the computer, they can turn on critical notifications. HDD errors by E-Mail.
Programs from hard drive manufacturers
Some HDD manufacturers have developed their own utilities for analyzing the status of the hard drive. They are intended for use with devices of the same name; diagnosing a hard drive from another company is possible with their help, but this must be done carefully. Unlike simpler programs, these utilities have versions on different languages, including in Russian. Which program is better to analyze the HDD status?
The proprietary program from Seagate exists in two versions: standard version to run under Windows and a DOS version in iso image format, from which you can make a bootable USB flash drive. It is recommended to use the second option, since the check in this case will be more accurate and efficient.
SeaTools uses part of the S.M.A.R.T indicators. For hard testing disk, without giving out details about each item. Three tests can be performed:
- short self-test of HDD;
- short rapid test;
- a long-term check in which all sectors are read sequentially.
As the scan progresses, the program automatically corrects any errors found.
Owners of WD hard drives should know how to check performance hard drives using proprietary software from this manufacturer. The range of its capabilities is similar to that of the program from Seagate, but is somewhat expanded and allows for more in-depth work with the affected device.
There are two additional functions:
- deep disk formatting - the program writes zeros to all sectors, permanently destroying information;
- blocking access to bad sectors - the program marks bad blocks, preventing the writing of new information to them.
Unlike SeaTools, this program for diagnostics, the HDD can be freely used with devices from any manufacturer to check the hard drive for errors - no problems were identified with this.
Deep testing software
If you need not only checking your hard drive for errors, but also correcting bad sectors, you cannot do without a complex software, which carries out the most in-depth analysis of the HDD state.
Victoria HDD
According to many users Victoria HDD is the best software for detecting hard drive problems. The program gained this reputation due to its wide range of functions.
Victoria exists in two versions:
- with a graphical shell for use from inside Windows;
- with a DOS shell to create a boot disk.
enjoy better than the second one version. HDD diagnostics outside the system allows you to achieve best results, so it is always recommended to follow the principle “if possible, test the disk from the boot disk.” As a last resort, you can use a LiveCD of another OS, for example, Linux distribution like Ubuntu.
Victoria HDD has a variety of functions:
- fast and full check disk;
- reassignment of bad sectors and their restoration;
- checking the status of contacts in the IDE or SATA cable;
- equipment performance analysis;
- viewing S.M.A.R.T. indicators.
When checking, you need to pay attention to the access time to sectors. It should not exceed 200-600 ms. You can also view the temperature of the disk during operation, but this is not so important.
HDD Regenerator
HDD Regenerator is a program for professional hard drive recovery. It not only marks bad sectors as unused, but also tries to revive them. For this purpose it is not used standard method deep formatting, but its own algorithm based on transmitting signals of different levels to the sector. Despite its professional level, inexperienced users can also use this software, since testing a hard drive with its help is not difficult thanks to its convenient Russian-language interface.
Program features:
- ensuring data safety - it works only in read mode;
- support for various file systems;
- the ability to scan the disk surface;
- real-time monitoring.
The program is not suitable for everyone, since you can check your hard drive for functionality for free, but you will have to pay $90 for the sector recovery function.
If you don’t want to pay, you can use TestDisk, a free program that can restore the partition table, boot sectors and MFT. It also detects bad sectors and can repair deleted information and fix file system errors. The only drawback is the lack GUI, you have to work from the console.
If after HDD checks and if all problems are corrected, the computer has not stopped working incorrectly, it is worth checking the registry. Perhaps the failures are caused not by hardware failure, but by internal system errors.
Even on the highest quality and most reliable HDDs, bad sectors begin to appear in the PC some time after installation. When the number of bad blocks becomes large, the hard drive stops working and requires replacement. However, the hard drive can often be restored using third-party software. This article will describe programs for treating a hard drive and provide instructions for working with them.
Bad sectors
HDD records user information on magnetic disks. Their surface is divided into tracks and sectors. If it is not possible to extract data from a sector, it is called faulty or bad. Recovering bad blocks, although difficult, is quite possible.
Remember that after treatment, the information from the HDD should be copied to another drive, and over time the hard drive should be replaced. If bad sectors begin to appear on the hard drive, then their spread will not stop even after repair. Another device failure can happen at any time.
VictoriaHDD
VictoriaHDD is a program for treating hard disk sectors, considered one of the most effective and absolutely free. The application runs in DOS mode, so it requires some preparatory steps. First you should

- Download the VictoriaHDD utility image in ISO format.
- Also download the WinSetupFromUSB application and run it.
- From the drop-down menu, select the USB drive that will later become bootable.
- Check the box next to “Autoformat”.
- Check the “Linux ISO” box and provide the full path to the VictoriaHDD program image.
- Click the “Go” button to begin the file recording process.
BIOS Settings
Since hard drive treatment programs operate in DOS mode, you must run BIOS setup.

- Restart your computer.
- After turning on, press the “DEL” or “F8” button several times to enter the “Setup BIOS” utility. Some devices have different keys to launch BIOS settings. To find out which one is responsible for entering the “Setup BIOS” on your computer, read the information at the bottom of the screen immediately after turning on the machine.
- Go to the “Main” section and find the “SATA Mode” item. Press "ENTER" and select "IDE".
- In the "First Boot Device" field, set the value to "USB".
- Press the "F10" key to save the settings changes.
- The computer will then restart.
Check and recovery
If all the above steps are performed correctly, after rebooting the PC VictoriaHDD will start automatically. To get started hard restoration disk:
- Press the key with English letter"P" on the keyboard.
- In the menu that opens, select the port to which the HDD is connected. Today, almost all drives operate via a “SATA” socket, so you need to set the switch to the “Ext PCI ATA/SATA” position.
- Press “F9”, information taken from the SMART table will appear on the screen. Special attention look at the column " Current pending sectors". This is where the number of sectors from which data is not read is indicated. Remember or write down this number.
- Press the “F4” key and start scanning in “BB: Erase 256” mode. The utility will try to find all bad blocks and restore them. In this case, the information stored in them will be deleted.
- Open the SMART table again and look at the quantity bad sectors. If some of them could not be recovered, you should scan the HDD in a different mode.
- Press the "F4" button and select "BB: Classic Remap". Now the application when found damaged sector will not restore it, but will mark it as non-working. This approach will stop the spread of bad blocks.
- When VictoriaHDD finishes checking, restart your PC.
Treatment programs built into the OS
After scanning the drive with the VictoriaHDD utility, it is worth checking it with the utility installed in the operating system by default.
- Open My Computer.
- Right-click on the local disk icon.
- Go to the "Service" tab.
- Select "Run check".
- In the window that opens, check the box next to “Automatically correct errors.”
- Click on the “Run” button and wait until the program finishes.
- Do not turn off the PC under any circumstances until the verification process is completed.
HDD Regenerator
HDD Regenerator is a free program for treatment. The main advantages of the utility include its user-friendly interface. Many users choose HDD Regenerator for this very reason.

- Close all applications and launch HDD Regenerator.
- Open the “Recovery” menu and click on “Start processing”.
- If a warning window about BIOS settings appears on the screen, click the “No” button.
- Select the drive that needs treatment.
- After this, the screen will open command line, where you will need to enter a number from 1 to 4.
- Enter "2" and press "ENTER".
- The utility will ask you to indicate where to start scanning. Just click on the "Enter" button.
- The application will scan the HDD and provide information about bad blocks.
- When the scan is completed, enter “2”, now the utility will not only scan the hard drive, but also try to recover bad sectors.
I must say that the program for treating the Windows 7 hard drive works very slowly. Sometimes the process takes 2-3 days. However, HDD Regenerator actually tries to restore the blocks' ability to store data, rather than simply marking them as unused, which explains the long scan times.
MHDD
The functionality of MHDD is almost completely similar to VictoriaHDD. The application runs in DOS mode. Using it, you can view the SMART table, diagnose and treat the hard drive. The program is not presented in Russian.

- Create a bootable USB flash drive, just like for the VictoriaHDD utility.
- Perform BIOS setup and restart your computer.
- Press "F2" and select the device you want to work with.
- To scan the surface of the hard drive, enter the word "SCAN" or use F4. The screen will display settings in which all destructive functions (erasing, removing bad blocks) are disabled.
- Press "F4" again. The scanning will start, and the display will display a table in which the colors of the cells will change during the scan: white, gray, green - the sector is operational; yellow - there is a risk of damage; red - the block is damaged.
If there are bad blocks on the drive:
- Copy all information to another HDD.
- Enter the ERASE command, which will completely erase data from each sector. This will get rid of soft-bad blocks.
- If this does not solve the problem, press the "F4" key and enable the REMAP option. Now the utility, like the built-in Windows programs to treat a hard drive, it will simply mark the bad sectors and they will no longer be used.
Naturally, accidental and intentional deletion of files destroys previously recorded information, which can be restored using special utilities. But you can also find cases of quick or complete formatting of hard drives, when data is believed to be deleted irrevocably, not to mention damage to the hard drives themselves. What to do in this case? This is where programs come to the rescue restoration of hard disks. You can download mostly simple utilities for free. However, even they help, as they say, to bring the disk to life. Let's look at the most popular ones, including both free and paid utilities.
How does the process of deleting files from a hard drive work?
Before considering the main topic, let’s make a short digression into the theoretical part and see how information is deleted. In Windows systems, there are two ways: deleting to the Recycle Bin and without it. In the first case, the files are simply moved to a reserved area on the hard drive, so restoring them from the Recycle Bin is as easy as shelling pears.
In the second case, the first character in the name changes to unreadable ($). If during work in the clusters where such a file is located, no overwriting was performed, the information can also be restored.
The situation is worse with quick or complete formatting of disks and partitions, as well as with situations when the hard drive begins to “crumble” or is simply subject to physical damage. Many users mistakenly believe that it is impossible to recover files in this case, saying that only professional experts can do this. Nothing like this! If you use, for example, the same programs to restore Seagate Barracuda hard drives, which at one time had many problems, anyone, even an untrained user, can carry out this process. And it’s completely elementary.
Programs for restoring hard drives after formatting: can it be done?
When quick formatting hard drive, the partition tables are overwritten, and when full, the disk surface is also checked, followed by correction of bad sectors. In this case, we are talking about factory low level formatting doesn't work at all.

This is precisely what allows many developers to create programs for restoring hard drives, which seem to perform the reverse process. This gives the same recovery effect. But first things first.
The best hard drive recovery programs
As for the most famous utilities today, a sample list might look like this:
- Victoria HDD;
- R.Saver and R-Studio;
- HDD Regenerator;
- Acronis Recovery Expert and Active Partition Recovery Pro;
- Hetman Partition Recovery;
- Zero Assumption Recovery.
Naturally, it is impossible to give a complete list, since today there are such software products you can find hundreds. But let’s look at the above utilities in a little more detail.
Victoria HDD
If we consider the most popular programs for recovering hard drives and disk partitions, of course, leadership belongs to one of the most powerful utilities of our time under named Victoria HDD, developed by Sergey Kazansky.

The program has five levels of hard drive testing, is capable of identifying and displaying faulty areas, eliminating errors, plotting surface condition graphs, measuring performance, etc. The operating modes also look interesting. The application can be launched normally graphical shell, or you can use a somewhat unusual DOS mode. By the way, it is with such a test that the most powerful effect is achieved.
R.Saver and R-Studio
These two programs for recovering hard drives from flash drives work just fine and are very similar to each other. They can even be used as portable versions.

The main advantage of these utilities is that they support almost all file systems known today and are capable of recovering data on any type of media, including even formatted or damaged cards memory.
HDD Regenerator
This utility is relatively new among all programs. It is designed specifically for restoring bad sectors and, as the developers themselves say, even for resuscitating the surface of the hard drive.

The latest technology of so-called magnetization reversal is used here, which allows you to completely restore the hard drive and the information that was previously recorded on it. It works, however, only in DOS mode, which causes some confusion among many. In addition, the technology itself looks almost unrealistic, because some people cannot imagine how a surface can be remagnetized programmatically. Nevertheless, everyone who has encountered it expresses only admiration - the application is able to revive even completely “dead” disks.
Acronis Recovery Expert and Active Partition Recovery Pro
Here are two representatives of the family of HDD recovery utilities. The peculiarity of these applications is that they support a large number of file systems and hard drives.

In addition, they provide a creation mode bootable media, with which you can fix many problems if starting the operating system from a problematic hard drive is impossible.
True, the first utility is paid, the second is not. But the second application is also interesting because it can be launched from both DOS and Windows.
Hetman Partition Recovery
Another USB device or memory card and the information stored on it is interesting because it can work with all types virtual partitions. It goes without saying that data can be recovered even after full formatting.

But the most important thing is that the program can work in manual mode, and in the “Wizards” mode, which allows any user to automate the entire recovery process.
Zero Assumption Recovery
Finally, one more small and fairly simple application, abbreviated as ZAR. This program is mainly designed to recover file files. FAT systems and NTFS, although it can also be used for Linux. For Windows system users, it is perfect.

But here it is worth considering that in this case we're talking about exclusively about recovering information (even from bad sectors). In this case, the program does not make any corrections on the hard drive itself after analysis.
Conclusion
Of course, only the most basic programs were considered here. When choosing a program, you should be guided by the situation itself, that is, choose which operation should be used (recovering information or eliminating failures on the hard drive itself), and only then make a decision about using one or another utility.
Like
Like
Tweet
The hard drive in the computer and the drive icon in the My Computer window are different concepts. For example, a computer may have one hard drive installed, while there may be several of them in “My Computer”. The reason for this strange discrepancy is that the hard drive can be divided into so-called partitions. This is called logical disk layout.
I will talk about why such markup is needed, how to do it correctly (and whether it should be done at all), and also talk about free programs ah for such a delicate procedure.
Why do you need to partition your hard drive?
There are several reasons to partition a hard drive:
- Partitions on a hard drive are primarily needed for proper storage of information. For example, some users prefer the following division: operating system and programs on one disk (usually C), documents - on the second ( D), photo archive on the third ( E) and so on. In this case, there may well be only one hard drive.
- If you have one hard drive, but want to have two or more operating systems, you will have to divide the hard drive into partitions, since Windows and other operating systems can only be installed on different partitions or hard drives.
- Manufacturers of laptops (and some computers from famous manufacturers such as Acer) have their own reason for dividing hard drive partitions: on a section that is visible as a disk C, Windows installed, second ( D) is completely empty, and the third (which is not visible in the “My Computer” window) stores a compressed copy of the partition C. This hidden partition of the hard drive is called recovery partition. If something happened to the operating system (“Windows crashed” - as some users like to say), then when you turn on the laptop, just press a key combination (see which one - see the instructions for the laptop) and a special program will clean the disk C, then unpacks the contents of the hidden partition there. As a result, the user will receive a laptop with the programs that were originally on it at the time of purchase in the store. Disk D however, it will not be changed. The conclusion suggests itself: if you store all documents on a laptop with such a recovery system not on drive C, A only on D, can be restored at any time damaged Windows brand new, without losing important data. By the way, any advanced user can make such a recovery system for themselves, but I’ll tell you about it some other time.
- The Windows 7 and Windows 8 operating systems, when installed on a blank, “unpartitioned” hard drive, create a hidden partition of 100-350 megabytes in size. This small partition stores a bootloader designed, oddly enough, to boot Windows. This partition will not exist or its contents will be damaged - and the computer will not start the operating system, displaying the message “Boot fail”, “Cannot find boot device”, “Boot error” or similar on a black screen, the meaning of which is one - not found boot disk with the operating system. Actually, the bootloader can be stored on disk C:, and/or in hidden sectors of hard disk (outside partitions), but the developers decided in Windows 7/8 to use a separate hidden partition in order to somehow protect the boot loader from damage by other programs, viruses or the user.
- There are other reasons division of hard disk into partitions. For example, for correct operation GNU/Linux operating systems should create several sections, but this is the topic of a separate article, we will not consider them here.
So, The main reasons for partitioning a hard drive are: for the convenience of storing information, for installing several operating systems, for operating a recovery system, for storage Windows boot loader 7/8.
A little theory: file systems, partition types
Information about partitions (i.e. logical drives) is stored in a "partition table". Each logical drive can have its own file system. You can read more about all this in the Wikipedia articles: Disk partition, Logical disk, File system. A novice user only needs to know the bare minimum:
- If you divide the hard drive into logical drives(sections), Disk capacity will not increase- there’s simply nowhere to find free space! You can make partitions of any size, but in total they cannot be larger than the capacity of the real hard drive. Less please. Then you will have unallocated free space, not visible in My Computer, from which you can get one or more new partitions. This is a question I often get from newbies, so I put it first.
- Exist primary (main) And extended (additional) sections. One hard drive cannot have more than four main partitions (see the links above for why this is so), so they came up with an extended partition - this is a primary partition that can include any number of partitions. As a result, thanks to the extended partition, the hard drive can have any number of partitions - tens, hundreds.
- Each partition can have its own file system. Currently for Windows installations Vista, 7 and 8 can only be used NTFS, and the outdated Windows XP can be installed on disks with the FAT32 file system. However, I do not recommend doing this, as it imposes too many restrictions. Make all partitions in NTFS - everything will work as it should.
- Any hard drive must be partitioned one way or another. In one or more logical drives- you decide. When purchased, the hard drive is usually already partitioned into one partition - this is what the manufacturer decided. If you are satisfied with this way of organizing information, leave it alone.
- It is very undesirable to partition the disk in laptops - most of them have hidden recovery partitions that can be damaged (see point 3 of the previous chapter).
- If you bought a 2 terabyte hard drive, but in “My Computer” it is “only” 1.86 terabytes (1860 gigabytes), then do not rush back to the store. It's all about how manufacturers and Windows calculate the volume. Read more about this in the Wikipedia article Hard Drive. The larger the size of the hard drive, the more clearly it is clear that there are fewer real gigabytes.
- Sections can be delete, create, move(change their physical position on the disk), resize them, format them, convert them file systems on partitions from one to another. Moreover, many programs can do this while saving all the data. There are other operations, but novice users most often need the above.
- If there is an error during the process of changing partitions (see point 7), information is almost always lost. Yes, it can be restored (or part of it) using special programs with the participation of specialists, but it is best to save all of it in advance important information to other disks (not logical, but real disks) or flash drives, so as not to pay money for data recovery.
Disk Management in Windows
Windows has standard remedy section changes - " Disk management". Depending on the Windows versions, the capabilities of this program change a little, but in general over the past years (if we talk about Windows Vista, 7, 8) there have been no major changes. Windows XP looks more modest in this regard - apart from formatting and changing the drive letter, there is little that can be done there.
As an example I’ll take “ Disk management» Windows 7. You can open this program in several ways:
- The simplest one is to right-click on the line Computer on the menu Start- select an item Control- in a new window select Disk management.
- Opening Control Panel - Administration - Computer management - Disk management.
- Click Start - Execute(or the Win+R key combination) - enter in the window that opens diskmgmt.msc- press OK.
Disk management looks like that:
Here you can see both physical disks (including DVD drives, flash drives and other devices for storing information) and logical ones, i.e. virtual - hidden partition of the Windows 7 boot loader, disks C And D. The number of disks on your computer may vary.
Basic actions are available by right-clicking on the desired section:

The list of actions is quite meager:
- Items Open, Conductor allow you to view the contents of disks
- Make the section active- indicate on which disk (partition) the bootloader is located. In Windows 7 and 8 this is system reserved chapter. You cannot make another partition active - the operating system will stop loading.
- Change drive letter or drive path- you can change the drive letter displayed in the Computer window or display it as a folder. Yes, partitions can be displayed not only as disks, but also as folders on any disk.
- Format- you can read about this in the Wikipedia Formatting article. The item opens a window with which you can start high-level formatting.
- Extend Volume- if there is space on the hard drive that is not marked as a partition, then you can expand the partition size using this free space.
- Shrink Volume- this item allows you to reduce the size of the partition. The result will be the formation of unallocated space, which can be used to expand the volume of another section (see the previous paragraph).
- Delete volume- delete the section. Don't click on an item without thoroughly considering the consequences. If you delete a partition, the information on it can only be saved using special programs, and even then not always.
- Properties- a properties window will open with information about the selected disk (partition).
Of course, this is not a complete list of possibilities. Disk Management. You can create dynamic disks, for example. However, this is of no use to novice users; this article is intended specifically for them.
So, to create, delete, resize partitions via Disk management, you only need three menu items: Expand Volume, Shrink Volume, Delete Volume.
All operations take place in real time, i.e. after clicking the desired item and answering the question in the affirmative - do we want to do this - the actual action occurs.
Do not forget that there is a risk of failure, due to which we could lose either one or all of the partitions. This applies primarily to computers with a large number of unnecessary programs- each of them may be the culprit in deleting all data. Moreover, the scenario is when you need to change the partition from which Windows is launched (usually this is the disk C), is the worst - most often problems arise for users when they try to change system partition.
To minimize the risk of failure, There are three methods:
- Insert the hard drive into another computer and change partitions from it by running Disk management or any other program for changing partitions. Due to the fact that Windows will be launched from another disk, no programs will fit on foreign disk, interfering with a critical operation.
- Boot from a Live CD - the operating system and programs will be launched not from the hard drive, but from a CD or DVD, flash drive - again, nothing will interfere with changing partitions.
- To change partitions, use a program that can work in Native mode. For example, disk check C always works in this mode - a black window with white text before loading the Desktop. In this mode, a minimum number of programs are launched and the risk of failure is minimal.
The third option is the simplest, because the user essentially does not need to do anything - just restart the computer and wait a few minutes. The following two review programs can do this.
Free for home use program for changing hard disk partitions.
Surface test- checking the disk surface (physical). Allows you to detect bad sectors (so-called “bads”, “bad blocks”).
View properties- display information about the disk.
Yes, knowledge of English is clearly required here, especially considering that almost every item opens a window with settings for the action being performed. After you have made the necessary manipulations, you need to apply the changes by pressing a button Apply(Apply):

Only then will the partition changes begin. This process may take some time - from a couple of minutes to several hours.
Depending on whether the system partition is affected or not, operations are carried out either immediately in the window, or you will need to restart the computer and start changing the partition in Native mode:


The program has so many functions that it is impossible to list them all. I recommend that you read the help for EaseUS Partition Master. She is on English language, unfortunately, but you can use Google translator. The translation is quite understandable.
Pros of EaseUS Partition Master Home Edition:
- Lots of functions.
- All actions are “virtual” until you click the Apply button. This means that you can cancel operations before this “point of no return” and try to do something else with the partitions. Or don’t do it at all if you change your mind.
- Works stably and predictably. For example, during testing, while changing partitions, I started copying files to the partition that was to be changed. Result - a window appeared stating that it was not possible to lock the partition, all operations were interrupted, the data did not disappear anywhere.
- The program is free for home use.
Cons of EaseUS Partition Master Home Edition:
- The interface is in English only.
- There are, perhaps, too many possibilities - this can confuse beginners.
- A serious failure during the operation will lead to serious consequences.
- For example, if you turn off the computer while changing a partition, the data on the partition will disappear. However, this is a minus of absolutely all programs for changing partitions.
Conclusion: the program is good. You can and should use it; there is no alternative among free programs.
Paragon Partition Manager 11 Free
Free program for changing partitions from a company based in Russia. Unfortunately, the program is in English. What made the developers take such a step is unclear. Moreover paid version Russian-language programs.
The main window of the program is no different from the window of the hero of the previous review, except that the buttons have changed their order:

Deserves special mention Express Mode(Simplified mode). By clicking on this button, we will get a window with a list of the most frequent actions:

One could say that this is an ideal mode for beginners, if not for one “but”: everything here is in English. Moreover, I had a suspicion that the English here was somehow incorrect, as if it was not a person who was translating, but a machine.
Pros of Paragon Partition Manager 11 Free:
- Many windows are clear enough to understand the functions.
- Some operations are carried out immediately in the program window, some (if required) in Native mode. That is, the program does everything to reduce the chance of data loss.
- The program is free to use at home.
Cons of Paragon Partition Manager 11 Free:
- English-language, and due to the strange construction of phrases it is quite difficult to understand.
- The simplified Express Mode works exactly the opposite: firstly, the descriptions of operations and the operations themselves have more technical subtleties than is required; secondly, this mode is very capricious and does not really work, producing meaningless errors.
- The program is too slow. For example, deleting a 38 GB hard drive partition took me about 5 minutes - quite long for such a simple operation.
Conclusion: The program works, but somehow it is unpredictable. I do not recommend using this program, fortunately there is an alternative in the form of EaseUS Partition Master Home.
Changing partitions during installation of Windows 7, 8, 10
This tool also deserves a mention.
We take any installation disk with Windows Vista, Windows 7, 8 or 10, start the disk installation, go to the partition selection and click Disk setup:

It seems that everything is simple: you need to click on a section in the list, then the action button. Unfortunately, there is little action here: deletion, formatting, partitioning and expansion.
You can, for example, delete a partition and use the freed up space to increase the size of another partition or partitions (by selecting required sections, you need to press the Delete and Extension buttons in turn).
Alas, a very popular operation - reducing the size of partitions - is not here. You can delete the partition, then re-create a new one with a smaller partition, but, unfortunately, we will lose the data.
All operations take place in real time, i.e. after pressing the button the action occurs.
Result: editing partitions during Windows installation is an extremely primitive tool. It works, but performs only a limited list of actions, among which the only one that saves data is increasing (expanding) the size of the partition. If you need to install Windows and do not need to save data on partitions, then the tool will come in handy.
If you suddenly accidentally deleted a partition during Windows installation or through some program, do not despair - the partition recovery function is included in EaseUS Partition Master Home Edition.
In order to recover a deleted hard drive partition, don't touch the partitions, immediately boot into Windows (or insert the hard drive into another computer if you deleted the system partition and Windows boot impossible), then run the above program, click on the line with the word in the list Unallocated("Unallocated"), then click the button Partition recovery.
The rest, as they say, is a matter of technique - the action wizard will tell you where to click, where to check the boxes, and then restore your deleted disk.
Tip #2: Installing two or more Windows operating systems on one hard drive
All you need for this is several sections. If your hard drive already has a second partition that is visible in the " Computer" - make sure that there is at least 20 GB of free space (more is better), then during Windows installation simply specify this second (third, fourth, etc.) disk. Once installed, you will be able to select Windows using a menu that appears when you turn on your computer.
If you have one disk ( C), I suggest the simplest option: Through Disk management give it to the section first WITH team Compress, reducing it by at least 20 gigabytes (or better yet, more, because in addition to Windows you will also be installing programs):

Right click on drive C...

After pressing the button Compress disk size C decreases, unallocated (free) space appears in the partition map:

We indicate unallocated space. The installer will create the partition itself.
After installation you will have two operating systems. You can create unallocated spaces or empty disks and indicate them for installation.
Thanks to reader Vladimir for raising this topic.
You may have noticed that in the screenshots of the Disk Management window, all partitions are marked with a blue stripe. You may have sections with green stripes. What is the difference between blue and green sections?
A green bar in Disk Management is a sign of an extended (additional) partition. As I wrote above, there may be “nested” sections inside, which from the user’s point of view are no different from the main (primary) ones. Nested partitions have one peculiarity - if you reduce their size, then due to the free space that appears, you will not be able to simply expand the main partition. You must first compress the extended partition itself (which stores free place and a smaller partition) to create free space outside of any partitions, only then can you expand the disks.
Like
Like
Often it is not enough to work with a hard drive standard tools offered by the system. And therefore we have to resort to more effective solutions, which allows you to obtain detailed information about the HDD and its partitions. The solutions discussed in this article will allow you to familiarize yourself with the operations applied to the drive and its volumes.
Thanks to its tools AOMEI Partition Assistant is one of best programs of a kind. Wide functionality will allow you to effectively configure hard disk volumes. In addition, the program makes it possible to check a specific section for errors. One of interesting features– this is transferring the OS with all installed software to another hard drive or SSD.

Writing an image file to a USB device is also supported. The interface is endowed with a pleasant graphical shell. Despite the large number useful functions, the program is available for free use, which makes it even more in demand. At the same time, it is possible to download the Russian version.
MiniTool Partition Wizard
This software has powerful functionality that allows you to merge, split, copy partitions, and a number of other functions. MiniTool Partition Wizard is completely free and available for non-commercial use only. The program provides the ability to change the disk label, and when creating a partition, the cluster size.
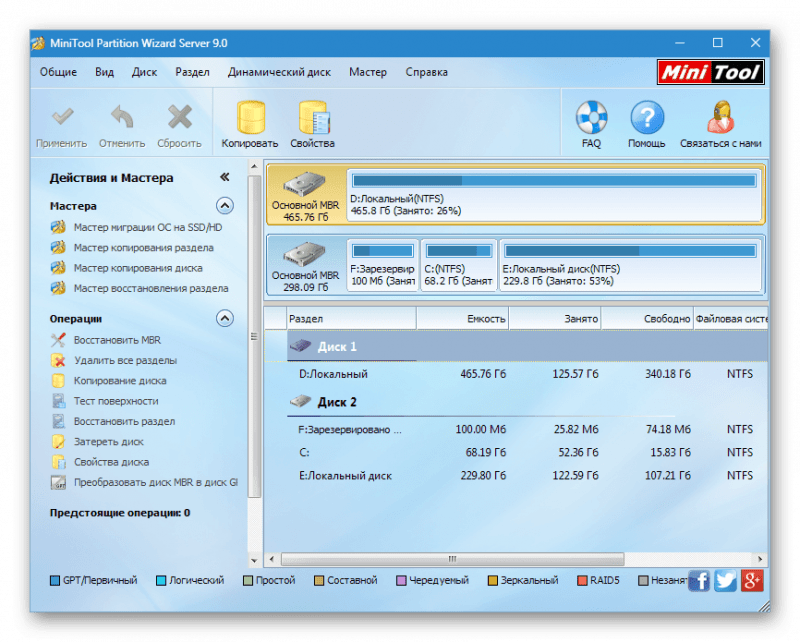
The surface test operation allows you to detect bad sectors on the HDD. The ability to convert is limited to only two formats: FAT and NTFS. All tools for working with disk volumes are located very in a convenient way, so even an inexperienced user will not get confused.
EaseUS Partition Master
A program that opens up many possibilities when working with a hard drive. Among the main ones: disk cloning and importing the OS from HDD to SSD or vice versa. Partition Master allows you to copy an entire partition - this function is suitable if you need to create a backup copy of one partition to another.

At the program user-friendly interface, in which all operations are in the left block - this allows you to quickly find the desired function. The peculiarity of EaseUS Partition Master is that it can be used to hide a specific volume by deleting a letter on it. Creating a bootable OS is another interesting and useful tool.
Eassos PartitionGuru
Convenience of working with Eassos PartitionGuru is achieved primarily due to its simple design. All instruments are located on top panel. Distinctive feature is the ability to build a virtual RAID array. To do this, the user just needs to connect drives to the PC, from which the program itself will construct a RAID.

The available sector editor allows you to search for the desired sectors, and hexadecimal values are displayed in the right block of the panel. Unfortunately, the software is supplied in an English trial version.
Macrorit Disk Partition Expert
A pleasant interface displays functionality, which is divided into sections. The program allows you to scan your PC for bad sectors, and you can configure the disk space to be scanned. Conversion available NTFS formats and FAT.

Macrorit Disk Partition Expert is free to use, but only in the English version. The software is suitable for people who need to quickly hard settings disk, but for more efficient work it is recommended to use analogues.
WonderShare Disk Manager
A program for performing various operations with hard drive, allowing high-quality data recovery. Compared to other similar software, Macrorit Disk Partition Expert allows you to deeply scan partitions for lost information.

You can trim and merge hard disk volumes without losing files stored on it. Other tools will allow you to hide the partition if necessary or convert the file system.
Acronis Disk Director
Acronis Disk Director is one of the most powerful programs with a set of functions and operations for management sections of hard disk and more. Thanks to the capabilities of this software from Acronis, users can recover lost or deleted data. Among other things, it is possible to defragment the volume and also check it for file system errors.

The use of mirror technology allows you to save backup copy section selected by the user. Acronis Disk Director offers the use of a disk editor, which makes it possible to find a lost cluster, taking into account the fact that the execution environment for this operation displays hexadecimal values. The program can be safely used to carry out the most efficient work with the HDD.
Partition Magic
A program that allows you to perform basic operations with a hard drive. The interface is very similar to standard application Windows Explorer. At the same time, among the tools located in the graphical shell, it is easy to find what you need. The advantageous feature of Partition Magic is that it allows you to select multiple active partitions, each of which has its own separate OS.

You can also use file system conversion services, two of which are supported: NTFS and FAT. You can resize the volume and merge partitions without losing data.
Paragon Partition Manager
Paragon Partition Manager pleases users with an interesting set of functions and purposes for their use. One of them is connecting the image virtual disk. Among them, image files are supported, VMware and other virtual machines.

A noteworthy feature is that it allows you to convert HFS+ file system formats to NTFS and vice versa. Other operations are basic for partitions: trimming and expanding. A large number of settings provided by the program will allow you to customize all the functionality to your liking.
Reviewed software solutions have unique potential, each in its own way. The powerful tools of the developed software make it possible to save disk space and prolong the life of the hard drive. And the function of checking the HDD for errors allows you to prevent critical errors in the operation of the drive.