Convert mbr to gpt. How to convert a GPT disk to MBR using the command line
Good day!
If you have a new computer (relatively :)) with UEFI support, then when installing a new Windows you may be faced with the need to convert (convert) your MBR disk to GPT. For example, during installation you may receive an error like: “On EFI systems, Windows can only be installed on a GPT disk!”
In this case, there are two solutions: either switch UEFI to Leagcy Mode compatibility mode (not good, because UEFI shows higher performance. The same Windows loads faster); or convert the partition table from MBR to GPT (fortunately, there are programs that do this without losing data on the media).
Actually, in this article I will consider the second option. So, …
Converting an MBR disk to GPT (without losing data on it)
For further work you will need one small program - AOMEI Partition Assistant.
An excellent program for working with disks! Firstly, it is free for home use, supports the Russian language and runs on all popular OS Windows 7, 8, 10 (32/64 bit).
Secondly, it has several interesting wizards who will do the entire routine process of setting up and setting parameters for you. For example:
- disk copy wizard;
- Partition Copy Wizard;
- Partition Recovery Wizard;
- OS transfer wizard from HDD to SSD (recently relevant);
- bootable media creation wizard.
Naturally, the program can format hard drives, change the MBR structure to GPT (and vice versa), and so on.
So, after starting the program, select your drive that you want to convert (you need to select the name “Disk 1” for example), and then right-click on it and select the function “ Convert to GPT"(as in Fig. 1).

Rice. 1. Convert MBR disk to GPT.

Rice. 2. We agree with the transformation!
Then you need to click the “Apply” button (in the upper left corner of the screen. For some reason, many people get lost at this step, expecting that the program has already started working - this is not the case!).

Rice. 3. Apply changes to disk.
Then AOMEI Partition Assistant It will show you a list of actions that it will perform if you give your consent. If the disk is chosen correctly, then just agree.

Rice. 4. Start conversion.
Typically, the conversion process from MBR to GPT is quick. For example, a 500 GB drive was converted in a couple of minutes! During this time, it is better not to touch the PC and not interfere with the program doing its job. At the end, you will see a message indicating that the conversion is complete (as in Figure 5).
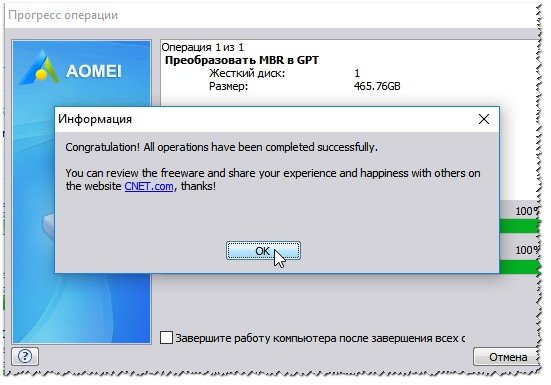
Rice. 5. The disk was converted to GPT successfully!
Pros:
- quick conversion, literally a few minutes;
- conversion occurs without data loss - all files and folders on the disk are intact;
- no need to have any special skills. knowledge, you don’t need to enter any codes, etc. The whole operation comes down to a few mouse clicks!
Minuses:
- It is impossible to convert the disk from which the program was launched (i.e. from which Windows was loaded). But you can get out - see. below:);
- if you only have one disk, then in order to convert it you need to connect it to another computer, or create a bootable flash drive (disk) and convert from it. By the way, in AOMEI Partition Assistant There is a special wizard for creating such a flash drive.
Conclusion: Overall, the program copes with this task perfectly! (The given disadvantages can be cited to any other similar program, since it is impossible to convert the system disk from which the boot was made).
Converting from MBR to GPT during Windows installation
This method will unfortunately delete all data on your storage device! Use it only when there is no valuable data on the disk.
If you are installing Windows and an error appears in front of you that the OS can only be installed on a GPT disk, then you can convert the disk directly during the installation process (Attention! The data on it will be deleted, if the method is not suitable - use the first recommendation from this article).
An example of the error is shown in the figure below.

Rice. 6. Error with MBR when installing Windows.
So, when you see an error like this, you can do this:
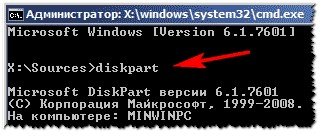
1) Press the Shift+F10 buttons (if you have a laptop, then maybe you should try Fn+Shift+F10). After pressing the buttons, the command line should appear!
2) Enter the Diskpart command and press ENTER (Fig. 7).
The question of converting the GPT hard disk partition style to the MBR style most often arises when they try to install Windows on a computer with a regular BIOS (Legacy) rather than with a UEFI BIOS. A hard drive with the GPT style transferred from a computer based on BIOS UEFI or initially initialized by mistake, being the second one and providing additional disk space to the first (primary) hard drive with the MBR style, will not in any way affect the work inside Windows with user data. On a disk with the GPT style, you can store videos, music, documents and other files, play them, move them to the main disk with the MBR style and back. The problem will only arise when Windows is installed on a GPT disk. The operating system will not install on the GPT disk of a computer with a regular BIOS. But even if you have a modern computer with a UEFI BIOS, there will still be problems installing the system on a GPT disk if we are talking about 32-bit Windows 7. In such cases, after going through a couple of preparatory windows of the Windows installation process and reaching the selection of disk partitions, the user will be faced with a notification that it is impossible to install the system on a disk with a GPT partition style.

In the situation of installing 32-bit Windows 7 on a computer with a UEFI BIOS, of course, you should not give up the benefits of a BIOS with a new format and style of GPT partitions. In this case, it is better to prepare an installation disk with 64-bit Windows 7. But if we are dealing with a computer based on a regular BIOS, the GPT disk partition style must be converted to the MBR style.
This issue is most easily resolved when there is no important data on the hard drive. Without leaving the Windows installation process, the GPT hard drive partition style can be converted to MBR using the command line. Not much, but a little more complicated, things will be when such a hard drive has partitions and stored data. The Windows command line does not save data during the style conversion process. Partitions and data will be deleted, leaving only unallocated space on the disk. But some third-party Windows programs, for example, disk managers from Acronis, Paragon, AOMEI, can convert styles from GPT to MBR and back while preserving the partition layout and stored data. The brainchild of the latter - AOMEI Partition Assistant - allows you to do this completely free of charge. We will resort to the help of this program in the process of converting a GPT disk into an MBR disk with data safety, which will be discussed in this article. But first, let's look at how to convert a GPT disk to MBR with loss of partitions and data during the Windows installation process.
1. Convert GPT to MBR during Windows installation with complete destruction of hard drive data
Inside running Windows, there are many ways to convert disk partition styles. Without saving partitions and data, you can convert the partition styles of additionally connected hard drives using the standard Windows arsenal - using the disk management utility or, as mentioned, the command line. But only the command line will help if the fact of using the GPT partition style was discovered only during the Windows installation process, and there is no bootable media with a disk manager such as Acronis, Paragon or AOMEI at hand.
Repetition is never unnecessary in matters such as deleting data from disks. Therefore, we remind you once again that the instructions below will lead to complete erasure of the hard drive data.
At any stage of the installation process, including the window with partition selection and a notification that it is impossible to install the system on a GPT disk, press Shift+F10 to open the command line window. In the command line window, first enter commands that launch the console disk management utility and display a list of connected hard drives:
If the computer has only one hard drive, it will be listed as Disk 0. If there are several hard drives, you need to find out how the desired GPT disk is displayed in the list - as Disk 0, as Disk 1, as Disk 2, etc. In this case, the size of the hard drives will serve as a guide.

In our case, for example, there is only one hard drive, and it is listed as Disk 0. Therefore, the following command will be like this:
If two or more hard drives are connected to the computer, in the “select disk 0” command the number 0 must be replaced with the number 1, 2, etc., in accordance with how the desired disk is listed after running the “list disk” command .
The following command is actually the command to convert a GPT disk to an MBR disk:
To exit the console utility, enter the command:

Now the command line window can be closed in the usual way by clicking the cross in the upper right corner of the window. If the command line was launched at the stage of selecting disk partitions for installing Windows, click the “Update” option so that the data is displayed taking into account the changes just made.

After updating the data, we will see that the hard drive is now visible as unallocated space. Then you can continue the Windows installation process - either create new partitions on the disk, or click “Next” if all the disk space is allocated to the system partition, for example, when using an SSD drive with a small capacity.

2. Convert GPT to MBR using AOMEI Partition Assistant while preserving hard drive data
To convert a hard drive from GPT style to MBR while preserving the markup and data stored on it, as mentioned above, we will use the free AOMEI Partition Assistant program. Naturally, this will require a fully functioning computer. If you have the only GPT hard drive on your computer, you can disconnect it and temporarily connect it to another computer running Windows. Or you can do it differently: burn a bootable USB flash drive or DVD with the AOMEI Partition Assistant program on another computer. This option is suitable for cases when the second computer device is a laptop. By booting from such a flash drive or DVD on the source computer with a GPT disk, the latter can be converted to MBR style without the help of Windows.
AOMEI Partition Assistant can be downloaded from the official website. The free Standard Edition includes functionality for converting GPT partition styles to MBR and vice versa.

Install the program on a secondary computer and launch it.
2.1. Working on Windows
First, let's look at the process of converting GPT to MBR inside a Windows system when the GPT disk is connected to the computer. In this case, in the AOMEI Partition Assistant window we will see at least two hard drives with their layout and partition sizes. The main hard disk with the Windows system partition will be listed as Disk 1. The connected GPT disk should be looked for among other disks. In our case, there are only two hard drives, so the GPT disk is listed as Disk 2. Click on this label in the table for visual representation of disks (not on the partitions, but at the beginning of the cell, on the disk itself). After that, in the panel on the left we will see the available operations specifically for hard drives, and not their partitions. Find the “Convert to MBR” command in the list and click it.

We confirm the operation.

Then click the “Apply” button at the top left.

A couple more steps to scare away newcomers: first click the “Go” button,

then we confirm the decision to directly launch the operation.

All – GPT disk converted to MBR disk.

2.2. Working with AOMEI Partition Assistant bootable media
Bootable media is created using the AOMEI Partition Assistant program installed on the Windows system. On the toolbar on the right, in the “Wizards” section, look for the “Make bootable CD master” command and run it.


Decide on the media type - CD/DVD, flash drive or ISO file - and click the “Go” button.

Once the operation of creating bootable media is completed, you can immediately boot from it on the source computer where you need to convert the hard drive from GPT to MBR. Working with AOMEI Partition Assistant from bootable media will be no different from working in Windows. Here we click on the inscription “Disk 1”, since we are dealing with the only connected hard drive. And in the “Disk Operations” section, click the “Convert to MBR” command.


That's it - GPT partition style has been changed to MBR.

Have a great day!
Often when installing Windows, when selecting a target disk, you may come across a message like “The selected disk contains an MBR partition table. On EFI systems, Windows can only be installed on a GPT disk."
Example of MBR error when installing Windows
The Internet is full of advice, ranging from the strange “you need to press esc very often at a certain stage of installation,” to quite passable, but not always applicable.
Let's try to figure out what can be done in this situation, how best to proceed, and in general the reasons for this error.
Reasons for the error
Long ago, when hard drives were small (less than a terabyte) and used a BIOS, they used what was called a master boot record (MBR). Any operating system of the Windows family settled firmly in this entry in order to boot successfully. This recording was located in a specific area of the hard drive, and accordingly was limited in size. Over time, the BIOS was replaced by the UEFI system. And the screws got bigger. And bright minds realized that MBR is very outdated and that its volume is small. What if a cunning user wants to install ten operating systems on his multi-terabyte screw? That's how they came up with a replacement for MBR - GPT. And new versions of Windows (starting from 8 for sure) require that the hard drive, if the computer does not have BIOS or UEFI, be formatted in GPT - just in case.
What to do?
Option one is to enable a special boot mode - Legacy. This mode will let the Windows installer know that this computer is compatible with older systems and can use the MBR. Unfortunately, it is impossible to say how to enable this mode in a specific BIOS - every developer hides it as best he can. Here is one example:
 Example of switching boot mode in Legacy
 The downside of this method is that if at some point the installer stops responding to Legacy mode, then the method will stop working.
What to do if the previous method cannot be used? The obvious answer is to convert the disk to GPT format. Windows Installer provides this option, but - all data on the disk will be destroyed. There is also a third method - but more on that later.
So, you are ready to convert the disk to GPT, erasing all data. Here are the steps for this:
- In the Windows installer we reach the disk partitioning stage
- Click Shift+f10. The console will open (black window with white letters).
- Enter the following commands sequentially (after each line, press Enter and wait for a new prompt to enter a command):
- diskpart list disk select disk
clean convert gpt exit
- diskpart list disk select disk
- At the select disk stage, you need to enter the number of your disk, which is exactly what the list disk command shows. Most likely the disk number is 0. But if you boot from a flash drive, the number may differ.
- That's it, the disk is formatted
This is all great, but not everyone wants to destroy all the data on their disk. In this case, a wonderful utility will help us. Naturally, for it to work, you need a downloadable working copy of Windows. You can install old XP for this purpose, you can use some kind of assembly that allows you to run programs. In general, the sequence of actions is as follows:
- Download the utility and unpack it to a place accessible to Windows (for working Windows - anywhere, for an installer with programs running - most likely to a flash drive with the installer)
- We get to any Windows console in any way. In a working copy, this can be done with the “cmd” command in the “Run” window.
- Go to the folder with unpacked gptgen (for those who do not know how to use the console, google the CD command).
- Run the following command gptgen.exe -w \\.\\physicaldrive0
Naturally, instead of the zero at the end, you need to substitute the number of the disk that needs to be distilled. How to find out the disk number is described above. Most likely you will still need to confirm the conversion, but the program will kindly ask you for this. All! The disk is converted, the data is in place. The only thing is that the windows boot loader will most likely crash. But you can either restore it, if necessary, or install new windows, which is what all this was actually started for.
- Translation
Have you ever wondered how your computer boots? Regardless of the hardware and operating system, all computers use either the traditional BIOS-MBR method or the more modern UEFI-GPT method, implemented in the latest versions of the OS, when booting.
In this article, we will compare GPT and MBR partition structures; GPT stands for GUID Partition Table and MBR stands for Master Boot Record. Let's start by looking at the download process itself.
The following chapters highlight the differences between GPT and MBR partition styles, including instructions on how to convert between the two styles and advice on which one to choose.
Understanding the Boot Process
When you press the power button on your PC, it starts a process that will eventually load the operating system into memory. The first command depends on what the partition structure is on your hard drive.If there are two types of partition structures: MBR and GPT. The partition structure on a disk determines three things:
- Data structure on disk.
- The code that is used during boot if the partition is bootable.
- Where does the section begin and end?
MBR boot process
Let's return to the download process. If your system uses an MBR partition structure, the first execution process will load the BIOS. The Basic Input/Output System includes bootloader firmware. The bootloader firmware contains low-level functions such as keyboard input, video display access, disk I/O, and code to load the initial stage of the bootloader. Before the BIOS can detect the boot device, it performs a sequence of system configuration functions, starting with the following:- Self-test at power-on.
- Detection and initialization of the video card.
- Displays the BIOS start screen.
- Perform a quick memory (RAM) test.
- Plug and play device configuration.
- Boot device definition.
- First stage of the bootloader (446 bytes).
- Disk Partition Table (16 bytes per partition × 4 partitions) - MBR only supports four partitions, more on that below.
- Signature (2 bytes).
A VBR usually contains an Initial Program Loader (IPL), this code initiates the loading process. The program's boot loader includes a second boot loader stage, which then loads the operating system. On Windows NT family systems, such as Windows XP, the bootloader first loads another program called NT Loader (NTLDR), which then loads the operating system.
For operating systems based on the Linux kernel, the GRUB (Grand Unified Bootloader) bootloader is used. The download process is similar to that described above, the only difference is the name of the loaders at the first and second stages.
In GRUB, the first stage of the boot loader is called GRUB Stage 1. It loads the second stage, known as GRUB Stage 2. The second stage load retrieves a list of operating systems on the hard drives and provides the user with a list to select an OS to boot.
GPT boot process
At the same boot stage, the following happens in the GPT partition structure. GPT uses UEFI, which does not have the MBR procedure of storing the first stage of the bootloader in the boot sector and then calling the second stage of the bootloader. UEFI - Unified Extensible Firmware Interface - is a more advanced interface than BIOS. It can analyze the file system and even download files itself.
After turning on your computer, UEFI first performs system configuration functions, just like BIOS. This includes energy management, setting dates and other system management components.
UEFI then reads the GPT - GUID Partition Table. GUID stands for Globally Unique Identifier. GPT is located in the first sectors of the disk, just after sector 0, where the master boot record for the Legacy BIOS is still stored.
GPT defines the partition table on the disk where the EFI boot loader recognizes the EFI system partition. The system partition contains bootloaders for all operating systems installed on other partitions of the hard drive. The bootloader initializes the Windows boot manager, which then boots the operating system.
For Linux kernel operating systems, there is an EFI-enabled version of GRUB that loads a file, such as grub.efi, or an EFI boot loader, which loads its own file, such as elilo.efi.
You may notice that both UEFI-GPT, And BIOS-MBR transfer control to the bootloader, but do not directly load the operating system. However, UEFI does not require you to go through multiple bootloader stages like BIOS. The boot process occurs at a very early stage, depending on your hardware configuration.
Differences between GPT and MBR partition structures
If you've ever tried to install Windows 8 or 10 on a new computer, you've probably seen the question: which partition structure to use, MBR or GPT.If you want to know more or are planning to install a new operating system on your computer, then read on. We've already looked at differences in boot processes that are worth keeping in mind when partitioning a disk or choosing a partition structure.
GPT is a newer and more advanced partition structure, and it has many advantages, which I will list below. MBR has been in use for a long time, it is stable and has maximum compatibility. Although GPT may eventually replace MBR as it offers more advanced features, in some cases only MBR can be used.
Master Boot Record
MBR is a traditional structure for managing disk partitions. Since it is compatible with most systems, it is still widely used. The master boot record is located in the first sector of the hard drive or, more simply, at the very beginning. It contains a partition table - information about the organization of logical partitions on the hard drive.The MBR also contains executable code that scans partitions for the active OS and initiates the OS boot procedure.
An MBR disk allows only four primary partitions. If you need more, you can designate one of the partitions as an extended partition, and you can create more subpartitions or logical drives on it.
The MBR uses 32 bits to record the partition length, expressed in sectors, so that each partition is limited to a maximum size of 2 TB.
Advantages
- Compatible with most systems.
- Allows only four partitions, with the ability to create additional subpartitions on one of the main partitions.
- Limits the partition size to two terabytes.
- Partition information is stored in only one place - the master boot record. If it is damaged, the entire disk becomes unreadable.
GUID Partition Table (GPT)
GPT is a newer standard for defining the partition structure of a disk. Globally unique identifiers (GUIDs) are used to define the structure.This is part of the UEFI standard, meaning a UEFI-based system can only be installed on a drive that uses GPT, such as the Windows 8 Secure Boot feature.
GPT allows for an unlimited number of partitions, although some operating systems may limit the number to 128 partitions. There is also virtually no limit on partition size in GPT.
Advantages
- Allows an unlimited number of sections. The limit is set by the operating system; for example, Windows allows no more than 128 partitions.
- Does not limit partition size. It depends on the operating system. The maximum partition size limit is greater than the capacity of any disk available today. For drives with 512-byte sectors, a maximum supported size of 9.4 ZB (one zettabyte is equal to 1,073,741,824 terabytes)
- GPT stores a copy of the partition and boot data and can recover the data if the main GPT header becomes corrupted.
- GPT stores cyclic redundancy checksum (CRC) values to verify the integrity of its data (used to verify the integrity of GPT header data). If corrupted, GPT can notice the problem and attempt to recover the corrupted data from another location on the disk.
- May not be compatible with older systems.
GPT vs MBR
- GPT allows an unlimited number of primary partitions, while MBR allows only four primary partitions and the rest are secondary.
- GPT allows you to create partitions of any size, while MBR has a limit of 2 TB.
- GPT stores a copy of the partition data, allowing it to be restored if the main GPT header becomes corrupted; MBR stores only one copy of partition data in the first sector of the hard disk, which can lead to the loss of all information if partition information is damaged.
- GPT stores checksum values to verify that data is not corrupted and can perform necessary recovery from other areas of the disk if corruption occurs; The MBR has no way of knowing if data is corrupted; you can only find out if the computer refuses to boot or the partition disappears.
Operating system compatibility
The first sector (sector 0) on a GPT disk contains an MBR protection record, which records that the disk has one partition that spans the entire media. In case of using older tools that only read MBR disks, you will see one large partition the size of the entire disk. The protective record is made to prevent the old tool from mistaking the disk as empty and overwriting the GPT data with a new master boot record.MBR protects GPT data from being overwritten.
Apple MacBooks" and use GPT by default, so it is not possible to install Mac OS X on an MBR system. Even though Mac OS X can run on an MBR disk, it is not possible to install on it. I tried this, but without success.
Most Linux kernel operating systems are GPT compatible. When installing Linux OS on the disk, GRUB 2 will be installed as the bootloader.
For Windows operating systems, booting from GPT is only possible on UEFI computers running 64-bit versions of Windows Vista, 7, 8, 10 and related server versions. If you bought a laptop with a 64-bit version of Windows 8, then there is a high probability that it has GPT.
Windows 7 and earlier systems typically install on MBR drives, but you can still convert partitions to GPT, as discussed below.
All versions of Windows Vista, 7, 8, 10 can read and use data from GPT partitions - but they cannot boot from such non-UEFI drives.
So GPT or MBR?
You can feel comfortable with both MBR and GPT. But considering the advantages of GPT mentioned earlier and the fact that modern computers are gradually switching to this technology, you may prefer GPT. If the goal is to support older hardware or need to use a traditional BIOS, then you are stuck with MBR.Check the hard drive partition type
On each Windows hard drive, you can check the partition type using Disk Management. To launch Disk Management, do the following:Press the Windows + R hotkey combination to open a window for launching programs.
Type diskmgmt.msc and press Enter.
Windows will scan your hard drives and show them shortly. To check the partition type of any hard drive, right-click on the disk plate at the bottom of the interface. You need to click on “Disk 0”, “Disk 1” and so on, and not on partitions.

In the context menu that appears, select “Properties”. A window with the properties of the selected disk will open.
Go to the Volumes tab and look at the Partition Style value.

If you prefer the command line, you can choose another option. Its advantage is that it is slightly faster, since it immediately displays drives and partition styles.
- Press the Windows key, type cmd.exe, hold Ctrl and Shift, press Enter.
- Confirm the UAC message about increasing system privileges.
- Type diskpart and press Enter.
- Type list disk and press Enter again.

All drives are listed. The Gpt column indicates the partition style for each disk. If you see an asterisk in the column, then it is GPT; if it is not there, it is MBR.
Convert between MBR and GPT during Windows installation
There are two common error messages that may appear when installing Windows on a hard drive:- Error #1: “Windows cannot be installed on this drive. The selected disk does not have a GPT partition style."
- Error #2: “Windows cannot be installed on this drive. The selected disk has a GPT partition style."
As you already know, MBR and GPT are two completely different hard disk partition structures. MBR is the traditional partition structure, while GPT is the newer one.
Error #1 occurs when you try to install Windows on a UEFI computer and the hard drive partition is not configured for UEFI mode or Legacy BIOS compatibility. Microsoft TechNet offers two options to resolve the issue.
- Reboot the computer in Legacy BIOS compatibility mode. This option will keep the current section style.
- Reformat the disk for UEFI using the GPT partition style. This option will allow you to use UEFI firmware features. You can do the reformatting yourself by following the instructions below. Always back up your data before formatting.
Instructions for converting a hard drive from MBR to GPT

Using Windows Setup
- Select the unallocated space and click Next. Windows will detect that the computer is booted in UEFI mode and will automatically reformat the drive using the GPT partition style. The installation process will begin immediately after this.
- Turn off your computer and insert a bootable Windows drive (USB or DVD).
- Boot from it in UEFI mode.
- Clean the disk: clean .
- Conversion to GPT is done with the convert gpt command.
Instructions for converting a hard drive from GPT to MBR
Sometimes it is necessary to convert a disk to an MBR partition structure. For example, if you receive the following error message during Windows installation:"Windows cannot be installed on this drive. The selected disk has a GPT partition style"
Booting from GPT is only supported on 64-bit versions of Windows Vista, 7, 8, 10 and corresponding server versions on UEFI systems. This error message means that your computer does not support UEFI, and therefore you can only use a BIOS that works with the MBR partition structure.
Microsoft TechNet offers two options to resolve the issue.
- Reboot the computer in BIOS compatibility mode. This option will keep the current section style.
- Reformat the disk using the MBR partition style. Always back up your data before formatting. Although there are third-party utilities that can convert disks to GPT while preserving the data, it is still safer to make a backup copy in case the utility fails to complete the conversion.
Using Windows Setup
- Turn off your computer and insert a bootable Windows drive (USB or DVD).
- Boot from it in UEFI mode.
- Select "Other" (Custom) in the installation type.
- A screen will appear asking “Where do you want to install Windows?” Select all partitions on the disk and click Delete.
- After successful removal, the disk will be a single area of unallocated space.
- Select the unallocated space and click Next. Windows will detect that the computer is booted in BIOS mode and will automatically reformat the drive using the MBR partition style. The installation process will begin immediately after this.
- Turn off your computer and insert a bootable Windows drive (USB or DVD).
- Boot from it in BIOS mode.
- From the Windows installation, press Shift+F10 to open the console. After each next command, press Enter.
- Run the diskpart tool with the diskpart command.
- To select the disk to convert, type list disk .
- Specify the disk number to convert: select disk # .
- Clean the disk: clean .
- Conversion to GPT is done with the convert mbr command.
- Type exit to exit diskpart.
- Close the console and return to the Windows installation.
- When choosing an installation type, select "Other". The disk will be a single area of unallocated space.
- Select the unallocated space and click Next. Windows will begin installation.
Read, how to convert MBR and GPT in Windows 10. Why does this lead to data loss and how to avoid it. Historically, during the initial boot of a computer, the BIOS initialized devices and transferred control to the operating system (hereinafter referred to as OS). To do this, he accessed the logical partition table, which is stored in the Master Boot Record of the disk. The disks described in the MBR had a maximum size of 2 TB and their number did not exceed 4. The capabilities of modern hard drives required improved software and GPT replaced MBR.
Content:
GPT is an abbreviation for GUID Partition Table, which has a limit of 128 partitions and a disk size of 9.4 zettabytes. But in order to boot the OS from a GPT disk, the computer must operate in UEFI (Unified Extensible Firmware Interface) mode, which replaced the BIOS.
Why convert MBR and GPT on Windows 10?
From the above, it is clear that MBR supports partitions up to 2 TB. What does this mean? For example, if the logical disk size is 3 TB, then 1 TB will be defined as unallocated area in Windows 10 and you will not be able to use it. To overcome this limitation, users need to convert MBR to GPT.
In addition to hardware limitations, 32-bit operating systems (Windows XP, Windows 2003, Windows 2000, Windows NT4) also do not support GPT disks. On these operating systems, the GPT disk will be shown as protected, and you will not have access to the data on it until you convert it to MBR.
However, progress does not stand still and many Windows 10 users will have the opportunity to convert MBR to GPT and vice versa, depending on their needs.
How to convert MBR and GPT on Windows 10?
For Windows 10 users, there are two ways to convert MBR to GPT and vice versa. Let's look at it in detail.
Disk management
Disk Management is a built-in Windows 10 tool that gives you the ability to modify (create, delete, grow, shrink) partitions, convert them to GPT or MBR.
Use this tool:
- Open the window by clicking “This PC” > “Manage” > “Disk Management”;
- Right-click on the drive you want to convert (for example, “Disk 0”). In the pop-up window, you will see the “Convert to GPT disk” function inactive.
With this tool you can convert to MBR or GPT only if there are no partitions on the disk. You need to delete all partitions on Disk 0 and then convert MBR to GPT and vice versa.
Command line
Command Prompt is a built-in Windows 10 tool that can organize partitions and convert MBR to GPT. The command line allows you to convert MBR to GPT and vice versa only if the disk you plan to work with does not have partitions.
So, we do the following:
- Click "Start"> enter "Command line" and run it as administrator;
- Enter "diskpart" and press "Enter";
- Enter "list disk" and press "Enter";
- Enter "select disk N" and press "Enter". "N" is the number of the drive you want to convert (for example, "Disk 0");
- Enter "clean" and press "Enter" to delete all partitions or volumes on the selected disk;
- Enter "convert mbr" and press "Enter" to complete the conversion with GPT V MBR format.
Both of these methods make it possible to convert an MBR disk to GPT and vice versa. But both methods require deleting all partitions from the disk, and you are at risk of losing data. Therefore, before you start the conversion process, make a backup of all the data that will be deleted and then restore it.
Reasons for data loss
There are a number of programs from different manufacturers that allow you to carry out such conversions without losing data. They do not require deleting all partitions. But nevertheless, the risk of data loss still exists, and you need to be prepared for it. After all, there is a possibility of information loss during any operations with partitions and/or disks. For which, as stated above, it is necessary to at least make a backup copy of the data.
But if you do not have the opportunity to use such programs or you realized late that you made a mistake by not using them, you can restore your files using special data recovery programs. And in this case, Hetman Partition Recovery is perfect for you! After all, this program finds all previously created disk partitions and displays them to the user for further analysis and search for deleted information.
Reasons why your data will not be accessible after converting from MBR to GPT:
- You need to install a 32-bit OS, which will not install on a GPT disk;
- The computer uses “old hardware” with a BIOS, and you plan to install a 64-bit OS on this hard drive;
- You plan to use an external USB drive as a boot drive for computers with a BIOS system;
- You have several operating systems installed on your disk with a bootloader that does not support GPT;
- Do you plan to use a USB drive as file storage with a router, TV, car radio, etc.;
Reasons why your data will be lost after converting from GPT to MBR:
- Partitions larger than 2 TB cannot be described in the MBR;
- If the disk is divided into more than 4 logical partitions, it will not be possible to convert it to MBR;
Therefore, our advice is to approach the issue of converting disks from MBR to GPT and vice versa, thoughtfully and with understanding.