Do I need to tear down Windows before installing a new one? This page allows you to enable or disable
Every Windows user knows that he is the best effective method To resolve problems related to the operation of the operating system, reinstall Windows. However, if you have not yet encountered the procedure Windows installations, then without detailed instructions not enough. In this article you will find step-by-step instructions that will allow you to reinstall Windows 7.
Reinstalling Windows 7 will occur in three main stages:
1. Creating a bootable USB flash drive or disk with Windows 7 OS;
2. Entering the BIOS to select a bootable USB flash drive or disk as the main one boot device;
3. Process Windows reinstallation 7.
Stage 1. Creating a bootable USB flash drive or disk with the OS
To be able to install Windows on a PC or in case of serious problems, it must be recorded on removable media– flash drive or disk.
In the case of a disk, you will need an empty DVD-R or DVD-RW disc, and in the case of a flash drive, any capacity of 4 GB or more will do.
To burn a flash drive or disk, you can use the program Ultra ISO , the link to which is at the end of the article.
After UltraISO installations launch the program window and go to “Boot” – “Record” image of Hard disk" . Next in the field "Disk Drive" enter the drive letter or flash drive, and next to "Image file" indicate the path to Windows image 7 saved on PC. Then click on the button "Format" to prepare the media for recording, and then the button "Record" .
Once completed, you can proceed to the Windows reinstallation procedure.
Step 2. Entering the BIOS to install a bootable USB flash drive or disk as the primary boot device
Once the Windows media is prepared, you will need to set it as the first boot device. To do this you will need to get into the BIOS.
Typically, entering the BIOS is done as follows:
1. Click "Start" and go to;
2. As soon as the computer restarts, you need to press the button on the keyboard that is responsible for going to the BIOS. Typically this is the key F2, but if it doesn’t work, reboot again and try the keys F1, F8 And Del.
3. If you are unable to enter the BIOS, then, as a rule, at an early stage of turning on the computer, the name of the required key may be displayed on the screen.
4. You have successfully entered the BIOS when you see the settings menu on the screen.
Now let's move on to installing the boot device. To do this, use the arrows to navigate and Enter key to select, go to section "Advanced Bios Features" - "First Boot Device" and select your flash drive or CD-ROM. Click item "Save and Exit" to exit the BIOS (option names may vary slightly).

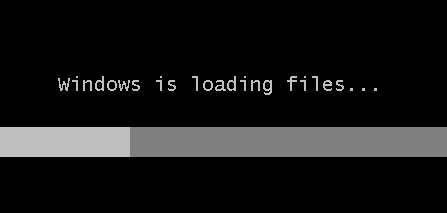
If you did everything correctly, you will see a black screen with a Windows loading bar on your screen.
Stage 3: Reinstall Windows 7
Wait a while for a window to select a language to install Windows 7 to appear on the screen. After setting the language settings, click on the button "Further" .

Select a button "Install" .


Select the drive where you want to reinstall Windows, and then select the option just below "Disk Setup" .

Click the button "Format" . Please note that the formatting procedure will delete all files and data that were previously stored on the selected drive.

After waiting for the process to complete, a window will appear on the screen in which you need to specify the user and computer name.

Next, you will need to provide a password to protect your account. If necessary, this procedure can be skipped.


Select one of three computer protection options and finally select your time zone.

After waiting a couple of minutes, a clean desktop will appear on the screen. This completes the Windows reinstallation procedure, and you can begin setting up and using your computer.
Greetings, dear readers.
There are several ways to clean your computer from the old operating system. So, for example, a new one can be placed on another HDD, and the previous one can simply be deleted manually. Or, during installation, simply specify the same partition, and later also try to deal with the previous OS manually. All this usually leads to early failure of the new version.
But how to remove Windows xp correctly? By and large the most effective method is HDD formatting. If you decide to take this step, it means you most likely want to install more new version Microsoft OS is the seventh. Therefore, I will tell you how to do this from under the installation process of this particular operating system.
It is necessary to say right away that we need a plastic disk or flash drive with the Win 7 distribution. Next, we follow the simple step-by-step instructions:
It’s worth noting right away that along with Windows, other files that were on this partition will also disappear, including the desktop and “My Documents”. As a result, you will get a completely clean disk.
Uninstalling Windows 7( )
If you don't take the Vista version, the next successful OS after XP can safely be called the seventh. Usually it is installed on the computer, and for some reason users want to say goodbye to it. In most cases it is proposed to put more new modification– 8 or 8.1. So I’ll tell you how to remove old version from under the installation menu of the new operating system.
In addition, you can completely delete the disk on your computer and then create it again - the essence will not change, and the system will automatically split it into sectors and tracks.
Uninstalling Windows 8( )
After Microsoft released the tenth version of the operating system to the market, which is suitable not only for laptops and computers, but also for mobile devices, many began to switch to it. Others were skeptical about the new product. But after several major updates, Win 10 was able to win over most of the users. And at the same time there was no need to purchase new equipment - everything software Perfect for devices that previously had earlier versions installed.
If you decide to uninstall Windows 8, it’s worth noting right away that in general the process is exactly the same as in previous versions. The only difference is that when you select a partition to install, there is no button “ Formatting" For it to appear, you must click "". And then select the section and format it. Here you don’t even need to watch the video - everything is clear.

It is important to remember that it is advisable to first find out exactly where previous version systems so as not to accidentally say goodbye to personal information. By the way, if you are wondering how to remove Windows 10, do the same.
Using a third party program( )
Another very popular method used by professionals is to connect a separate utility. There are a lot of such programs, but the highest quality and most effective can be safely called Acronis Disk Director. The program has a wide range of functionality, including the ability to work with sections of hard disk without loading the operating system. However, I have already talked about the operation of this program. You can find all necessary information by going to .

In addition to the above, you can also use ERD Commander. So, the application suggests creating boot disk. There's nothing complicated about it. Just use the tips that will appear as you work.

Then insert the prepared disk or flash drive and restart the computer. Again, go to the BIOS and indicate booting from the location we need. We save and exit. Next, at startup, a menu will appear where we need to select “”. A new window will open. Requests will appear in it one after another. Users just have to press the button " Further" This must be done before the menu appears " Disk Cleanup" Here we select desired area and confirm the actions.

It is important to note that without a disk or a separate flash drive you will not be able to do anything, since the OS is located on the HDD - it simply cannot remove itself. This is why you need to use separately prepared portable devices.
Well, as you can see in general, the removal Windows different versions on a computer comes down to the same simple principles. Therefore, everyone can perform all the necessary actions.
I hope you found the answers you needed to your questions and learned new information. Subscribe and you can solve any computer-related problems.
How to remove Windows?


Quite often it happens that when the next version of the operating system is released Microsoft users they install it not instead of the previous one, but next to it. This step is justified as an experiment. It allows you to identify the advantages and disadvantages of the new OS without uninstalling the old one.
When everything has been tested from your own experience, it is advisable to get rid of one of the Windows, as this will significantly increase the free HDD space. It’s not difficult to demolish Windows on a laptop or desktop computer. Any user can handle this.
Loader
Before proceeding directly to the demolition of Windows, you need to remove it from the bootloader. If you skip this step, when you turn on the computer, the system selection menu to boot will appear as before. To prevent this from happening, you should:
- load the operating system you want to keep;
- enter the Start menu;
- In the “Search programs and files” window, enter “msconfig”;
- press the “Enter” key on the keyboard;
- in the window that opens, select the “Download” tab;
- click on the line with the system you want to leave;
- click the “Use as default” button;
- click on the line with the system you want to demolish;
- click the “Delete” button;
- click the “Apply” button;
- press the “OK” button.
Now the bootloader program will “see” and use only one OS.
Data
An important step in removing an unwanted OS version is saving user files on her system partition. Once the work is completed, this will not be possible. Therefore, it is recommended to carefully review the disc for the presence necessary files(including in the “My Documents” folders of all accounts). After copying everything you need to another partition, you can proceed to the final stage.
Formatting
This step will directly be the removal of Windows itself. It can be implemented both through BIOS (we wrote about this in the article) and through special programs.
We use Acronis Disk Director( or ). Demolition of Windows in it goes like this:
- launch Acronis Disk Director as administrator;
- click on the disk with the system that you want to delete;
- Click the “Format” button on the left panel of the program;
- confirm the choice;
- Click the “Apply scheduled operations” button;
- We agree with all warnings.
Personally, I am satisfied with the operating room Windows system 7 on my laptop, I’ve already gotten used to it and fixed some glitches that I had. But the other day, while talking with a friend, I heard his opinion about this OS, and also that problems arise if you decide to uninstall the “seven” yourself and install the usual XP. Indeed, if you decide to remove Windows 7, you better observe some subtleties in this work.
What is needed to remove Windows7?
I want to warn you right away that if you have never dealt with such serious matters as removing an operating system before, then it is better to have a specialist do it for a certain amount of money. If you have some experience in reinstalling operating systems, then prepare the essentials:
Your laptop with Windows 7
Flash card with a USB connector, at least 4-8 GB
A CD with the operating system you want to install (for example, Windows XP)
And of course, access to the Internet.
Attention!
When you are removing Windows 7 from your laptop for the first time, do not rush to format the hard drive. A fully functional computer will be very useful to you in order to prepare the files that will be needed when installing a new OS.
How to proceed?
For convenience, I will outline the process step by step. uninstall Windows 7 from a laptop, smoothly transitioning to installing Windows XP.
You need to start working by searching for the necessary drivers for hard drive. Often, when trying to install Windows XP on a laptop, problems arise with definition of hard disk. You can avoid such a disaster by searching on the laptop manufacturer’s website necessary drivers(“by default” your laptop will not have them).
In the Download Center you need to download the files you need, unzip and copy to a flash card (you can use external hard drive with USB connector).
You will need to download the installation image Windows disk and burn it to disk (you can use ISO program File Burning). Do not remove this disc after recording is complete, insert the flash card with the recorded hard drive drivers and reboot your laptop.
When the laptop starts booting, press and do not release the F8 key; when the menu for quickly changing the boot device appears, use the Internal DVD-Rom item, click on any key to start booting from the disk.

Next, follow the instructions step menu when the boot program prompts you to select partitions, or says that the hard drive is missing. You need to select the “Install drivers” menu item, for which write down the path to the USB drive. After the driver installation is complete, remove the flash card.
When the program detects the hard drive, find the partition with Windows 7 installed. Then select “Format to NTFS” and click Enter. 
During the installation of OS XP, the laptop will reboot several times on its own. Do not pay any attention to this and do not try to interfere with it, the device will boot from the hard drive itself.
Now all you have to do is go to the laptop manufacturer’s website and download drivers for motherboard and other devices necessary for normal functioning laptop. Just don't forget that you need drivers for Windows XP.
That's all, actually. Good luck with your work on the usual XP.
Today there will be a post on how to remove the old Windows and cleanly install the new operating system.Here, I will tell you how to completely remove Windows. For some reason, many people don't understand this.
What does it mean to demolish Windows?
Removing Windows means formatting the disk with installed Windows and install it on a blank disk. If we talk in simple words, demolishing Windows means correctly removing the old Windows.
Windows installers are divided into 2 types.
The first ones write it to disk. Launch the disk from under the old Windows and begin the installation. This WRONG SOLUTION installation of any Windows.
For correct installation Windows Xp, 7, 8, 10 - you will need to run the disk or bootable USB flash drive, AFTER rebooting the computer and BEFORE loading the old Windows.
First, you need to restart your computer and go into bios. In some cases, it is necessary to set support usb adapter V bios settings (or your keyboard and mouse will not respond to pressing and the Windows installation disk will not start)
After this, you need to set either disk loading or flash drive loading (depending on what you are doing the demolition of Windows and clean install Windows)
If the key is not pressed, then you should set usb support (this is written above)
So the disk started loading. We wait and press next. We need a moment when we can delete partition C:
Windows demolition occurs after deleting partition C:(most likely Windows is installed there)
Now, let's choose unmarked area and install Windows there.
This way you will delete EVERYTHING OS from your computer and install just one. This method is suitable for any Windows Xp/7/8/10. Now you know how remove Windows correctly and install new Windows Xp/7/8/10 I advise you to do this in every manual!
P.S: This method is suitable for installing any builds of Windows. I love it Windows assembly It is recommended to install according to this manual. Do not run the disk under Windows, load it correctly!