Is it possible to take a screenshot on a computer? How to take a screenshot on a computer using the Print Screen key
In computer activities, situations arise when you need to save an image from the monitor screen, or, as they say, take a screenshot of the screen. A screenshot is often also called a printscreen. You can do them using built-in functions operating system, and using specially designed programs that may have additional functions and provide additional convenience in taking screenshots.
How to take a screenshot in Windows. On all operating systems Windows family(XP, Vista and Windows 7) the screenshot is created in the same way. To do this, you just need to press a button PrtSc on keyboard. PrtSc is an abbreviated version of PrintScreen, which in our opinion is read as a printscreen, or screenshot. On some types of keyboards this button can be signed as Print Screen/SysRq.
When you press this button, the entire visible part of the monitor screen, that is, everything that you see on it, is transferred to the clipboard. If you are not satisfied with this and want to get an image of only the active window, without Windows menu and other unnecessary elements, you can use the key combination PrtSc+Alt. First, press Alt, and then PrtSc, and as a result, the image of only the active one will be copied to the clipboard. this moment window. Thus, we almost completed the task and received a screenshot, but for now it is in our special department random access memory computer - clipboard. To save it as an image, you need to open any graphic editor (you can use the built-in Paint), create new document and insert an image from RAM into it by pressing the Ctrl+V key combination. First press the Ctrl button and then V ( english letter V). In modern graphic editors, the size of a new document when you copy an image into it will automatically adjust to the size of your screenshot. You don't need to specify them manually.
After you copy your screenshot into a new document, you can perform various editing operations. Resize, cut desired area, add the necessary captions, change brightness, contrast and other parameters as needed. In conclusion, you only need to save the image by giving the file a unique name and choosing one of possible formats jpeg, gif, png, tiff or bmp. At this point, the question of how to take a screenshot of the screen using the built-in tools of the operating system can be considered closed.
In many computer games, developers provide for creating screenshots by pressing a key F12. They will be saved in the My Documents folder.
There are also various options for taking screenshots. third party programs and utilities. The most famous of them: Paparazzi, Floomby, Magic Screenshot, Jing and many others. If you wish, you can familiarize yourself with the functions of each of these programs on their official websites and select the one you need based on your needs.
How to take a screenshot on a laptop.
As you know, laptop keyboards have an incomplete set of buttons. This is due to the lack of space allocated for the keyboard. Therefore, the PrintScreen button in them can be combined with another key. You can press it using the Fn button located at the bottom left of the keyboard. In all other respects, the process of taking a screenshot is no different from taking it on a full keyboard.
How to take a screenshot on Mac (Mac).
Over the past few years, computers from Apple began to enjoy increased popularity. When those users who have worked in Mac for a long time switch to Mac Windows environment, then they are horrified to discover that many things that they have already become accustomed to and brought to automaticity in Mac OS do not work. But this does not mean that they are not there at all. In practice, taking a screenshot on a Mac using the operating system is even easier than on Windows. To do this you do not need to use graphic editor, since the image of the eran is saved directly into the image literally in one step.
All you need to do is press the keyboard shortcut Shift+Cmd+3. First press the Shift button, then Cmd and then the number 3 on the keyboard. As a result, a print screen of the entire screen area will be saved on the computer desktop as a file with the name “Screenshot 2012-02-29 at 17.44.09” and the extension .png. The time and date in your file name will, of course, be different.

In order to take a screenshot of part of the screen in Mac OS, you must press a keyboard shortcut Shift+Cmd+4.

The cursor will look like this. You need to put it to the left top corner area from which you will take a screenshot, press left button mouse and without releasing it, select the required area. As soon as you release the left button, a screenshot will be taken and saved on the computer desktop.
In conclusion of the article, I would like to remind you that when creating screenshots and posting them online, you should always check that they do not contain private information that could be used by attackers. Happy shooting!
Hello.
Who among us has not wanted to capture some episode on a computer screen? Yes, almost every novice user! You can, of course, take a picture of the screen (but this is too much!), or you can take a picture programmatically - that is, as it is correctly called, a screenshot (the word came to us from English - ScreenShot) ...
You can, of course, take screenshots (by the way, they are also called “screens”) and in " manual mode"(as described in this article:), or you can configure one of the programs presented in the list below once and receive screenshots by pressing just one key on the keyboard!
It is about such programs (more precisely, about the best of them) that I wanted to talk about in this article. I will try to present some of the most convenient and multifunctional programs of their kind...
F astStone Capture

FastStone Capture window
One of best programs to take screenshots! She has helped me out more than once and will help me out again :). Works in all versions of Windows: XP, 7, 8, 10 (32/64 bits). Allows you to take screenshots from any windows in Windows: be it a video player, a website or some program.
I will list the main advantages (in my opinion):
- the ability to take a screenshot by setting up hot keys: i.e. press the button - select the area you want to screenshot, and voila - the screenshot is ready! Moreover, hotkeys can be configured to save the entire screen as a screenshot, separate window, or selecting an arbitrary area (i.e. very convenient);
- after you have taken a screenshot, it will open in a convenient editor where you can process it. For example, change the size, add some arrows, icons and other elements (which will explain to others where to look :));
- support for all popular image formats: bmp, jpg, png, gif;
- possibility of auto-loading when Windows startup- thanks to which, you can immediately (after turning on the PC) take screenshots without being distracted by launching and configuring the application.
S nagit
![]()
Very popular program to take screenshots. Possesses a huge amount settings and various options, for example:
- the ability to take screenshots of a specific area or the entire screen, separate screen, scrolling screenshots (i.e. very large tall screenshots 1-2-3 pages high);
- converting one image format to another;
- There is convenient editor, which will allow you to carefully trim the screen (for example, make it with uneven edges), add arrows, watermarks, change the size of the screen, etc.;
- Russian language support, all Windows versions: XP, 7, 8, 10;
- there is an option that will allow you to take screenshots, for example, every second (well, or at the time interval that you set);
- the ability to save screenshots to a folder (each screen will have its own unique name. The template for specifying the name can be customized);
- the ability to customize hot keys: for example, you configured buttons, clicked on one of them - and the screen is already in the folder, or opened in the editor in front of you. Convenient and fast!

Options for creating screenshots in Snagit
The program also deserves the highest rating, I recommend it to absolutely everyone! Perhaps the only negative is that functional program worth some money...
G reenShot
Another cool program that allows you to quickly get a screenshot of any area (in almost 1 second! :)). Perhaps it is inferior to the previous one only in that it does not have such large quantity options and settings (although this may be a plus for some). However, even those that are available will allow you to quickly and easily make high-quality screenshots.
In the program's arsenal:
- a simple and convenient editor in which screenshots are saved by default (you can save them automatically directly to a folder, bypassing the editor). In the editor you can change the size of the picture, crop it beautifully, change the size and resolution, and add arrows and icons to the screen. In general, very convenient;
- programs support almost everything popular formats pictures;
- practically does not load your computer;
- made in the style of minimalism - i.e. there is nothing superfluous.
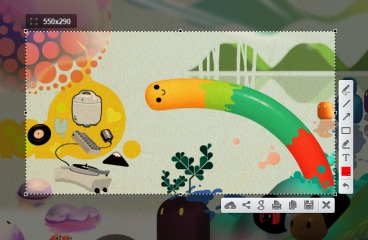
By the way, the view of the editor is shown in the screenshot below (such a tautology :)).

Fraps
(Note: a special program for creating screenshots in GAMES)
This program is designed specifically for creating screenshots in games. But not every program can take a screenshot in a game, especially since if the program is not designed for this, your game may freeze, or you may experience lags and freezes.
Using Fraps is very easy: after installation, run the utility, then open the ScreenShot section and select hotkey (which will take screenshots and send them to the selected folder. For example, the photo below shows that hot button F10 and screenshots will be saved to the folder “C:\Fraps\ScreenShots”).
The screen format is also set in the same window: the most popular are bmp and jpg (the latter allows you to get screenshots very small size, however, they are a little inferior in quality bmp).

Fraps: ScreenShot settings window
An example of how the program works is presented below.

Screen from computer game Far Cry(reduced copy).
By the way, in order for screenshots to be saved on your desktop and not uploaded to the Internet, you only need to adjust one switch in the program settings. Click on the program icon in the lower right corner of the screen and select the “save location” option.

Where to upload screenshots - ScreenCapture
In addition, if you save pictures to your desktop, you can select the format in which they will be saved: “jpg”, “bmp”, “png”. It's a shame the "gif" is missing...

How to save screenshots: choosing a format
Generally, great program, suitable even for completely novice users. All main settings are displayed in a prominent place and can be easily changed. Moreover, it is completely in Russian!
Among the shortcomings: I will highlight the installer, which is quite large in size - 28 MB * (* for this kind of program this is a lot). And also the lack of support for the gif format.
Light Shot
(Russian language support + mini-editor)
A small and simple utility for creating and easily editing screenshots. After installing and launching the utility, to create a screenshot, just click on the “Preent Screen” button, and the program will prompt you to select an area on the screen, as well as where you will save this picture: on the Internet, on your hard drive, on social media networks.
Light Shot - selecting an area for the screen.
In general, the program is so simple that there is nothing more to add :). By the way, I noticed that using it it is not always possible to screen some windows: for example, with a video file (sometimes, instead of a screen, there is just a black screen).
J Shot
Developer website: http://jshot.info/
A simple and functional program for creating a screenshot of the screen. What’s especially pleasing is that this program has the ability to edit a photo. Those. After you have taken a screenshot of an area of the screen, you are offered a choice of several actions: you can immediately save the picture - “Save”, or you can transfer it to the editor - “Edit”.

This is what the editor looks like - see photo below

Screamshot Creator
A very “light” (weighs only: 0.5 MB) program for creating screenshots. Using it is very simple: select a hotkey in the settings, then click on it and the program will prompt you to save or discard the screenshot.

Screenshot Creator - taken screenshot
If you click save: a window will open in which you will need to specify the folder and file name. In general, everything is quite simple and convenient. The program works very quickly (even if the entire desktop is captured), and it is also possible to capture part of the screen.
P icPick (in Russian)
Very convenient program for editing screenshots. After launch, it offers several actions at once: create an image, open it, determine the color under your mouse cursor, and capture the screen. Moreover, what is especially pleasing is that the program is in Russian!

PicPick Image Editor
How do you proceed when you need to take a screenshot and then edit it? First, screenshot it, then open some editor (Photoshop for example), and then save it. Imagine that all these actions can be done with one button: the picture from the desktop will be automatically loaded into a good editor that can handle most of the most popular tasks!

PicPick image editor with added screenshot.
Shotnes
(With the ability to automatically post screenshots on the Internet)
A very good screen capture utility. After you remove the desired area, the program will offer several actions to choose from:
- save the picture to HDD your computer;
- save the picture on the Internet (by the way, it will automatically place a link to this picture on the clipboard).
Eat small opportunities editing: for example, highlight some area in red, draw an arrow, etc.
Shotnes Tools - Shotnes tools
For those who develop websites - a pleasant surprise: the program has the ability to automatically convert any color on the screen into code. Simply left-click on the square area, and without releasing the mouse, move to the desired location on the screen, then release the mouse button - and the color is determined in the “web” line.
Define color
S creen Presso
(screenshots with the ability to scroll the page, to create high-height screenshots)
A unique program for creating high-height screenshots (for example, 2-3 pages high!). By at least, this function, which is in this program, is rare, and not every program can boast of similar functionality!
I’ll add that the screenshot can be made very large, the program allows you to scroll the page several times and capture everything in full!
Video recording / Snapshot of the selected area.
S upper Screen
(Note: minimalism + Russian language)
A very small screen capture program. Required for operation installed package Net Framework 3.5. Allows you to perform only 3 actions: save the entire screen into a picture, or a pre-selected area, or an active window. The program does not fully justify its name...

SuperScreen - program window.
E asy Capture
But this program fully lives up to its name: it takes screenshots easily and quickly, just by pressing one button.
By the way, the good news is that she immediately has a mini-editor in her arsenal, reminiscent of regular paint - i.e. you can easily edit your screenshot before posting it for public viewing...
Otherwise, the functions are standard for programs of this kind: capturing the entire screen, active window, selected area, etc.

EasyCapture: main window.
Lip2Net
(Note: light and quick addition screenshots on the Internet + receiving short link on the screen)
Quite a popular program for creating screenshots! I’ll probably say a banality, but “it’s better to try once than to see or hear 100 times.” Therefore, I recommend that you launch it at least once and try to work with it.
After starting the program, first select the function of capturing part of the screen, then select it, and the program will open this screenshot in the editor window. See below picture.

Clip2Net - a screenshot of part of the desktop was taken.

Results of publishing the screenshot on the Internet.
-----------------------
This concludes the review of the best programs (in my opinion) for capturing the screen and creating screenshots. I hope that you find at least one graphics program useful. I would be grateful for any additions on the topic.
For taking a screenshot of the screen in Windows 7, 10 and more earlier versions The system responds with a button on the keyboard called Print Screen. Most often its abbreviated name is indicated - Prt Scr. The key is usually located in the upper center or right side of the keyboard, just behind the F1-F12 row. Before you click on it, make sure the screen is displayed exactly the way you want to capture it. The most difficult thing for a beginner begins precisely after clicking on Print Screen, since at first it is not clear where the screenshot is saved. But it is the user himself who determines the path for the location of the screenshot, which requires a few more steps.
Open any image editor, for which the standard one is quite suitable Windows program– MS Paint. The application is located in the section standard programs, accessible through the Start menu. Once MS Paint starts, click on the “Edit” menu section and select “Paste.” The screenshot of your computer screen will immediately appear in the main field of the program. The same action of inserting an image can be performed using the Ctrl + V button combination. Make sure you are happy with the screenshot. Otherwise, you can use the program's tools to fix it, for example, select and trim off excess edges or flip the image. After that, go to “File” - “Save as..”, where you need to specify the folder to save the screenshot and click “Save”. The image will immediately appear in the selected folder and will be available for further use.
Here are the advantages and disadvantages of the described method to take a screenshot of the screen on a computer using the keyboard. Its advantages are as follows:
- comparative simplicity and accessibility;
- compatible with all versions of Windows;
- data security.
Despite the number of actions required to obtain and save a screen, the “Print Screen + Paint” method remains the most accessible and understandable for both beginners and advanced users. It is not necessary to resort to assistance to obtain an image. third party programs and people, which helps prevent personal data leakage and computer virus infection. However, this method also has disadvantages:
- a large number of actions;
- tangible time costs;
- keyboard addiction.
The method of capturing the screen via the Prt Scr key takes some time to get used to, so there is often confusion in the sequence of actions, which is why you have to turn to the help of specialists again and again. In addition, not everyone may have a working keyboard with the desired key, so every self-respecting user personal computer obliged to look into additional ways getting the coveted photo.
How to take a screenshot on a computer if there is no Print Screen button
Many users are interested in how to take a photo of a laptop if the necessary Print Screen button is missing? To begin with, it’s still worth looking for it, because, as mentioned earlier, it can be called differently: Prt Scr, PrScr, or even just have a screen icon. The location of the key may also vary depending on the equipment. However, the oldest computers, which are still installed in many Russian offices, do not really have a Print Screen button. In this case, special programs will come to the rescue, with the help of which you can easily take a screenshot of the screen on a computer or. Applications will also become great solution for those who simply want to reduce the time it takes to create and save a screenshot.
There are a great many different programs for creating a screenshot, but it is best to immediately pay attention to the simplest and free apps, which have long proven themselves well among ordinary users. If you try to install the first program you come across on the Internet, there is a big risk of simply not understanding all its functions or, even worse, of catching a virus from a site where attackers operate. So, one of best apps Lightshot is considered to be of its kind. The program is quickly installed and integrated into the system, starting to run when it starts. In the settings, you can assign any key to take a screenshot, and after pressing it, the image is immediately saved to a folder convenient for the user. Thus, it is created in just one step.
You can use the closest analogue of Lightshot - the Screenshoter program, which has similar functionality and which also allows you to take a screenshot of the screen in one action. Snagit and Clip2net are quite good in terms of convenience, which also have their own image editor that allows you to quickly and easily process the resulting screen. However, there are also certain disadvantages to the method of photographing the screen using applications:
- not compatible with all versions of Windows;
- deterioration of system performance;
- time required for development.
Alas, most programs do not actually work on the oldest computers, and if they are installed, they significantly slow down the system if the hardware configuration is weak. In addition, it will take some time to learn all the functions of the program and remember how to use it. However, in further process Creating screenshots can be simplified tenfold. Thus, each user decides in his own way which method suits him best. If you rarely have to take a screenshot of the screen on your computer, it will be enough to remember the “Prt Scr + Paint” procedure, but if such a need arises every day, you should think about choosing a program that is suitable for convenience.
Hello, dear readers of the blog site. Taking a screenshot may be necessary in many cases. This could be, for example, when you encounter a problem and you want to send a screenshot or error to another user to solve it, or you want to explain step by step how to do some series of actions. For each case there is the most The best way how to take a screenshot on a computer.
For example, why install a program to take screenshots from your computer screen if you only need to send one photo. And in another version - why complicate your life by using standard using Windows to take screenshots frequently. I will tell you what I use myself and you will know which products are best for your specific case.
How to take a screenshot on your computer using Windows tools
Using the PrintScreen key you can take three screenshots at once different ways. The only thing is the differences in the version of your operating system.
The first method is to take a screenshot of the entire screen.
1. Press the “PrintScreen” key on the keyboard, which, depending on the keyboard, may be called “PrtScn”, “Prnt Scrn”, “Print Scr” or something similar. It is usually located as in the image below.

The copied image, after clicking on “PrintScreen,” goes to the clipboard without any notification and to extract it, you must use any image editing program. The simplest one would be to use Paint programs, which comes as part of the operating system.
2. Launch the “Paint” program.

3. In the program, click on the “Insert” button and the image of the entire screen will appear in the editor window. To save to a file, click on the floppy disk and save it so that you can then insert a screenshot of the computer screen into the message.

If you use the Windows 8 operating system, you can immediately save the screenshot to a file without using an editor. To do this, use the key combination Win+Print Screen.

The second method is to take a screenshot of the active window.
In this case, when you press the Alt+Print Screen key combination, only the image of the active window, which was on top of all others and was active, will be transferred to the clipboard.
We repeat all the steps for saving to a file from the previous method using an image editor.

The third way is to use the scissors tool.
This option is only available for those who have the operating system installed Windows Vista, 7, and 8 with the exception of Starter and Basic versions.
1. Click the “Start” button -> “All Programs” and in the “Accessories” tab launch the “Snipping Tool” tool.

2. Click the “Create” button and select the tool you need from the drop-down list.

It is possible to create the following formats:
Free form screenshot: Draw any shape around an object.
Rectangular selection: Create a rectangular-shaped object by dragging the cursor around the object.
Window: Select the active window, such as a dialog box, from which you want to capture an image.
Full Screen: Captures the entire screen.
Screenshot by FastStone Capture
FastStone Capture is my workhorse, which I use constantly and every day in my work. There are a lot of advantages - small, fast and does almost everything necessary functions as a program for creating a screenshot of the screen.
It's paid, but it has trial period in thirty days. Its cost is not exorbitant. You can download the program for taking screenshots.
We install it like any other program, agree to a trial period of use, and after launch you have a panel to work with. It looks like this.

The purpose of the buttons from left to right in order:
- (1) Open an existing file or create a file for editing.
- (2) Take a screenshot of the active window in Windows
- (3) Create a ScreenShot of a Window or Object. You choose what to create
- (4) Capture part of the screen (rectangular area)
- (5) Capture part of the screen ( arbitrary area, which you define yourself)
- (6) Capture the entire screen (the same as pressing the “Print Screen” key in the previous examples, but unlike them, the program itself will paste from the clipboard into its editor)
- (7) Screen capture using the scrolling method (an irreplaceable function, if the area to capture does not fit in the viewing window, you will not need to take several pictures and stitch them together, but FastStone program Capture itself will scroll the screen and glue everything together)
- (8) Create a picture of a predetermined size. Very useful when creating a series of photographs certain size. Click on this button and use F2 to edit the size.
- (9) Record video of everything that happens on the screen. Useful for creating educational videos.
- (10) Function for selecting where to transfer the original captured image (there are many options - from the editor and directly to a file, to special programs type Word)
- (11) Program settings
Working with the program is very simple. I mainly use 4 types of taking screenshots. These are options (2), (3), (4) and (7).
When you click on the button (2), the program takes a snapshot of the entire visible screen and creates a screenshot with a size depending on your monitor and screen resolution. When you click on button (3), you will take a screenshot of only the object you select. (4) the button allows you to create a screenshot of only that part of the image that you define yourself. The area will look like a rectangle. And option (7) will create a screenshot of the entire screen area (even the one that is hidden at the bottom).
Updated: 09/13/2017 Published: 2016 or earlier
What is a screenshot in simple words.
The methods described below are completely suitable for any desktop computer or laptop with installed Windows 7 / 8 /10 / Server. Partially for Linux and Mac.
Method 1: Print Screen key
This is the classic method of taking a screenshot. It is universal and can be suitable not only for the Windows operating system.

If you hold down the key Alt and press PrtScr This will take a snapshot of the active window rather than the entire screen.
Method 2. Scissors application
This method is more suitable if you need to take a screenshot of not the whole screen, but part of it. The application appeared in Windows 7.

Method 3. Using the Lightshot online service
This method is convenient because the screenshot can be immediately transferred via the Internet.

Method 4. Using various programs
There are many programs for both Windows, Mac OS and Linux that help you take screenshots. If taking screenshots is a daily task, such applications will provide some advantages in terms of convenience and speed. Let's briefly describe some of the most popular ones.
- Joxi. Suitable for Windows, Mac and Linux. To use, go to the website joxi.ru, download the program, install it and follow the prompts. Pros: ease of use, ability to send a screenshot to the cloud, social network or FTP server, a wide range of settings, hot keys. Of the minuses: the need to register before use.
- ScreenCapture. For Windows, Android, iOS (iPhone, iPad). You can download the program from the website screencapture.ru. Pros: fast loading to the Internet, photo history, built-in editor, hot keys. Cons: there is no option to save to the cloud or social network.