How to install a new font on your computer. How to download and install fonts on your computer
If you are looking for how to install a font, then most likely you know why it is needed. Let me take a guess - you're making a card for a wedding, and you want the greeting to look exotic, and not in the standard Times New Roman font. (or worse - Comic Sans). Or maybe you are creating a resume and need to highlight the title in a special font. One way or another, two questions arise in connection with fonts:
- Where can I download beautiful font;
- How to install a font.
Where to download a beautiful font
Here are several services where you can download a variety of fonts:
What’s convenient is that on these services you can immediately see what the font looks like.
How to install a font
In fact, installing the font is a simple matter. In general, fonts are stored in the folder C:/Windows/Fonts(it is hidden by default). But the system provides standard way installing fonts through the interface.
The control panel has separate section "Fonts". By dragging any downloaded font (file in ttf format) into this “folder”, you will see it in the list of fonts, for example, in Photoshop. Below I showed this whole “process” on.
And as you can see, our font has successfully appeared in the list of fonts Microsoft Word
Lesson topic: how to install fonts in Photoshop. The lesson is based on the CS6 version, but it can be applied to CS5 and other versions.
To add fonts to the editor, you need to have them on your computer. Just download them from any site that provides this option. But be careful when choosing - not all fonts support the Cyrillic alphabet, that is, the Russian alphabet.
To ensure that fonts display correctly in Adobe Photoshop, you should choose them with the extension .ttf (TrueType) or .otf (OpenType), of which the first is the most common.
Methods for installing fonts
Fonts are installed in system folder computer, sometimes into the program itself. There is conflicting information about where it is better to add them. Some argue that you should not add it to the system folder, as it becomes full and all editors with text support will become slow. Others believe that you should not overload Photoshop new settings to make it work faster. Both are right - both the editor and the OS become heavier with a large volume of files. To prevent this from happening, you can use special programs. Let everyone choose the best option for themselves.
In any case, the archive downloaded from the Internet must first be unzipped.
Native font installer
The method works flawlessly in Windows systems and Vista.
Option 1. Open the file with the font - at the top there is an Install button. Click it - the font goes to the system folder and becomes available to all text editors.
If the button is inactive, then this font already exists in the folder.
Option 2. Without opening the file, select it, and right click mouse to call up the context menu. In it, select the Install command. It will download to the system folder.

These methods are good when you need to insert 1 – 3 fonts. If there are more of them, it is better to use other methods.
To the OS system folder
In the XP system, go to Start → Control Panel → Fonts. In the window that opens: Menu → File → Install font. It becomes possible to find the required file on your computer. We find and install.
In OS Windows library fonts is located in the Fonts folder, which can be accessed in two ways. Along the way:
- Start → Control Panel → Appearance and Personalization → Fonts.
- My computer → Drive C → Windows →Fonts.
If your computer is running MAC OS, you should look for the Fonts folder in the Library directory.
On Linux systems, a folder with the same name is located one level lower - in the share directory in the usr folder. The path will be like this: /usr/share/fonts.
The folder was found. Open it and insert the fonts.
By dragging. Next to the Fonts folder, open the folder with fonts. Select the desired file or several, hold it with the mouse and drag it to Fonts.

Copying. We highlight necessary files, copy them using Ctrl+C or click on the selected one right mouse and in context menu select Copy. You can also select the Cut command if you do not intend to leave these fonts in this folder.
Then go to the Fonts folder, right-click on the white field between the files (not on the file!), select the Paste command.

How to Install Fonts in Photoshop Editor
You can insert files of other formats into Photoshop itself, not just TrueType.
You can use the copying method described above, with the difference that you need to paste them into the system folder of the editor itself. It is located along the path: drive C → Program Files → Common Files → Adobe → Fonts. They will work in Photoshop, but will remain unavailable for other programs.
Tip: after installation, the fonts will appear in Photoshop immediately. If this does not happen, restart the editor.
Using manager programs
There are various programs that make it easy to activate a large number of fonts of different, even non-standard formats, and deactivate when they are no longer needed.
The main advantage is that they do not create a load on either the operating system or Photoshop. Here are the names of some of them:
- Adobe Type Manager;
- Hpfonts;
- Adobe Type Manager Deluxe;
- Fonts Expert.
If you have a font on your computer that you want to use, then all you need to do is install the font in Windows. After that it will be available in any program, be it Photoshop, Sony Vegas or any other program that uses fonts.
To install the font, click “Start/Control Panel”. If you entered the control panel for the first time, the window will look like this (Fig. 1):
Figure 1. Panel Windows management XP.
Now in the Control Panel window ( classic look), find the “Fonts” icon (Fig. 2) and click on it. A window will open containing all the fonts installed in Windows.

Figure 2. Fonts in the Control Panel Windows XP Control Panel.
However, an easier way is to simply copy the desired fonts to the “Fonts” folder using Explorer (Figure 3).

Figure 3. Installing a new font in Windows XP.
Installing fonts in Windows 7.
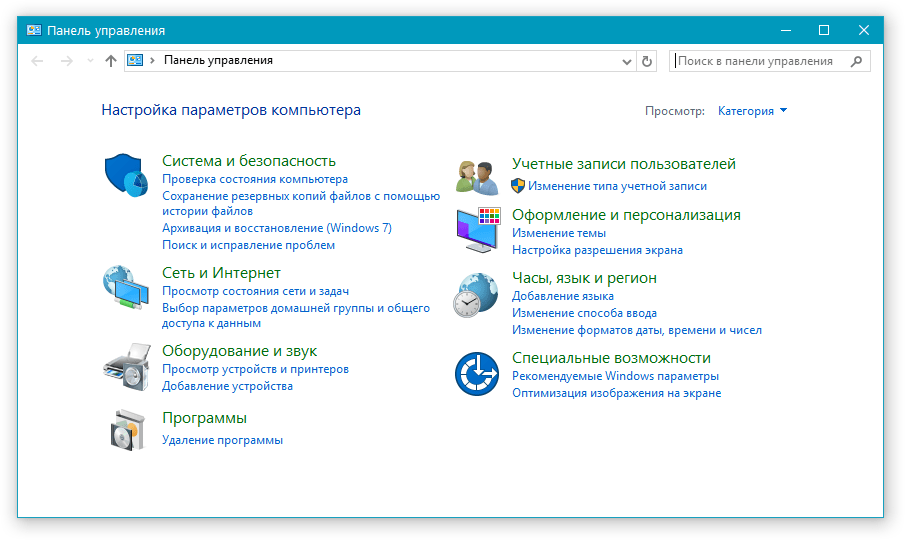
Installing fonts in Windows 7 is almost no different from installing in Windows XP, except that appearance. As in the first case, we need to click “Start/Control Panel”. In the window that opens, you need to click “Category” (Fig. 4) and select “Large icons”.

Figure 4. Windows 7 Control Panel.
Then find the “Fonts” icon (Fig. 5), open it, and use simple copying fonts in this folder- install new fonts in Windows 7.

Figure 5. Installing a new font in Windows 7.
How to download Russian fonts
And so, in order to install new fonts on your computer, you first need to get them somewhere. There are many fonts on the Internet, but to find those that support the Russian language, the query should look like this: “Russian fonts” (you can add the word download), or “Cyrillic fonts”.
When searching for fonts, you may find sites where you can see what it looks like before downloading a font. I consider this option the most convenient and I advise you to look for just such sites (Fig. 6).

Figure 6. Preview the font before downloading
But there is another option, which is to download fonts in entire collections, for example “2000 Russian fonts in one archive.” It seems that this option is much more convenient since you do not need to search for fonts one by one. However, as practice shows, after downloading such a package of fonts, most users “don’t bother” and install all these fonts into the system.
Thus, firstly, they create additional load on the system, which can significantly affect overall performance.
Secondly, searching for the right font among so many becomes much more difficult.
And thirdly, I personally doubt that anyone will use all these fonts in their work.
Therefore, if you download so many fonts, it is better to install only those that you definitely need.
To see what the font looks like before installing it, you need to open it using Notepad, which takes a lot of time. That is why I once again advise you to download fonts one at a time, carefully selecting only the ones you need.
And most importantly, do not forget that the font, first of all, should be “readable”, and then beautiful.
IN latest versions text editor Microsoft Word has a fairly large set of built-in fonts. Most of them, as expected, consist of letters, but some use various symbols and signs, which is also very convenient and necessary in many situations.
And yet, no matter how many built-in fonts MS Word has, the standard set will always not be enough for active users of the program, especially if you want something truly unusual. It is not surprising that on the Internet you can find many fonts for this text editor created third party developers. That is why in this article we will talk about how to add a font to Word.
Important warning: Download fonts, like any other software, only from trusted sites, since many of them may well contain viruses and other malicious software. Do not forget about your own safety and the safety of your personal data, do not download the fonts provided in the installation EXE files, since in fact they are distributed in archives, which contain files in OTF or TTF formats supported by Windows OS.
Here is the list safe resources, from which you can download fonts for MS Word and other compatible programs:
Note that all of the above sites are extremely conveniently implemented and each of the fonts is presented clearly and understandably there. That is, you look at the preview picture, decide whether you like this font and whether you need it at all, and only after that download it. So let's get started.

1. Select a suitable font on one of the sites we offer (or on another that you completely trust) and download it.

2. Go to the folder where you downloaded the archive (or just a file) with the font(s). In our case, this is the desktop.

3. Open the archive and extract its contents to any convenient folder. If you have downloaded fonts that are not archived, simply move them to a location where you can easily access them. Do not close this folder.

Note: In addition to the OTF or TTF file, the archive with fonts may also contain files of other formats, for example, an image and Text Document, as in our example. It is not necessary to extract these files.

4. Open .
IN Windows 8 - 10 you can do this using the keys Win+X, where in the list that appears you need to select . Instead of keys, you can also right-click on the menu icon "Start".

IN Windows XP - 7 this section is in the menu "Start" — .
5. If in viewing mode "Categories", as in our example, switch to the small icons display mode - this way you can quickly find the item you need.

6. Find the item there “Fonts”(most likely it will be one of the last ones) and click on it.

7. A folder with fonts installed on Windows will open. Place the font file(s) previously downloaded and extracted from the archive into it.

Advice: You can simply drag it (them) with the mouse from folder to folder or use the commands Ctrl+C(copy) or Ctrl+X(cut) and then Ctrl+V(insert).
8. After a short initialization process, the font will be installed on the system and appear in the folder where you moved it.

Note: Some fonts may consist of multiple files (for example, regular, italic, and bold). In this case, you need to place all these files in the fonts folder.
Installing a new font in Word
1. Launch Word and find new font in the list with standard ones built into the program.

2. Often, finding a new font in the list is not as easy as it might seem: firstly, there are already quite a lot of them there, and secondly, its name, although written in its own font, is quite small.

To quickly find a new font in MS Word and start using it in typing, open the “Font” group dialog box by clicking on the small arrow located in the lower right corner of this group.

3. Listed "Font" find the name of the new font you installed (in our case it is Altamonte Personal Use) and select it.

Advice: In the window "Sample" you can see what the font looks like. This will help you find it faster if you don’t remember the name of the font, but remember it visually.
4. After you click "OK" in the dialog box "Font", you'll switch to the new font and can start using it.

Embedding a font into a document
Once you install the new font on your computer, you will only be able to use it on your own. That is, if you send a text document written in a new font to another person who does not have this font installed in the system, and therefore is not integrated into Word, then it will not be displayed for him.
If you want the new font to be available not only on your PC (well, on the printer, or rather, on a printed sheet of paper), but also on other computers, other users, it must be embedded in a text document. Read below for information on how to do this.
Note: Embedding a font into a document will increase the size of the MS Word document.
1. In a Word document, go to the tab "Options", which can be opened through the menu "File"(Word 2010 - 2016) or button "MS Word" (2003 — 2007).

2. In the “Options” dialog box that opens in front of you, go to the section "Preservation".

3. Check the box next to the item “Embed fonts into file”.

4. Select whether you want to embed only characters that are used in the current document (this will reduce the file size), whether you want to exclude embedding system fonts(in fact, it is not necessary).


Actually, we can end here, because now you know how to install fonts in Word, having previously installed them in Windows. We wish you success in mastering new functions and limitless possibilities. Microsoft programs Word.
Photoshop is popular program to work with graphic files. They even teach how to use it in schools. Many users learn Photoshop for work or just for fun. Perhaps few people have not heard of similar application. Today we are going to learn how to install fonts in Photoshop CS6. As practice shows, not everyone understands this process. It is not so important for beginners. But advanced users can sometimes find new ones useful. standard fonts, not originally provided in Photoshop. Therefore, it is important to know about some secrets and recommendations that will help solve the problem.
The essence of the problem
How to install new fonts in Photoshop CS6? This question does not arise for everyone. Photoshop is a very good program. It initially provides quite a variety of tools for working with graphics.
Only some users initially consider standard fonts unoriginal and boring. For some work it is necessary to acquire new tools not provided for in the program.
A user who is wondering how to install fonts in Photoshop CS6 should understand that bringing an idea to life is sometimes not as easy as it seems. The main problem is that apart from Windows fonts will not work. Therefore, you will initially have to load the downloaded documents into the operating system. How to bring your idea to life?
For system
If you think carefully, installing fonts in Photoshop is not such a difficult procedure. The first advice that users are given is to download new “letters” into Windows.

How to install fonts in Photoshop CS6? To do this, you can use the following algorithm of actions:
- Download the right tool. Typically fonts are represented by archives.
- Unpack (if necessary) the document to any place convenient for working with the file. For example, on the desktop.
- Go to C:\Windows\Fonts. The Fonts folder stores all fonts recognized by the operating system.
- Upload a previously downloaded document by dragging or copying.
- It is advisable to reboot the OS. This is an optional step.
This will end all work with fonts in Windows. Loaded letters will now be recognized in all applications, not just Photoshop. This method has some disadvantages. But more about them a little later. First you will have to understand how to install fonts in Photoshop CS6 using other methods.
To the program
For example, there is an option to upload a document directly into the application. Not a bad way for users who need to recognize new text only within Photoshop. It is this algorithm that is most often used in practice.
How to install fonts in Photoshop CS5/CS6? The advice and recommendations that experienced users give to each other often boil down to the following instructions:
- Download the font you need to use. If necessary, unpack the document.
- Find the "Photoshop" folder, which contains all the fonts recognized in the application. To do this, you can use the address: C:\Program Files\Common Files\Adobe. There you can find the Fonts folder. It is advisable to open it.
- Upload the unpacked font to the mentioned folder. You can copy and paste it or just drag it from the unpacking location.
In a similar Windows case will not recognize new letters at all operating system. The font will only appear in Photoshop. U this method has its advantages. For example, the operation of the operating system will not decrease due to the abundance of fonts.

Secret tricks
But there is one more little secret that will help answer how to install a new font in Photoshop CS6. About what we're talking about? About use additional application, helping to bring the idea to life.
So, if all of the listed methods are not of interest to the user, he can enrich “Photoshop” with new fonts using the following actions:
- Download and install the FontExpert program.
- Launch the application.
- Open the folder called Fonts and press the key combination Alt+F4.
- Find a suitable font and click on it. Activation will occur.
You can close the application. Working with FontExpert leads to the following: installed font recognized by both the operating system and Photoshop. There is nothing special or difficult about the process. Which of all the previously listed methods is best to choose?
What is better to choose
From now on it is clear how to install fonts in Photoshop CS6. In fact, there is no difference regarding which version of the application to work with. The algorithm of actions remains the same in all cases. Everyone should remember this.

- Uploading a font to the Fonts folder in Windows is a good way to enrich the operating system. Subject to availability only huge amount new letters, the performance of the OS is disrupted. The computer is running slower. A recommended technique when working with several new fonts.
- Uploading a font to the root folder of Photoshop does not harm the operation of the OS. But it affects the performance of the application. However, it is more convenient to delete old fonts here.
- Using FontExpert includes different fonts. The operating system is not affected too seriously by the program. The downside is that it is not always possible to find the appropriate letters in the application.
Now each user can choose how to act. It’s clear how to install new fonts in Photoshop CS6 or any other. All of the above techniques can be implemented in a few minutes.