How to delete letter templates in Yandex mail. What amount of money and what property is allowed when making a share contribution?
Hello, dear readers!
In this post I want to tell you how to create a letter template in Yandex mail. Likewise postal service Gmail, Yandex mail also has this option. Why did you bring up this topic? There was a need to send essentially identical letters to clients. Well, maybe just change the name and some numbers, otherwise the whole text is the same.
This will be convenient, for example, for sales managers. Having created the required template once, you just need to press one button, and the text from the template will be inserted into the body of the letter automatically. All you have to do is edit the necessary parameters, for example, change the amounts, client name, date, etc.
Setting up a letter template in Yandex mail.
My entire guide can be summarized in three steps:
- Creating a signature
- Adding a portrait
- Creating a letter template
Let's break it down point by point.
Open your or corporate mailbox. First of all, go to the settings and select the section there - “Personal data, signature, portrait”
Creating a signature
In the top field, enter your first and last name, and just below click the “Create signature” button. Using text editor, we create the signature itself, which will be automatically inserted at the very bottom of the body of the letter. You can format the text beautifully, make hyperlinks, add a picture.

Check the “Bind to address” checkbox and select an address if you have more than one. You can create multiple signatures this way, so to speak, on different cases. When writing the next letter, a choice between them will be shown. To do this, check the “allow signature selection on the letter writing page” checkbox. Now, first click the “Create signature” button, and then “Save changes”.
Adding a portrait
If you don’t have a portrait yet, you can add it through the “passport” section. On the right after entering the “passport” you will see a text link “Change user portrait”. Click and you will be able to upload a photo or company logo.

Creating a letter template
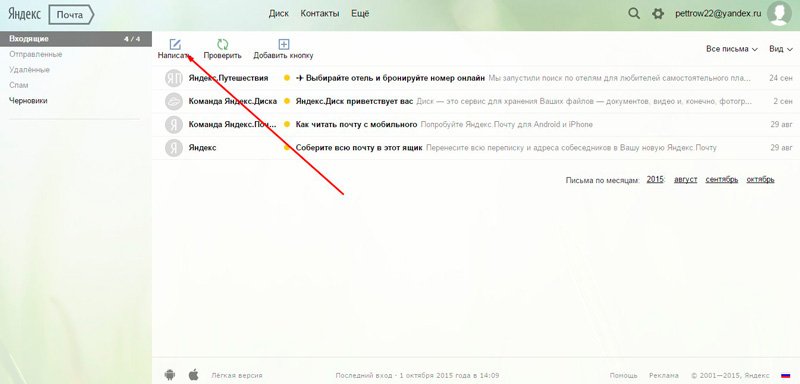
Here we come to the most important thing. We have a beautiful and informative signature, a portrait too, let’s start creating a letter template. To do this, simply click “write a letter”, and in the “subject” line on the right side you will see text inscription"Sample". Click on it, and then “create template”.
We enter the subject of the letter, in my case “Calculation of installments for a car.” Then, in the body of the letter, where our previously created signature has already been inserted, we add the main text. The last step the “save template” button will be pressed. The theme will be the name of the template.
The next time you write a letter, just select from the list required template. Edit as needed and send by mail.
Afterword
As a representative, I need to work with clients. Moreover, according to different programs, and the presence of such templates greatly simplifies my work. One needs payment calculations to be sent, the other “
1 voteGood day, dear readers. The ability to write and format beautiful letters is never superfluous. Often the fate of the project you are going to work on depends on this. Thanks to today's article, you will learn how to insert a picture into a Yandex letter.
Why suffer?
Writing is a simple and free way promoting your own services. Whatever you do: or engaged in the manufacture of pottery - thanks to emails you can find clients. I'm not talking now about the garbage that some users throw at people. There will be no need to just bombard people with meaningless spam.
Let's say you found a customer and are going to send him an email special offer which might interest him. Beautiful design letters will give a broader idea of you as a specialist, which means there will be a greater chance of receiving an order.

You can look at the resources in your region and understand that the company’s portal is outdated, but you can do it better, faster and cheaper. Find in the companies section email address and write a letter. Insert pictures into the body of the message to show what can be fixed and show that you can handle the task. Everything is simpler than you think.
One of my friends received his first order this way. He simply found a very old and ugly portal and analyzed it in detail. As it turned out, the entrepreneur spent a lot of money on creating this site and no longer wanted to be associated with it; he was convinced that all the developers were working just as badly as his previous contractor.
The friend was able to show even those mistakes that the owner of the company himself did not see.
If you offer your own services, you must provide all the conditions for convenient perception of information. No one will look at the drawings in the application, dig around and compare.
In addition to this method of promotion, there is another one. You communicate with colleagues or friends, but who among them knows about your new hobby? Accidentally sent information in the signature can play into your hands. Even if they don't need it, they may pass on your contact information to others in need.
How to insert a picture into the body of an email
So, first we need to enter Yandex mail. Once again I will not bore you with a description of how to register; if you wish, you can find and read a detailed publication about this on my blog.
Now select “Write a letter”.
We turn on the design. Without this nothing will work.

Now we write the text. This is the best place to start.

Now you can insert a photo into a message. Open the folder with the image, left-click on the image and hold it, drag it into the text of the message.

The result is not very encouraging. The photo is too big.

It can be easily reduced. Just click on the picture. Dots should appear along its edges, as shown in the figure below.

Grab them with the left mouse button and hold them and point them in the direction you want.

You can also drag the image to a better location. Focus on the cursor at the back.

If you don't know where to find beautiful pictures, then quite recently an article on this topic appeared on my blog. From it you can learn everything about legal and illegitimate methods, searching on Google, on free service Pixabay , as well as the secrets of free acquisition of pictures from a wonderful, but relatively expensive resource DepositPhotos .
Mailings are important part marketing campaigns. Creating emails for them is a lot like designing simple web pages. At the same time, there are certain important differences to be taken into account. In particular, sending HTML emails will only be effective if they themselves are technically correct and their content and style match your goals. At the same time, there is an opinion that a non-specialist cannot cope with this task. This article provides detailed step-by-step instruction, how to write and how to send an HTML letter.
Features of creation
A modern person receives on average 5-6, and sometimes up to 10, emails every day. This means you only have less than a second to grab the recipient's attention before he moves on to read the next message. Otherwise, your HTML email marketing will be completely ineffective and you will simply be wasting your time.
One of the nuances that increases your chances of attracting attention potential clients or other target audience, is to create correspondence that is tailored to mobile devices. After all, the majority of those to whom it is addressed to view mail probably use them much more often than desktop computers and laptops.
For this purpose, you can use, for example, “ responsive design", easily adapting to screen size.
What should the letter template be?
When laying out a document intended to be sent to correspondents, the following requirements should be adhered to:
- It should be made quite narrow, i.e. in size it should not exceed the range of 500-600 pixels, which will ensure the correct display of text and other content on devices of any type.
- Need to use enough large font for everyone text information, since on iOS devices the HTML email will be difficult to read if the font size is less than 13 pixels.
- Clickable elements should be large enough and isolated from nearby links. In this case, the recipient will be able to easily activate them on the first try.

Preparation
Before developing an HTML letter, you should create on one of the disks new folder and call it, for example, “Newsletters”. You also need to download and install Dreamweaver CS3. This product from Adobe is one of the fairly simple website design tools and is well suited for developing newsletter emails in HTML format.
Creating and saving a document
Before writing the text part of the letter, you need to:
- open the fairly popular HTML email designer program Dreamweaver CS3 (DW);
- create a document by selecting “Transitional HTML 4.01” as the type;
- save the file with the extension “.html”;
- V top menu find the editing command;
- uncheck the “Use CSS instead of HTML tags” checkbox.
Step-by-step instruction
Now, let's look at how to create an HTML letter. For this:
- Sequentially open the “Insert” and “Table” tabs in the menu and set the desired table parameters. For example, rows - 2, columns - 1, width - 700, title - on top. Borders can be set, or you can do without them by specifying 0.
- Form the header of the letter. Since an HTML letter is intended for a larger number of recipients, therefore the operator is used, substituting desired name recipient.
- In the lower “Properties” window, set the necessary parameters for the font, size and color of the title text and
- "Exit" from the header area. At the bottom of the screen, set the parameters for the cursor “Center” and “In the Middle”.
- We insert the finished text of the letter or “write” it directly in the DW program by selecting desired type and as well as the placement of text on the page.
Creating hypertext links
We will try to make HTML writing more professional and advanced. For this purpose, we will hide hypertext links in the content. To do this, you need to highlight the place in the text that you chose as a hypertext link. In the left corner at the top of the screen, you should “open” the corresponding icon and paste your link into the pop-up window. In this case, you must remember to check the “_blank” checkbox so that the link opens in a new window, and the recipient does not lose access to the main letter after viewing it.

How to insert pictures
Typically, a letter in HTML format ends with contact information, preferably with a photo of the author or a suitable thematic picture. It can be downloaded from the Internet or by first uploading it to the Internet, as you will need the URL of this image. The best way to do this is through one of the free services.
In order to create such a nice ending:
- insert another one with 3 columns and a border setting of 0 pixels at the bottom of the letter, inside the main table;
- place the cursor in the place in the table where they want to see the picture;
- mark in the lower window “In the middle” and “On the top edge” for each section;
- select the “Insert” tab in the top menu;
- click on the “Image” inscription and paste the address we copied into the drop-down menu;
- Click “Ok” 2 times.

View
Now that you know how to create an HTML email, you need to make sure that the recipient sees it in the correct form. To do this, you need to view your work in the Dreamweaver CS3 browser before submitting. To do this, click on the icon with the globe in the middle top menu. If abracadabra appears on the screen instead of letters, you should set auto-encoding in your browser settings.
Encoding
From the “Project” section and go to the code part - “Code”. In the window that opens, select and copy everything contained between the tags
And. Save the file. Next, insert the HTML code.
Sending an HTML email
- select or create a new letter by filling out the lines “Name” and “Sender’s Address”.
- fill in the line “Subject of the letter”;
- mark the HTML code in the upper left menu;
- paste the code copied in the DW-code program into the large “Source” field;
- check the correctness of the display using the Preview tool;
- delete text version letters;
- test it for spam using the button of the same name located next to the “Submit” button.
Several popular templates
Using a framework helps to significantly speed up the process of creating a letter and make it more accessible to a developer who is just learning the basics of creating web documents. The most popular templates are:
- Cerberus. This set of so-called responsive templates allows you to create emails that display normally in both mobile application Gmail and Outlook. It allows you to use blocks of HTML code either individually or by combining them.
- Ink is a preparation of letters, the mailings of which are almost universal and compatible with any devices and clients.
- Really simple HTML email template. The template allows you to create newsletter letters very simply and quickly. True, they will have an extremely simple design in the form of a single column, which contains a call to action.

How to insert HTML into an email
Let's now consider a slightly different problem. To paste the HTML code into email for example, gmail using the browser as in the example below Google Chrome, follows:
- press the “F12” button or select the appropriate sequence of commands in the menu;
- in the window that opens with the code current page gmail client find the place where the HTML letter should be inserted, right-click and select “Edit as HTML”.
- paste the copied HTML code;
- press the combination of two keys “Ctrl” and “Enter”.
For the same purpose, you can download an easy-to-use Mozilla program thunderbird. With its help, you can create a letter, and then first select “Insert”, and then “HTML”, and paste your newsletter code there.
Tools
The e-Newsletter WordPress plugin allows you to professionally manage mailings and subscribers. Moreover, both are done directly through the WordPress admin panel. This circumstance ensures full control and completely free, which is good news.
Another simple tool is Bulletproof background images, which is a simple tool that allows you to get the code for background image created letters. With its help you can make correspondence much more beautiful. To simply specify the URL of the background image you like and its fallback color, and whether these parameters should apply to the entire body of the HTML email or whether they are intended only for one of the table cells. The result will be ready code, which you want to copy and paste into your template.

Now you know how to send an HTML email. Its creation is not particularly difficult, especially if you use ready-made templates, of which there is no shortage on the Internet. Therefore, even those who do not have special knowledge can easily cope with this task.
Standard folders
IN mailbox the following are available standard folders:
- Outbox. Emails that were not sent because the Internet connection was lost. When the connection is restored, the emails will be sent automatically.
- Archive . Folder for storing old letters.
Note. If there are no letters in the Archive, the folder is not displayed. To move a letter to this folder, click on it right click mouse and select Archive.
Inbox. All new letters (except spam and letters sent to other folders using ).
Sent. All emails you sent.
Deleted. All emails you deleted manually or using automatic sorting letters.
Spam. Emails that have been identified as spam.
Drafts. Drafts letters and templates.
Standard folders are not edited or deleted.
Personal folders
To add a personal folder, click New Folder (below the list of folders). You can add multiple personal folders - they will all appear as subfolders in the Inbox.
Note. When you move the email to the folder, a message will appear “Should I move such letters to a folder?”. If you answer “Yes”, a rule will be created automatic sorting of letters. You can change or delete a rule on the page rules for processing letters.
The Archive folder is not displayed in the list of folders if there are no emails in it. To move a letter to this folder, right-click on it and select Archive.
If you cannot move the letter to another folder, refresh the page by pressing the key combination Ctrl+F5. If the problem persists, clean