How to create a local server on a computer? How to open ports for a minecraft server.
Creating your own local server based on a regular personal computer– the task is quite complex and painstaking. Here you need to understand the following points:
- 1. , and whether you even need your own server. This is one of the key questions that requires a clear and unambiguous answer from the future administrator.
- 2. What technical resources are at your disposal, and what will be necessary for the operation of a full-fledged server. Minimum technical requirements to create a “high-quality” server are quite high: the equipment alone will cost 70 - 80 thousand rubles.
Also note that for normal operation resource (for which you plan to make your own server), you need the server computer to be constantly on and work without interruptions. Therefore, it is necessary to ensure an appropriate power supply.
3. What cash you are willing to spend on creating and maintaining the server. In addition to the above-mentioned hardware costs, to create a full-fledged server on a computer, you need a dedicated (statistical) IP address and high speed data reception and transmission (the minimum value is 10 Mbit/sec). Accordingly, you will have to pay extra for this to the provider and conclude additional agreement to provide this type of service.
And before you try to make a server out of a computer, you need to clearly define all these nuances.
How to make a server from a home computer?
To create your own server, you first need to install a multi-user network operating system.
The choice is huge: Debian, FreeBSD, CentOS, OpenSUSE, Ubuntu, Windows and many others.
On the Internet you can find many examples of testing in the operation of the above-mentioned operating systems and their ratings in accordance with the test results. For example, the “SOS” rating for 2016:
1st place: “Debian” and “Ubuntu Server”;
3rd place: “FreeBSD” and “ Windows Server»;
4th place: " Red Hat Enterprise";
5th place: “Fedora”.
Of course, the lion's share of the network software market is made up of operating systems that occupy first place in the ranking. Therefore, in order to create a server on a computer for the first time, we recommend choosing one of them.
As an example, let's focus on the installation operating system"Ubuntu Server".
How to set up a local server from scratch on ubuntu?
1. Download and upload the operating system image to bootable USB flash drive. Boot your computer from the flash drive: at the first stage you will be asked to select a language.

3. In the next steps, select "Region" and "Keyboard Layout Settings";

4. Enter your username, account computer and password,

then click “Continue”;


configure “Disk Layout”

and select which disk the system is installed on;

6. Wait for the installation and system update to complete.
7. Select software, which you need for work.

8. Confirm that the installation is complete by clicking on the “Continue” button;
If you want to open your own server, but don’t know how to do it, then this article will be of interest to you. Creating a server in Minecraft will allow you to play with friends or with other players in your own world. There is also a collection of mods that will decorate your world for the better. The assembly is carried out without any difficulties. Use various commands, they will allow you to control the game in your world: ban players, change the weather in Minecraft and much more.
You can find many videos on YouTube on how to have fun. And also, if you are interested, you can create your own channel and make a video of all your adventures. By creating your own server, you will have complete control over it. Minecraft is a game where imagination is given free rein, so you can appreciate not only your imagination, but also your friends. Assembling various modifications for the game will fill it with more opportunities. Also, the assembly for the game can be made by the players themselves and distributed on sites. An assembly can be created by combining several mods in Minecraft.
You can also put various maps on the server, which you can play with friends. You can install them on our website in the Maps section. You can install them and have fun, or you can make them yourself, creating your own world. And if you are planning to create something really cool, you can put them up for public download if you wish. If players wish, they can create a map of incredible beauty that will justify your efforts when looking at a beautiful map in minecraft.
Commands on the server also play an important role, as was already written above, they allow you to “hold the control panel in your hands.” Commands are written to ensure that the server is under your control.
The commands are shown in the screenshot below (CLICK ON THEM):

Creating a server in Minecraft
First, you need to open the page http://www.minecraft.net/download.jsp and you will need to download a file called Minecraft_Server.exe. This is the official website, hence it has all the latest versions.The file that you downloaded Minecraft_Server.exe (or otherwise called minecraft_server.jar) needs to be opened and transferred to the folder in which you will have the server.
Now let's move on to the ports, you need to open it, but if you have it open 25565, then you will see the following message:

Now, keep calm and wait until the process for the minecraft game reaches the end. After completion, you will need to close the window.
Another case will be if your port for minecraft is closed, or the operation of Minecraft_Server.exe or Java is blocked by some program, for example a firewall, as shown in the picture below. If this happens, try uninstalling java and installing it again, a message will appear from the firewall and you will need to allow the application access.
How to open port 25565. In any case, first you must allow java access, unless of course such a window appears. Of course you grant java these rights. The screenshot shows an example of blocking.


If everything goes well, new files will appear in the folder, and the world.
We definitely need a file called server.properties. You need to open this file notepad. Now you should take note of the information below. In order to find out your IP address, you need to go to sites that will show it to you. For example, I can cite the site 2ip.ru, where you can freely view your IP address, as shown in the screenshot.

If your IP changes, and most people do, then you need to enter an update to the server-ip= line before each server startup.
Sites that show IP should be bookmarked to make searching easier.
Launch and log into your server (with video)
The information is relevant for Minecraft versions 1.2.5, 1.5.2, 1.6.1, 1.6.2, 1.6.4. Next, you need to run Minecraft_Server.exe and wait for the download to finish. Go to minecraft (it is not necessary to enter your username and password).Click on Multiplayer, then Add Server, as shown in the picture below.

Next you need to enter the server name (this name will be shown in the list) and server ip
Next, click Done, and your server will appear in the list. Green stripes on the right indicate that it is working and is also shown online. Next you need to click Join Server.


Done, now you play on your own server.
The server in the Minecraft game allows the user to play with other people in the world he created. However, for many players, especially beginners, creating their own server sometimes becomes a problem.
Server capabilities in the game Minecraft
- The player who created his server completely controls the new space. In this virtual entity, it is possible to place cards on which you can play games with other users.
- Experienced players who come up with something interesting can enter their developments into the race.
- Basically, users create their own dimensions and invite outside players through the server to play together.
The process of creating a server in Minecraft
The procedure for inventing and programming in the game own server is not complicated at all. To do this, you just need to perform the following sequence of actions.
- Open any browser.
- Go to the page with the following address: http://www.minecraft.net/download.jsp.
- Find the file named Minecraft_Server.exe in the list.
- Download it at HDD your computer.
- After the download is complete, you need to open the folder intended for unpacking the server.
- Then you will need to transfer the saved file to it.
- When you double-click on the file, a window will appear that can be closed only after all server installation processes have been completed. In any case, the start of unpacking will begin only when the game port 25565 is connected. After this, the creation of the server will be completed.
- If during installation the computer port is closed, you need to allow java access to your PC. If some program, for example, antivirus or java, blocks the downloaded file, then you will need to reinstall it on your computer. When re-unpacking, you must remember to indicate the access rights permission value in the firewall message.

Starting a server in Minecraft
After the server has been created, it needs to be launched in Minecraft. This is not difficult to do by following a strict sequence of steps.
- Run the processed file and wait for the download to complete.
- Enter the Minecraft game. Here, entering a password and login will be optional.
- Select Multiplayer mode.
- Go to Add Server.
- In the field provided, enter the IP address and name that will be indicated in the lists. Click the Done button.
- If green stripes appear on the right, then the server is working well and on this moment is online.
- The next step is to follow the Join Server link.
- Next, the game will launch from the already created space.
Often, determining your IP address becomes a problem for players due to ignorance of it ordinary users networks. It's actually very easy to recognize. One of the most simple methods- this is to go to the website www.2ip.ru, where the information you need will be displayed on the screen immediately after going to the resource. Users with a constantly changing IP address will need to update the server-ip= line every time they start the game.
Probably many have asked themselves the question of how everything appears Minecraft servers . In this article you will find out all the details. Today you can install a server on your computer or anything else. We'll even tell you how to install plugins and mods on the server. will be discussed in this news. Read the instructions carefully so that there are no unnecessary questions that were already in the article. We will discuss two operating systems on which the server can be installed. These are Linux and Windows.
Windows installation:
First you need Ready servers Minecraft Minecraft.net.
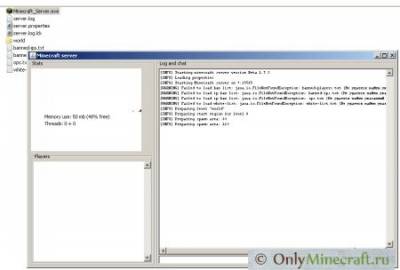
This is what the server looks like when downloaded from the official website: 
He doesn't ask too much random access memory, and just computer resources. Therefore, you can safely play with friends local network or through hamachi.
Well, you've downloaded the server and now you need to put it in specific folder(Better empty). The thing is that when you first launch it, it will create a world and a bunch of configuration files. All files that appear are shown in the screenshot: 
When the server completes its loading you will receive the following message:
Done (5,706s)! For help, type "help" or "?" (The numbers may differ, they mean how long your server has been running)
Now you can briefly close the server.properties window and open it text editor. Here's what the config consists of and how it needs to be configured:
server-ip= - Here is your IP
difficulty=1 - Difficulty
Now you can log into your server under the IP that you specified in the config.
Linux installation:
First you need download minecraft server 1.2.5. I think everyone understands that you can download from our website in a certain section - Ready Minecraft servers. Or you can download the official Assembly - Minecraft.net.
1) Launch the Putty program.
1.1) Login
1.2) You need to install java, enter yum install java
When installing it will display:
Total download size: 29 M
Is this ok:
Enter "y"
2) Launch with the command java -Xmx1024M -Xms1024M -jar craftbukkit-0.0.1-mine.jar nogui
Then we edit the server.properties file according to plan:
allow-nether=true - whether hell will work. If set to true, it will work, you can turn it off by setting it to false.
level-name=world - The name of your world
enable-query=false - Ability to obtain information about the server
allow-flight=false - Is it possible to fly on the server?
server-port=25565 - Port on which the server will be accessible (If you don’t know what this is, don’t change it)
level-type=DEFAULT - It will be better as it stands
enable-rcon=false - You can use the server remotely
level-seed= - Unique code for your world (You don’t have to write anything)
server-ip= - Here is your IP
max-build-height=256 - How many blocks can be built up
spawn-npcs=true - Will there be locals on the server?
white-list=false - Will there be a White List on the server?
spawn-animals=true - whether there will be animals on the server
online-mode=true - Will your server be accessible only with a License (Remove from pirate sites if necessary)
pvp=true - You can beat other people on the server
difficulty=1 - Difficulty
gamemode=0 - What mode will be according to the standard
max-players=100500 - Maximum amount people on the server
spawn-monsters=true - whether there will be monsters on the server
generate-structures=true - Will fortresses, treasures, etc. be created?
view-distance=10 - At what distance can you see ahead?
motd=A Minecraft-goldmods.ru Server - Message that will be written in the client
The tincture is ready!
If you want to Minecraft server on Linux worked constantly, after turning off the console you need:
1) Create a file start.sh in which we write the following text:
#! /bin/sh cd
~/.minecraft_server/
java -Xincgc -Xmx1G -jar craftbukkit-0.0.1-SNAPSHOT.jar
Then we drop this file into the server folder. Now for the server to work as it should, enter:
chmod a+x start.sh
Attention: to turn off the server you need to write "/stop" in the game chat or in the console "stop"
Thank you for reading the article you learned how to make a Minecraft 1.2.5 server on different OS. The server version in the news is the latest -
All players Minecraft games thought about: - “How to create a Minecraft server?” , "How to open ports on a computer?", "How to start a minecraft server?" Everyone wants to feel the power of the administration over the server players, or simply finding a suitable server to play with friends is not so easy. Since not every player can afford to rent expensive hosting for a minecraft server. we will look at options for running a server on a computer. We will discuss these and a few more questions in part in this article.
Features of kernels for minecraft
To run the server, the developers created server cores. They are our main part of the server, which determine the version of the server.
We have created where the most common versions of cores for the minecraft server are located with download links from the site and a description of each core and its features. You can choose the right kernel for you.
We will consider from the most simple kernels for the minecraft server to the most difficult.
Description of the core for the Minecraft server
Vanilla
Vanilla Core- this is the very first kernel that is released after the version of the game itself is published, then assemblies of other kernels are created on its basis. You cannot install mods or plugins for Minecraft on the Vanilla core. It can be downloaded from the official website
CraftBukkit
CraftBukkit - aims to make it easier for developers to create plugins, since CraftBukkit can support plugins that are written only for this core.
Spigot
Spigot core created on the basis of the CraftBukkit kernel and is designed to replace the “big brother” with stability and performance as it allocates even less RAM. In addition, all plugins written for CraftBukkit will also work on Spigot, but Spigot also has its own plugins that are not available to CraftBukkit.
PaperSpigot
PaperSpigot core is a third-party improvement to the Spigot core that requires even less RAM and is perfect for installing plugins on it. All plugins designed for Spigot will install perfectly on PaperSpigot.
MCPC plus
MCPC plus core is a server modification which, unlike its older brother (MCPC) which was created on the basis of Bukkit, MCPC plus is written from scratch, and allows you to install mods and plugins on the minecraft server without any porting.
Cauldron
Cauldron Core is a server modification based on MCPC plus which is created for installing both mods and plugins on the server. Minecraft is already built into it, and installing mods with this core will not be difficult. This kernel was developed by combining the efforts of the Swedish developers of server server kernels Spigot, Cauldron and Bukkit.
Choosing a kernel for creating a server
This is one of the most important issues when creating a server. First, you must select the version of your server, then will this server have mods, or will it only have plugins.
For a server with only plugins, server cores such as PaperSpigot, Spigot, CraftBukkit, and of course Vanila are excellent.
For a server with mods, you can use the Cauldron and MCPC plus kernels.
You can find all server cores
1) Create a folder future server and go to it.
2) Download your chosen server core
3) In the same folder we create Text Document, and call it starter.bat(you can name the file whatever you want, the main thing is that it has an extension .bat)
4) Click right click mouse over the file and click "Change". It is better to use an editor to edit server files
5) Write the value in the file -
@ECHO OFF SET BINDIR=%~dp0 CD /D "%BINDIR%" java -Xincgc -Xmx1G -Dfile.encoding=UTF-8 -jar paperspigot-1.11.2.jar
where paperspigot-1.11.2.jar is the name of your kernel.. Save the file
6) Launch our created file double click left mouse button.
The server console should appear, and after a while it should close so that you can agree to the rules EULA.

7) Several folders have appeared in the folder with our server, we now need a file called eula.txt. Open it and change the value false on true. Then save the document and close.


8) We launch ours again starter.bat. The console should appear and the server should boot completely.
We write in English letters in the console stop And press Enter thereby stopping the server.

After which the server will save all files and the console will close.
Approximately the same folders and files will appear in the server folder as in the screenshot below.

9) Now in the folder with the server, open our main server settings file - server.properties, and immediately change the value online-mode=true on online-mode=false, thus we will be able to access the server with pirated versions minecraft. Save the file.
generator-settings- sets the template for generating a superflat world;
allow-nether- determines the possibility of transition to the Lower World. By default, this setting is set to true. If set to false, then all players from the Nether will be moved to the normal one;
level-name- the name of the folder with map files that will be used during the game. The folder is located in the same directory where the server files are located. If there is no such directory, the server automatically creates new world and places it in a directory with the same name;
enable-query- at set value true enables the GameSpy4 protocol to listen to the server;
allow-flight- allows flights on Minecraft world. The default value is false (flights are prohibited);
server-port- indicates the port that will be used by the game server. Standard port for Minecraft - 25565. It is not recommended to change the value of this parameter;
level-type- determines the type of world (DEFAUT/FLAT/LARGEBIOMES);
enable-rcon- opens remote access to the server console. By default it is disabled (false);
level-seed- input data for the level generator. To be able to create random worlds, this field must be left blank;
force-gamemode- sets the standard game mode for players connecting to the server;
server-ip- indicates the IP address that will be used by players to connect to the server;
max-build-height- indicates maximum height buildings on the server. Its value must be a multiple of 16 (64, 96, 256, etc.);
spawn-npcs- allows (if set to true) or prohibits (if set to false) the appearance of NPCs in villages;
white-list- enables and disables use whitelist players on the server. If set to true, the administrator will be able to create a white list by manually adding player nicknames to it. If the value is false, then any user who knows its IP address and port can access the server;
spawn-animals- allows automatic spawning of friendly mobs if set to true);
snooper-enabled- allows the server to send statistics and data to developers;
hardcore- enables Hardcore mode on the server;
texture-pac- texture file that will be used when the player connects to the server. The value of this parameter is the name of the zip archive with textures, which is stored in the same directory as the server;
online-mode- includes verification of premium accounts of users connecting to the server. If this parameter is set to true, only premium account holders will be able to access the server. If account verification is disabled (set to false), then any users can access the server (including, for example, players who have faked their nickname), which creates additional security risks. When checking is disabled, you can play Minecraft over a local network, without access to the Internet;
pvp - allows or denies players to fight with each other. If this parameter is true, then players can destroy each other. If set to false, players cannot deal direct damage to each other;
difficulty- sets the difficulty level of the game. Can take values from 0 (easiest) to 3 (most difficult);
gamemode- indicates which Game Mode will be installed for players entering the server. Can take the following values: 0 - Survival, 1-Creative, 2-Adventure;
player-idle-timeout- inactivity time (in minutes), after which players are automatically disconnected from the server;
max-players- maximum allowed number of players on the server (from 0 to 999);
spawn-monsters- allows (if set to true) the generation of hostile mobs;
generate-structures- enables (true)/disables (false) the generation of structures (treasuries, fortresses, villages);
view-distance- regulates the radius of updated chunks to be sent to the player; can take values from 3 to 15.
10) Start the server again by running starter.bat.
After the server is fully loaded, you will be able to log into the server. Using an IP address 127.0.0.1 or localhost. This local addresses your computer, and at this address you will be able to connect to the server that is running only from your computer.
To make the most of your server, you need to give your nickname an OP. The easiest way to do this is to write in the running server console
op VashNick Everything in the console is written in Latin (English) letters.
For example, my nickname in the game SyRauk
So in order to register the op I need to register in the console
op SyRauk You need to write without "/" (slash)

After entering the command, press ENTER

The case does not matter. (You can write with either a small or a capital letter)
Article extracted from site article
Minecraft Admin Commands
/clear [object number] [additional data]- Clears the specified player's inventory of all items or specific IDs.
/debug- Starts debug mode or stops it.
/defaultgamemode- Allows you to change the default mode for new players on the server.
/difficulty- Changes the difficulty of the game, 0 - peaceful, 1 - easy, 2 - normal, 3 - difficult.
/enchant [level]- Enchant an item in your hands to the level specified in the command.
/gamemode [target]- Changes the game mode for the specified player. Survival (survival, s or 0), Creativity (creative, c or 1), Adventure (adventure, a or 2). For the command to work, the player must be online.
/gamerule [value]- Allows you to change several basic rules. The value must be true or false.
Rules:
doFireTick- if false, stops the spread of fire.
doMobLoot- if false, mobs do not drop drops.
doMobSpawning- when false, prohibits mob spawning.
doTileDrops- if false, objects do not fall out of destructible blocks.
keepInventory- if true, after death the player does not lose the contents of his inventory.
mobGriefing- if false, mobs cannot destroy blocks (creeper explosions do not spoil the landscape).
commandBlockOutput- if false, the command block does not output anything to the chat when executing commands.
/give [amount] [ Additional Information] - Gives the player an item specified by block ID.
/help [page | team] ? [page | team]- Displays a list of all available console commands.
/publish- Provides access to the world via a local network.
/say- Shows a message in pink to all players.
/spawnpoint [target] [x] [y] [z]- Allows you to set the spawn point for the player at the specified coordinates. If coordinates were not specified, the spawn point will be your current position.
/time set- Allows you to change the time of day. Time can be specified in numerical value, where 0 is dawn, 6000 is noon, 12000 is sunset and 18000 is midnight.
/time add- Adds the specified amount of time to the current one.
/toggledownfall - Allows you to enable or disable precipitation.
/tp , /tp- Makes it possible to teleport a player specified by name to another or to the entered coordinates.
/weather- Allows you to change the weather to certain time, specified in seconds.
/xp- Gives a specific player the specified amount of experience, from 0 to 5000. If you enter L after the number, the specified number of levels will be added. In addition, levels can be lowered, for example -10L will reduce the player's level by 10.
/ban [reason]- Allows you to block a player’s access to the server by nickname.
/ban-ip- Allows you to block a player’s access to the server by IP address.
/pardon- Allows you to unblock the specified player from accessing the server.
/pardon-ip- Removes the specified IP address from the blacklist.
/banlist- Allows you to see a list of all players blocked on the server.
/op- Gives the specified player operator privileges.
/deop- Takes away operator privileges from the player.
/kick [reason]- Kicks the specified player from the server.
/list- Displays a list of all players online.
/save-all- Forcefully saves all changes to the server.
/save-on- Allows the server to make automatic saves.
/save-off- Prevents the server from performing automatic saving.
/stop- Shuts down the server.
/whitelist list- Displays a list of players in the whitelist.
/whitelist- Adds or removes a player to the whitelist.
/whitelist- Enables or disables the use of a whitelist on the server.
/whitelist reload- Reloads the whitelist, that is, updates it in accordance with the white-list.txt file (can be used when white-list.txt is modified manually).
Even more commands for the minecraft server have been written
How to open ports for a minecraft server

If you have ever used Skype or torrent or creating game server on your computer, then you encountered the problem of opening ports on the router and setting up a firewall or firewall. If in the case of programs like Skype or for example uTorrent it is much simpler, since they themselves configure and open ports in automatic mode using UPNP (Universal Plug And Play) technology - Universal automatic setting network devices., and add themselves to the firewall exclusion list themselves, then setting up a game or web server requires the user to do all this manually.
Before moving directly to practice, let's define the terminology:
Port- application address to local computer. It is tied to the IP address of your computer and it looks something like this: 192.168.1.7:80
. IN in this case 192.168.1.7
this is the IP address, and what remains after the colon is the port, that is 80
. Ports are needed in order to determine for which program the information received from the network was intended. There are 65,536 ports in total, which is two to the sixteenth power. Some of them are reserved. For example, port 80 is used by servers to work with HTTP and port 444 is used to work with HTTPS. If you need to create your own own web server, then you will need to open both of these ports for incoming and outgoing connections. By the way, the ports are used by two TCP protocols and UDP and the difference is that TCP allows you to create a connection in which all data is checked and reaches the recipient guaranteed, without errors. And UPD transmits data without integrity checks and does not guarantee delivery, which is not entirely good. But due to unreliability UDP protocol the load on the server is reduced, so it is very often used in online games, where a lot of players play at the same time, and for transmission streaming video For example Skype program. Sometimes ports are used by viruses to remote connection and transferring user data to attacker servers, for this there are programs for filtering ports, they can be called differently Firewall, firewall, firewall, and so on. But they have the same goal - to prevent viruses from working normally, and vice versa - to do everything possible to regular programs worked correctly. For example, if your computer is connected to the Internet through a router, and this router has a firewall, and you have a firewall installed on your computer and the rules of these firewalls It is forbidden to accept and receive traffic, for example, on port 5000, then until you configure both of these filters, your program that uses this port will not work correctly.
I hope now you understand more or less what a port is and what a firewall is used for. And now you can move on to the most interesting and useful thing, the settings.
Video instruction.
Information for this article was taken from the news site