How to use dr web cureit without damaging system files? Antivirus utility CureIt. Operating Instructions Carrying out a quick check
If you are performing treatment outside of Safe Mode, we strongly recommend that you disable your main antivirus during the scan. This will greatly speed up the verification process and save you from possible unpleasant surprises.
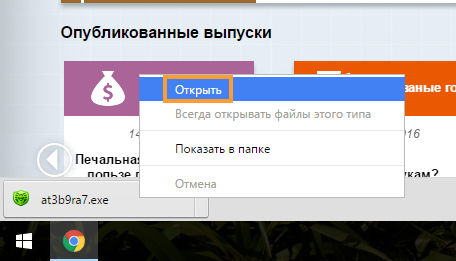
2. Run the downloaded file.
If you have Windows 7 or 8, be sure to run the file as an administrator (right-click on the file and select the appropriate item).
3. Agree to the request from Dr.Web CureIt! enable enhanced protection mode.
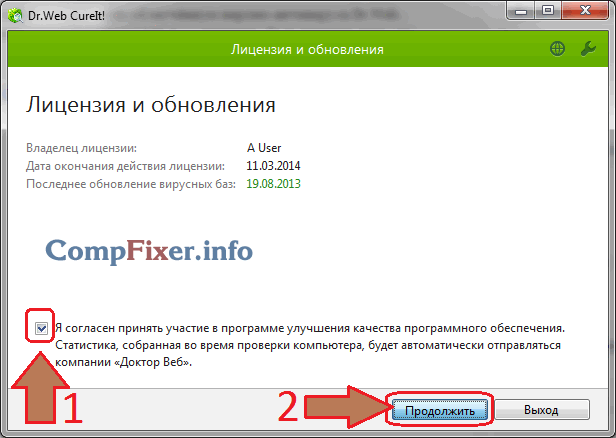
4. Agree to participate in the quality improvement program by checking the box and clicking “Continue”, otherwise the verification will not be completed.
5. Before checking, go to “Options”, click on the “key” in the upper right corner, select “Settings”.
6. In the first tab “Basic”, mark
- “Protect the work of Dr.Web CureIt!”,
- “Block network access” and
- “Automatically apply actions to threats.”
7. You don’t need to change anything else in the settings. "OK".
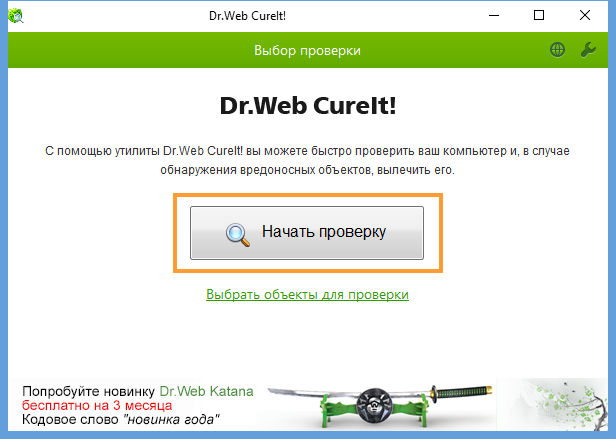
To scan your computer completely, click “Start scan”; to select the items to be scanned, click “Select objects to scan”.
For the first scan, I advise you to scan your computer completely.
8. After checking with the Dr.Web CureIt! A scan results window will appear, showing the number of detected and neutralized threats, and below a list of disinfected, moved or deleted files.
9. If you find a deleted system file in the list and are afraid for the performance of Windows, then it is easy to restore it from quarantine by going to
“Options” → “Quarantine Manager”.
Mark the desired file and click “Recover”.
This way you won't damage the system and can re-check for viruses with another scanner, like or, which may cure the infected file rather than delete it.
The CureIt! utility, developed by Danilov’s laboratory, is a lightweight version of the Dr.Web antivirus. It does not require installation and is designed to scan your computer on demand. The program does a good job of removing most viruses and is convenient to use when the system is infected with viruses and malware. You can use the utility both if there is no protection on your computer, or in parallel with another antivirus - to be on the safe side. In this article, we will tell you how to use CureIt and get rid of malware with its help.
Where to download the program
Click Download for free:

Select Download Dr.Web CureIt! with statistics sending function:

Check the box I accept the terms of the License Agreement.
Click Continue:

Wait until the file is downloaded.
How to use CureIt
Run the downloaded file:

Agree with the security warning:

Opt out of enhanced protection mode:

Check the box I agree…
Click Continue:
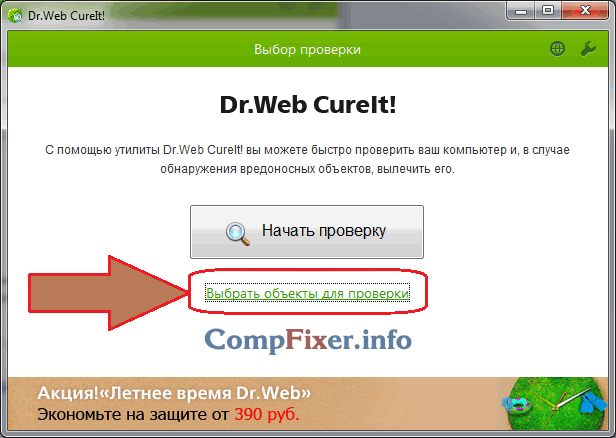
Select all available objects:

In the upper right corner, click the button Settings and check the box Automatically apply actions to threats:

Click the button Run scan:

The scan has started and if viruses are found, they will be automatically removed!

Attention! After finishing the utility, be sure to restart your computer!
How check your computer for viruses for free. For this, the free Dr.Web CureIt! utility is usually sufficient.
In Russian it’s simply “Doctor Web”.
You can download from the official website.
I’ll also say that it’s better to check by booting your computer in safe mode! Because, if you don’t know, a virus is a small program that sneaks into your computer to carry out certain actions! But programs do not start in safe mode! And the virus, in this mode, is easier to catch and remove!
How to boot your computer in safe mode?
To do this, when booting or rebooting the computer, when it is just starting to turn on, you need to hold down or continuously (with an interval of about 0.5 seconds) click the F8 key.
Until a black screen appears on the monitor, as shown in the picture below (if you didn’t manage to catch this moment the first time, then restart your computer and try again):

Using the arrows on the keyboard, you need to select the line “Safe Mode” and press Enter.
Of course, you can run the scan in normal mode! This is just a recommendation for the best!
Let me remind you that Dr.Web CureIt does not require installation on your computer! The utility simply starts and does its job. After which, you can simply delete it like a regular shortcut!
Regardless of the mode in which you do this, now the further steps are the same! So, let's launch...


So, when you click the “Disarm” button, which will appear after the scan is completed on the right side of the program, all threats will be removed from your computer! After this, you can close our “doctor”.
Another important point! If, when closing Dr.Web, a small white window appears with a warning about modification of the host file (which is a system file), then when asked whether you allow it to be corrected, be sure to answer “Yes”!
Well, I also recorded a video for you of how I do it in real life! Watch it if you perceive the video format better.
How to check your computer for Dr.Web viruses
And again, hello everyone, today we’ll look at another important utility for fighting viruses, this is Dr.Web CureIt!, it’s free (for home) and can be used together with an already installed antivirus, that is, there should be no conflicts.
Now let's talk a little about the scanner itself, as I already wrote, Dr.Web CureIt! This is a free scanner from the developers of the Dr.Web antivirus itself and can remove viruses such as email viruses, worms, as well as those that hide in office documents, advertising viruses (Adware), potentially dangerous software, spyware (Spyware), but anything that can cause harm your computer - everything will be found and deleted
Rootkit detection technology can detect threats that use advanced methods to hide in the system.
But there are also disadvantages to the scanner, all of which you have to pay for something for free, namely the lack of automatic updating of signature databases (when re-checking, you will need to download the scanner from the site again). Also, a free scanner does not have the ability to protect you in real time. As you can see, there are disadvantages, but they are not particularly critical. Another joke is that you can check your computer only if you accept the terms for improving the software, and statistics will be sent. But there’s nothing wrong with that, believe me!
Well, that's it, we got to know the utility a little, now it's time to test it - follow this link and click Download for free to download the scanner:

You will be redirected to a page where you need to read about the agreement again and click Download again:

Well, now the file download will begin. I will say right away that it weighs a lot, mine is 180 MB, but I think this is due to the fact that it already has signature databases. What’s also good is that the file is downloaded, as I understand it, with a random name, so that the virus cannot determine that it is an anti-virus utility (some even block anti-virus sites to prevent deletion attempts).
In general, as it downloaded, run it (I recommend running it as an administrator, to do this, open the folder where the scanner was downloaded, right-click on it and select Run as administrator):
A window will appear where you need to agree to participate in the program to improve the quality of the scanner, in general this is probably still a minus, since without this you will not be able to use the scanner, here’s the problem:

Before you click Continue, I’ll also tell you that there are some options, you can see them if you click on the key in the upper right corner:
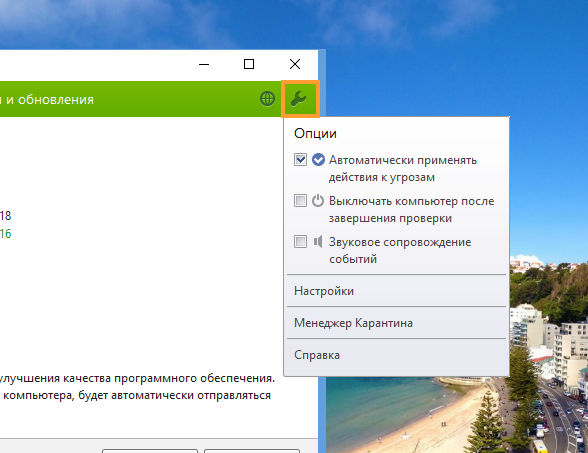
Here I see one useful option - this is to enable automatic action for detected threats. You don’t have to check the box, but if you do, all detected viruses will be eliminated.
By the way, the Dr.Web CureIt interface! resembles another scanner - only it downloads anti-virus databases separately before each scan.
Well, now you can click on the Continue button, and then - Start scanning (under the button there will be another button, if you click it, you can choose what exactly to scan, which folders and areas, you can just check the Scan Objects checkbox and don’t worry, but the verification itself may take some time):
After this, the verification began:

The check took me almost 10 minutes, despite the fact that there are not very many programs installed and there are no games, so if you have a lot of software, the check can take much longer.
If there are no viruses, then you will see a message like this, but if there are, then Dr.Web CureIt! will try to delete them, and cure the infected files (if this is impossible, they will be quarantined), I didn’t find any viruses, so this message:

After checking Dr.Web CureIt! can be deleted, because if you want to check again later, you need to download a new one. Now all that remains is to wish you good luck
14.04.2016Hello. Now I will write a very interesting and useful article about the utility CureIt by Dr.Web. I will write about how you can use it to check the reliability of your antivirus and how you can quickly remove a virus, Trojan and other malicious software. Let’s first tell you a little about Dr.Web CureIt, and then I’ll write what you can do with this utility, in what cases you need to use it, how to download and use the Dr.Web CureIt utility.
Dr.Web CureIt is a free utility (only for treating a home computer) from the famous anti-virus company Dr.Web. The trick is that Dr.Web CureIt does not need to be installed on your computer and you do not need to remove the already installed antivirus. Just download Dr.Web CureIt, launch it, select the scanning mode and wait for the utility to scan our computer and remove the threats found.
Why use Dr.Web CureIt?
If you already have an antivirus installed, for example, I have ESET NOD32 installed, then using the CureIt utility you can check the reliability and effectiveness of the already installed antivirus. How? Yes, just scan your computer using CureIt. And if it detects many viruses with which your antivirus has lived in harmony for a long time, then you should think about changing your antivirus, for example to the same Dr.Web.
As I already wrote, I have NOD32 installed, so when scanning with Dr.Web CureIt, it found and cured only one Trojan. Whatever antivirus you have, well, except for Dr.Web :) I advise you to perform such a check and understand how effectively your antivirus works.
It often happens that strange and different problems appear on your computer. Typically, viruses and other malware are to blame. Sometimes it’s clear that the virus is to blame for everything, and sometimes you can’t tell what the problem is. In any case, I always advise scanning your computer with an antivirus with updated antivirus databases, or with the AVZ utility, which I wrote about in the article.
So, the Dr.Web CureIt utility is another tool that needs to be used to check your computer in such situations.
How to check your computer using Dr.Web CureIt?
Enough with the theory, let's move on to the technical part. First, we need to download the utility. To do this, go to the website http://www.freedrweb.com/cureit/ scroll the page and click on the button "Download for free".
Scroll the page and press the button.
Put a tick next to “I accept the terms of the License Agreement.” and click “Continue”.
A message will appear in which you need to click “Save” and save the file, for example, to your desktop. The file size is almost 106 MB.
When the file cureit.exe fully boot onto the computer, launch it by double-clicking on it with the left mouse button.
A window will open with a message that Dr.Web CureIt is running in enhanced protection mode. Click “Ok”. In enhanced scanning mode, the computer will be blocked, but there is also a greater chance of finding a virus.
You can check the box and agree to participate in the program to improve antivirus programs and click “Continue”.
If necessary, you can select objects to scan and click on the big button to start scanning “Start checking”.
Now you need to wait until the check is completed. After scanning, the utility will display a list of threats found, opposite which you can choose what to do with them; I recommend choosing “Cure”. And press the “Disarm” button.
After cleaning the system, reboot, and the file that we downloaded can be deleted.
Now you know another good way to quickly remove a virus. This utility definitely deserves attention and thanks to Dr.Web for the opportunity to scan and clean your computer from viruses for free. Everything is organized so simply that anyone can perform such a check, you don’t have to be a specialist.
Check your computers, check the effectiveness of the antiviruses that you have installed. Good luck!