How to set up NTV Plus channels. Algorithm for self-tuning NTV Plus channels
1. Before you start searching for NTV-Plus channels, you must install and connect to the receiver an antenna tuned to the satellite in position 36E.
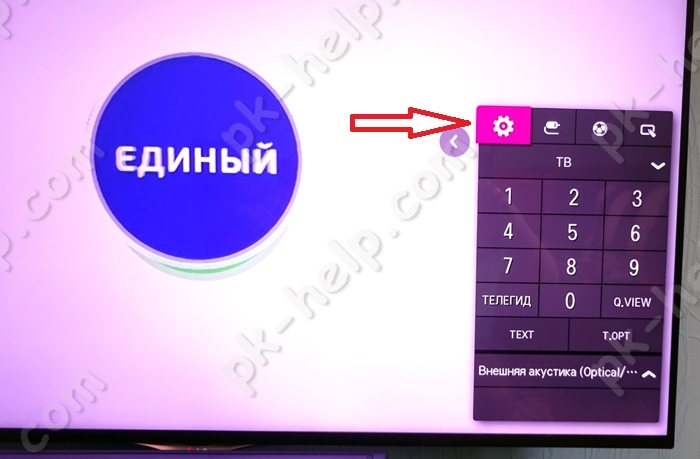
2. Go to the "Main Menu", then to "Settings"
3. Then in "Antenna Settings"

4. In "Antenna Settings" specify the following values:

Leave the "LNB/Switch" value as it is - off/off, if you have one antenna tuned to one satellite.
If you have several satellites configured, then adjust the “LNB/Switch” value according to the values of the DiseqC/ output numbers
Leave the "Motor Setting" value as is -No unless you are using a motorized antenna.
If you have a motor installed, then set the “Motor Settings” values according to your antenna position parameters.
5. If you have configured everything correctly, an inscription should appear at the top displaying the operator’s name, and at the bottom the “Level” and “Quality” values will be from 1 to 100%.


7. The receiver supports four search modes satellite channels.
“Auto” search mode: Automatically searches for channels using all satellite frequencies that are stored in the receiver by default.
Search mode “Manual”: Search for channels by selected satellite frequency.
Blind search mode: The receiver scans everything possible frequencies satellite, and then searches for channels using the found frequencies.
“Advanced” search mode: Manual search not all channels located on the selected frequency, but specifically one specified channel.
Select Manual mode
Set "Network Search" to "On"
Then press the OK button on the remote control, on the item "Start Search"

Using this method, NTV-Plus channels can be found on all satellite frequencies that have the network identifier "NTV+"

8. If there are frequencies not signed with the name of the operator, and in network search the channel search did not work on these frequencies, in this case, go to https://www.lyngsat.com/
9. In column 73E-0E, select the second row.


Please note that NTV-Plus can be listed twice, East packages from satellite 56E and West packages from satellite 36E. In our example, we are looking for channels from the NTV-Plus West package
11. After selecting an operator, you will have access to a list of all broadcast frequencies of the operator and a list of channels

Select the desired frequency from the list and start searching for channels, as indicated in paragraph 7
For reference:
Polarization L (Left) - In the receiver, select the value H (Horizontal)
Polarization R (Right) - In the receiver, select the value V (Vertical)
So, as I wrote earlier, classic way connections satellite television as follows:
Satellite dish- satellite receiver- TV.
Advantages of using a satellite receiver:
For this method, you can use any TV, no matter whether you bought it a year ago or 10 years have passed, the main thing is to choose a cable to connect the satellite receiver and TV;
A satellite receiver can act not only as a satellite signal receiver, but also have other functions, for example: Internet access, Smart TV, DLNA, etc.
Disadvantages of using a satellite receiver:
Inconvenience when using two remote controls (from the TV and from the satellite receiver). Although modern TVs use various technologies to combine all devices and use only the TV remote control (for example, anynet+ technology in Samsung-e), but similar technologies They do not fit all equipment and do not always work perfectly.
Connecting satellite television using a CAM module.
Another way to connect satellite TV is to use a CAM module. CAM module(Conditional Access Module, module conditional access) - electronic device, used as an adapter specific system coding to common interfaces conditional access (Common Interface) in televisions and digital television receivers to provide subscribers with access to encrypted media content in digital television(Wikipedia).
In the majority modern TVs A satellite receiver (DVB-S2) is already built-in, which only needs to add a device for decoding channels - a CAM module. Since each operator has its own encoding system, each operator (Tricolor, NTV+, etc.) has its own CAM module. Thus, using the CAM module specific operator, you activate the receiver built into the TV and watch satellite channels of the selected operator without using an external satellite receiver.

Pros of use CAM module:
Control from one remote control. It would seem like a small thing, but it is VERY CONVENIENT.
TV must support DVB-S2 and Cl+ module. You can find this information from technical documentation to the TV or by telling the model of your TV when purchasing a CAM module.
How to connect and configure the CAM module?! In fact, connecting and setting up a CAM module is extremely simple and can be done without the help of specialists. Below we describe in detail how to install and configure the CAM module; it will be relevant for all popular operators - Tricolor, NTV+, Telekarta, Rainbow etc.
Installation and configuration of the CAM module.
The first step is to correctly insert the access card into the CAM module. To do this, turn the access card with the metal contacts facing up and insert it all the way, with the CAM module facing you.

Then turn off the TV and insert the CAM module into the special slot (PCMCIA slot), usually located on the rear side panel of the TV. The module must be inserted with its front side facing the wall.

Connect satellite dish to the TV.

After that, turn on the TV.
Before setting up satellite channels, I recommend making sure that the TV “sees” your CAM module; to do this, go to the TV settings and look at the information about the CAM module. For example, on LG TVs, to do this you need to go to "Settings" - "Quick" - "Search for channels" - "CI data (CAM)"


After that "Module".

Select your module, in my case it is Tricolor CI plus CAM

And see information about it.

If the TV does not “see” the CAM module, it means you inserted it incorrectly, turn off the TV and insert the CAM module correctly.
Setting up satellite channels via CAM module.
Below I will describe how to configure the CAM module on an LG TV; for other TV models (Philips, Samsung, Sony, etc.) everything will be similar.
Go to the TV menu, to do this press:
1) on a regular TV remote control the “Settings” button
2) on the magic remote control the "Input" button

and select the Settings button on your TV.
In the "Quick" menu, select "Search for channels."

Select "Auto Search"

Select "Satellite" in the settings mode and click "Next".

From the list, select the operator whose CAM module you are using, in in this case Tricolor.

If you use the popular operator Tricolor, NTV+, etc., then in the next step just click “Next”, otherwise click “Settings” and make the settings appropriate for your satellite operator.

The next step is to click “Run” to start searching for channels. You can also specify more exact search by selecting, for example - Skip encrypted channels, etc.

Will begin automatic search satellite channels, you must wait a few minutes before it ends.

As a result, you will see the number of channels and radios found, now you can click “Done”.

As a result, you have configured satellite television using the CAM module.
Video settings of the CAM module Tricolor, NTV+, Telekarta, Raduga.
Today we will talk about how to install and configure the dish yourself and satellite equipment NTV plus + do it yourself at home. We will also consider detailed instructions on installation and configuration of the NTV+ plus satellite television set with visual instructions step by step diagrams and photo
The satellite dish is configured using certain coordinates, which you can find in the instructions.
COLLECTION AND INSTALLATION OF SATELLITE TELEVISION
To assemble correctly satellite dish You must have instructions, which are usually found in the box with the equipment, as well as a key for 10 and 13. The process of installing and assembling satellite television is described in detail using illustrated tips.
After installing the antenna and its parts, first of all, you need to secure the equipment bracket, which is most often located on the south side of the building. Before you begin attaching the bracket, evaluate the direction of the antenna and make sure it is mounted correctly. It is recommended to install the device so that there are no obstacles in its direction. You can also install the antenna on a special stand, which can be purchased at construction stores any city.
Before you connect coaxial cable with the receiver, you need to make sure that after attaching the bracket all the bolts are well tightened and only then proceed with the connection. All the connectors you need are included with the satellite dish.

ANTENNA SETUP
In order to set up a satellite dish yourself, you first need to connect the receiver to the TV. After that, you need to automatically search for channels. If you see two scales changing on their own, then you did everything right. After a while the channels will tune in on their own.
In order for the antenna to be in the correct angle, you need to install it on a vertical plane. It is recommended to place the antenna perpendicularly with a slight upward deviation. Finding directions on a satellite is a little more difficult. It is best to use a compass. The direction can also be compared with your neighbors' satellite dish, if possible.

After determining the location of the satellite, we recommend slightly changing the antenna location to improve the signal level.
SOFTWARE HARDWARE
To start using satellite television from NTV PLUS, you must register as a subscriber and antenna user. You can register on the company’s official website or at the main office.

Without registration, watching television will not be available, since you need to turn on the receiver, which is blocked. The dispatcher will provide the code after you pay the tariff and register. After this, a picture with the company logo will appear on your TV screen. Having done all the steps correctly, after a while you will be able to enjoy high-quality television.
Converter is receiver, which is attached to the focus of the signal reflected from the satellite antenna and converts this signal into electrical, after which it transmits it to the receiver.
A receiver is a device that converts the signal coming from the converter into an “understandable” signal for the TV. The receiver connects to the TV using HDMI interface, SCART, "tulip", etc. depends on the model of the receiver and the connectors on the TV.

The general diagram is presented below.
Installation of NTV+ dish
So, let's move from theory to practice. Below I will describe how I installed and configured NTV+
When installing a satellite dish, you can also look around, since most people use either Tricolor or NTV+, accordingly you will understand in which direction you need to turn the antenna. If there are no dishes nearby, turn the dish to the south (since the satellite “hangs” on the equator), it should be noted that there should not be any trees or buildings on the path between the satellite and the direction of the dish, since they will not allow the signal to reach the dish.

Next, you need to run a coaxial cable from the receiver (where the TV will be) to the satellite dish converter. If the cable exceeds 10 meters, you can buy a high-quality 75 Ohm coaxial cable of the required length.
After this, using HDMI cable, SCART or "tulip" connect the receiver to the TV. Then turn on the receiver, select AV mode (corresponding interface) on the TV. You will see the receiver menu, select the satellite in the settings (let me remind you, for NTV+ and Tricolor it will be the same satellite), for the European zone it will be EUTELSAT W4/ W7 or EUTELSAT 36A/ 36B (they have been renamed).

the following rules must be followed: unobstructed view in a southerly direction, because The satellite is located approximately in the south. The location must be chosen in such a way that there are no serious obstacles to the signal in the direction towards the satellite: high-rise buildings, trees, etc. Through tree foliage, branches, window glass, etc. the signal does not pass through. It is not necessary that the windows of your apartment or private house face strictly south; it is important that it is visible in one of the windows (for some satellites, southwest or southeast). If the south direction is not visible from the windows, the antenna is mounted on the roof.

The Dishpointer service will help you decide on the location for installing the satellite dish.
1. Find the building where you plan to install the satellite dish on the map.
2. Using the mouse, drag the mark to the intended installation location.
3. Using the [+]/[-] buttons, set the required scale.
4. On the map, the green line will show the direction of the NTV plus antenna.
5. Geographical data of your location (latitude and longitude), parameters for setting up a satellite dish (elevation angle, azimuth, polarization), you can find under the map.

Assemble the satellite dish (instructions included). Fix the satellite converter on the bracket.
Drill holes for the support (bracket) using a hammer drill.
Pay great attention to securely fastening the satellite dish bracket and tuning the dish to the satellite.

If the wall is load-bearing, made of brick or concrete, the satellite dish bracket is installed using anchors. If the wall is not very strong and cannot withstand the vibration of a satellite dish during strong gusts of wind, then the bracket is secured with studs.
Cut the cable.
The next step is to connect the coaxial cable to satellite converter and satellite receiver NTV plus.

Please pay Special attention- when connecting the coaxial cable of a satellite receiver, the receiver must be de-energized (unplugged from the power supply). Otherwise, the satellite receiver may be damaged.
You can set up a satellite dish using a receiver or a device for setting up satellite dishes - a satellite finder.
Setting up an NTV plus satellite dish using a satellite receiver.
Option 1, with the HUMAX VAHD-3100S receiver - connect the receiver to the TV - connect the coaxial cable from the satellite dish to the LNB IN input of the satellite receiver, insert the NTV Plus smart card into the receiver, turn on the receiver.
Attention, when connecting the cable to the receiver, the receiver must be turned off from the power supply!!! Otherwise, the receiver may be damaged.

Before starting the search, you must go to the receiver’s menu item “Signal Information”.
To do this, press on the remote control: "Menu" --- select "Settings" - "System - "Signal information (pin code 0000). Next, we proceed to setting up the satellite dish.
One person sits directly next to the receiver, the other adjusts the satellite dish; communication can be maintained using walkie-talkies or mobile phones
Satellite antenna without sudden movements, adjustable around the axis (azimuth) and vertically (angle).
You need to make it appear largest signal, rotating the antenna in small steps. It is necessary to adjust the antenna 3-5 mm at a time, fixing it in each position for 1-2 seconds, so that the satellite receiver can process the signal from the satellite.

If you see satellite signal on the receiver scale, tighten the nuts of the holder responsible for rotating the satellite dish around its axis. After this, adjust the antenna until highest value“Signal quality”, on the receiver scale. Then tighten all fasteners on the antenna.
Searching for a satellite signal and setting up the NTV Plus antenna using satellite finder.
Sitefinder – simplifies setting up a satellite dish and searching for a signal from the NTV Plus satellite. Setting up a satellite dish with a household satellite finder. These devices have an audible alarm, two light diodes, a dial signal indicator, and sensitivity adjustment.

1
Connect the sitefinder with a coaxial cable, between satellite converter and the receiver, at a distance of 1-1.5 m from the converter. Satfinder connectors are indicated by markings (on back side). The cable (going to the converter) is connected to the “LNB” connector, and the cable going to the NTV plus satellite receiver is connected to the “REC” connector.
All actions with a coaxial cable must be performed with the receiver turned off from the power supply.
2
Open the satellite receiver menu item "Signal information".
On the remote control, press: "Menu" --- select "Settings" - "System - "Signal information (pin code 0000). Next we proceed to setting up the satellite dish.

3
Approximately point the NTV Plus satellite dish in the desired direction. Set the level arrow in the middle, using the sensitivity control on the satellite finder, slowly rotate the satellite dish in azimuth to the left/right and in elevation up/down. Achieve the highest signal level on the dial scale. Please note that when tightening the satellite antenna mounts, the angles are lost, so the antenna adjustment continues until the last turn of the adjustment nuts.

4
After this, make sure you are tuned to the right companion, to do this, enable automatic channel search on the receiver. If the satellite receiver saw the TV channels you required, it means you followed all the instructions correctly and were able to set up the satellite dish on your own. If the signal from the satellite is not found or you have found the wrong satellite, continue adjusting the antenna until the satellite finder shows you the signal from the desired satellite.
5
After completing the setup, turn off the receiver and disconnect the device from the satellite dish.

If the antenna is configured correctly, you will see an image free channels, such as: NTV plus info channel, etc.
Next, you need to go through the procedure of activating the NTV Plus card and registering the NTV Plus agreement.

Fill out the NTV Plus agreement according to the columns on the agreement form.
We remind you that the first form of the NTV plus agreement (handwritten original) must be sent to the NTV plus television company by postal letter, within a month, at the address: 117545, Moscow, Vorshavskoe highway, 125, building 1, sec. 10. OJSC NTV Plus.

Installation of NTV+ antenna
1. Assemble the antenna according to the instruction manual.
2. Attach the antenna bracket to the wall. Fastening elements (anchor bolts, studs, nuts, screws, etc.) are selected depending on the wind load and the material of the wall on which the antenna is mounted.

3. Install the converter in the holder with the connector facing down so that precipitation does not get inside the converter.
4. Connect the cable to the converter using the F-connector*.
5. Attach the cable to the converter holder arc with plastic ties or insulating tape.
6. Seal the entire length of the F-connector with heat shrink tubing or 2 layers of insulating tape, and apply a layer of silicone sealant evenly to the insulating tape.

7. Install the antenna on the bracket. Tighten the adjusting nuts so that you can move the antenna in the vertical and horizontal planes with some effort.
8. Secure the cable to the antenna bracket with plastic ties or electrical tape. Leave a 1m cable reserve near the antenna, also securing it to the bracket.
*Installation procedure for standard satellite television F-connectors

1. Remove the top insulation of the cable by 15 mm without damaging the shielding braid.
2. Place the braided shielding along the cable.
3. Carefully position the foil along the braided shielding.
4. Remove a layer of internal insulation by 10mm.
5. Screw the connector until it stops.
6. “Bite off” the central conductor so that it does not protrude beyond the connector by more than 2 mm.
3. Setting up the NTV+ antenna
1. Approximately set the azimuth and elevation angle of the antenna, focusing on the data for the city closest to you given in the table. The azimuth can be set using a compass. It is more difficult to accurately determine the elevation angle, since the angle of inclination offset antenna depends on its design, and the NTV-Plus project uses antennas from several manufacturers. For example, the exact vertical position of the antenna of the Ulyanovsk Supral plant corresponds to an elevation angle of 26.5°.

2. In accordance with the operating instructions for the digital terminal, connect the cable coming from the converter to it. Carry out the cutting of the F-connector according to the method given above.
3. Connect the digital terminal to the TV according to the terminal's operating instructions and turn it on.
4. The digital terminal is pre-programmed for NTV-Plus channels. Select an “open” channel from the list of terminal channels (for example, Info channel).
5. Slowly moving the antenna mirror in the vertical and/or horizontal planes around the intended location of the satellite, until a television picture appears on your TV screen.
6. Activate the “Received signal level” item in the menu of your terminal. Achieve maximum value received signal level by smooth movement antenna mirrors in vertical and/or horizontal planes. Please remember that the signal level depends on weather conditions. In conditions of dense clouds, heavy rain or snowfall, the signal level may decrease until the image disappears. Snow stuck to the antenna also significantly worsens reception conditions.
7. Tighten the adjusting nuts while monitoring the received signal level.
8. Insert the NTV-Plus card into the digital terminal according to the operating instructions.
The CAM module must be installed in a switched off TV to avoid damage to the equipment. Before connecting the TV to the network, make sure that the CAM module is completely inserted into the corresponding connector (PCMCIA port) of the TV.
The access card was correctly installed in the CAM module itself - the metal contacts of the access card chip were directed towards the front side of the TV module.
ATTENTION! After turning on the TV, information about the initialization of the CAM module will appear on the screen.
For the correct orientation of the Card in the module, pay attention to the image of the chip on the sticker of the TV module.
Setting up the CAM module:
We reset the settings on the TV to factory settings. Menu - support - self-diagnosis - reset - ok.

After the TV reboots, go to the menu - channel - antenna - select the value “satellite”.
Then in the same section: satellite - system - enter the password - 0000 - in the menu that appears, click “select satellite”.
Uncheck all satellites that are installed by default (if this cannot be done, you need to remove the CAM module from the slot and reset the settings again), scroll through the list of satellites and select the “USER SAT” satellite.

Create your satellite (check the box next to it) and save it. Next, the “LNB power supply” option should be ON. Then we go to LNB settings, do as in the picture below, except:
section “transponder” - we don’t fill anything in there, so we’ll enter it manually.
Next, we exit this submenu, go to the “manual setup” section, see our new satellite and click “scan”.
The “transponders” section will be empty, select “create”.
Next, we enter the frequencies we need (list below), indicate the appropriate transmission speed and select the type of polarization (L or R). Click “save”.
The channel package for this transponder will be scanned and saved into the TV memory.
Then everything is repeated for each subsequent transponder. There, in the “manual setup” menu, click “scan” in the “transponder” section, create the next one with your data, and so on. All previous loaded and scanned transponders with settings and channels are saved.
List of NTV-Plus transponders:
To independently configure the reception of NTV Plus satellite channels, you first need to reset all settings of the receiver. This is done by selecting the "Default Settings" item in the tuner menu. Next, in the “Channel” submenu, you need to click on the “Antenna” tab and go to the satellite settings.
Algorithm for self-tuning NTV Plus channels
- When the receiver asks for a PIN code, you must enter four zeros (if the code has not been changed before).
- In the window that appears, you will need to uncheck all satellites available by default. If this operation is blocked by the tuner, you must remove the CAM module from the slot.
- NTV Plus channels are broadcast by the EutelsatW4 36E satellite, which is marked with a checkmark in the receiver menu.
- Additional settings include setting the transponder 12130 R and LNB levels (lower - 0, upper - 10750).
After saving the entered parameters in the menu " Manual setting"You need to select the previously specified transponder and start searching for the network. The operation takes some time, after which all available channels NTV plus. This completes the setup.
If in standard list The EutelsatW4 36E satellite is not displayed, you should select “User sat 1” and create a new satellite network. In the satellite settings you need to enable the option " Power LNB» and set the above border parameters. There is no need to specify the transponder yet. After saving the data, you should go to the “Manual setup” menu, find the created satellite there and scan it. Then transponders and their parameters are created, which can be obtained from service providers.
After saving the changes, it will appear NTV Plus network. It must be scanned by clicking the “Search” button. After some time, channels associated with the selected transponder will be added to the receiver’s memory. Similar actions are performed for all other transponders. At the end of the setup, all NTV Plus TV and radio channels will be saved in the receiver.
Users are often faced with a choice of what to give preference to: ethereal digital channels, or satellite television. Exactly satellite broadcasting you will be interested if there is no cable television, and the distance to the tower does not allow setting regular antenna. Or you are simply not satisfied with the quality of the signal, the number of channels, and perhaps even the prices of the cable companies.
It’s not exactly a simple process, but if you strictly follow the instructions, it’s a completely doable task. If you are completely unaware of how satellite television works, we are ready to give you detailed explanations.
The technology of satellite TV is quite simple. The beam directed from the orbital vehicle is reflected at an angle in the antenna mirror and focused on the converter, where it is converted into a signal “understandable” to the receiver (receiver). In turn, the receiver also converts received signal, and after that gives it to the TV.

So, setting up NTV Plus yourself In any case, it starts with assembling the antenna. The instructions describe everything in detail, and it is almost impossible to make a mistake. After assembling the device, you need to determine the place where it will be located. Where can and where can’t you mount an antenna?
You can: walls of a house, roof, on the ground.
You can’t: on a roof canopy, indoors, behind glass.
Also remember that there are no obstacles between the satellite and the antenna. They can be either neighboring houses or trees.

So, you have decided where exactly the plate will be mounted. In which direction should it be directed? Answer: south. It is in this direction that the satellite hangs. Setting up NTV Plus yourself It will be much easier if your neighbors also have NTV. Point your antenna in approximately the same direction. Note that the fastenings to the bracket must be tightened sufficiently tightly, but so that the mirror can be moved horizontally and vertically. Connect the coaxial cable to the receiver and converter, and then connect the receiver to the TV. Tricolor TV channel settings.
After turning on the equipment, select AV mode. A list of satellites will appear on the screen. For NTV this is EUTELSAT W4/W7 or EUTELSAT 36A/36B. Now we are looking for an assistant, leaving him in front of the TV, and we ourselves return to the plate. We turn the mirror up and down very slowly and listen to the assistant’s feedback about the quality of filling the scales on the screen. At good quality You can start tuning channels. If setting up NTV Plus did not work out, or you are not satisfied with the image quality, then you can always use the help of our specialists to make adjustments. Tricolor