How to Set Up an iPhone Like New from Scratch - Detailed Instructions. How to set up your iPhone like new First launch of iPhone 6
Apple technology is one of the easiest to use. With each new version of iOS, developers try to simplify the system and make it as comfortable as possible for owners. But despite this, inexperienced users still have problems setting up Apple gadgets upon first activation. Let's look at all the settings and their nuances in detail.
Setting up iPhone, iPad and iPod from scratch: description of all points
The initial setup largely determines the level of quality and ease of interaction with the device. Despite the fact that many of its points can be skipped or changed later, for optimal operation of the gadget it is recommended to carry out all the necessary manipulations at the start.
Selecting a country, setting time and date
Once your Apple device starts up, a welcome message will appear on the screen. Swiping it aside will take you to the interface language options. Next you will need to select your country. After this, based on the time zone data of the selected region, the time and date will be determined automatically.
Connect to a wireless network
Connecting to Wi-Fi will be useful when performing subsequent device setup steps, in particular creating a new Apple ID or connecting an existing one (if you use one authentication system on several Apple gadgets). However, if you intend to save time or simply do not have access to a Wi-Fi network at the moment, you can skip this step.
Geolocation
In this device settings item, you are prompted to enable or disable geolocation. Location services are responsible for collecting information about your geographic coordinates. They are used by apps like Maps, Instagram, Camera, etc. to calculate your approximate location. You can also track your Apple device using location services. This function will come in very handy if the gadget is lost or stolen. As for the advantages of turning off geolocation - it will save battery power.
You can activate or deactivate location services at any time by going to Apple's settings. Also, their effect can be limited for some programs.
Setting up iPhone, iPad, iPod
At this stage it is proposed:
- set up your Apple device as new;
- restore it from iCloud backup;
- restore the device from a backup copy on a local disk.
If your smartphone or tablet is completely new and you are setting it up from scratch, don’t hesitate to select the first option. However, when setting up a gadget after a firmware upgrade or system recovery, it will be more relevant to use backup copies of data.
Apple ID
The next step is to create an Apple ID or log into an existing account. Apple ID is an account that gives access to applications such as the App Store, Apple Music, iCloud, iMessage, FaceTime, etc. To create it, you will need to fill out the following information:
- FULL NAME.;
- e-mail to which the account will be linked;
- account password;
- select security questions and answers to them (required to restore your account);
- Date of Birth;
- spare email;
- mailing address.
If you decide to skip this step, you can add or create a new Apple ID through your device settings at any time.
Terms of Use
Next, you must accept the terms of the license agreement for use. This point is mandatory and cannot be skipped. It's no secret that 99% of Apple users accept the terms of use without reading them. But if you decide to conscientiously read the full list of nuances of the user agreement and still disagree with some point, the only way out is to reject the terms of use and return the device to the store.
Touch ID and passcode
Acceptance of the terms of use will take you to the final stages of setup - creating a fingerprint using Touch ID and a password. These options will help protect your smartphone or tablet from unauthorized use. Confirming your password and/or fingerprint is required when unlocking the gadget (moving from the lock screen to the desktop) and logging into the App Store. You can skip this step and create a password and fingerprint at any other time by going to iOS settings.
The Touch ID function works on Apple devices with a fingerprint scanner, i.e. from iPhone 5s and higher. On older gadget models, a standard password is used.
Diagnostics
The final step requires you to agree or not to send system diagnostic data to Apple. The request is very standard and there is nothing in it that would violate confidentiality. On the contrary, information about errors and failures in the iOS system will allow developers to improve it and correct shortcomings in subsequent updates.
Having finished with the last stage of setup, all that remains is to click the “Get Started” button and enjoy using your Apple device.
First launch and setup of an iPad, iPhone or iPod immediately after purchase - video
Apple's initial setup does not take much time and requires minimal manipulation. Most of the steps, namely connecting to Wi-Fi, geolocation, creating an Apple ID, Touch ID and password, can simply be postponed until later. The iOS system makes it possible not only to return to setting all these options at any time, but also to change them in the future, based on personal preferences.
The pleasant moment has come to unpack the new Apple iPhone 6 smartphone. The iPhone 6 with a large screen was preferred by many Android users as a device for switching to Apple products. Carefully remove the device from the box to... Remove the iPhone and install the SIM card. Now you can move on to the most interesting part: how to activate the iPhone 6 when you turn it on for the first time, how to correctly fill out the initial settings that iOS 8 shows at startup. The user is greeted with a welcome screen that speaks many languages. Swipe from left to right to unlock your device. Now you can select the language of your iPhone 6.

Select your country of residence and a Wi-Fi network with Internet access, otherwise further activation will not be possible.


If a window opened in front of you iPhone activation- an alarm bell, they sold you not a new device, the phone was used before you. You must enter the Apple ID and password of the previous owner in order to activate the iPhone 6. Apple ID is the email on the basis of which an account is created in Apple services for further use of its devices. If you have passed the activation point, enable or disable the Geolocation service. Geolocation determines your location, is needed for maps and navigation, and geotags photos. It can be enabled in the future for individual applications.


There are two ways to set up a new iPhone: like new, and restore a backup from the iCloud cloud service or computer using iTunes. If you don’t have any other Apple devices, feel free to select “Set up like a new iPhone.” Create your Apple ID, an account for all Apple services, just enter your permanent e-mail in this field. Create a password for your Apple ID, the rule is as follows: at least 8 characters, must contain at least one capital letter and one number.


Next, agree to use all the services that Apple offers, they are free for users. iCloud Drive is 5 GB of cloud storage where contacts, letters, notes, photos and much more will be synchronized. Find My iPhone lets you locate your lost or stolen device. This function is very good at resisting attackers; with it you can track your iPhone on a map if it is turned on.


Set an access password; it will be shown when you turn on the iPhone, as well as when unlocking it, if you make the appropriate setting at a certain frequency. iCloud Keychain, a service that stores your passwords and credit card numbers, works stably. Automatically fills out forms in the Safari browser.


Hello dear friends! I thought for a long time about what would be so useful to write on New Year’s Eve and the decision came by itself. Surely, due to the upcoming holidays, the number of iPhone owners has increased significantly. This means that the number of questions about using the gadget, proper configuration and optimization of its battery life has increased.
Initial iPhone setup
First of all, I want to warn you that you should not fall for the offers of an abstruse seller to set up an iPhone and create an Apple ID for a symbolic amount. Firstly, you can do it yourself without any problems with the help of this small guide, and secondly, I have repeatedly had to fix the mistakes of such customizers (either the Apple ID will be made ugly, or they will not tell the owner the answers to the security questions). So send them to hell, we’ll set everything up and create it ourselves. And just one more important recommendation - be sure to keep your receipt, despite the fact that Apple’s international warranty (1 year) obliges official service centers to carry out repairs and maintenance without a receipt, it will be of great use to you if you sell your phone. This way you can easily prove that the iPhone was bought in a store and you are not a huckster.
Attention! Depending on the phone model and software version, the above setup items may vary slightly.
1. So, we press the treasured power button and we see such a screen.
2. Select a country, region.
3. Connect to WiFi or use cellular communication. Next, you are prompted to enable or disable location services. As a rule, I enable and then, at the detailed configuration stage, disable geolocation for applications where it is not needed. The fact is that it does a good job of reducing the battery life of the phone, so it’s better to turn off everything unnecessary. I'll tell you more about this later.
4. If you purchased an iPhone model 5s or higher, you can set up the Touch ID function, which allows you to access the phone, as well as the AppStore and some applications using a fingerprint.
Next, you need to come up with a six-digit numeric password, which is necessary if it is impossible to unlock the iPhone using a fingerprint. By the way, if six digits are too many for you, you can set a 4-digit password by clicking “password options.”
5. If the iPhone you purchased is not your first and you have prudently made a backup copy of data from your old device, you can select the appropriate item. Or set it up as new.
9. This step is for owners of iPhone 6 and later models. The system offers you to choose one of two options for displaying information on the screen: “standard” and “enlarged”. If there are no vision problems, then “standard” is the best.
10. Click “get started”, drum roll... and the phone’s home screen finally appeared before our eyes. Congratulations :)
What I mean is that the advice below is purely advisory in nature and is not dogma. It all depends on which of the two user groups you belong to.
2. Import contacts to iPhone. Read this short article about all the simple ways to transfer contacts to iPhone.
3. Now let’s return to the issue of setting up geolocation services (settings>privacy>geolocation services). I recommend turning on geolocation (select “when using the program”) for the following items:
- Cards
- Camera. Your photos will be automatically assigned a geolocation.
All other checkboxes are optional.
Scroll down the list and select “system services”. Disable:
- Geolocation iAds
- Compass calibration
- WiFi networks
- Diagnostics and use.
Be sure to leave the “find iPhone” switch turned on, the rest is again optional. If necessary, you can always adjust the geolocation settings to suit you.
4. Software Update. Don't forget to update iOS promptly (Settings>General>Software Update), as a rule, Apple improves stability and performance with each new firmware. But not always :). Keep in mind that this procedure requires stable WiFi if you are updating over the air (without a computer). Since updates weigh around 1 GB and not everyone can afford to spend all their mobile traffic on this matter.
For a complete look at the coolest features of iOS 9, read on
5.Get to grips with iTunes. Unfortunately, many beginners cannot make friends with iTunes. I think the reason lies in the fact that Apple decided to cram too large a list of functions into it. Here are a couple of articles for your reference.
7. Installing applications. If you have already created an Apple ID, then now you just need to go to the AppStore, select the desired application, download it and launch it.
By the way, if you don’t want to enter a password every time you download applications and content, then in the Touch ID settings (settings>Touch ID and password) you can activate fingerprint access.
This is where I think I will end my short guide. I sincerely hope that these tips could save someone from making mistakes. Of course, this is not a complete list of everything that can be configured and optimized. Therefore, I look forward to your comments with recommendations.
Happy upcoming year everyone! I wish you new iPhones and successful operation! 🙂
When you turn on any of the Apple tablets and smartphones for the first time, you need activate. Beginners and iPad users are unaware that the activation procedure is quite simple - they are willing to pay sellers to take the right steps.
The initial setup service for Apple equipment is one of the most expensive; in different salons, consultants charge from 500 to 1,000 rubles for activation. This article will tell you how to properly set up your iPhone the first time you turn it on. on one's own, and will relieve the user of the need to enrich communication stores.
Before you begin setting up your Apple device for the first time, you need to take the following steps:
- Recharge your device. It is necessary that the gadget's battery is filled at least 30%.
- Insert the SIM card into the tray using a special needle. Without a SIM, it was possible to activate gadgets with a pre-installed iOS operating system lower than version 7 by making an emergency call to 112. The new iOS 10 operating system does not provide this option.
- Connect your smartphone to Wi-Fi or mobile Internet. If 3G (or LTE) appears next to the network signal indicator and the operator's name, you will be able to do without Wi-Fi. If you have an EDGE signal (letter E), you will have to connect to the router.
- Download and install the latest version of iTunes on your PC. You can find the program here - http://itunes.apple.com/. If the user does not have access to a Wi-Fi network and does not have an “unlimited” SIM card, he can perform the initial setup via a PC/laptop with iTunes installed and wired Internet.
After completing all of the above steps, you can proceed directly to activating your iPhone.
How to set up iPhone for the first time?
You need to activate your Apple gadget as follows:
Step 1. Turn on the device by holding the “Power” button for 2-3 seconds. The Apple logo will first appear on the screen, followed by a greeting in different languages (“Hello,” “Hello,” and so on).
There is no need to be afraid of hieroglyphs at this stage - if the greeting is in Chinese, this does not mean at all that the iPhone is fake.
Step 2. Swipe your finger from left to right along the bottom of the display and on the next screen select Russian from the list of available languages.

Step 4. Select an available Wi-Fi network and connect to it.

If the network you would like to use for activation is not in the list, add it - click the “Select another network” button and enter the SSID.
If you want to use mobile Internet for initial setup, click on the “ Use cellular connection", located just below the list of networks.
Step 5. Enable/disable location services. Many of the iPhone applications are related to geolocation - if you refuse it, you will not be able to use, for example, a navigator. On the other hand, geolocation consumes a lot of energy - therefore, it is still recommended to turn it off during activation (“ Disable»).

Whatever decision you make at this stage, it will not be fatal. Location services can be activated or deactivated at any time.
Step 6. The iPhone will prompt you to create an Apple ID or sign in with an existing account.

Click on the button " Skip this step" and then confirm your decision by clicking " Skip».

Step 7. Accept Apple's terms of use - click " I accept" You can familiarize yourself with them in advance, but this will not bring you much benefit - there is nothing remarkable or interesting in the text.

Step 8. If you are the owner of an iPhone 5S or a newer model, the device will prompt you to configure Touch ID- fingerprint sensor. At this stage you have 2 options: " Tune" And " Set up later».
It is clear that by choosing the first option, you agree to configure immediately, and if you prefer the second one, you postpone the procedure. It is recommended that you set up Touch ID the first time you activate it. This does not take much time and effort - the user only needs to touch the button with their index finger or thumb several times. Home" You can be sure that the procedure has been completed correctly if the message “ Successfully» (« Success»).

Image: everythingicafe.com
Step 9. Create a numeric password. This code will allow you to unlock your device if for some reason Touch ID is unable to recognize your fingerprint. Enter 4 numbers that you will definitely remember, twice.

You can leave creating a security code “for later” - to do this, click on the “ Don't add a password».
Step 10. The final step is to choose whether you want error data to be sent to Apple. The manufacturer recommends choosing the option " Send automatically“- according to representatives of the Apple company, reverse information allows you to create more advanced products.

Information that goes to Apple includes geodata. This essentially means that the manufacturer will know where and when you were.
This completes the initial iPhone setup process. The welcome message “ Welcome!».

Click " Get started"and start exploring your new device!
Common problems when activating an iPhone and how to solve them
Most often, problems arise when activating an iPhone because of the SIM card. If the user sees the message “ Activation Error", he needs to make sure that the SIM card is working.

Image: infoidevice.fr
To do this, just move the card to another phone and see if the network is detected.
If the SIM is OK, you should try to fix the error as follows: by pressing the " Home"Call the bottom menu and click on " Start Over" This will not take you to the first settings page - try activating it again. You may have to do this procedure 6-7 times in order to get rid of “ Activation Error».
During the initial setup, you may encounter another error - “ Could Not Activate iPhone."
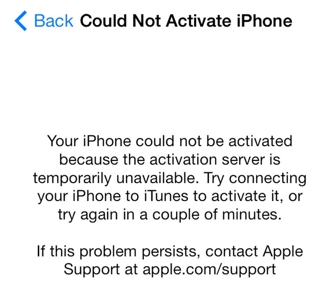
Image: ipadappsbuzz.com
The reason for this error is high load on the Apple server. It is best to wait 2 - 3 minutes and try to activate again. If this doesn’t work, you should change the way your gadget connects to the Internet - for example, use 3G instead of Wi-Fi. You can also write a complaint to Apple support, but you will have to wait several days for a response from the company’s specialists.
Finally, the third common problem is that beginners are unable to set up Touch ID - the sensor simply does not respond to finger touches. The solution to this problem lies on the surface - it is necessary to remove the factory film from the front edge of the device. The desire to protect the new iPhone from scratches is commendable, but for this you need to use a special film, and not the one that comes in the kit.
How to set up your iPhone like new?
The need to set up a used iPhone like New occurs when the device begins to freeze and slow down. The gadget's memory becomes clogged - this leads to slow and unstable operation of the device. A complete reset of your iPhone will help you quickly get rid of “garbage” in your memory. There is no need to worry that all user data will be deleted as a result of the reset - after all, you can first “pack” valuable information into a backup copy.
Correctly configure your Apple device like new you need this:
Step 1. Check if Apple offers you to update the operating system of your gadget. To do this, follow the path " Settings» — « Basic» — « Software Update" If you see that under the iOS version it says " Latest software installed", carry out further actions.
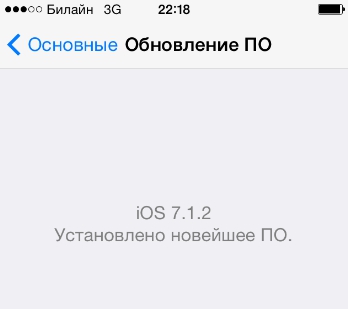
If there are updates available, install the latest version of iOS
On a jailbroken iPhone, you can only update the operating system through iTunes.
Step 3. Disable iMessage and the " Find iPhone" The messenger is deactivated in the " Messages" V " Settings" To turn off " Find iPhone"you need to go to the section " iCloud».

Step 4. Start cleaning your device. Follow the path " Settings» — « Basic» — « Reset" In the last subsection you will find the item “ Erase content and settings“—that’s what you need.

Click on this item and enter your security password.

Then confirm that you want to erase your iPhone - click on the appropriate button.

Next, wait for the gadget cleaning procedure to complete. If at the end of the procedure a welcome message appears on the screen, it means you did everything correctly. Set up your iPhone according to the instructions given in this article, and then. Through such manipulations, you can significantly increase the performance of the gadget without losing any important information.
Conclusion
When setting up your iPhone for the first time, the most time-consuming part is opening your Apple ID account. Another difficult step used to be registration in Game Center - but this application is no longer available in iOS 10. You can complete all other stages of iPhone activation in 5 minutes - they are simple and do not require programming skills from the user. For this reason, paying the money that consultants ask for the initial setup of an Apple gadget is completely unreasonable.
Have you just come from the store, taken out a new product from Apple with your hands trembling with happiness, but don’t know what to do with it now? No problem, read these detailed instructions on how to set up an iPhone from scratch like a new phone! Go!
iPhone activation and setup
When you turn it on for the first time, you need to do several steps once to initially set up your iPhone, which you will never have to repeat later. So, after pressing the power button, the first thing the phone will do is greet us in several languages and offer to set up the iPhone. Click on the corresponding link
In the next step, select your country

Next, to set up the iPhone, we will be asked to connect to a WiFi network. If you wish, you can do it right here. If there is no free Wi-Fi in the coverage area, then skip this configuration and select “Use cellular communication.”

After this comes geolocation - determining the location of the smartphone using GPS satellites. Since it consumes battery power unrealistically when constantly activated, it is better to disable it at this stage of setting up the iPhone. Subsequently, when installing applications, for example, Navigator, the phone itself will ask again whether you need to allow the use of geolocation specifically for this application - then we will allow it.

All modern iPhone models contain the unlocking function using a fingerprint; you will be offered to set up the so-called Touch ID in the next step. Follow the instructions on the screen, place your finger on the scanner and this smartphone protection will be activated. Later you can add more fingerprints for other fingers or family members.

And upon completion, we will also be asked to come up with a six-digit password in case the fingerprint scanner does not work

The next step is to restore settings from your old phone. If you already had an iPhone before, you can transfer all the old saved iPhone settings to the new one. If this is your first Apple phone or you don’t have a backup copy of your old one, then select “Set up as a new iPhone.” There is also the opportunity to transfer data from the Android platform, but this is a topic for a separate article.


When creating an Apple ID, we will be required to enter the region again

Accept the privacy policy

Enter your real email, which will receive a letter with a registration confirmation code, and also create a password


That's it - now go to the mailbox specified during registration and confirm registration.
Let's return to setting up the iPhone. After creating and authorizing your Apple ID, the voice assistant Siri activation window will appear. The thing is convenient, but you need to get used to using it. Therefore, if you do not plan to control the phone with your voice, then turn it off - also to save charge.

Finally, if you have the latest iPhone model in your hands, you can customize the appearance of icons and text on the display in a standard or larger version.
All! The iPhone is configured from scratch and is completely ready to work. Now you can start the fun part - installing applications, but more on that some other time