What is needed to build a PC. How to assemble a computer with your own hands? Basic rules and mistakes for beginners when assembling modern PCs
The computer configurator with compatibility check allows you to quickly assemble a system unit with the technical characteristics required by the user. Using our online designer, you can easily assemble a reliable office machine, a home multimedia system unit, or a powerful gaming configuration.
Computer assembly online
Nowadays, like many years before, assembling a computer from independently selected components is popular. This is a good opportunity to choose what you want. Nothing limits you; there are hundreds of options available for assembly, among which there is sure to be one you like.
Our online store offers the opportunity to assemble a computer online through the configurator. In it, this process is presented in the form of categories of components, from the processor to the power supply. Each category contains an expanded range of models with descriptions of characteristics for ease of selection.
To simplify the selection of components, the configurator has a compatibility filter for the main components of the assembly. For example, by selecting a specific processor, the following components are automatically filtered by compatibility. Also, you will be presented with a choice to install the operating system. After completing the assembly process, you receive the final result based on three parameters: price, technical data, rendered image. After placing an order and confirming it by phone, our specialists assemble this kit and check its functionality.
The advantage of this method of purchasing a system unit is that you not only choose the components you want, but also have the opportunity to choose the brand or manufacturer of the part.
Having assembled a certain configuration and completed by pressing the assemble/buy buttons, the assembly is assigned a specific serial number, by typing it in the product search bar, you can find this PC and send a link to it to friends or acquaintances for consultation or recommending them for purchase.
An important feature of our configurator is the “get an expert’s opinion” function. By sending your request through this form, you will receive a detailed response with a recommendation to the email you specified.
Try it and see for yourself - assembling a computer online is easy and simple! In case of difficulties, you can always get advice from our specialists on all issues that interest you.
Important! Computer assembly is free
The PC Configurator is an easy way to assemble a computer online while checking the physical compatibility of components.
Let's start assembling. We add the first element - the central processing unit (CPU). When selecting components, the appearance of the installed units is visualized. The price is calculated automatically online, consistently forming the cost of the finished PC. In a couple of clicks, the designer program helps you assemble and buy a system unit from scratch, assigns an assembly identification number, and saves a link. If necessary, prints the saved configuration. There is an option to find out the expert’s opinion using the feedback form.
Assembling a computer is a fascinating process. Available - top-end GEFORCE RTX video cards, latest generation Intel processors, RAM with passive radiator cooling and RGB backlighting, high-speed SSD drives, plus capacious HDD drives. Choose Asus Msi Gigabyte motherboards, spacious cases on aluminum chassis, Corsair, Thermaltake, Seasonic power supplies. Our designer knows how to solve difficult problems. Allows you to collect gaming computer, a productive graphics station, a machine for professional audio and video digitization.
When you have configured your PC, click the “place an order” button. Fill out the standard form, then you will receive an email with confirmation and contents of the order. Edelweiss store managers will contact you, answer your questions and agree on the time and conditions of delivery or pickup. The sales department will configure the selected PC, deploy licensed software (if you select an OS), and install the necessary drivers and utilities. The procedure for updating the BIOS to the latest available version is mandatory. PCs are tested with specialized software at full load for 4 hours.
Additional bonuses for clients
- using the code, discuss the benefits of assembly with an engineer
- the ability to quickly select a computer at a price online
- product customization
- information support, characteristics and descriptions of the nodes used
- free delivery in Moscow, fast delivery throughout Russia
Advanced online PC building service
Our experts suggest starting assembling a system unit by selecting a CPU (Processor). The configurator has an integrated module for checking the compatibility of components online. Therefore, having decided on a processor, you will be offered only components compatible with it. This will greatly simplify and speed up the assembly process.
- Build for games medium budget processor → six-core i5-8400, i5-9400F, Ryzen 5 2600. The AMD option is more suitable for game streaming.
- Build for games, medium budget video card → for FHD GTX1660, GTX1660Ti, RTX 2060 will deliver 2K (1440p). For budget builds, we can recommend a video card from AMD RX 570 8GB, but the RX 580 and RX 590 are not profitable to buy compared to the fresh GTX1660.
- Pre-top assembly processor → i7-8700, i7-8700K, i7-9700K, Ryzen 5 2600X, Ryzen 7 2700. Eighth-generation coffee machines with hyperthreading are better than their refreshes and are cheaper. The i7-9700K can be recommended exclusively for gaming builds. Ryzens are better at multi-threaded tasks.
- Pre-top assembly video card → for 2K QHD RTX 2070, AMD RX Vega 64. Video cards from NVIDIA are more energy efficient and generally faster, so it makes sense to look at Vega only if there is a big discount on these video cards.
- Top build processor → i9-9900K, i7-8700K, i7-9700K, Ryzen 5 2700X. In the top gaming builds, it makes sense to buy an eight-core, sixteen-thread i9-9900K processor.
- Top video card assembly → RTX 2080 Ti, RTX 2080, . For 4K UHD gaming, the only choice is the Nvidia RTX 2080 Ti video card.
Which computer to choose in 2018?
Due to the current difficult situation with the video card market and exorbitantly high prices, there is no need to talk about buying a budget computer in 2018. Players can be advised to switch to consoles - for example, the PlayStation 4 Pro/1TB now costs the same as an average GTX 1060 video card.
The rest of the pack boyars have to moderate their graphic appetites and choose a video card at a lower level. We wanted to take the GTX 1080, now, God forbid, we can scrape together a GTX 1070. Thanks to the gentlemen miners and a small cartel of video card manufacturers, who in turn blame the RAM manufacturers, allegedly the latter are exorbitantly inflating the prices of their products and, on top of everything else, disrupting the supply of GDDR5 chips so necessary for the production of video cards.
So, what can you use to build the best computer in 2018? Which processor and motherboard to choose for it, how to choose a video card and optimal RAM - read below!
Top computer (enthusiast), budget from 100 thousand rubles
Gaming computer
We give preference to the latest generation Intel Coffee Lake processors. The most expensive in the coffee line is the i7 8700K. The processor will be compatible with a motherboard based on an older Z370 chipset. The Z370 will allow you to overclock the processor and increase the frequency of the RAM if the stock performance is not enough.
16 gigabytes of memory is enough for a gaming PC. It is advisable to buy a 2x8 GB kit kit for memory operation in dual-channel mode. The performance of the system as a whole directly depends on the frequency of the RAM, so it is advisable to select DDR4 sticks with a rating of ~2666-3000 MHz. Also pay attention to timings. Low latency CL14/15 memory costs more than standard CL16. By the way, the benefit from low timings is more noticeable on Intel processors; on AMD Ryzen, the high operating frequency of RAM will greatly benefit.
The main thing in a powerful gaming computer is, of course, the video card. The top Nvidia GTX 1080 Ti models are best suited for gaming builds. However, video cards are now indecently expensive even for wealthy gamers. Therefore, we can advise you to pay attention to video cards of the GTX 1070 Ti, RX Vega 56/64 level. Wealthy gentlemen choose monsters like Titan V, although buying the latter is more difficult than buying an iPhone X on the day sales start. According to the latest inside information, you shouldn’t expect a price reduction with the release of the 2000th series of Gifors, unless of course you are ready to wait forever. For comfortable gaming in 4K, one 1080 Ti with ultra graphics settings will not be enough; if finances allow, purchase two GTX 1080 Ti video cards.
Installing an SSD drive will help reduce the boot time of the system and games. For optimal performance, it is worth investing in two disks - allocate one disk for the operating system with a page file, and install games and applications on the second.
Hard drives are selected based on needs. Currently, models up to 14 TB are available on the market. If you do not work with huge amounts of information, you can completely do without classic HDDs. However, remember that in the event of a failure, it will be quite difficult, and most likely impossible, to recover information from a solid-state drive. So regularly backup important data to an external HDD.
Computer for work
For work tasks (programming, rendering, editing, modeling, photo processing, etc.), both the presence of fast cores and their number are important.
We recommend paying attention to the top-end Ryzen 7 1700 on the AM4 platform, as the most budget eight-core processor. The Ryzen 7 desktop uses the AM4 platform, so you can easily upgrade your existing computer that uses an AMD Ryzen processor. By the way, AMD will support the AM4 socket for another 2-3 years, so you won’t have any problems with a future upgrade.
For serious guys, the Intel LGA2066 platform is suitable, with a wide range of processors - from the ultra eight-core top i9-7980XE to more affordable eight-core processors, such as the i7-7820x. Quite expensive motherboards based on the X299 chipset are suitable for Skylake-X processors. The chipset supports four-channel memory and has a large number of free PCIe lanes, which allows you to connect several fast devices (video cards, nvma drives).
It is also worth considering assembling high-performance systems based on AMD Ryzen-ThreadRipper processors. There are only three processors available in this line: the eight-core 1900x, the twelve-core 1920x and the older ripper 1950x equipped with sixteen cores. Threadrippers require a motherboard with TR4 socket on the X399 chipset. The characteristics are similar to the X299 platform from Intel, but AMD costs a third less. The only drawback is the non-standard mountings for the cooling system and the small range of TR4 motherboards.
Pretop computer, budget 80 - 90 thousand rubles
An excellent computer for work and play. On this system you can equally comfortably play a popular game or render a project in Premiere or Blender. Note that Intel processors are more suitable for building gaming systems, and eight-core Ryzen for workstations.
Medium - mainstream computer, budget 60 - 70 thousand rubles
The optimal computer for gaming in FHD 1080p resolution, also perfect for office programs. The recommended video card is nvidia GTX 1060 in the version with 6 GB of memory. The price tag for the RX 580 is now too high.
In this category, Intel fans have some problems - in particular, Intel has not yet released budget motherboards on the 1151v2 socket (B360, H370, H310 chipsets), so you will have to buy an expensive motherboard on the Z370 chipset. AMD does not have such problems - for the popular Ryzen 5 1600 processor, you can choose any board on the AM4 socket (A320, B350, X370). The mid-budget motherboard based on the B350 has overclocking functions and has everything needed to build a high-performance computer, while the price tag for such boards is half that of the similar Z370 from Intel.
Budget option 35 - 40 thousand rubles
RAM: 8-16 GB 2400-2666 MHz
For a gaming system without a video card, we recommend the AMD Ryzen 5 2400G with a built-in Vega video core, which provides GT1030/RX550-level performance. The computing power of the R5-2400G processor is comparable to the R5-1500X, which makes it possible to upgrade in the future - you just need to buy a powerful video card without changing the processor. It is worth noting that the Ryzen 5 2400G out of the box is guaranteed to work with memory with a frequency of 2933 MHz (instead of 2400 MHz for desktop Ryzens).
Ultra-budget builds up to 20 thousand rubles
Such assemblies are suitable for mining farms or media centers.
Take the cheapest processor, for example Celeron G3930, equipped with a built-in Intel UHD 610 video core. This budget processor is capable of playing online video with 4K resolution.
For a media center, 4 GB of DDR4 RAM is sufficient. Any frequency will do, starting from the standard for DDR4 2133 MHz. We recommend taking the cheapest “green” dies from Samsung; this RAM is quite reliable and also overclocks well.
A discrete video card is not considered in the ultra-budget segment.
Popular builds - good PCs 2018
For those who decide to build their own computer from scratch, rather than buy a ready-made system unit, it will be useful to know how to correctly assemble individual elements into a single workable whole. I present to your attention a guide on how to assemble a computer.
What to buy
The first step is to buy the minimum required kit to start the computer
- frame
- source
- motherboard
- CPU cooling system
- RAM
- Video card (discrete is not always required)
- HDD
It is necessary to understand that all purchased items must be compatible.
When purchasing a motherboard and a processor, the socket (in other words, the platform where the processor is inserted) on the board and the CPU must be the same. This parameter is always indicated in the technical specifications, for example, Intel Core i3-4130 has an LGA1150 socket, we can easily install it on the ASRock H81M board. It is also necessary to take into account the connector for RAM; at the time the article was published, the most common is DDR3, therefore, you need to buy DDR3 memory.
We start with the case, which will be the “home” for all other components. After unpacking, unscrew the side panel.
We see ready-made holes for mounting the system board. All you need to do is “try on” the board to the holes and secure it. There are a lot of holes, since some cases are designed for motherboards of different sizes (form factors).


However, before attaching the motherboard, you need to install some elements on it.
Installing an Intel Processor and Cooling System
Open the processor socket using the latch shown in the figure. The thing is quite delicate, you don’t need to make a lot of effort.

After opening the slot, pay attention to the processor. In the case of Intel, there is a special edge and a guide on the motherboard that will prevent you from inserting the processor incorrectly. Which makes our life much easier; those who are familiar with electronics know how to tinker with microcircuits in order to solder them correctly to the board. As a rule, there are no guides on the board, only a dot in the corner of the chip indicating the first leg.


After installing the processor, we complete the procedure by protecting the socket: we close it in the same way as we opened it before.

The next important step is connecting the cooling system.
A cooler is often included with the purchased processor; if it is not there, the processor manufacturer has a list of recommended ones for connection.
You definitely need to remember about thermal paste. Some radiators already have thermal paste applied; if it is not there, you need to apply it.
Please note that the cooling system is secured using four latches. They should fit perfectly into the holes on the board, in the corners next to the socket. 

Actually, we install it in the holes, and begin to press without much effort until you hear four clicks. 


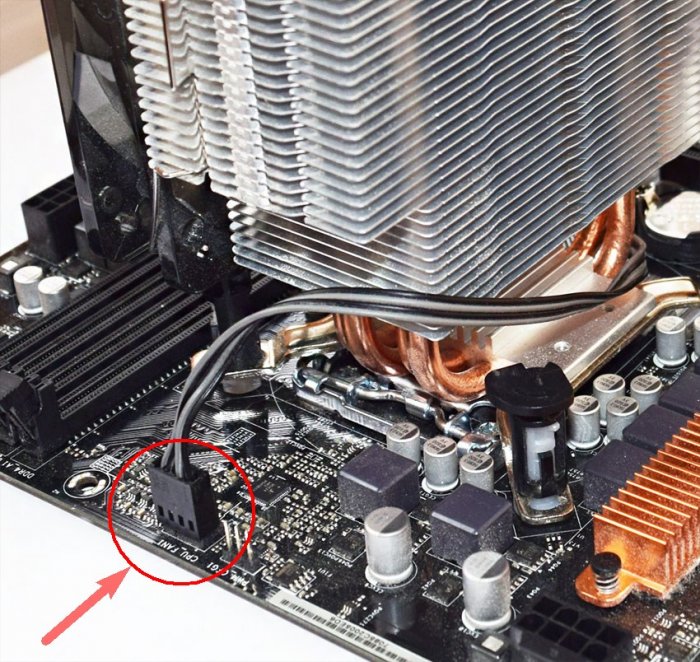
All we have to do is connect the fan to the power system; on the board the connector is designated CPUF AN, so we connect it to it) 

If you bought cooling separately, you decided that the standard one is not enough for you. Then you will definitely need to apply thermal paste. Simply apply a small amount to the center of the CPU and spread it over the entire surface using an old credit card or discarded plastic card to precisely fit the surface of the CPU and cooler

Note: When buying a cooling system, do not forget to peel off the film

System Installation with CPU and Heat Sink - AMD
Consider that in the case of an AMD CPU, installing a cooling system 
First, unlock the socket by pulling the metal handle directly adjacent to the edge

The legs of AMD processors are positioned so that they can be inserted into the slot in only one way: as in the case of Intel, it is impossible to install the processor differently than the manufacturer intended. Inserted and secured. 
Then apply thermal paste... 
Combining the processor plane and the base cooling system

The mounting methods for coolers are different, and they are all indicated in the manual; there should be no difficulties. In our case, next to the socket we have a plastic base with protrusions. The metal mount comes complete with cooling. 

Installing memory (RAM)
The last element we can install in this phase is the RAM.
To do this, you need to find the RAM slots located next to the processor socket.

Before installing memory, you should check your motherboard's manual to find out which slots to install in first (if the number of modules is less than four). In our case, these are blue slots. Opening the latches

Inserting modules properly


After installation in the memory slot, return the plastic latches to their original position

At this stage, you should receive a motherboard with a processor, cooling and memory modules. Let's put everything aside for a while and move on to the case and power supply.
Installing the power supply
The power supply is installed at the bottom of the case. 
Secure it with the fan DOWN.

This position provides it with ideal operating conditions: the device constantly has access to cold air from under the body and at the same time excludes the entry of warm air, which is thrown out of it onto other elements, and nothing is heated additionally.
On the rear panel of the case, secure the power adapter by screwing four bolts.

If the power supply does not have removable wires, then we simply pass all the wires through rubber bushings to the rear panel of the case.
If it is modular (removable cables), then you first need to connect the necessary cables, including PCI Express power (for the video card) and SATA (for storage media). 


Only now we pass the entire bundle of wires from the power supply through rubber hoses behind the tray with the motherboard.
Installing the motherboard into the case
We insert the board into the case; there should be a specially allocated place in the case for it. 
We do not install any gaskets or pads, we only use the set included in the kit (bolts plus stands) 
Then you need to connect the external USB ports located on the front panel, as well as the Power and Reset buttons, two indicators indicating storage media activity and power.
First we look for a connector labeled as USB, then we connect the plug

And then find the pins (JFP1) associated with the buttons and LEDs, connect them to the connector, according to the markings nearby. 


Installation media (HDD/SSD)
Speaking about mounting hard drives, again, everything is individual. In our case, we have a rack with plastic slides. We attach the hard drive to these slides and insert it into the rack. 


The next necessary step is to connect the media/media to the motherboard using SATA signal cables, as well as supplying power to them.

To do this, find small connectors on the board labeled SATA. In the instructions for the board, we check which of them are the fastest (SATA 3 - 6 Gb/s), and it is to them that we connect the disk on which we will install the system, especially if the system is installed on an SSD. Other media will be fully satisfactory and have a slower speed (SATA 2 - 3 Gbit/s). 

First of all, connect the power cable, and then the signal cable
Installing a video card
The video card is the last item (within the basic configuration) that needs to be installed. 
Look for the first free PCI Express x 16 port (blue, closer to the processor cooling system in the photo below). First, let's deal with traffic jams. 99% of currently available graphics cards require the space occupied by two dies on the back 

As with memory module slots, the PCI Express slot has small protrusions that will prevent you from misplacing a video card. You simply have no choice, you will do everything right. 

Then we attach the video card. 

Connecting power to the motherboard
The motherboard is powered through two wires. One of them is a 24-pin connector, shown in the picture below. Located on the right side of the board, next to the RAM. 
The second cable is for powering the heart of the computer – the processor. insert it into the slot located in the upper left corner.

All that remains is to “feed” our video card. The most energy-intensive (but powerful) models require two plugs, as can be seen in the photo.


Before closing the case, you need to check the operation of the power button, reset button and LED information (the part that tells you that your computer is on, and others that indicate HDD / SSD activity).
Results
The idea that there is something extremely complex in the assembly is erroneous. It really takes a lot of effort to ruin something. Equipment manufacturers take care of user convenience by introducing physical restrictions: the processor can only be inserted into the socket in one position, and it is impossible to connect the power connector to the wrong side or to the wrong connector. The worst thing that can happen is that you might forget about one of the cables. But don't worry about this: the computer won't do anything, it just won't start until the wires are connected correctly. Good luck!
Hello friends! If you are a computer enthusiast, then learn on your ownAssembling a computer will not be difficult for you.
When I wrote this article, I immediately showed it to a person who had never assembled a personal computer. He read it carefully and began asking me questions, from which I realized that the publication urgently needed to be supplemented with many little details, only then would it become understandable to beginners. As a result, I almost completely rewrote the article several times and only now am I offering it for your consideration.
In my last publication, I explained to you, but today we will independently assemble a classic PC.It is best to assemble a computer on a table so that you can see everything and be as comfortable as possible. Let's start withapplying thermal paste to the processor and installing it in the motherboard socket, then we assemble the processor cooler and connect it, after that we insert the RAM modules into special connectors on the motherboard, then mount the power supply into the case and tighten the wires, secure the SSD, HDD in the system unit, and only after that install the motherboard in the case...
How to assemble a computer yourself
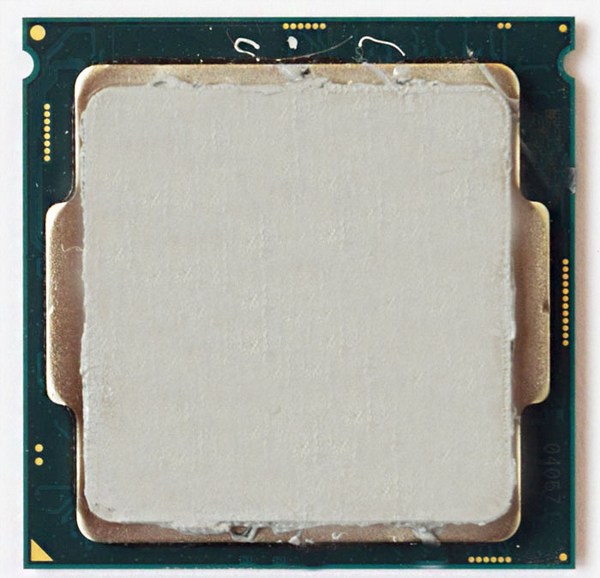
First, we need to buy thermal paste and apply a thin layer to the processor. It is inexpensive and is usually sold together with a special hard card, with the help of which it is literally smeared over the surface. Why do you need thermal paste? During operation, the processor heats up very much and, with the help of thermal paste, effectively removes heat from itself to the cooling radiator.
Installing the processor into the motherboard
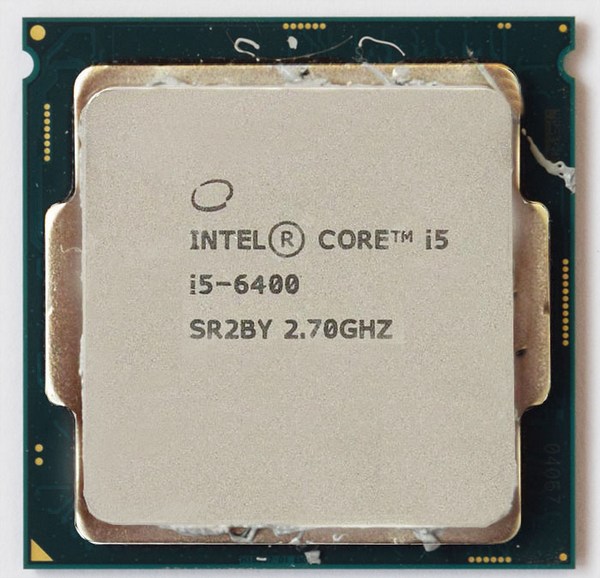
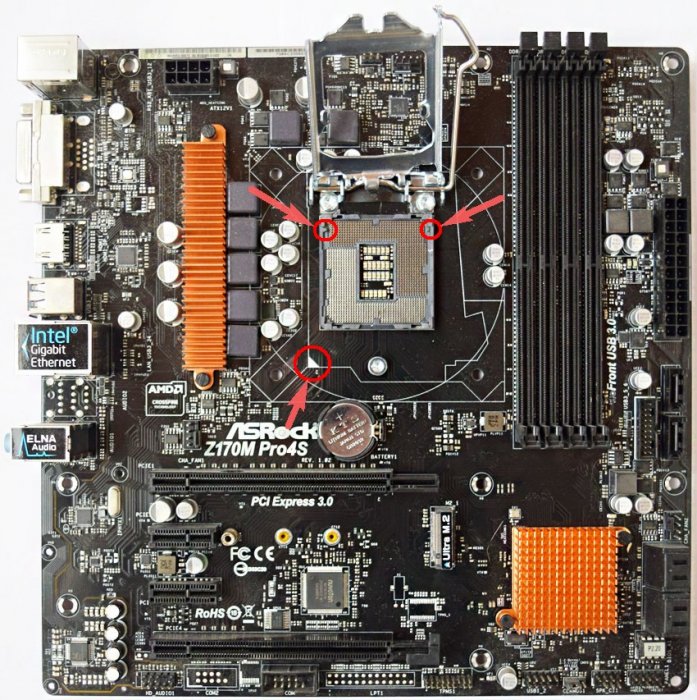
Now let's install processor in, in my case i5 6400 and Asrock z170m pro4s. Install the processor into the socket very carefully and carefully so as not to damage it. This especially applies to AMD processors, since unlike Intel processors, which have contact pads, first there are so-called “legs”, bending which the processor will stop working. So, we open the socket on the motherboard using the side latch and look at the keys that show us how to insert the processor correctly.

We take the processor in our hands and see that it has corresponding recesses and a triangle in the corner, thanks to which it will be difficult to make a mistake during the installation process.

With a gentle movement of your hand, simply place the processor in the socket,

We make sure that it does not hang out there and close the side latch.

CPU cooler
Next, I prefer to outfit the motherboard in full and install RAM on it immediately, outside the case, because personally, with my large hands, doing this in a cramped space (inside the case) is problematic.
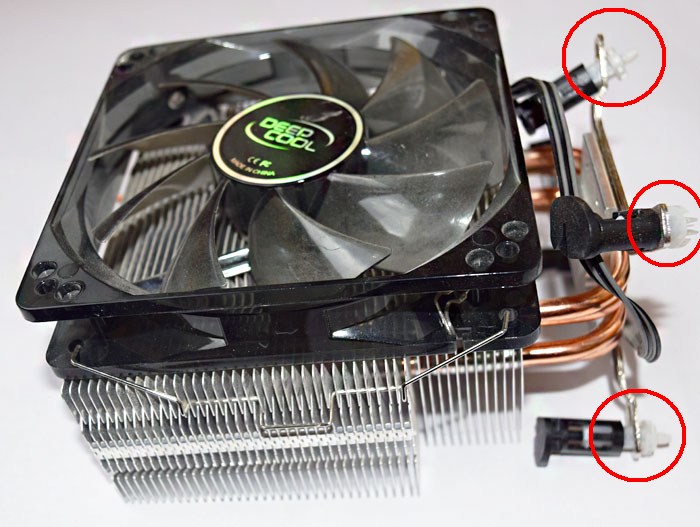
So, we look at the motherboard and see special connectors for mounting the cooler, and that’s where we’ll install it.


This is done simply, take the cooler, put the special legs into the holes and snap them into place.
After installation everything will look like this.


Don’t forget to also connect the cooler’s power to a special connector on the motherboard called CPU FAN.

RAM
power unit
Now that the motherboard is fully charged, we proceed to installation in the case. Many people advise installing the motherboard into the case first, but I prefer and recommend that you start with the power supply, because if you follow my advice, you can stretch all the necessary wires properly and avoid damage to the motherboard, since the unit is usually very large and takes up a lot of space . One awkward move and you can easily damage the microcircuits - goodbye motherboard. In my case, the GMC Forge case and the Aerocool KCAS 600W power supply.
Installing the unit is a very simple process. We install, stretch the wires as desired and screw the screws into special holes on the back of the case.


I would like to note that the power supply is always installed so that the fan is directed downwards when the unit is mounted at the bottom. Inside the case you can tell your own microclimate and temperature, so it will be better if the power supply draws in cool air from the outside, rather than warm air from the inside.
SSD and HDD
Now before installing the motherboard for the same reason as with the power supply. We insert the solid-state drive and hard drive into the corresponding cages, if they exist; if they do not, then simply screw them to the case. I will have a Patriot Spark 128gb and a Seagate Barracuda 7200 1000gb working hard on my system.


Motherboard
Let's move on to installing the motherboard into the case. The mother itself has special holes for fastening; depending on the model, the number of these holes may vary. We insert the motherboard into the case in accordance with these fasteners and tighten it with the screws that are included with the case.


CPU power
And finally, all we have to do is connect all this stuff together. Let's start with powering the processor. The power connector can be 4pin or 8pin and is usually located directly next to the processor. We find the corresponding cable at the power supply and connect it.


Motherboard power


Case cooler
Let's move on to connecting case coolers for injection/exhaust. They are connected to the corresponding connectors on the motherboard with the name CHA FUN or SYS FAN or similar.


Now let's connect our drives using SATA interface cables to the corresponding slots on the motherboard.

Don't forget to connect additional power to our drives. In my case, this can be done from the back of the case.

Connecting Front Panel Cables to the Motherboard
And finally, I decided to leave the most difficult thing, which causes some problems for most users, namely connecting the power to the front panel. All connectors are located at the bottom of the motherboard. Let's start with the audio outputs. Take the wire with the name AUDIO and connect it to the connector with the same name.
