Installing and configuring phpMyAdmin on Ubuntu, Linux. Managing external databases via phpMyAdmin Phpmyadmin how to add files
phpMyAdmin is a LAMP application created specifically for administration MySQL servers. Written in PHP and accessible via a web browser, phpMyAdmin provides a graphical interface for database administration tasks.
Installation
Before installing phpMyAdmin, you will need access to the MySQL database on the same computer where you are installing phpMyAdmin, or on a remote computer accessible over the network. See the MySQL section for details. To install in the terminal, enter:
Sudo apt-get install phpmyadmin
When prompted, select which web server will be configured for phpMyAdmin. This section assumes use as a web server Apache2.
Sudo ln -s /etc/phpmyadmin/apache.conf /etc/apache2/conf-available/phpmyadmin.conf sudo a2enconf phpmyadmin sudo /etc/init.d/apache2 reload
In your browser, go to http:// localhost/phpmyadmin. On the login page, enter root as the username, or another user if you configured one, and the MySQL password for that user.
If in the previous step, when you go to the address http:// localhost/phpmyadmin, the server gives an error 404 - Not found, check the file location phpmyadmin.conf. In case of ubuntu 12.04: if the file is missing at /etc/apache2/conf.d/phpmyadmin.conf and at the same time exists at the address /etc/phpmyadmin/apache.conf, then move the file and restart the server: sudo ln -s /etc/phpmyadmin/apache.conf /etc/apache2/conf.d/phpmyadmin.conf sudo /etc/init.d/apache2 restart
After that, try logging in through your browser again.
Settings
The phpMyAdmin configuration files are located in /etc/phpmyadmin. The main settings file is /etc/phpmyadmin/config.inc.php. This file contains configuration options that apply to phpMyAdmin globally.
To use phpMyAdmin to manage MySQL on another server, set up the following entry in /etc/phpmyadmin/config.inc.php:
$cfg["Servers"][$i]["host"] = "db_server";
Replace db_server to the current IP address of the remote database server. Also make sure that the computer with phpMyAdmin has access rights to the remote database.
After setup, log out of phpMyAdmin and log in again and you will have access to the new server.
The config.header.inc.php and config.footer.inc.php files are used to add header and footer HTML for phpMyAdmin.
This article will describe in great detail how to properly install and configure phpmyadmin, which will help us manage our website databases more efficiently and visually than through the terminal.
We will install on Ubuntu 14.10. But the article will also be relevant for others deb-base d distributions, in some cases with minor amendments. First, let's look at the installation and configuration phpmyadmin to the apache2 web server.
Installation via GUI
Open the Application Center of our distribution and enter phpmyadmin in the search bar. The application we need will immediately be displayed below. Select it with the mouse and click “Install”

Ubuntu Application Center
Before starting the installation, we will be asked to enter the administrator (superuser) password to continue the installation. Enter the password and press Enter

During installation we will need to answer some questions. In the first window, select the web server for automatic reconfiguration. Place a check mark next to it apache2 and press the button "Forward"

Next we are asked whether to configure the database for phpmyadmin using package dbconfig-common. The default is checked. We don't need to reconfigure the databases. Uncheck the box and click "Forward"

and wait for the installation to complete.
Installation via terminal/console
Installation through the terminal/console is similar to installation through the application manager.
Open the terminal with the combination CTRL+ALT+T and enter the command
sudo apt-get install phpmyadmin -y
sudo apt - get install phpmyadmin - y |
The installer will ask for a superuser password. Enter it and click Enter. The password will not be displayed when entered.
Next, as with the GUI installation, we need to select a web server for automatic reconfiguration. The mouse does not work in the pseudo-graphical interface. To select a checkbox, press the Spacebar. Celebrating apache2 and click Enter.

In the next window we answer in the same way as when installing in graphical mode. Select with the cursor " <Нет> " and press Enter.

We are waiting for the installation to complete.
Checking the operation of phpmyadmin
Check functionality phpmyadmin possible at the address http://localhost/phpmyadmin/ in a web browser. If we see the login form, then phpmyadmin installed successfully

Select the language, enter the login and password for the MySQL databases and confirm with the “OK” button. As a result, we should get to the interface phpmyadmin

Setting up phpmyadmin on a web server with nginx without apache2
For some server configurations that do not include a web server apache2, there may be a problem with phpmyadmin. We won't be able to get into the interface phpmyadmin. An example of a configuration would be the bundle nginx + php5-fpm. This problem can be solved quite simply.
Open the site’s configuration file in your favorite text editor (configurations are usually located in the directory /etc/nginx/sites-available/) and to the section server add the following:
Location /phpmyadmin ( root /usr/share/; index index.htm index.html index.php; location ~ ^/phpmyadmin/(.+.php)$ ( try_files $uri = 404; root /usr/share/; # fastcgi_pass 127.0.0.1:9000; # uncomment when using php5-cgi # fastcgi_pass unix:/var/run/php5-fpm.sock; # uncomment when using php5-fpm fastcgi_index index.php; fastcgi_param SCRIPT_FILENAME $request_filename; include /etc/ nginx/fastcgi_params; ) location ~* ^/phpmyadmin/(.+.(html|ico|xml|css|jpg|png|js|txt|gif|jpeg))$ ( root /usr/share/; ) ) location /phpMyAdmin ( rewrite ^/* /phpmyadmin last; )
location/phpmyadmin( Root/usr/share/; Index index . htm index. html index . php; Location ~^/phpmyadmin/(.+.php)$( Try _ files $ uri = 404 ; Root/usr/share/; #fastcgi_pass 127.0.0.1:9000; # uncomment when using php5-cgi # fastcgi_pass unix:/var/run/php5-fpm.sock; # uncomment when using php5-fpm Fastcgi_index index . php; Fastcgi_param SCRIPT _ FILENAME$ request_filename ; Include /etc/nginx/fastcgi_params; Location ~ * ^ / phpmyadmin / (. + . (html | ico | xml | css | jpg | png | js | txt | gif | jpeg ) ) $ ( |
Phpmyadmin is one of the most popular tools for managing mysql databases through a web interface. It is written in PHP and JavaScript and with it you can manage a local or remote database server.
Using PhpMyAdmin we can create, delete, rename, edit databases, tables, fields, as well as manage users, export, import records and execute any SQL commands. Currently supported database servers are MariaDB, MySQL and Drizzle. In this article we will look at how to install PhpMyAdmin Ubuntu 16.04 on an Apache or Nginx web server.
Installing PhpMyAdmin on Ubuntu 16.04
The phpmyadmin utility is available in the official Ubuntu repositories. So you can install it from there very easily. To do this, first update the list of repositories:
Then install the program itself:
sudo apt install phpmyadmin
The official repositories contain an older version, so if you want to install the latest version of phpmyadmin ubuntu, you need to use the PPA:
sudo add-apt-repository ppa:nijel/phpmyadmin
$ sudo apt-get update
$ sudo apt install phpmyadmin
During installation it will be necessary to select the web server with which we will install phpmyadmin, select Apache using spacebar and press OK:

Settings for Nginx will have to be specified manually and we will look at them a little later. Next you need to set a password for the PhpMyAdmin database, click Yes:

Then enter the required password twice. You are unlikely to need it in the future, so you can choose something complex:


You may have to include several php modules and the apache configuration file to make it work:
sudo phpenmod mcrypt
$sudo phpenmod mbstring
Then include the Apache configuration file:
sudo a2enconf phpmyadmin
Installing phpmyadmin nginx ubuntu is done by adding the following section to the /etc/nginx/nginx.conf file, we assume that nginx is running through php-fpm:
sudo vi /etc/nginx/nginx.conf
server(
listen 80;
server_name phpmyadmin;
access_log /var/log/phpmyadmin.access_log;
error_log /var/log/phpmyadmin.error_log;
location ^~ /phpmyadmin/ (
alias /usr/share/phpMyAdmin/;
index index.php;
location ~ /phpmyadmin(/.*\.php) (
include fastcgi.conf;
fastcgi_param SERVER_NAME localhost;
fastcgi_param SCRIPT_FILENAME /usr/share/phpMyAdmin$1;
fastcgi_pass 127.0.0.1:9000;
fastcgi_index index.php;
}
}
}
Save and restart your web server:
sudo systemctl restart apache2
sudo systemctl restart nginx
Now everything should definitely work. Open your browser and type http://localhost/phpmyadmin in the address bar:

Enter your username and password and then you can do whatever you need with the databases.

PhpMyAdmin protection
Installation of phpmyadmn Ubuntu 16.04 is complete. But this program gives full control over the database, so we need to ensure its maximum security. Let's make access to Phpmyadmin using a password. To configure Apache, create a file /usr/share/phpmyadmin/.htaccess with the following content:
sudo vi /usr/share/phpmyadmin/.htaccess
AuthType Basic
AuthName "Restricted Files"
AuthUserFile /etc/phpmyadmin/.htpasswd
Require valid-user

This is what these lines mean:
- AuthType Basic- this line sets the authentication type, we indicate that we will use a password;
- AuthName- set the message that will be seen;
- AuthUserFile- a file with data that will be used for authentication;
- Require- a necessary condition for authentication.
sudo htpasswd -c /etc/phpmyadmin/.htpasswd user

You can add multiple users, but do not use the -c option to do this:
sudo htpasswd /etc/phpmyadmin/.htpasswd user
Now, when you try to open the phpmyadmin address, the system will ask for a password. Only users who enter the password will be able to access the phpmyadmin login interface.
conclusions
In this article, we looked at how to install phpmyadmin Ubuntu 16.04. As you can see, everything is very simple, and it only takes a little time to figure it out. If you have any questions, ask in the comments!
Any web developer knows that almost every website requires a database to function. It allows you to store information, manage it and retrieve it at the right time. So that all of the above could be used in a more convenient form, a group of enthusiasts decided to create a product that combines convenience and functionality when working with a DBMS. Its name is phpMyAdmin. As a rule, it is already available on many hosting sites. Therefore, this article will discuss how to install and configure phpMyAdmin on
Preparation
Since phpMyAdmin itself is written in PHP, for it to work you will need to install the entire set of necessary software - Apache, PHP, MySQL.
Each component can be installed manually individually, or all at once. For Linux there is a bundle of LAMP, for Windows - "Denver" or OpenServer. Installing all the software and configuring it separately will allow you to study the composition and structure of the entire server as a whole. If time does not allow you to deal with the internal structure, it is easier and more convenient to install the assembly right away.
Setting up PhpMyAdmin on Ubuntu
The package is available in the standard Ubuntu repositories, so just type the command in the terminal:
sudo apt-get install phpMyAdmin.
During the process, you will be asked to go through the steps of setting up phpMyAdmin. First, you need to select the web server that you plan to use for launch. In this case it is apache2.
The next window will ask you to configure the database for phpMyAdmin. It's worth agreeing. The system will ask for a password for MySQL. And then for phpMyAdmin.

After that, in the /etc/apache2/conf-enabled/ folder The configuration file will appear.
It remains to install a couple of parts and activate them. You can use the commands:
sudo apt-get install php-mbstring php-gettext.
And they are launched like this:
sudo phpenmod mcrypt;
sudo phpenmod mbstring.
After this, you will need to restart the web server. This is done using the command:
sudo systemctl restart apache2.
In theory, everything is ready and you can start working.
Startup and configuration
To get into the depths of the phpMyAdmin settings, you need to open any browser and type in the address bar:
created domain/phpmyadmin.

The application will ask for a password to log in. It was created during the installation phase. After logging in, the user will be presented with an interface with many elements and settings.
Control Panel
The application interface is divided into logical blocks, united according to a general principle.
On the left there is a panel for quick transition between databases and tables. Here you can create a new instance of a particular format.
The top menu contains items for going to table settings, as well as additional functionality:
- Database. It practically duplicates the menu on the left, that is, it contains a list of available databases;
- SQL. A very interesting point for those who know how to correctly compose queries and actively use them. You can manually perform select, delete, sort, and other SQL functions;
- state. Current position in the databases. Their total volume, traffic, amount of received and sent data;
- user accounts. All saved data about users, indicating their privileges, addresses and passwords;
- export and import. Very convenient functions for exchanging between the database and other software. For example, to update the site manually, if such a need arises. In addition, this is a very convenient tool for creating a backup copy of important data if this option is not available automatically;
- settings. Many different parameters, one way or another related to the operation of phpMyAdmin, databases, queries and much more;
- replication. Communication with other servers for simultaneous changes on replicas - that is, repeated instances of the current database server;
- variables. As the name implies, the section contains values for the internal needs of the server and system. As a rule, they are not used unless necessary;
- encodings. Shows all font display options available in the system;
- intelligence about the types of data storage used in phpMyAdmin;
- extensions. List of phpMyAdmin add-ons that increase the functionality of the system.
General settings right in the center allow you to change the password or set the text encoding to use.
Display options will help you change the language, theme, font size and other settings for the appearance of the system.

On the right is an information panel with information about the database server and web server, as well as several links for help with phpMyAdmin.
Unfortunately, the application is often used by attackers to gain unauthorized access, so you need to know how to protect yourself from this.
Safety
The very first thing to do is to use the Apache htaccess web server files. First you need to tell apache that a special file will be used to configure phpMyAdmin.
To do this, you need to configure the configuration file located at /etc/apache2/conf-available/phpmyadmin.conf.
You need to add a special AllowOverride All directive. After changing and saving the file, you need to restart the web server again.

Now to configure phpMyAdmin you will need the file itself, in which the rules for access to the control panel will be defined. It should be called .htaccess and located at /usr/share/phpmyadmin.
It specifies the following parameters:
AuthName "Restricted Files"
AuthUserFile /etc/phpmyadmin/.htpasswd
Require valid-user.
This. a set of keywords will allow you to do the following:
- The first line is responsible for the nature of the authorization. The “basic” parameter means that you can log in using your username and password.
- The second determines what text will be shown instead of the greeting.
- The third line specifies the file in which the password will be stored.
- The fourth tells the system that only authenticated users can enter here.
Password
Creating a password file when setting up phpMyAdmin will require a little tinkering.
First you need to install the htpasswd utility. It is available in the Ubuntu repositories, so just run the command in the terminal:
sudo apt-get install apache2-utils.
Now you still need to type in the terminal:
sudo htpasswd -c /etc/phpmyadmin/.htpasswd username.
It will create a new user and prompt you to provide a password for it.
Access is now securely protected. When a user tries to log into the phpMyAdmin administrative panel, an additional window will open to obtain viewing rights and change settings.
CentOS
Setting up phpMyAdmin on CentOS is actually not much different. The algorithm of actions will be almost the same. Except the installation command is a little different:
yum install -y phpmyadmin
All further settings and manipulations are relevant for both Ubuntu and CentOS.
Windows environment
For the Windows operating system, there are several ready-made solutions for creating a server with the existing set of technologies. For example OpenServer. It already contains phpMyAdmin installed on board. You can find it in the server context menu, in the “Advanced” item.

Setting up MySQL and phpMyAdmin in OpenServer is done using various ready-made menus and windows, which is undoubtedly more convenient than manually entering commands.
Before concluding, we can talk about several common errors and configuration subtleties. Here are basic tips for setting up phpMyAdmin, Apache and MySQL:
- to avoid server crashes, you should use the latest versions of software;
- phpMyAdmin is most likely already installed on the hosting, but its security can still be configured through htaccess files;
- You should be careful when choosing a password. Often its restoration takes much longer than a thoughtful approach to its creation;
- Using ready-made assemblies allows you to quickly deploy a server with everything you need, but does not always provide the opportunity to flexibly configure it and understand the intricacies of its operation.
Finally
PhpMyAdmin is used on many services and sites on the Internet. This can be explained by the ease of configuration and access to the database. And also the presence of a large number of additional functions and capabilities. The project is constantly evolving and adapting to new solutions and technologies.
Click on the title to open/close a detailed description of the process
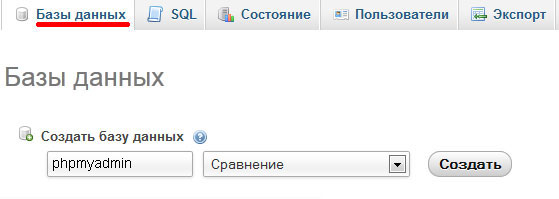
We will need to create a new database - click on the tab "Database". In the subsection text field "Create Database" enter phpmyadmin, press the button "Create".
Let's create a new user - click on the tab "Users".
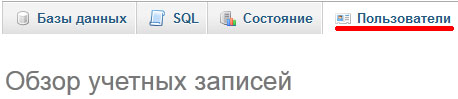
At the moment we have a single user created with the name root. Click on the link "Add user",
in the pop-up window that opens, in the section "Account Information" to text field "Username:" enter "pma". To text field "Host:" enter "localhost". In field "Password:" enter the password (any one that comes to your mind). In field "Confirmation:" Confirm the password entered above.

Scroll the window to the section "Global Privileges", click on the link "Select all".

Click on the button "Add user".

A new user named pma will be created.

Now, you need to import data into the created database. In the left column select phpmyadmin(click on it with the mouse).

In the top menu, click on the tab Import.
In the subsection Imported file: Click the review button.

In the context menu that opens, select the file create_tables.sql which is in the folder examples, located inside the phpMyAdmin root directory (in my case the full path looks like this: c:\Program Files (x86)\Apache Software Foundation\Apache2.2\htdocs\phpmyadmin\examples\create_tables.sql).
At the very bottom of the page we find and press the button Ok. The database has been imported.
Let's make changes to the configuration file.
Open the file in notepad config.inc.php. Looking for a string $cfg["Servers"][$i]["controlhost"] = "";, uncomment it (remove the double slash), enter it in quotes localhost(the line will look like $cfg["Servers"][$i]["controlhost"] = "localhost";).
Find and uncomment the line $cfg["Servers"][$i]["controlpass"] = "pmapass";, in quotes, change the password to the one that was assigned when creating the user pma.
Find and uncomment the following lines:
$cfg["Servers"][$i]["controluser"] = "pma";
$cfg["Servers"][$i]["pmadb"] = "phpmyadmin";
$cfg["Servers"][$i]["bookmarktable"] = "pma_bookmark";
$cfg["Servers"][$i]["relation"] = "pma_relation";
$cfg["Servers"][$i]["table_info"] = "pma_table_info";
$cfg["Servers"][$i]["table_coords"] = "pma_table_coords";
$cfg["Servers"][$i]["pdf_pages"] = "pma_pdf_pages";
$cfg["Servers"][$i]["column_info"] = "pma_column_info";
$cfg["Servers"][$i]["history"] = "pma_history";
$cfg["Servers"][$i]["tracking"] = "pma_tracking";
$cfg["Servers"][$i]["designer_coords"] = "pma_designer_coords";
$cfg["Servers"][$i]["userconfig"] = "pma_userconfig";
$cfg["Servers"][$i]["recent"] = "pma_recent";
$cfg["Servers"][$i]["table_uiprefs"] = "pma_table_uiprefs";
We save the changes to the file, exit and enter again phpMyAdmin. The warning has disappeared.
As an alternative (if you really don’t want to dig into the code) - replace the entire contents of the file config.inc.php to the code below
< $cfg["blowfish_secret"] = "a8b7c6d"; $i = 0; $i++; $cfg["Servers"][$i]["auth_type"] = "cookie"; $cfg["Servers"][$i]["host"] = "localhost"; $cfg["Servers"][$i]["connect_type"] = "tcp"; $cfg["Servers"][$i]["compress"] = false; $cfg["Servers"][$i]["extension"] = "mysqli"; $cfg["Servers"][$i]["AllowNoPassword"] = false; $cfg["Servers"][$i]["controlhost"] = "localhost"; $cfg["Servers"][$i]["controluser"] = "pma"; $cfg["Servers"][$i]["controlpass"] = "пароль для пользователя pma"; $cfg["Servers"][$i]["pmadb"] = "phpmyadmin"; $cfg["Servers"][$i]["bookmarktable"] = "pma_bookmark"; $cfg["Servers"][$i]["relation"] = "pma_relation"; $cfg["Servers"][$i]["table_info"] = "pma_table_info"; $cfg["Servers"][$i]["table_coords"] = "pma_table_coords"; $cfg["Servers"][$i]["pdf_pages"] = "pma_pdf_pages"; $cfg["Servers"][$i]["column_info"] = "pma_column_info"; $cfg["Servers"][$i]["history"] = "pma_history"; $cfg["Servers"][$i]["table_uiprefs"] = "pma_table_uiprefs"; $cfg["Servers"][$i]["tracking"] = "pma_tracking"; $cfg["Servers"][$i]["designer_coords"] = "pma_designer_coords"; $cfg["Servers"][$i]["userconfig"] = "pma_userconfig"; $cfg["Servers"][$i]["recent"] = "pma_recent"; $cfg["UploadDir"] = ""; $cfg["SaveDir"] = ""; ?>
Don't forget to write in the line $cfg["Servers"][$i]["controlpass"] = "password for user pma"; in quotes the password that was set for the user pma and in the line $cfg["blowfish_secret"] = "a8b7c6d"; increase the inscription in quotation marks to at least 10 characters