Text under torn paper, unusual text, torn paper effect in Photoshop tutorial. Paper Cut Out Effect in Photoshop
In this tutorial you will learn how to create a vintage effect on a photo in Photoshop program using simple technology. I added an old frame effect to a photo using a filter Ripple(Ripple) and also added a torn paper effect to give the photo a vintage look. If you want to add a torn paper effect to your photo in one click, then you can use the paid action Torn Corner Generator.
You can create an antique effect using simple filters, adjustment layers and brushes. Vintage effect can be applied to any photo and get excellent result. There are many tutorials on the Internet on how to create a vintage effect in a photo, if you want, you can also search for them; you can also check out the best tutorials on how to create a vintage effect in a photo.
Final result:
Step 1
The vintage effect can be applied to any photo, so you can also use your own photo, but to make this tutorial more visually interesting, I used beautiful photo girls in pin-up style, which you can download from the deviantart website using the link at the beginning of the lesson. So open it original image models, name the layer with the model Original image(Original Image). Duplicate the model layer, name the duplicate layer Young woman(Girl).

Step 2
The first thing we need to do before we begin the process of aging the photo is to add a vintage frame. If you look at old photographs, you will notice that all of these photographs have a white frame: sometimes it is a simple frame, and sometimes it is a frame with ragged edges. I will choose the second frame to make the lesson more challenging so that we can learn something new and interesting.
Double click on the layer Young woman(Girl) to apply the layer style Stroke(Stroke), set size(size) stroke is approximately 15 px, the size of the stroke will depend on the size of your photo (the width of my photo is 550 px). Install following settings for the stroke layer style, stroke color is white:

Step 3
For the next step, we need to rasterize the layer style so that the stroke becomes part of the image with the girl. There are several ways to flatten a layer with all the layer styles. If you apply layer styles to text or shapes and then rasterize the layer, you will notice that only the text or shape is rasterized, while the layer styles are not rasterized but can be edited. This means you can't apply filters and other effects to an entire layer.
To rasterize and flatten the contents of an entire layer, you can create a new layer below the current layer and then merge both layers (Ctrl+E). Or you can choose better method, to do this, convert the layer to a smart object. This way you'll be able to apply smart filters and still be able to edit the old layer styles.
In this tutorial we will create a new layer to rasterize effects and then merge it with the layer Young woman(Girl). Name the merged layer Photo Frame(Girl Frame).

Step 4
Holding CTRL key, click on the layer thumbnail Photo Frame(Girl Frame) to load the active selection. Next, go Selection - Modification(Select > Modify) and in the menu that appears, select the option Border(Border). Set the value as shown in the screenshot below.
Translator's note: If after you click on the layer thumbnail you don't see the active selection loading, don't worry, continue further, apply the modification and then the filter Distortion(Distort) Ripple (Ripple). Finally, simply zoom out and you'll see a jagged edge effect along the outline of your photo.

Step 5
Without removing the active selection, go to Filter - Distort(Filter > Distort) and select the option from the menu that appears Ripple(Ripple). Set the settings to create the distortion effect, which are shown in the screenshot below. Now you can see the jagged edge effect along the frame outline.

Step 6
Apply the filter again Ripple(Ripple Filter) using the same settings. You should end up with a photo with the same torn edge effect.
Translator's note: don't forget to apply the modification.

Step 7
Fill the layer with background a dark color tone and then add an Old Paper texture. Place the old paper texture on top of the background layer, change the blending mode of the old paper texture layer to Multiplication(Multiply). You can choose any Old Paper texture from the collection. I used an old paper texture, which you can download from the link at the beginning of this tutorial. Add an adjustment layer to the old paper texture layer. Brightness/Contrast(Brightness and Contrast) as a clipping mask. To convert the adjustment layer to a clipping mask, click the button that is highlighted with a red circle in the screenshot below.
Translator's note: Fill the background layer with dark brown.

Step 8
Now we are going to create a vintage effect on the photo, but before we start, I want to create a torn off corner effect in the top right corner of the image to add authenticity to the photo. Select a tool Lasso(Lasso Tool), select the top right corner of the layer Photo frame(Girl Frame). Try to make the selection look as realistic as possible.

Step 9
Without removing the active selection, first press the keys (CTRL+X), and then (CTRL+V) to get a fragment of a torn piece of the photo on a separate layer. Next, simply move the torn piece and then turn the corner slightly to get the effect of a torn photo. Name this layer Torn corner(Torn Corner).

Step 10
The effect looks great, but we still need to add depth to the edge of the torn corner because the photo paper is not that thin. If you want to learn more about creating a torn paper effect in Photoshop, then you can check out these. So, create a new layer on top of the layer Torn corner(Torn Corner) and using a brush, brush color white, paint along the edge of the corner. Use a standard Splatter brush or look online for a brush with a grunge edge. Name this layer Torn edge(Torn Edge).
To layer Torn edge(Torn Edge), apply a layer style Inner shadow(Inner Shadow) to add depth. Apply the settings for this layer style, which are shown in the screenshot below.

Step 11
Now you can add a realistic effect to the torn edge on the layer Photo frame(Girl Frame), here you can apply Eraser(Eraser Tool), and use the same Splatter brush as a brush to add realism. Our photo should look like the screenshot below:

Step 12
Select three layers: Torn edge(Torn Edge) Torn corner(Torn Corner) and Photo frame(Girl Frame) to merge them (CTRL+E). Name the merged layer Old photo(Old Photo), and then add the following layer styles to this layer: Shadow(Drop Shadow) External glow(Outer Glow) and Inner glow(Inner Glow).


Step 13
Now we can begin the process of aging the photo. As you may know, old photographs are usually monochrome, in most cases in sepia. We'll add two adjustment layers. First let's add an adjustment layer Color tone/ Saturation(Hue Saturation) to reduce the saturation level. Don't forget to press the button Attach to layer Old photo(Old Photo).

Step 14
Next, add an adjustment layer Photo filter(Photo Filter) to reduce the saturation level. Don't forget to press the button Attach to layer(Clip to Layer) so that the effect of the adjustment layer is applied only to the layer Oldphoto(Old Photo).

Step 15
I'm using the old paper texture again, this time just for the layer. Oldphoto(Old Photo). So, copy/paste the old paper texture onto our working document, place the texture on top of all other layers. Name the old paper texture layer Old Paper Texture(Old Paper Layer). Change the blending mode for the layer with this texture to Multiplication(Multiply). Create an active selection by holding down the (CTRL) key and clicking on the layer thumbnail Old photo(Old Photo). Now add a layer mask to the layer Old Paper Texture(Old Paper Layer).
Translator's note: In the screenshot below you can see that the author has corrected the texture; you can also correct the texture at your discretion by applying adjustment layers Hue/Saturation(HueSaturation) and Brightness/Contrast(BrightnessandContrast) as clipping masks.

Step 16
Add a second Old Paper texture to our working paper. Change the blending mode for this texture layer to Soft light(Soft Light) and then add an adjustment layer Hue/Saturation(Hue Saturation) as a clipping mask so that the correction affects only this layer with the texture of the old paper.
Create an active selection by holding down the CTRL key and clicking on the layer thumbnail Old photo(Old Photo). Now add a layer mask to the second layer with the old paper texture.

Step 17
If you want, you can add some scratches and chips; To do this, select all the layers and then group them into one group. Rasterize the group to flatten the layer styles. Add a layer mask to the new layer, and then apply a filter to the mask Add noise(Add Noise filter), Effect(amount) 100%. Apply filter Watercolor(Watercolor), for this we go Filter - Filter Gallery - Imitation - Watercolor(Filter > Filter Gallery > Artistic > Watercolor). Apply the settings for this filter, which are shown in the screenshot below:
Translator's note: The scratch effect can be added using the Scratch texture and then playing with the blending modes.

Step 18
To enhance the aged effect, you can apply Coffee Marks brushes and Duct Tape brushes, including scratches, as well as other effects that enhance the vintage look. I used the Duct Tape shapes that you can download from the link at the beginning of the tutorial, but you can also try other brushes.

You can see the final result in the screenshot below. I hope you enjoyed this tutorial! I will be glad to see your work.
Final result:

I recently became acquainted with a very interesting technique for creating the texture of crumpled paper and that is why, in fact, this lesson appeared. Also in the lesson there is another interesting technique for creating a torn edge on a figure. But first things first. First, let's create a background and decorate it with noise. Then we’ll create a rectangle and use a quick mask and filter to make it have jagged edges. Let's create two more copies of the layer. From the bottom layer we will make a shadow and transform it a little. On the top layer we will create the effect of crumpled paper and apply an overlap. And on the middle layer we will darken the places with a brush. And as it darkens, the texture of the paper will appear.
Step 1.
Create in Photoshop new document 1280 x 1024 pixels, filled with black. 
Step 2.
Let’s use “Filter” > “Noise” > “Add Noise...”. 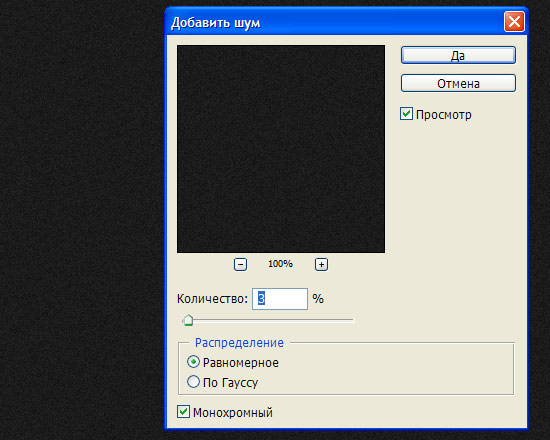
Step 3.
We got this background texture. 
Step 4.
Select an area in the middle. 
Step 5.
Press Q on the keyboard to enter quick mask mode. 
Step 6.
In the menu, select “Filter” (Filter)> “Design” (Pixelate)> “Crystallize” with a value of 3. 
Step 7
Press Q again to exit quick mask mode. We received a selected area with torn edges. 
Step 8
Create a new layer and fill the selected area with white. Immediately make 2 more duplicates of this layer and turn them off for now. 
Step 9
Bottom layer using the Color Overlay layer style ( Color Overlay) paint the layer with color #919191. Reduce the layer opacity to 50%. 
Step 10
From the menu, select “Edit” > “Transform” > “Warp” and stretch the corners a little to give a shadow. For clarity, you can turn on the layer with the top white shape created in Step 8. 
Step 11
We got this result. Immediately go to the layer with the top white shape. 
Step 12
Activate the Gradient Tool. IN top line settings, select a simple black and white gradient, " Linear Gradient"(Linear) and blending mode "Difference" (Difference). Hold Ctrl and click on the layer to select the shape. After this, use short strokes to randomly poke the mouse over the entire area of the rectangle. It should look something like this. 
Step 13
Remove the selection and apply Filter > Stylize > Emboss. 
Step 14
Then press Ctrl+L and adjust the levels, as in the picture below. 
Step 15
We got this result. 
Step 16
Change the layer blending mode to “Overlay” (Overlay). Turn on the second layer with the white shape (above the shadow layer and below the layer from the previous step) and go to it. It should look like the picture below. 
Step 17
Activate the Burn tool and use a large soft brush to start brushing over the shape. The texture of the paper should begin to appear. 
Step 18
As a result, we get this texture of crumpled paper. 
Introduction
This tutorial is about creating a realistic torn paper effect with coffee stains. The lesson trains skills in working with layers.
The purpose of the lesson: to continue working with layers, working with different types of brushes.
Description: when creating this image we will work with layers, textures, brushes. Using brushes we will create jagged edges as well as coffee stains. In the end you should get a picture like this
Creating a document
2. Fill with any color.3. Duplicate the Background layer. Press CTRL+J. Click right click on a new layer and rename it “Note”.
Creating torn edges
|

2. Delete the selection. Select Edit->Cut. We do the same with the remaining sides of the square. We get:

Let's make the edges of the note even more uneven, for this:
2. Go to the “Brush Mark Shape” tab. Select the standard radius brush
17px, set the following parameters:
Set the Intervals value to 47%.
Check the box next to “Shape Dynamics”. Set size fluctuations to 100\%.
Angle fluctuations 61\%.
Check the box next to the “Scattering” tab. Check the box next to “Both axes”. Set the counter value to 2 and the counter fluctuation to 98\%.
Check the box next to “Smoothing”.
Press F5 again to remove the brush settings from the screen.
3. Create a new layer.
5. Do the same for all sides. The result should be:Merge these two layers (the layer with the square and the layer with the “torn” edges). For this:
1. Right-click on Layer1 -> Merge with Previous.
Working with textures
Apply the following settings to the “Note” layer:
1. Go to Layers->Layer Styles->Pattern Overlay.
|


For better effect You can add a texture, for example, wood, under the layers of paper.
1. Click File->Open.
2. Select required file. Click OK.
3. In the window that appears on the right, in the Layers tab, right-click on Background and select “Create a duplicate layer.”

4. In the Document tab, select Coffee, give the layer the name “Tree”. Close the file
"Tree".
5. In the “Coffee” file, move the “Tree” layer to the last place.
6. Right-click on this layer and merge it with the Background layer.
Editing an Image
Let's create a shadow under the note. For this:
1. Duplicate the Note layer.
2. Select the object and fill it with black.
|

4. Move the shadow layer below the paper layer.
5. Do: Edit->Transform->Warp.
6. Deform the bottom edge of our shadow as shown in the figure:

7. Blur the shadow a little:
|

We see that the shadow is unevenly visible. Let's fix this. Using the Warp tool,
Let's adjust the shadow, this should add more realism to the image

The next step is to apply the crumpled paper texture. (You can download it here
https://www.sxc.hu/photo/1146676)
1. Click File->Open. Select the desired file. Click OK.
2. In the window that appears on the right, in the Layers tab, right-click on Background and select “Duplicate Layer”.
3. In the Document tab, select Coffee, give the layer the name “Paper”. Close the file
"Paper".
4. In the “Coffee” file, move the “Paper” layer above the other layers.

Change the Blend Mode to Multiply. For this:
1. Go to Layers->Layer Style->Blending Options.
2. Change the blending mode to Multiply. Click OK.

Now let's add more details. To do this you need this file
https://www.sxc.hu/photo/1231636.
1. Load this file in the same way as the “Paper” file. Name the layer Texture.
2. Move the layer above the others.
3. In the Layers tab, right-click on the Texture layer.
4. From the list, select Create Clipping Mask. Set the opacity to 26%.

Working with brushes
Let's add some coffee stains. To do this, you will need new brushes, you need to download them. (Link to brushes https://www.brusheezy.com/brushes/1192-Coffee-Stains)
1. Select the Brush Tool and press F5 to display the brush settings.
2. Click on “Manage Sets” at the bottom of the screen.

3. In the window that opens, click Upload and go to the folder where the brushes are stored.
Select the desired file.
4. Create a new layer.
5. Select a dark brown color and add a few spots on a new layer.

You need to remove those parts of the brush that extend beyond the paper area.
1. Go to the Paper layer, and with Ctrl pressed, click on this layer.
2. Go to the Stains layer and click Select->Invert to invert the selection.
3. Press Ctrl+X to delete the area we do not need.

Work with text
Let's write the text on the note:
1. Select the “Horizontal Text” tool.
2. Select some area and write text.
3. Select Segoe Script font size 36pt. Change the color to dark blue.
Move the text if necessary. Change the Blend Mode to Hard Light.
First, you need to have an idea of what a torn edge of paper looks like. To see it, take a sheet of paper and tear it into two halves. Now look at the torn edge of one of the halves from as close as possible. If from a distance it seems smooth, then upon closer examination it becomes clear that this is not the case at all: it is uneven and rough. Knowing this fact will be useful to us when creating the torn paper effect in Photoshop.
We will need a paper texture as the starting material for this tutorial. Most The best way To obtain it, download it from some resource on the Internet. You can also take a large photograph of a sheet of paper yourself.
Now let's go to Photoshop. Open the newly obtained paper texture in it.
We also need to open a document (for clarity, let's call it a working document), in which we will make a torn edge of the paper. If the size of this document is smaller size document with a texture, reduce the value of the latter. This can be done using dialogue
Image Size
Called by the command
Image > Image Size
Tool
drag the texture into the working document. As a result, in the palette
along with an empty layer ( background layer, Background) another one will appear, with a texture. Let's activate Background layer by clicking on it. Then select the tool
Pain Bucket (paint bucket)
and fill the background layer with any color.
Move Tool
Pain Bucket Tool
Let's create a duplicate layer with the paper texture. To do this, right-click on it in the layers palette and select
Duplicate Layer
As a result, we get two texture layers: the original and the double. For convenience, let’s call one of them (no matter which one) “top texture”, and the other “bottom texture”. Next we will work with the first layer. Therefore, to avoid confusion, we will turn off visibility for the second one. To do this, click the mouse to remove in the palette
Opposite the “bottom texture” layer is an image of an eye.
Let's shoot in the palette
Opposite the “bottom texture” layer is an image of an eye
Now let's draw a line along which the future will walk.
torn edge of paper.
First, let's create a new layer. This can be done by clicking on the "Create a new layer" button in the palette
Let's create a new layer
Let's set it up for the instrument
Brush
thickness "3" and mode "Normal". On the newly created empty layer, draw a broken line with it. Draw it in a color that can be used to divide your document into two parts.
Select the Brush tool
Let's configure the necessary parameters for it
Draw a broken line on an empty layer
Now the tool
Let's select the part of the texture located under the break line.
Let's choose a tool
Magic Wand (magic wand)
Select the part of the texture located under the break line
Activate the visible “Texture Top” layer. Then by pressing the key
delete the selected area of the texture. And let's press
Activate the visible layer "Texture Top"
Delete the selected area of the texture
It's time to make a break line that the other will have
torn edge of paper
It belongs to the "bottom texture" layer. Let's make it visible and the "top texture" invisible. Create a new layer above the “bottom texture” layer. Let's call it "slice 2".
Above the “bottom texture” layer, create a new layer, “slice 2”
Take the brush again with the same parameters and draw a line indicating the border where the second one will pass
torn edge of paper.
While drawing the bottom line, repeat the first line, but make slight differences in some places.
Draw the border of the second torn edge
Then we perform the actions already familiar from working with the top edge. Tool
Magic Wand (magic wand)
select the area under the second line and in the “bottom texture” layer delete the selected texture.
In the “bottom texture” layer, delete the selected texture
For layers with auxiliary lines indicating the boundaries along which the torn edge of each piece of paper runs, turn off visibility. We won't need them anymore. Now visually separate the top edge of the gap from the bottom, making the “bottom texture” layer a little lighter. You can lighten a layer using the dialog
Brightness/Contrast
Called by the command
Image > Adjustments > Brightness/Contrast
In it, by setting the appropriate parameters, we achieve the desired effect.
The inside of the sheet of paper has a rough structure, and our line of the torn edge turned out to be too smooth. A torn sheet of paper has slightly bristly edges. Let's achieve the corresponding effect using the tool
Eraser (eraser).
First, set its parameters to the following values: Brush="1", Mode="Pensil", Opacity="100%".
Let's choose a tool
Eraser
Let's set up the tool
Eraser
Now let's erase some pixels from the very edge of the "bottom texture" layer.
Let's erase some pixels from the very edge
Using a filter
Gaussian Blur
Let's add "fibrous" to the same layer. Team
Filter > Blur > Gaussian Blur
Call up the filter dialog box. We will produce in it necessary settings. You need to act more carefully so as not to smear the picture at all.
All that's left to do is cast a shadow on the torn edge of the paper. Double click mouse over the "bottom texture" layer in the palette
Let's call the layer editor of this layer. In the editor menu we look for the item
Drop Shadow
and configure the parameters provided to us, as shown in the figure. After completing the settings, click
Casting a shadow on the torn edge of the paper
Like this
torn paper
I got it in the end.
In this tutorial we will create a very simple paper cut out effect. Despite the simplicity of implementation, we will get a cool, realistic effect! suitable for beginners, however, it also contains a couple of techniques that we have not seen before in other lessons. We highly recommend that experienced Adobe Photoshop users also take a look at this tutorial!
Result
1 Step
Draw a template according to which you want to do the work. Outline it using the Pen Tool. Fill your objects with the color you like.

2 Step
To add a shadow for the top of the letter, double-click on its layer in the Layers menu and select Drop Shadow. Adjust the settings to get the desired effect. Uncheck Use Global Light.

3 Step
Add an Inner Shadow layer style.

4 Step
Repeat Step 2.

5 Step
To edit the shadow separately from the fill layer, select Layer > Layer Style > Create Layer from the menu. Now in the Layer palette you will have two layers: a separate letter and a separate shadow.

6 Step
Use the Eraser tool to erase parts of the shadows.
Now let's add textures. Create a new layer and fill it gray. From the menu, select Filter > Noise > Add Noise/Filter> Noise> Add Noise.

7 Step
Set the layer's blending mode to Soft Light in the Layer palette.
