Screenshots for iOS is the most powerful application for working with screenshots. Editing a screenshot Programs for creating screenshots
Snipping Tool in Windows 7
The Snipping Tool allows you to take a screenshot of any element on your desktop or the entire screen. The program is launched from the menu Start → All Programs → Accessories.
More details
macOS
To take a screenshot on macOS, press the keyboard shortcut ⌘ Cmd + Shift + 3. A file with a snapshot of the entire screen will appear on your desktop.
If you want to take a screenshot of a specific part of the screen, press the keyboard shortcut ⌘ Cmd + Shift + 4 and highlight the desired area of the screen with the cursor.
To take a screenshot of just the active window, press the keyboard shortcut ⌘ Cmd + Shift + 4 and then press Spacebar.
iOS
The iOS platform allows you to take a screenshot using standard tools starting from version 2.x. The resulting images are saved in the standard Photo application. The method for taking screenshots depends on the iOS device model.
iPad, iPhone SE–8 Press and hold the button for a couple of seconds On/Off and Home. iPhone X–XR Press and hold the button for a couple of seconds On/Off And Raising the volume.
Android
You can take a screenshot on a mobile device running Android in different ways, depending on the device manufacturer and platform version. The resulting images are saved in the standard Gallery application.
- Android 4.x–9.0
- Android 3.2 and higher
- Android 1.x and 2.x
- Samsung
Press and hold the button for a couple of seconds Decrease volume and Nutrition.
Press and hold the button for a while Recent Programs.
The Android platform version 2.x and below does not support taking screenshots using standard means. You must use third-party applications installed from Google Play.
Press and hold the Home and Power or Back and Home buttons for a couple of seconds (depending on your device).
Press and hold the Power and Home buttons for a couple of seconds.
And if you use special programs and applications, you can add important signatures, comments to screenshots, or simply edit the picture and video. Here are 50 ways to take a screenshot and record video from the screen on all devices.
Hotkeys
Let's start with the easiest ways to take a screenshot.
1.Windows
The familiar Alt and Print Screen key combination is for taking a picture of an open window. Just Print Screen - for a screenshot of the entire screen.
2.Mac
Command (⌘) + Shift + 3 - snapshot of the entire screen. Command + Shift + 4 - for part of the screen. You will find the resulting screenshots on your desktop.
3. iOS
Press the Power and Home buttons at the same time. The screen will appear in the folder with all the photos.
4.Android
Owners of Android 4.0 and higher can take a screenshot by simultaneously pressing the power and volume down buttons. In earlier versions of Android, there is basically no special command for taking screenshots. But some manufacturers, for example, Samsung, still included this function in their gadgets: press the Power and Home buttons and the screen is ready!
Windows Applications
Special offline programs for Windows.

5.Greenshot
A simple and free screenshot tool. Capture a full screen, a specific area, or a scrolling web page. Save screenshots to a buffer, upload them to graphic editors, send them by mail and choose a format.
6. Snipping Tool
Take a screenshot and immediately change it: crop it, add comments, send it by mail or save it.
7. PicPick
Free multi-tool. Ability to add icons, symbols, text, graphic effects (blur, sharpening, color balance).
8. Jing
Program for Windows and Mac. Jing is similar in functionality to PicPick, but has a more developed system for uploading screenshots to various sites: Flickr, Twitter, Facebook. It is also possible to record video from the screen.
9.FastStone
A paid program that is equipped with some additional functions: direct transfer of a screenshot to a Word document or Power Point presentation, video recording.
10. Tinytake
Free tool with video recording capability (up to 120 minutes). Add comments, share screenshots immediately, view the history of actions. For Windows and Mac.
11. Screenshot Captor
Several screen screen options, as well as a large number of filters and other effects.
12. WebShot
Save screenshots as separate images in JPG, GIF, PNG, or BMP formats.
13. I4X Screencatcher
Nothing extra, just standard tools and functions that will help you quickly take a screenshot. It is possible to save the screenshot as a GIF.
14. Lightshot
Edit screenshots and share them immediately. The big pole is the ability to search for similar images. The program works on both Windows and Mac.
Video
Special programs that will help you record video from the screen.
15. Ezvid
Shoot videos and insert text between videos. Disadvantage: Videos can only be uploaded to YouTube.
16. BlueBerry FlashBack Express Recorder
Use a webcam to film yourself and your monitor screen at the same time. Then edit the video and save it in FBR format.
17. CamStudio
CamStudio allows you to record a separate soundtrack or turn it off altogether, add comments and “remove” the mouse cursor from the screen.
18. Rylstim Screen Recorder
Suitable for those who just want to record video from the screen without additional effects and editing tools.
Applications for MAC OS
Many Windows programs are available for Mac, but if you don't want to waste time searching for the apps you need, here are a few tools just for Apple products.

19. Skitch
Skitch is available for various platforms, but it has proven itself as an application for Mac. It has a large set of tools that allow you to edit screenshots, add captions to them, change the size, save the image in various formats and share them on social networks. There is also automatic archiving of the screenshot for future use. There are both free and paid versions of the application.
20. LittleSnapper
It has a very good image management and editing tool. The app is more expensive than Skitch, although it has similar features.
21. Paparazzi!
A small free utility for Mac with no additional options.
22. InstantShot
Save the image in different formats or immediately import the screen into other applications. The program is available in several languages.
23. SnapzProX
Video recording program. Videos can be saved in QuickTime format, sent by mail, or uploaded to a website.
24. Voila
Take a screenshot or record a video, save separately or upload to the Web, edit and add comments, group images and videos - all in one program.
25. Snagit
A dedicated app for Chromebooks with classic features and editing tools.
Online tools
If you don't want to download and install a special program, you can use online tools. The operating principle of each is simple - paste the page URL and take a screenshot.

26. Thumbalizr
Screenshot the desired page and save the image in various sizes.
27. web-capture
28. Screen Capture
It will take a screenshot of any site, except those that require registration (for example, Gmail), have Flash elements or Google Maps.
Extensions
Another way to take screenshots if you don’t want to install special programs. In addition, extensions are very easy to use: you don’t need to open a separate application - everything is in the browser.
Extensions for Google Chrome
29. Awesome Screenshot
Rightfully the most popular extension of all existing ones. It has a whole set of tools that is not inferior to special programs: adding comments, signatures and symbols, hiding confidential information, horizontal scrolling, saving in different formats.
30. Capture Webpage Screenshot Entirely
The available image saving formats are impressive: PDF, JPEG, GIF, PNG and BMP, as well as the ability to immediately print a screenshot.
31. Nimbus Screenshot and Screencast
You can take not only screenshots, but also record videos. And then immediately edit them.
32. Full Page Screen Capture
Convenient plugin with standard tools.
33. Webpage Screenshot
Horizontal and vertical scrolling, the ability to save the screen, share it on social networks or print.
Firefox Extensions
34. Save as image
Allows you to take a screenshot and edit it a little.
35. Pearl Crescent Page Saver
Allows you to screen Flash content, save a screenshot in JPG or PGN format, and change its size.
36. GraphicsEx
A simple plugin for taking screenshots of the entire screen or part of it.
37. Screengrab
You can screen Java and Flash elements, save them separately or copy them to the clipboard.
Other browsers
38. UpShot Safari Extension
Extension for Safari. Take a screenshot, which is saved in “Drafts”, where you can edit it.
39. Nimbus Screen Capture
40. Capture Webpage Screenshot - FireShot
Android
Often you need to screenshot not only on a computer or laptop, but also on phones or tablets. Special applications for the Android platform.

41. Screenshot
You can preview the screenshot before saving it to a folder of your choice, edit it, draw on the screenshot, or make a mosaic out of it.
42. Screenshot Easy
One of the most popular applications with a lot of tools. Available for Android 4.0 and above.
43. Screenshot Ultimate
Add time and date to the screen, change colors, share it on social networks. More than 16 ways to capture images from the screen.
46. Screenshot - Frame Maker
Select the device format, and the application will “adjust” the image to the desired size. Save the screenshot or share it on a social network or with another application user.
47. Screenshot Maker Pro
You can add a shadow to the screen, rotate it in a mirror, make a 3D background, and also save it in PNG format for further editing in Photoshop.
48. Screen Grabber
Ability to add a map, phone number, contact information or other image.
49. DS Screenshot
Watermark your screenshot to protect it from theft and feel free to share it.
50. Screenshot Sweeper
An easy-to-use application with a minimum required set of tools.
Hello.
Who among us has not wanted to capture some episode on a computer screen? Yes, almost every novice user! You can, of course, take a picture of the screen (but this is too much!), or you can take a picture programmatically - that is, as it is correctly called, a screenshot (the word came to us from English - ScreenShot) ...
You can, of course, take screenshots (by the way, they are also called “screens”) and in “manual mode” (as described in this article:), or you can configure one of the programs presented in the list below once and receive screenshots by pressing just one key on the keyboard!
It is about such programs (more precisely, about the best of them) that I wanted to talk about in this article. I will try to present some of the most convenient and multifunctional programs of their kind...
F astStone Capture

FastStone Capture window
One of the best programs for creating screenshots! She has helped me out more than once and will help me out again :). Works in all versions of Windows: XP, 7, 8, 10 (32/64 bits). Allows you to take screenshots from any windows in Windows: be it a video player, a website or some program.
I will list the main advantages (in my opinion):
- the ability to take a screenshot by setting up hot keys: i.e. press the button - select the area you want to screenshot, and voila - the screenshot is ready! Moreover, hotkeys can be configured to save the entire screen, a separate window, or select an arbitrary area into a screenshot (i.e., very convenient);
- after you have taken a screenshot, it will open in a convenient editor where you can process it. For example, change the size, add some arrows, icons and other elements (which will explain to others where to look :));
- support for all popular image formats: bmp, jpg, png, gif;
- the ability to auto-load when Windows starts - thanks to which you can immediately (after turning on the PC) take screenshots without being distracted by launching and configuring the application.
S nagit
![]()
A very popular program for taking screenshots. It has a huge number of settings and various options, for example:
- the ability to take screenshots of a specific area, the entire screen, a separate screen, scrolling screenshots (i.e. very large tall screenshots 1-2-3 pages high);
- converting one image format to another;
- There is a convenient editor that will allow you to carefully trim the screen (for example, make it with uneven edges), add arrows, watermarks, change the size of the screen, etc.;
- Russian language support, all versions of Windows: XP, 7, 8, 10;
- there is an option that will allow you to take screenshots, for example, every second (well, or at the time interval that you set);
- the ability to save screenshots to a folder (each screen will have its own unique name. The template for specifying the name can be customized);
- the ability to customize hot keys: for example, you configured buttons, clicked on one of them - and the screen is already in the folder, or opened in the editor in front of you. Convenient and fast!

Options for creating screenshots in Snagit
The program also deserves the highest rating, I recommend it to absolutely everyone! Perhaps the only negative is that a fully functional program costs a certain amount of money...
G reenShot
Another cool program that allows you to quickly get a screenshot of any area (in almost 1 second! :)). Perhaps, it is inferior to the previous one only in that it does not have such a large number of options and settings (although, perhaps, for some this will be a plus). However, even those that are available will allow you to quickly and easily make high-quality screenshots.
In the program's arsenal:
- a simple and convenient editor in which screenshots are saved by default (you can save them automatically directly to a folder, bypassing the editor). In the editor you can change the size of the picture, crop it beautifully, change the size and resolution, and add arrows and icons to the screen. In general, very convenient;
- The program supports almost all popular image formats;
- practically does not load your computer;
- made in the style of minimalism - i.e. there is nothing superfluous.
By the way, the view of the editor is shown in the screenshot below (such a tautology :)).

Fraps
(Note: a special program for creating screenshots in GAMES)
This program is designed specifically for creating screenshots in games. But not every program can take a screenshot in a game, especially since if the program is not designed for this, your game may freeze, or you may experience lags and freezes.
Using Fraps is very easy: after installation, run the utility, then open the ScreenShot section and select a hotkey (which will take screenshots and send them to the selected folder. For example, the photo below shows that the F10 hotkey and screenshots will be saved to the “C:\Fraps\ScreenShots” folder).
The screen format is also set in the same window: the most popular are bmp and jpg (the latter allows you to get very small screenshots, although they are slightly inferior in bmp quality).

Fraps: ScreenShot settings window
An example of how the program works is presented below.

Screenshot from the computer game Far Cry (small copy).
By the way, in order for screenshots to be saved on your desktop and not uploaded to the Internet, you only need to adjust one switch in the program settings. Click on the program icon in the lower right corner of the screen and select the “save location” option.

Where to upload screenshots - ScreenCapture
In addition, if you save pictures to your desktop, you can select the format in which they will be saved: “jpg”, “bmp”, “png”. It's a shame the "gif" is missing...

How to save screenshots: choosing a format
Overall, an excellent program, suitable even for completely novice users. All main settings are displayed in a prominent place and can be easily changed. Moreover, it is completely in Russian!
Among the shortcomings: I will highlight the installer, which is quite large in size - 28 MB * (* for this kind of program this is a lot). And also the lack of support for the gif format.
Light Shot
(Russian language support + mini-editor)
A small and simple utility for creating and easily editing screenshots. After installing and launching the utility, to create a screenshot, just click on the “Preent Screen” button, and the program will prompt you to select an area on the screen, as well as where you will save this picture: on the Internet, on your hard drive, on social media networks.
Light Shot - selecting an area for the screen.
In general, the program is so simple that there is nothing more to add :). By the way, I noticed that using it it is not always possible to screen some windows: for example, with a video file (sometimes, instead of a screen, there is just a black screen).
J Shot
Developer website: http://jshot.info/
A simple and functional program for creating a screenshot of the screen. What’s especially pleasing is that this program has the ability to edit a photo. Those. After you have taken a screenshot of an area of the screen, you are offered a choice of several actions: you can immediately save the picture - “Save”, or you can transfer it to the editor - “Edit”.

This is what the editor looks like - see photo below

Screamshot Creator
A very “light” (weighs only: 0.5 MB) program for creating screenshots. Using it is very simple: select a hotkey in the settings, then click on it and the program will prompt you to save or discard the screenshot.

Screenshot Creator - taken screenshot
If you click save: a window will open in which you will need to specify the folder and file name. In general, everything is quite simple and convenient. The program works very quickly (even if the entire desktop is captured), and it is also possible to capture part of the screen.
P icPick (in Russian)
A very convenient program for editing screenshots. After launch, it offers several actions at once: create an image, open it, determine the color under your mouse cursor, and capture the screen. Moreover, what is especially pleasing is that the program is in Russian!

PicPick Image Editor
How do you proceed when you need to take a screenshot and then edit it? First, screenshot it, then open some editor (Photoshop for example), and then save it. Imagine that all these actions can be done with one button: the picture from the desktop will be automatically loaded into a good editor that can handle most of the most popular tasks!

PicPick image editor with added screenshot.
Shotnes
(With the ability to automatically post screenshots on the Internet)
A very good screen capture utility. After you remove the desired area, the program will offer several actions to choose from:
- save the image to your computer’s hard drive;
- save the picture on the Internet (by the way, it will automatically place a link to this picture on the clipboard).
There are small editing options: for example, highlight some area in red, draw an arrow, etc.
Shotnes Tools - Shotnes tools
For those who develop websites - a pleasant surprise: the program has the ability to automatically convert any color on the screen into code. Simply left-click on the square area, and without releasing the mouse, move to the desired location on the screen, then release the mouse button - and the color is determined in the “web” line.
Define color
S creen Presso
(screenshots with the ability to scroll the page, to create high-height screenshots)
A unique program for creating high-height screenshots (for example, 2-3 pages high!). At least, this function, which is in this program, is rare, and not every program can boast of similar functionality!
I’ll add that the screenshot can be made very large, the program allows you to scroll the page several times and capture everything in full!
Video recording / Snapshot of the selected area.
S upper Screen
(Note: minimalism + Russian language)
A very small screen capture program. To work, you need to have Net Framework 3.5 installed. Allows you to perform only 3 actions: save the entire screen into a picture, or a pre-selected area, or an active window. The program does not fully justify its name...

SuperScreen - program window.
E asy Capture
But this program fully lives up to its name: it takes screenshots easily and quickly, just by pressing one button.
By the way, the good news is that she immediately has a mini-editor in her arsenal, reminiscent of regular paint - i.e. you can easily edit your screenshot before posting it for public viewing...
Otherwise, the functions are standard for programs of this kind: capturing the entire screen, active window, selected area, etc.

EasyCapture: main window.
Lip2Net
(Note: easy and fast adding screenshots to the Internet + receiving a short link to the screen)
Quite a popular program for creating screenshots! I’ll probably say a banality, but “it’s better to try once than to see or hear 100 times.” Therefore, I recommend that you launch it at least once and try to work with it.
After starting the program, first select the function of capturing part of the screen, then select it, and the program will open this screenshot in the editor window. See below picture.

Clip2Net - a screenshot of part of the desktop was taken.

Results of publishing the screenshot on the Internet.
-----------------------
This concludes the review of the best programs (in my opinion) for capturing the screen and creating screenshots. I hope that you find at least one graphics program useful. I would be grateful for any additions on the topic.
Often when working on the Internet, beginners have a problem - taking a screenshot of the screen (photo of the page). Now we will quickly and step by step figure it out.
If you need to take more complex types of screenshots for your work, then it is better to use special utilities that can be downloaded on the Internet for free.
So, the easiest way to take a screenshot is
1. On the keyboard, find a button with this inscription and click on it
Or the button may have the inscription: PrtSc
2. Go to the graphic editor “Paint”, which is installed on almost any computer.
To do this, at the bottom of the computer monitor in the left corner, click “Start” - “All Programs” - “Accessories” - “Paint” (Fig. 1)

Fig. 1 “how to take a screenshot”
3. Place the mouse on the arrow anywhere in the window that opens and simply click.
Then press two buttons simultaneously “Ctrl” + “V” (Fig. 2) That’s it, the screen is ready and now all that remains is to send it to the folder.

Fig. 2 “how to take a screenshot”
Send screenshot to folder
1. In the upper left corner (see arrow in Fig. 3), click “Selection” and select the area we need.

Fig. 3 “how to take a screenshot of the screen”
2. In the center of the selected area, right-click the mouse to open the menu window and click “Copy to file” (Fig. 4)
3. In the window that appears, select the folder to save and enter the name of the file (in this case, “scrin-stranizy”) and click “Save”.

Fig. 4 “how to take a screenshot of the screen”
Now the file is saved as a bitmap (in the bmp,dip extension).
How to change screenshot extension
To convert it to another extension, say GIF or JPEG:
1. Click on the drawing twice, sending it again to “Paint”.
Fig. 5 “how to take a screenshot of the screen”

Fig. 6 “how to take a screenshot of the screen”
That's it, the work is finished. Now you have a screenshot of the screen (page), which is easy and convenient to work with.
(Visited 534 times, 1 visits today)
You can take and edit a screenshot using a 2-key combination and the built-in Paint graphic editor. Press Ctrl+PrintScreen to save the screenshot to the clipboard and launch Paint. Create a new file using the “New” command from the “File” menu and press Ctrl+V to insert the snapshot.
You can edit the screenshot in Paint. Using the selection tools, mark the selected portion of the image and right-click inside the selected area. Specify the desired action in the context menu. If you want to save a fragment of an image as a graphic file, select “Copy to file”. In the new window, specify the path to the folder in which the file will be stored (by default, “My Pictures”) and its name.
If you use the Copy command, the fragment will be downloaded to the clipboard. It can be used to insert into a new image. The Cut command also loads the selected portion of the image into the buffer, but removes it from the original image. A white background remains in place of the cut fragment.
Individual details of the screenshot can be marked to attract attention using the Rectangle and Ellipse tools. Select the highlight color from the palette. In addition, Paint has painting tools: brush, pen and spray. With their help, you can draw shapes like arrows and more complex ones if you have experience working with this graphic editor.
You can add a caption to the screenshot. To do this, click the letter “A” in the toolbar, select the appropriate color from the palette, the font type and size in the properties panel, and enter the text.
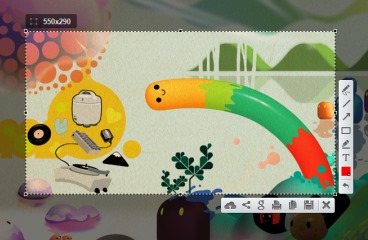
Lightshot program
The free Lightshot program makes it very easy to create and edit screenshots. Download it from the manufacturer's website and install it. After that, it will start automatically when you turn on the computer. Its icon is in the tray.
When you need to take a screenshot, press the PrintScreen key and circle the desired area on the screen with your mouse.
A toolbar appears along the vertical side of the frame, with which you can mark details inside the selection with a marker or a colored rectangle; draw something with a pencil; place a pointer in the form of an arrow; make an inscription. You can undo actions by clicking on the arrow.
To change the size of the selection, drag the side and corner handles on the frame. The selection can be moved to another location by holding it with the mouse.
A command bar appears along the horizontal side of the frame. Using the buttons located on it, the selected fragment can be loaded into the buffer, saved as a graphic file, printed, found similar images on the Internet, etc. It is not difficult to understand the purpose of the buttons, since a tooltip appears when you hover the cursor.