I split the table in Word and part of it is omitted. How to remove page breaks in Word in two simple ways and prohibit their further insertion
All users who work in text Word editor, they know that this process is by no means difficult, rather, on the contrary. The program has an extremely simple interface; even a less experienced user can navigate its menu. However, sometimes exceptions occur, and this or that issue is quite difficult to resolve.
For example, I noticed that many users do not always know how to break a table in Word. In fact, there is nothing complicated about this, the process takes several minutes, if not seconds, but you still need to be aware of some of the nuances. More on all this below.
Including non-printable characters
I think it’s no secret to anyone that signs and symbols in Word can be printed or non-printed, so when you decide, you need to take this into account too. The first ones are those that we see when typing. Non-printable characters are hidden from users, but their display can be activated. Non-printing characters include, for example, page breaks, paragraph marks, etc.
So, to break the table in your text file, you must first include non-printable characters. This can be done in two ways: using the combination Ctrl keys+Shift+8 or special button on the toolbar. I would like to draw your attention to the fact that the number “8” must be pressed on the main keyboard unit, and not using the touchpad. Otherwise, there will be no result from such a command. As for the button, it is located in the “Home” section, in the “Paragraph” category – “Display all characters”.
How to break a table
Finally, we got directly to the practical part of the article. Remember: in order to break a sign in Word, you need to use the “Page Break” function. How to do this - further.
- Place the cursor in the desired cell of the table row.
- Now open the “Insert” section, “Pages” subcategory, “Page Break” button.
- After this, the part of the table that will be located below the cursor will be torn off and placed at the beginning of the new page.

Of course, the method is not the simplest, however, you must agree, it is not complicated. However, if you are looking for something simpler, and for this case I have one option in store, namely: in the table, set the cursor to the required line, then simultaneously hold down the Ctrl+Shift+Enter buttons. The line that comes after the italics will be set first in new table. But later, if necessary, you will learn how to remove a page break
While working with MS Word documents, you may need to not only type text, but also insert a picture, make a table, chart or graph in Word. On our website you can find detailed articles on how to make a table in Word, and how to build a graph in Word. We also wrote about how to combine or split a table in Word.
In this article we will again touch on this topic. Suppose you have a table in your document that does not fit on one sheet, but occupies two, three or more sheets. According to the design rules and requirements written in GOST, on the second sheet and all subsequent ones, at the top you need to write: "Table continuation…".
Therefore, let's figure out how to insert the inscription Continuation of the table in Word. I'll show you two ways to do this. I have Word 2010 installed, all recommendations are suitable if you use Word 2007, 2013 or 2016. If you have Word 2003 installed, then everything is done the same way, only the names of the items and their location may differ slightly.
To begin with, I advise you to turn on the display of non-printable characters so that it is clear where the break will be added and the line end sign. If you are not used to using them, then after you make the desired inscription, these signs can be turned off.
To do this, on the “Home” tab in the “Paragraph” group, click on the button "Show all characters". After this, in the document you can see the beginning/end of paragraph marks, spaces, markers for filling the cell with text, etc.
Sign the continuation of the table: 1st method
Open required document and scroll through it to the page where the desired table is.

Then, on the top sheet, place the cursor at the end of the text in the last right cell and press “Ctrl+Enter”.

A page break will be added and the page will be divided into 2 parts. Place the cursor after the phrase that appears, near the black vertical marker, and type the desired text.

The added text will automatically be transferred to the second sheet, and the required inscription will be exactly above the line that begins on the second page.

This method is best used if each new data takes one or two lines. If you have one row in the table divided into several cells, and each one contains a lot of text that takes up not 1, but 5-6 lines, then use the second method.
Making an inscription above the table: method 2
Now let's consider this option: you have a large table in the document and a lot of text is written in the cells, as in the example. If you just use the first method, then after inserting a break, last line will automatically be transferred to the second sheet. As a result, there will be a lot left on the first sheet empty space, but this cannot be done, especially in official documents that are drawn up in accordance with GOST.
Click the mouse at the end of the text in the lower right cell. Then go to the tab "Working with tables"– “Layout” and in the group "Rows and Columns" click on the button "Insert from below".

Another row will be added to the table. Select it completely by clicking on the left margin with the mouse opposite it once. Then on the “Home” tab, in the font field, type the number “2” - this is the font size, and press “Enter”.

The line from the second sheet will move to the end of the first. Click on the bottom right cell (the blinking stick will be almost invisible, since the font size is set to “2”) and press “Ctrl+Enter”.

After this, the table will break into 2 parts. Place the cursor after the phrase that appears, where there is a vertical black stick - the end of the paragraph, and type the desired text.

As a result, what we need will be written on the second sheet. Now you need to delete extra line. Select it and press "Ctrl+X".

This is how we managed to do everything without transferring the last cells with data from the first sheet to the second.

I hope everything worked out for you, and now you can write the phrase Continuation of the table in just a couple of minutes.
Rate this article:Using convenient software Microsoft applications Office Word, having an understandable intuitive interface, even a novice PC user can convert any document. The program allows you to format data, highlight it with color, color the space around a certain block, and also create various kinds of tables. The product's multifunctional toolkit has huge opportunities, which are necessary in order to beautifully and competently manage tabular data stored in several formats. Using a text editor, you can create, merge, or split any tablespace. Although all of the above steps are simple, some people may have difficulty putting these steps into practice. In this article we will look at ways to help you create a table break or connect several separate fields with cells.
Most often, the need to combine graphs divided into several parts is required as a result of subsequent data formatting when the document boundaries increase or decrease. This kind of manipulation leads to a complete discrepancy between the previously created page breaks and their endings. The user has to re-combine everything and then split it in accordance with the new rules.
In this article we will talk about simple “horizontal” division and union relative to rows. Software features Word applications are such that in practice it is simply not possible to carry out vertical division or standard merging relative to columns.
Working in Word 2003
Merging tables in Word that have the same number of columns is quite simple; to do this, the user needs to place the cursor directly on the break line, which is located under the first block of table data, then gradually press the Delete button. After a few moments, the previously separated data will be combined into one table.

Don’t despair if your table blocks contain columns that have different widths; to do this, you just need to align them in width. There is no need to perform this time-consuming operation manually; the user will be greatly assisted by useful command"Align Columns Width" which is in context menu, called after selecting the table and clicking on the selected area. There are times when automatic alignment does not meet the wishes or needs of the consumer, so you first need to merge the two parts of the broken table, and then manually adjust the width in a way that is more appropriate for the specific data.
Working in Word 2007 and higher
Despite the many innovations that have appeared in more modern versions software product, you can also connect a table in Word 2007 quickly and easily using Delete button and the cursor placed in the gap.
Universal solution
As practice shows, there is one most convenient method in a text editor that allows you to quickly combine tables that, due to their characteristics, have the same number of columns with different widths. So, in order to take advantage in a unique way and align the width of the columns in several subsequently merged tables, you will have to first select the second table and simultaneously hold down the Ctrl+X buttons. This action causes the cut data to be placed on the clipboard. Then you need to place the cursor on the line that is located next to the first table. Simultaneously pressing the Ctrl+V buttons will allow you to paste the copied data back into the area where this moment cursor is located.

At first glance, this method may seem more complicated than the first, however, after the work is done, the user himself will be able to appreciate the convenience and simplicity of this method, which does not require either time or labor. It is worth noting that this kind of manipulation can be used even when the tables have very extensive formatting.

...and click Insert
Separation of information blocks
The need to split a table in Word arises no less often than to merge it. One of the simplest and quick ways, helping to implement the plan is the use special combination buttons To create a gap, placing the cursor on a line will help, which after the division will take place in the new table space.
After the user has decided on the location of the break, he must simultaneously press the Ctrl+Shift+Enter buttons. With just one click, the whole canvas will be divided into 2 parts.
More complex method, which allows you to make a break in Word, most likely, will also not cause any difficulties. To execute it, you need to place the cursor in the same line, which will be the first in the new table, then find the subcategory in the main menu that is responsible for working with tables. Among other commands, you should find the “Layout” tab; by clicking on the “Split” command, the entire table space will be divided into two independent parts.

Conclusion
In fact, the Microsoft Word text editor is ready to help those who use it in everything. It is enough to know just some specific key combinations or certain commands and the user will be able to very quickly merge the table or make the required break in it.
There are two types of page breaks in MS Word. The first of them are inserted automatically as soon as the written text reaches the end of the page. Breaks of this type cannot be removed; in fact, there is no need to do so.
Breaks of the second type are created manually, in those places where it is necessary to move a particular piece of text to the next page. Manual page breaks in Word can be removed, and in most cases this is very easy to do.
Note: View page breaks in "Page layout" inconvenient, it is better to switch to draft mode for this. To do this, open the tab "View" and select "Draft"

Any manually inserted page break in MS Word can be removed.

To do this you need to switch from mode "Page layout"(standard document display mode) to mode "Draft".

You can do this in the tab "View".
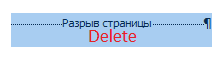
Select this page break by clicking on its border near the dotted line.

Click "DELETE".

The gap has been removed.
However, sometimes this is not so easy to do, as breaks can occur in unexpected, unwanted places. To remove such a page break in Word, you first need to understand the reason for its occurrence.
Spacing before or after paragraph
One of the reasons for unwanted breaks is paragraphs, or more precisely, the spaces before and/or after them. To check if this is your case, highlight the paragraph immediately before the extra break.

Go to the tab "Layout", expand the group dialog box "Paragraph" and open the section "Indents and Spacing".

Review the spacing before and after the paragraph. If this number is unusually high, it is causing unwanted page tearing.

Set the desired value (less than specified) or select the default values to get rid of page tearing caused by large intervals before and/or after the paragraph.

Pagination of the previous paragraph
Another possible cause of unwanted page breaks is pagination. previous paragraph.
To check if this is the case, highlight the first paragraph on the page immediately following the unwanted break.
Go to the tab "Layout" and in the group "Paragraph" expand the corresponding dialog box by switching to the tab "Page Position".

Check your page splitting settings.

If at your point "Pagination" ticked "With new page» - this is the reason for unwanted page breaks. Remove it and check the box if necessary "don't break paragraphs"- this will prevent the occurrence of similar gaps in the future.

Parameter "don't be distracted from the next" will bring paragraphs together on the edge of pages.

From the edge
An extra page break in Word can also occur due to incorrect set parameters headers, which we have to check.

Go to the tab "Layout" and expand the dialog box in the group "Page settings".

Go to the tab "Paper Source" and check opposite the item "from the edge" header and footer meaning: "to the header" And "to the footer".

If these values are too high, change them to what you want or set the settings "Default" by clicking on the corresponding button in the lower left part of the dialog box.
Note: This parameter determines the distance from the edge of the page, the place where MS Word begins printing the text of the headers, headers, and/or footers. The default value is 0.5 inches, which is 1.25 cm. If this parameter is larger, it decreases valid area printing (and with it display) for the document.
Table
Microsoft Word's standard settings do not provide options for inserting a page break directly in a table cell. In cases where the table does not completely fit on one page, MS Word automatically places the entire cell on the next page. This also leads to page breaking, and in order to remove it, you need to check some parameters.

Click on the table in the main tab "Working with tables" go to the tab "Layout".

Call "Properties" in Group "Table".

The following window will appear in which you need to switch to the tab "Line".

Here it is necessary "allow lines to wrap to next page" by checking the appropriate box. This parameter sets the page break for the entire table.

Hard breaks
It also happens that page breaks occur due to their manual addition, by pressing a key combination "Ctrl+Enter" or from the corresponding menu on the control panel in Microsoft Word.

To remove a so-called hard break, you can use search followed by replacement and/or deletion. In the tab "Home", group "Editing", click on the button "Find".
In the search bar that appears, enter "^m" without quotes and press Enter.

You'll see manually inserted page breaks and can remove them with a simple keystroke "DELETE" at the marked break point.

Breaks after "Ordinary" text
A number of template heading styles available in Word by default, as well as the text following them, which is formatted in "Ordinary" style, sometimes also causes unwanted breaks.

Arises this problem exclusively in normal mode and does not appear in structure mode. To remove an entry unnecessary gap page, use one of the methods described below.
Method one: Use the normal text option "Don't open the next one"
1. Select “normal” text.

2. In the tab "Home", group "Paragraph", will open a dialog box.

3. Check the box next to the item "Don't let go of the next thing" and press "OK".

Method two: Remove "don't be distracted from the next" in the title
1. Highlight the heading that precedes the text formatted in the “regular” style.

2. Call up a dialog box in the group "Paragraph".

3. In the “Page Position” tab, uncheck the option "Don't let go of the next thing".

4. Click "OK".
Method three: Change occurrences of unnecessary page breaks

1. In a group "Styles" located in the tab "Home", call up the dialog box.

2. In the list of styles that appears in front of you, click on "Heading 1".

3. Click on this item right click mouse and select "Change".

4. In the window that appears, click on the button "Format" located at the bottom left and select "Paragraph".

5. Switch to the tab "Page Position".

6. Uncheck the box "don't be distracted from the next" and press "OK".
7. In order for the changes you make to become permanent for the current document, as well as for subsequent documents created based on the active template, in the window "Change Style" check the box next to the item "In new documents using this template". If you don't do this, the changes you make will only be applied to the current piece of text.

8. Click "OK" to confirm the changes.

That's all, we learned about how to remove page breaks in Word 2003, 2010, 2016 or other versions of this product. We have considered everything possible reasons occurrence of unnecessary and unwanted breaks, and also provided effective solution for every occasion. Now you know more and can be even more productive with Microsoft Word.
M icrosoft Word, like the Bermuda Triangle, is fraught with many mysteries. Thus, novice users often complain that when they try to start new paragraph, instead of a line break, it creates a page break and they don't know how to remove it. Attempts to cope with the situation “at random” confuse the user even more. As a result, the document completely loses its appearance, and a lot of time is wasted to put it in order.
Meanwhile, the problem is easy to solve. Especially for the Day of Knowledge, I prepared a story on how to remove page breaks in Word so that other components of the document do not suffer, and also how to prevent the program from inserting them anywhere against your will. The instructions are written in Word example 2010.
Removing a Single Page Break
Page breaks in Microsoft Word can be created either by the program itself, automatically, or by the user, manually. The program creates them in two cases - when this is enabled in the document settings and when the text reaches the end of the printed field and goes to the next sheet. The user can insert a breakdown in any place - wherever he wants and as much as he wants.The gap cannot be deleted after filling the printed field of the sheet, but all the others can be deleted.
To quickly remove a single transition to new page, let's do the following:
- . In Group " Paragraph» menu « home» click on the button « Show hidden formatting characters».

- Select the split point in the text with the mouse and press “ Delete».
- Let's turn off the show hidden characters by clicking on the same button again.
Removing multiple page breaks at once
It’s not difficult to take a couple of flaws from a document by working with your hands. But what if there are hundreds and thousands of them? In this case, the method of replacing the page break character with something else, for example, an empty line, will help us out.The page break symbol in M$ Word looks like this: ^ m. To have the program insert an empty line instead, press the key combination Ctrl + H or click on the menu “ home» button « Replace" In field " Find» enter ^ m, and in the field “ Replaced by» – ^ p(blank line character). If we just want to remove the separation, we will not indicate anything in the lower field (replacing the symbol with an empty symbol means simply removing it).

Next, if you need autocorrect throughout the document, click “ Replace all" But if somewhere you need to save the breakdown, for example, before or after a certain place in the text, click the “ More"(in the screenshot it is shown as " Less“, since the menu is open), indicate the search direction (forward or backward), other parameters (if necessary) and press “ Replace».

It takes less than a minute to process hundreds of sheets. Convenient, isn't it?
How to prevent inserting breaks before, inside, or after paragraphs
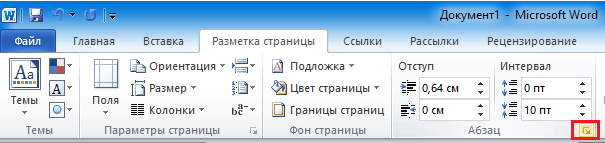
And sometimes, as we work on a document, break symbols are inserted in places other than where we want them to be. For example, before each red line or right inside the text. To prohibit this disgrace, let's do this:- Let's go to the menu tab " Page layout" and click on the button to open the dialog box " Paragraph" It is located in the lower right corner of the section of the same name on the top panel.
- Let's open the tab " Position on page" and in the section " Breakdown"check the boxes next to the items " Stay focused on the next one" And " Don't break the paragraph».
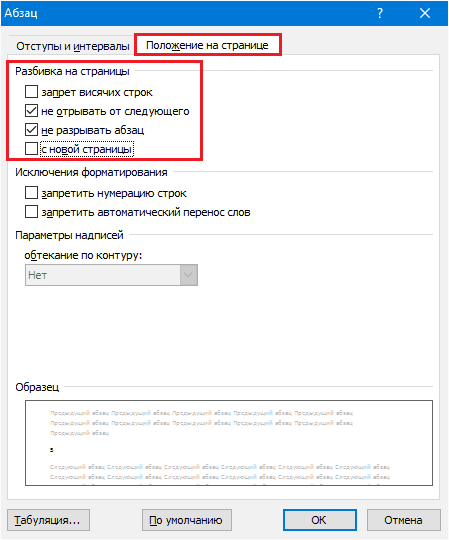
In some versions of Word here is another point - “ Gap in front(paragraph)." Don't forget to remove the flag from it too.
The effects of the described operations apply only to selected text fragments. To make this setting global, go back to the " home" and in the group " Styles» Click the button to open the dialog box. She is in the same place as in the group " Paragraph" - bottom right.
In the list of styles, click on the item “ Heading 1", go to the menu that is hidden behind the down arrow button in the line of this item, and select " Change».

In the window " Changing the style» click « Format" and click on the command " Paragraph».

With window " Position on page”, which will open after this, we are already familiar. Let's set the same settings in it as we did for one fragment and click " Save" Now the parameters we need will be applied to the entire document.
If you want to use these settings in the future, in the " Changing the style» check « In new documents using this template».
How to prevent a program from splitting tables
Word can be prohibited from cutting into pieces not only text, but also tables that do not fit on the sheet. However, only in one case - if the table is not longer than the printed field.
So, to do this, select the broken line or the entire table (if you don’t want it to split into parts somewhere else when you move the text) and place the cursor on it.