Unlock bootloader sony xperia x8. Unlocking the bootloader Sony
It's very easy to forget a password or pattern. This is a common problem that causes some to even run to service center. But in fact, you shouldn’t waste time looking for such a center in your city. Below are instructions for Sony Xperia owners to easily bypass the lock screen. By the way, This is what they use in service centers.
Please note that this text is intended specifically for unlocking Xperia smartphones. On devices from other manufacturers, you will have to try to bypass the blocking in other ways.
Step by step instructions
- The operation begins by pressing the emergency call button. On the keyboard that appears, enter the code:
- After entering the last character, service menu. It is also called engineering. Here select “Service Tests”.
- In the list that appears, find the “NFC” item. In it we are interested in the sub-item “NFC Diag Test”. It runs a diagnostic test. Wait for it to finish, then click on the “Home” button.
That's all, so you will find yourself on the desktop. This trick works on all Xperias. If you have new model, in which this operation does not lead to the desired result, then try on the screen emergency calls enter the code *#*#73556673#*#* . It does not work for all smartphones; on some models it only leads to a normal reboot of the device.
Updated: If no codes work on your device, 100% will help. It puts the device into operation even from the “brick” state.
If you have any difficulties, watching this video should help. You can also write your questions or thoughts in the comment form below!
But the guy demonstrates in a video how everything is done on the XPeria Z:
Unlocking the bootloader of an Android device is the first step to root access and flashing the ROM. And, contrary to popular belief, it is actually supported by many phones. What do you need to do to officially unlock the bootloader on your phone?
Not every phone will allow you to do this
All phones in the world are divided into two types: those that will allow you to unlock the bootloader, and those that will not.
Whether you can unlock the bootloader depends on the phone manufacturer, model, and even carrier. All Nexus phones are inherently unlockable, and many Motorola and HTC phones can unlock the bootloader using a similar method to the Nexus.
However, there are phones, as well as some operators, that do not allow you to officially unlock the bootloader, which means you will have to wait until the developers check the security vulnerability. If you have such a phone, this guide, unfortunately, will not help you.
The easiest way to find out which of these categories your phone falls into is to find information about it on XDA Developers. If you have HTC or Motorola, you can also look into unlocking it on the HTC or Motorola website. If it doesn't support unlocking, you'll have to use unofficial unlocking or rooting methods - these can usually be found on the XDA Developers forums.
If your phone supports more official unlocking methods, read on.
Step 0: Back up everything valuable
Before we get started, it's important to know that this process will erase all data. So if you have photos or other files that are valuable to you, save them to your computer. In addition, if you want to save application settings, use the settings export functions to save them into backup files, and transfer these files to your computer as well.
And here's another tip from me personally: If I'm dead set on rooting a phone, I'll unlock the bootloader as soon as possible after purchasing it. Then you won’t have to waste time on settings only to erase everything and set it up again a few days later. So if you like to dig deep Android settings and intend to root your phone, it’s better to unlock it right away, before fiddling with the settings.
When you have done everything necessary backups, we can continue
Step 1: installAndroid SDK and phone drivers
You will need two things: Android Debug Bridge, a command line tool for your computer that allows you to link your computer to your phone, and USB drivers for your phone. Even if you have installed them before, install the latest versions.
- Open the page Android downloads SDK and scroll down to the “SDK Tools Only” section. Download the ZIP archive for your platform and extract to where you want to save the ADB files.
- Launch SDK Manager and deselect everything except “Android SDK Platform-tools”. If you have a Nexus phone, you can also check “ Google USB Driver” to download drivers from Google.
- After installation is complete, close SDK Manager.
- Install USB drivers for your phone. They can be found on the phone manufacturer's website (for example, Motorola or HTC). If you have a Nexus, you can install the Google drivers that you downloaded in step 2.
- If your computer tells you it needs to restart, restart it.
Turn on your phone and connect it to your computer with a USB cable. Open the Platform-tools folder in Android folder SDK and, holding Shift, click right click on empty space. Select "Open Command Window" and enter the following command:
If shown serial number, your device is recognized and you can continue the procedure. If not, make sure you followed the above steps exactly.
Step 2: Enable software debuggingUSB
Next, you need to enable some functions on your phone. Open the application drawer, click settings and then “About phone”. Scroll down and tap Build Number seven times. You will see a message stating that you have become a developer.
Return to home page settings and you will see new item- “For developers.” Open it and activate “OEM Unlock” if there is this option (if it’s not, it’s okay - it’s only needed on some phones).
After that, connect your phone to your computer. A pop-up window should appear on your phone: “Allow USB debugging?” Check "Always allow on this PC" and click OK.
Step 3: get the unlock key (for phones other thanNexus)
If you have a Nexus, you can skip this step. Owners of other devices may have some additional steps to complete.
Go to your phone manufacturer's bootloader unlock page, select your device (if necessary) and log in or create an account.
The next steps vary somewhat depending on what kind of phone you have, but the manufacturer's website should have instructions on what to do next. In general, you need to do the following: First, turn off the phone and turn it on in mode fast loading(Fastboot). On different phones this is done a little differently, but on most modern devices just hold down the “power” and “volume down” buttons for 10 seconds. Release the buttons and the phone will boot into Fastboot mode (HTC owners will need to first select "Fastboot" with the Volume Down button and press the Power button to confirm the selection). You can probably find more information about this process by searching Google, which is what we recommend doing before proceeding.
Connect your phone to your computer with a USB cable. The phone will show that the device is connected. On your computer, open the Platform-tools folder in the Android SDK folder and, while holding Shift, right-click on an empty space. Select "Open Command Window" and use the command window that opens to obtain the unlock key according to your phone manufacturer's instructions (for example, for Motorola phones, this is the command fastboot oem get_unlock_data, for HTC - fastboot oem get_identifier_token).
The command window will display the token as very long line characters. Select it, copy and paste it into the appropriate box on the manufacturer’s website (no spaces, this is important!) and submit your application. If your device can be unlocked, you will receive an email with a key or file that you will use in the next step.
If your device cannot be unlocked, you will receive a message letting you know. If you want to gain root access or flash a ROM, use unofficial methods - you can find descriptions of them on resources like XDA Developers.
Step 4: Unlock your phone
Now everything is ready to unlock. If the phone is still in Fastboot mode, run the command below. If not, turn off the phone and hold down the “power” and “volume down” buttons for 10 seconds. Release and the phone will boot into Fastboot mode (HTC owners will need to first select "Fastboot" with the Volume Down button and press the Power button to confirm the selection). On your computer, open the Platform-tools folder in the Android SDK folder and, while holding Shift, right-click on an empty space. Select "Open Command Window."
To unlock your device, you need to enter one simple command. For most Nexus's the command will be as follows:
fastboot oem unlock
If you have a newer Nexus, such as a 5X or 6P, the command will be slightly different:
fastboot flashing unlock
If you don't have a Nexus, your device manufacturer will tell you which command to enter. For example, for Motorola devices, you need to enter fastboot oem unlock UNIQUE_KEY, using the unique key from the letter you received. For HTC devices, enter fastboot oem unlocktoken Unlock_code.bin using the Unlock_code.bin file you received from HTC.
After running the command, the phone may ask if you really want to unlock. Confirm using the Volume button.
Once finished, use the OSD menu to reboot your phone (or run fastboot reboot from your computer). If everything is done correctly, you will see a message at the beginning of the boot saying that the bootloader is unlocked and Android should boot in a few seconds. It's important to let Android boot before doing anything else, such as flashing a custom recovery.
Congratulations, you have unlocked your phone! At first glance, you won't see any significant differences, but unlocking the bootloader opens up the possibility of root access and flashing custom recovery.
This article provides step by step instructions, which will help even an inexperienced user successfully unlock bootloader And install custom recovery Cyanogen Mod.
Your data is subject to deletion. If you need to save important information– we recommend making a backup. You perform all your actions at your own peril and risk. Please note that the author is not responsible for the “bricking” of the user’s smartphone.
Getting ready for installation
1. Download and install drivers. You can do this by following our link below.
2. Unpack the archive anywhere on your hard drive.
3. Turn off the phone.
4. Start the phone in fastboot mode, for which you should press “volume -”, and while holding it, press “Power”.
5. The PC will display a message indicating that a new device has been found.
6. Go to the device manager (path: Control Panel – System – Device Manager).
7. Find unknown device, which is usually indicated by a yellow triangle with an exclamation point.
8. Double click on it.
9. In the window that appears, click: Update driver – Search for a driver on this PC – Select drivers from the list installed drivers– Install from disk – Select the folder where the drivers were unpacked – Check the “Search in subfolders” checkbox to complete the driver installation.
10. The device is completely ready for further manipulations.
11. Download ADB and Fastboot according to the bit depth operating system: for x32/86 or x64. Unpack the archive into a folder of your choice. It is necessary that the path does not contain Russian letters (Cyrillic) and numbers. For example, I unpack a folder in d:\ADB.
12. Download custom Recovery: CWM and throw *. img file in the same folder as ADB.
Bootloader unlock
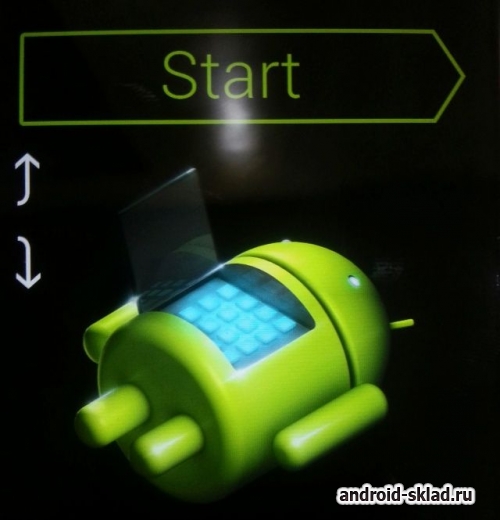
First you need to unlock Bootloader on your smartphone. To do this, you need to connect your smartphone to your PC and put it in fastboot mode. To switch to this mode, you need to turn off the phone and during shutdown, press and hold two buttons: “Volume -” and “Power”. In Fastboot mode, a green robot with an open stomach will appear on the smartphone display.
Next, you have to launch the command line: start – in the “run” line write “cmd” (without quotes) – “cmd.exe” should appear at the top - right-click “cmd.exe” - Run with administrator rights.
After that, we go to the folder in which ADB is located (in my case it is located on the path d:\ADB): first I enter “d” (no need to enter quotes) and press Enter - I enter “cd ADB” and press Enter again. The command line window now looks like this:
To unlock Bootloader you need to enter the following command:
fastboot oem unlock
We accept the unlocking by pressing the “Volume +” button and confirm the action by pressing the “power” button.
So, Bootloader is unlocked. Now we reboot into the system. The smartphone will make the necessary changes, boot, and then carry out initial setup from Google (I'm missing a lot, since the phone will still be updated). Next – launch fastboot and install custom Recovery.
Now install custom Recovery. For this purpose, you need to enter command line team
fastboot flash recovery ***
Users Android smartphones Sony/Sony Ericsson brands before receiving Root rights Initially you need to unlock Bootloader. This article provides detailed instructions how to do it.
If you don't know what Root is, read -
- Update firmware from
- Use proprietary applications from Sony
Sony Ericsson Xperia™PLAY
Sony Ericsson Xperia™ arc
Sony Ericsson Xperia™ arc S
Sony Ericsson Xperia™ neo
Sony Ericsson Xperia™ neo V
Sony Ericsson Xperia™ pro
Sony Ericsson Xperia™ mini
Sony Ericsson Xperia™ mini pro
Sony Ericsson Xperia™ ray
Sony Ericsson Xperia™ active
Sony Ericsson Live with Walkman™
Sony Xperia™ S
Sony Xperia™ P
Sony Xperia™ go
Sony Xperia™U
Sony Xperia™ sola
Sony Xperia™ acro S
Sony Xperia™ ion
Sony Xperia™ miro
Sony Xperia™ tipo
Sony Xperia™ tipo dual
Sony Xperia™ V
Sony Xperia™ J
Sony Xperia™ T
Sony Xperia™TX
Sony Xperia™ E
Sony Xperia™ E dual
Sony Xperia™ ZL
Sony Xperia™ Z
Sony Xperia™ L
Sony Xperia™ SP
Required Tools and Components
1. PC with Internet connection
2. Our Brand adb app RUN (download and install)
4. USB cable
Procedure
2. Agree to offers and click I accept
3. In the window you see the Name, Smartphone IMEI(to do this, dial *#06#) and your email.

4. The next page will show the unlock code, save it.
5. Turn off your smartphone.
6. Run the Adb Run program
7. With the smartphone turned off, hold down the search button and connect it to the PC with via USB cable.
8. After USB installation drivers in ADB program Run go to the Manual menu (control using numbers and Enter buttons) Unlock Sony/Sony Ericsson item
9. Select the Attached item. If you receive a return response of 0.3, then the smartphone is connected correctly.
10 Select Unlock Bootloader and enter the unlock code and press Enter.
11. Reboot your smartphone.
12. Bootloader is unlocked and you can now get Root rights.
Thank you for visiting the Fans Android site! Bookmark the site and add to our official page
If you become the owner of a device, but at the same time factory restrictions do not give you peace of mind, then you should start getting rid of them with unlocking bootloader. The method presented in this post can be applied to almost all devices (not only those based Android). In addition to being universal, it is also official.
But, even despite all the formality of the method, you must be careful, since unlocking bootloader leads to loss of warranty, and Sony created special page on your website with a description of the procedure. But the information posted there does not reflect the entire process in sufficient detail. unlocking bootloader, so many users fail to complete the task. In this post you will find detailed guide+ description of the preparatory stage, which will allow you to painlessly for yourself and your smartphone unlock bootloader.
What will it lead to? unlocking bootloader? In short, this is very important step required to obtain rights superuser, installing complex applications and custom firmware. Thus, unlocking bootloader will allow you to increase the capabilities of the device.
Below you will find a list of things to consider before carrying out the main procedure:
- take care of the safety of all data and settings of your device. Create all the necessary backups;
- use a PC to carry out the operation;
- to connect your smartphone to your computer, use a USB cable;
- turn off antivirus protection and Firewall;
- Install Android SDK and drivers. You can download them;
- charge your smartphone. If the battery is less than 60 percent charged, you may experience unlocking the bootloader it will not be possible to carry out this procedure because the smartphone will be discharged;
- enable USB debugging option;
- remember that the responsibility for the operation lies solely with you;
- Do not forget also that unlocking the bootloader will result in you no longer receiving OTA updates;
- Use this method only for devices.
A universal guide to unlocking the bootloader for Sony Xperia devices
1. Check if your smartphone is on the list of those that can be applied to this method. To do this, follow this link. If your device is not there, then this guide is not suitable for you.
2. On your device, dial the following combination: *#*#7378423#*#*, then go to Service info -> Configuration -> Rooting Status. If unlocking the bootloader is possible, you will see a message with the text " Bootloader unlock allowed". If only one word is displayed on the display of your smartphone " No", then this guide is not suitable for you.
3. Unzip the contents of the file downloadinf.zip mentioned earlier on a PC.
4. Copy the resulting file android_winusb.inf V .
5. If a message appears asking you to overwrite this file instead of the existing one, confirm this action.
6. Enter *#06# on your smartphone. You will receive IMEI number your device. Write it down as it will be useful later.
7. Follow this link.
8. On the first page, click on " Yes, I'm sure".
9. Agree to the terms Sony by pressing " I accept".
10. On the next page, enter your name, email address and IMEI of the device. Click " Submit".
11. You will receive an unlock code. Write it down.
12. Turn off the device and connect it to the computer by pressing the menu button (for Xperia arc, Xperia arc S, Xperia neo, Xperia neo V, Xperia pro handsets), search (for Xperia Play device) or volume up (for Xperia mini , Xperia mini pro, Xperia ray, Xperia active, Live with Walkman, Xperia S smartphones).
13. Install the drivers here: c:\android-sdk\extras\google\usb_driver.
14. Open a command prompt on your computer.
15. Enter following commands(one at a time):
- cd C:\android-sdk\platform-tools;
- fastboot.exe -i 0x0fce getvar version;
- fastboot.exe -i 0x0fce oem unlock 0xKEY(instead of key, enter the unlock code you received earlier).
16. That's all. Bootloader your Xperia device is unlocked.
17. Disconnect the USB cable and restart your smartphone.
A universal guide to unlocking the bootloader for Sony Xperia devices:
rating 80 out of 80 based on 80 ratings.
There are 80 reviews in total.