A program that deletes files without the possibility of recovery. Methods for permanently deleting data
Data recovery and destruction are two sides of the same coin. To know when and how you can get your information back, you need to understand how it can be permanently destroyed. And in some situations it is simply necessary: for example, destruction corporate information when disposing of equipment, destruction of your personal data when transferring a disk for use to friends or selling, or maybe you want to delete the history of correspondence with your mistress once and for all;) It is believed that the best data recovery specialists work in the special services, so we formulated the question exactly this way way: how to destroy information from a disk so that neither the cops from department “K”, nor Q from James Bond, nor even our specialists from StoreLab can recover it.
Destruction of data using software
If you still want to use the hard drive after destroying the data, and are not going anywhere, then you should look away software methods deleting data.Full disk rewrite
There are many algorithms for destroying data through a complete disk overwrite. But they all boil down to N-fold formatting and writing binary ones, zeros and pseudo random numbers. Since the disk writing speed usually does not exceed 70 MB/s, armed with a calculator we can calculate how much time we need?The formula is quite simple: Disk capacity (MB) / Write speed * Number of cycles = Seconds;
500000 / 70 * 7 = 50000 (sec.).
From this we can conclude that a 500 GB disk will be “erased” in about 13 hours. But should we use 7 rewrite cycles? Modern storage media do not leave residual magnetization after rewriting data. Therefore, one cycle is enough for us. This means that we will need not 13 hours, but only 1.5.
Operating systems have tools for completely deleting files.
Windows:
format c:
Instead of " c:" you must specify the letter of the logical partition.
For Windows Vista and older, previous generations of Windows delete only service information.
Linux:
dd if=/dev/zero of=/dev/sda bs=4k
Instead of " /dev/sda"You must specify the address of the device to format.
Partial data overwrite
By using a direct connection to the hard drive at the lower level via the disk driver API or its own driver, you can quickly corrupt information by overwriting data gaps with pseudo-random numbers. By directly specifying the memory address to write to, we do not need to completely rewrite the disk. Also, through the disk driver API, you can get the addresses where information is stored and overwrite only this memory area. This method is the most complex in its implementation, but on the other hand, it allows you to quickly destroy only confidential information while maintaining the functionality of the disk.Working with the driver involves 2 stages. The first is to get the address and length of the data, usually one file is written in different places on the disk, so we will get an array of addresses and an array of lengths. The second step is recording pseudorandom numbers in these memory areas, writing must also be done through the driver, so that the operating system does not block or redirect data writing to another area of the disk.
Destroying data along with the disk
Let's complicate the task: imagine that we do not have time for disk-safe data destruction. In this case, the only thing that can help you is to destroy the disk itself. To be precise, you only need to destroy the pancakes on which the information is recorded.Mechanical data destruction

The picture shows the hard drive after placing it in a hard drive pressurizer (EDR Solutions) .
You can destroy data once and for all if you damage your hard drive. It is difficult and often impossible to recover data from scratched disks; do not forget to keep a screwdriver nearby, because you will have to remove the hard disk cover and it can scratch the hard disk. Naturally, the data will be erased in the places where the scratch was made and adjacent to it. In other places, the data can be recovered in the laboratory. Do not spare your efforts on scratches; light strips will not destroy data even in places where your screwdriver has been. And if you bend the pancake, as shown in the picture, then your data will definitely never be recovered by anyone.
But dropping the disc on the floor won't be enough. Yes, it will not be detected by the computer, but the data will be successfully restored in the laboratory. The HDD drive will not survive a fall from the table, and when it is turned off, the safe fall height is greater than when the drive is running. SSDs were designed with such a case in mind; even a fall from a first or second floor window will not kill the disk. This is achieved due to the fact that the SSD has no moving elements; all actions are performed by the controller. The information can still be read by software or not. programmatically.
Modern discs are made of magnetically coated glass. Just remove the disk cover and pull out magnetic disk and break it. The glass disc breaks easily, but you should take safety precautions to avoid cutting yourself. A disk failure will lead to the destruction of the entire sputtering layer and it will no longer be possible to restore the data.
Physically
"What doesn't kill us makes us stronger." It would be logical to assume the opposite: what does not make us stronger kills us. From the previous article, you may have learned that cooling the disk negatively affects its performance. But is it possible to kill him like this? Putting your important storage device in the freezer does not kill it. You have a time bomb in your hands - the disk will work and you can read information from it programmatically. When the disk breaks, all data can be restored without much difficulty in a “clean room”.What do discs think about heating? Among all the disk devices, we are only interested in pancakes. The material that covers the pancake is capable of demagnetization at a temperature of 450 °C. When heated, the magnetic layer should oxidize and become Green colour. Another negative result for the disk, but positive for us, is a temperature of more than 660 °C.

At this temperature, aluminum - the basis of the hard drive pancake - begins to melt. A temperature of 750 °C at home can be obtained from the flame of a candle or a burning match. For achievement maximum temperature It is necessary to place the flame at the very edge of the pancake.
You can also demagnetize the disk using an electromagnet by exposing the pancake to an alternating magnetic field as the distance from the magnet to the disk increases. For such purposes, special equipment “Information destruction devices” was developed. By acting on hard drives with pulses, they completely demagnetize the drive, which makes it impossible to recover any data on it. These devices destroy everything in 2-3 seconds.
Chemically
As you probably already understood, in order to destroy data, you need to destroy the magnetic layer of the hard drive pancake. It is enough to pour any liquid onto the disk that can change the properties of ferromagnets. To change the structure of chromium oxide (the ferromagnet that covers the pancakes of hard drives - the magnetic layer of the disk), you need to pour hydrochloric acid or water on it at a temperature of 100 ° C.What else is important?
- If you do not need long-term storage of confidential data, write it to volatile (random access) memory, then you will not have to worry about destruction.
- Make sure that your data cannot be recovered from other media on which a copy was once recorded.
/ 04.08.2018
Deleting files permanently
The topic of today's article is somewhat unusual. Today we will talk about how to permanently destroy data. Destroy them so that they cannot be restored even with the help of special programs or research hardware systems.
- Deleting a file is not enough.
- Formatting the disk.
- Programs for data destruction.
- Destruction of data on CDs and DVDs.
Regular readers of our site already know that simply deleting a file is completely insufficient from the point of view information security. Deleted files (with rare exceptions in the form of SSD drives) can be restored within just a few minutes. This is due to the fact that when deleting a file, Windows does not destroy its contents, but simply makes a note in the file system that the file has been deleted and the disk space it occupies is free. Accordingly, a deleted file can be recovered using easy-to-use tools - for example, Hetman Uneraser.
Disk formatting
The very fact of the existence of tools like Hetman Partition Recovery, is a good indicator that formatted partitions are far from a guarantee of data security. In fact, with the exception of the same SSD drives, formatting a partition in “fast” mode (and in older versions of Windows, formatting in “full” mode) does not erase data, but only resets the file system. Accordingly, data after such formatting can be restored.
True, it should be noted that full formatting disk using Windows Vista and Windows 7 will still overwrite the contents of the disk with zeros, and formatting an SSD disk in any way will most likely (but not one hundred percent) also lead to the destruction of data.
Data destruction programs
There is a whole class of programs designed for reliable and safe destruction of information. Such programs use arrays of random numbers to physically overwrite the disk space occupied by the file being destroyed. Some security standards (such as those used by the US Army) require multiple rewrite cycles and insist on the use of cryptographically strong random number generators. In practice, it's more like shooting sparrows from a cannon. For private users and most commercial organizations, a single rewrite cycle will be enough.
Finding such a program is easy - just run a search by keywords"secure file deletion" Free disk space is erased in a similar way - even the same programs are often used.
It should be noted that these methods only work with traditional magnetic drives, in which unambiguous addressing of the physical space on the disk is possible. In case of SSD drives this is not the case, and the destruction of information on them is a separate and rather little-researched topic.
Destroying data on CDs and DVDs
When getting rid of old backups, be sure to destroy the data. The most in a simple way destroying information on a CD or DVD means physically destroying the media. Do not give in to the temptation to break the “blank” with your hands - you will most likely cut yourself with fragments, and small fragments of plastic and aluminum substrate will be found in the most unexpected places for a long time.
The easiest way to destroy disks is to use an office shredder equipped with a CD and DVD receiver. In addition to them, there are also specialized devices - by the way, they are not at all as expensive as one might think. For most purposes, it is normal to cut the disc into four strips.
There are also devices that render disks unusable by drilling several holes in them (by the way, you can make holes in the disk yourself using a regular drill). Experts consider this method less reliable compared to using a shredder.
Separately, it is worth mentioning device manufacturers safe storage information. DataTraveler and Silicon Power offer USB or hard disks, which store information in encrypted form. To destroy access to the data of such devices, it is enough to delete the decryption key. Hard drive data recovery software will not be able to decrypt the contents and will be absolutely useless.
We can also mention the heating of the disks, leading to the destruction of the translucent information layer. Like other methods, this method should be used only in specialized devices - overheated “blanks” can quickly melt.
Tagged: SSD driveLogical partitionBrand DataTravelerBrand Silicon Power
How to completely erase a hard drive
How to completely delete data from your hard drive?
Many people believe that if it is impossible to use a hard drive due to its inoperability, then it means that the data cannot be read from it. But this is not true, and even a broken hard drive is still a loophole for an information security breach.
A hard drive consists of a set of magnetic platters that contain sectors that cannot be read directly by the operating system. When a file is deleted, the operating system actually deletes only the pointer to it in memory. The area containing the deleted data is marked as free space, and therefore while new file will not be written to this location, the data can be read. Special software is used to recover and read deleted data. With its help, sectors containing any data from deleted files are searched for, and then they are restored. It's not too difficult to do this, and what's more, you can find free data recovery software on the Internet. It should be noted here that data recovery software for physical bad sectors disk does not work and that we cannot use this software without an operating system.
When we think that a disk is broken, we must remember that in fact only one of the microcircuits or mechanical parts inside the disk becomes faulty. And the platters where all the files are stored are still functional because the drive is in a hard case and the platters have no mechanical or electrical parts. Forensic experts use only platters to recover deleted files on broken drives. But if desired, even a less experienced specialist will be able to recover files in this case, because descriptions of procedures for manually recovering deleted files are widespread on the Internet.
What to do?
Users and companies wishing to sell or donate a used hard drive separately or with a computer, or discard damaged drives, must first completely clean the drive. Deleting data from disks is the process of permanently deleting data located on them. There are two types of cleaning hard drives- physical erasure of data and destruction of data.
Physical cleaning
Most quick option- disk demagnetization. To do this, you can use special devices designed to guarantee the destruction of data on magnetic media at the end of their service life in order to ensure storage security and prevent information leakage. As an example, I can mention the “Avalanche” device produced by the Ukrainian company “Epos”.
IN this device A physical method of data destruction is used, based on the impact of a powerful electromagnetic pulse on the storage device. As a result, all magnetic domains of the carrier are uniformly magnetized to a state of saturation. This leads to the disappearance of magnetic transitions in which the information recorded on the medium is encoded. Thus, the complete destruction of the original magnetic structure of the medium leads to the guaranteed destruction of all data ever stored on it.
Autonomous multifunctional device EPOS DiskMaster Portable allows you to work with all hard drives with PATA, SATA, eSATA interfaces, regardless of manufacturer, model and capacity. All operations are performed at the highest possible speed that the drive supports (data transfer rates up to 8 GB/min). Unlike software with similar functionality, the device provides copying and destruction of data in the hidden area of HPA hard drives (Host Protected Area), as well as on hard drives with defects on the surfaces.
Information destroyers of this kind are also produced by Detector systems, Infosecure and others.
Physical disk destruction is a method of securely deleting data. This is the preferred method of data destruction when other methods fail or when the hard drive is severely damaged. Physical destruction of hard drives is the fastest and most effective method safe deletion of data, but the hard drive itself, of course, will no longer be used in the future.
Software data cleaning
Software data wiping is the process of irreversibly deleting data stored in an area that is logically considered free space, using specific data deletion techniques. The process occurs when the computer boots, but after the operating system loads. This is the recommended method if you plan to sell, give away, or reuse the disc.
Here are the top three hard drive cleaning software:
- DBAN - boot cleaning program, multi-platform, free;
- DiskWipe - does not require installation, supports Windows (XP, Vista, 7), free;
- CCleaner, supports Windows (XP, Vista, 7), free.
Data cleaning software works great on drives that do not have bad sectors. It cannot erase information on damaged disks. To effectively destroy data, you must repeat the data erasure process at least three times. A complete erase cycle may take several hours or days depending on the disk capacity.
Darik's Boot and Nuke (DBAN)
Darik's Boot and Nuke (DBAN) software can be downloaded from http://sourceforge.net/projects/dban/files/dban/dban-2.2.6/dban-2.2.6_i586.iso/download. Here you will get the downloadable ISO image, which you can subsequently burn to a CD and, after booting from it, select the hard drive to delete the data. Next, turn on the computer whose hard drives you want to wipe, making sure it will boot from the CD drive, and then insert the DBAN CD.
1. If you boot correctly, you will see a welcome screen and a boot: _ prompt (screen 1).

Screen 1: Darik's Boot and Nuke Window
2. Press Enter and go to DBAN interactive mode, see screen 2. If your disk contains confidential information or business sensitive data, then go to step 3, otherwise skip it and go to step 4.

Screen 2. Disks and Partition
3. Press the M key to manually select a cleaning method and select Gutmann Wipe, then press Enter. This method is recommended for deleting sensitive data. The Gutmann Wipe method makes 35 passes over the hard drive (Screen 3).

Screen 3: Selecting Gutmann Wipe Removal Method
4. Make sure that the image on the screen matches that shown on screen 4.

Screen 4. Selecting a drive to erase data using Gutmann Wipe
5. Press the Spacebar to go to the screen to start the data deletion process (Screen 5).
Screen 5. Screen to start the data deletion process
6. Make sure that you have selected the desired disk (partition) to delete data. If everything is fine, press the F10 key to begin the uninstall process (Screen 6).

Data deletion process
The entire data deletion process may take up to 12 hours.
DiskWipe
Disk Wipe is a free Windows application designed for guaranteed data destruction, with no installation required. The Disk Wipe utility can be downloaded from http://www.diskwipe.org/. With Disk Wipe you can erase the entire contents of your disk and make it impossible to recover your data. Disk Wipe allows you to delete data from both a partition and the entire hard drive using Dod 5220-22.M, US Army, Peter Guttman algorithms. Supported interfaces are S-ATA (SATA), IDE (E-IDE), SCSI, USB, FIREWIRE (screen 7).

Figure 7: Disk Wipe Window
CCleaner
CCleaner is free program to optimize your computer, combining a system cleaning module that removes all unnecessary and temporary files, and a full-featured registry cleaning module. CCleaner cleans the following system components:
- Internet Explorer - temporary cache files, browsing history, cookies, hidden Index.dat files, download history.
- Recycle Bin.
- Clipboard.
- Windows temporary files.
- Windows logs.
- List latest documents(in the Start menu).
- History of executed commands (in the Start menu).
- History of the Search Assistant in Windows XP.
- Deprecated Prefetch data in Windows XP.
- Memory dumps after Windows crashes.
- File fragments remaining after the Chkdsk command has run.
Additional functions allow you to clear:
- menu queue cache;
- system tray message cache;
- Windows size and address cache;
- user assistance history;
- IIS log files;
- additional folders.
CCleaner not only removes old files and other data from standard Windows components, but also allows you to clean temporary files and lists of recent documents in many other programs: Firefox, Opera, Safari, Media Player, eMule, Kazaa, Google Toolbar, Netscape, Microsoft Office, Nero, Adobe Acrobat Reader, WinRAR, WinAce, WinZip and others.
CCleaner uses a registry cleaner to detect various problems and inconsistencies in the system. It checks file extensions, ActiveX controls, ClassIDs, ProgIDs, uninstaller, common DLLs, fonts, help file links, application paths, icons, invalid shortcuts.
In addition, a function is provided to permanently delete files with several rewrite cycles, which does not allow them to be restored in any way (Figure 8).
As Figure 8 shows, you can use the following algorithms to safely erase free disk space:
- simple erase (1 pass);
- DOD 5220.22-M (3 cycles);
- NSA (7 cycles);
- Gutmann (35 cycles).

Screen 8: Permanently erasing with CCleaner
You can choose the optimal algorithm for erasing free space based on speed/security requirements.
We must not forget about the built-in means of irrecoverable erasure from the operating system. Team
Cipher/W: directory
provides irrecoverable erasure of free space in the selected directory; it exists in Windows family starting from Windows 2000. However, please note that in this case, quick erasing is carried out.
In fact, deleting data permanently is not difficult at all. It is important to understand the advantages and disadvantages of the chosen removal approach (software or hardware). Soft erasing allows you to reuse drives, but it is time-consuming and can only be used on working hard drives. Hardware is much faster and allows you to process non-working (unreadable) disks. However, when used on working disks, there is always the possibility that due to too strong a magnetic pulse, the disks will fail forever.
Source
Leave your review:
- ccleaner
- data
- HDD
- Information Security
How to completely erase a hard drive from DBAN
Wiping a hard drive means completely erasing the hard drive and all information. Simply deleting does not erase the file from the hard drive, and formatting does not [always] wipe the hard drive clean. You will have to take an extra step to completely erase the hard drive. When you format a hard drive or delete a partition, you typically only delete the file system, which simply makes the data invisible. File recovery programs can easily recover information from such a hard drive.
If you want to make sure that your personal information is deleted permanently, you need to erase your hard drive using special software. In this article, I'm going to show you how to completely wipe a hard drive from DBAN. Follow these steps to erase your hard drive:
Back up everything you want to keep. Once the process is complete and the hard drive is wiped, there will be no way to get anything on the drive back.
Download the free data destruction program DBAN (http://www.dban.org/download).
There are actually several ways to destroy information from a hard drive (hammer, sledgehammer 🙂), but using software, data destruction is the easiest and allows you to still use the hard drive.
Burn the downloaded ISO image file to a DVD/CD to get the program on a boot disk. Restart your computer, enter BIOS and set it to boot from CD/DVD first and insert boot disk CD so your computer can boot from it. Once you are done, start your computer, log into DBAN, you will see a menu. You can pretty much ignore everything here and just type... autonuke, then press ENTER. This will erase any built-in hard drives using the default settings.

The progress of each hard drive will be displayed at the bottom of the screen. The screenshot below shows DBAN wiping two hard drives:

Data destruction program is used by several various methods to erase the hard drive. And, if you're paranoid and want to run a different method, you'll have to tinker with the options. You can select F3 and press Enter at the prompt to be directed to the selection screen. Here you can select a method to wipe, or press the M key to change the method.

You can choose between a bunch various options erasing. Each option has explanatory text when selected. When you are satisfied with the selected options, press - F10 to begin. Darik's Boot and Nuke: Quick commands. You can enter these commands at the boot prompt. In each case, everything on the computer's disk will be destroyed automatically without confirmation. Quick Erase: Wipe all disks with the Quick Erase method. RCMP TSSIT OPS-II: Wipe all disks with the RCMP TSSIT OPS-II method. Dod Short: Wipe all discs with the Short DoD method. (Default.) DoD 5220. 22-M: Wipe all disks with DoD method. Gutmann Wipe: Wipe all discs with the Gutmann method.
PRNG Stream: Wipe all disks with PRNG Stream method.
F2 to learn more about DBAN. F3 for list of quick commands. F4 to exclude liability. Press ENTER to start DBAN interactively. Enter autonuke to start DBAN in automatic mode. The process may take several hours depending on the size of your drive.
Deleting files permanently
Once it is completed, you will see the following message: DBAN failed. All selected disks were destroyed. Remove the DBAN boot media from the computer.
After properly wiping your hard drive, you can be sure that all the information that was on the drive is now a thing of the past.
Now you can install Windows on the disk, create new section, sell (give away) a hard drive or computer or whatever you need.
How to delete all data from your hard drive
The problem to be discussed is the process of complete destruction of data files on hard drives. It is a mistake to believe that deleting files to the trash and emptying it will help you get rid of old ones forever. unnecessary files. In a real situation, the recycle bin warns us that emptying it will delete the files and folders in it without the possibility of recovery. But such a statement is, to put it mildly, incorrect. It is necessary to understand that, even after emptying the Recycle Bin of its contents, all deleted objects can be easily restored by special programs. The “Delete” button only deletes links to such files and makes them invisible to users. But data files “deleted” in this way physically remain on the hard drive, and therefore their recovery is possible.
In addition to the above simple operation of deleting data files from HDD, many users consider the most in a fast way For this purpose – its formatting. Of course, formatting a disk is more reliable than simply deleting it, but still the data is not physically deleted - formatting a disk only deletes the data addressing tables. Of course, after such a process, recovering data is much more difficult. However, even in this case, computer specialists will be able to recover at least 90 percent of the data stored on the hard drive before formatting.
Let's look at some ways to securely and completely destroy data from the HDD. The most drastic of them is the physical disassembly and destruction of storage media disks. However, there is a more acceptable method - erasing the disk.
Complete disk erasing is a relatively new method of cleaning a disk from unnecessary information, which has gained popularity nowadays. The safe technology used for processing HDD partitions guarantees that all volumes of stored data will be irreversibly deleted by a special formatting algorithm. This method is much more effective compared to simple removal, or normal formatting hard drive partitions. Formatting a disk in this way completely overwrites a set of new, abstract data across all sectors of the hard disk, moreover, repeatedly, in several passes. Once the formatting process is complete, data recovery to the HDD will become impossible.
Very important! Before you completely erase all data from the HDD without the possibility of recovery, make sure that the necessary information is completely saved from the hard drive to be erased. The best method saving is considered: duplication of recording on optical discs and simultaneously on flash drives, while the quality of the recording on the media must be checked.
 Although the algorithms for erasing disks vary in programs from many developers, the main similarity is that all programs usually fill the entire volume of the hard disk with numbers (0 or 1), and then format it. To date, many have been developed various programs For secure erase discs that are available to purchase or download for free on the Internet.
There are some problems in the safe and complete removal files caused by the variety of hard drive designs and the use of data encryption. These features were taken into account when developing the Eraser program, which is most popular among users and, in addition, is free. Thanks to an intuitive and simple user interface, the data destruction program - Eraser, allows you to safely and completely delete personal data from your hard drive without the possibility of recovery. Eraser is a very complex tool that cleans a hard drive by removing all magnetized areas of memory by repeatedly overwriting information on them. The program allows you to completely delete personal data on hard drives and is currently supported by all versions of Windows.
In the category of paid programs for deleting data, the most acceptable is Paragon Disk Wiper, which has a convenient, simple user interface. At the same time, it has expanded functionality. Its use will allow you:
Guaranteed to delete data - information on the hard drive will be completely deleted without the possibility of recovery; Delete data from the entire hard drive or individual partitions, as well as erase free space after the file deletion process in the usual way.
And finally, if you are still not confident or want to make sure that the files you deleted are lost forever, use deleted file management systems. Nowadays, there are programs specifically designed to detect and immediately clean your computer of previously deleted files. Such programs first examine the data on the computer, find traces of deleted data, and finally erase all such data, even e-mail messages.
How to delete all information on your computer
Deleting every information on computer You may need it in exceptional cases.
How to permanently delete files in Windows
Please note that after all files are destroyed, you will not be able to turn on the PC, because the operating system itself will be deleted. Taking this into account, system files should not be deleted.

You will need
Instructions
1. Deleting individual files. Let's start small. When planning to delete any information from your computer, you need to locate its location. Later, when you find a folder with the necessary data, you need to delete it by right-clicking on it and clicking on the “Delete” option. After confirmation of the operation, the information will be destroyed. All you have to do is empty the trash can in order to hide any traces of its presence. If you need to delete all files and documents on computer, you can do it a little differently.
2. Deletes all files except system documents. Open the “My Computer” folder and go to the “C” drive partition (usually the system is installed on it and various data is saved). Delete all folders in this section except the “Windows” folder. To do this, you need to select the desired directories and delete them by clicking on the “Delete” button. After deleting, do not forget to empty the contents of the Recycle Bin. To delete documents on other disks, fully format them slowly.
3. If you want to remove all information, which is stored on your hard drive, you need to format all partitions. Let us note that by executing this operation, you will destroy system files. If this doesn't bother you, follow these steps. First, start formatting those drives that do not have an operating system installed. This is done quite primitively: on the disk icon, the right mouse button is pressed, and then the “Format” option is selected. Only after you have formatted all drives except the system drive can you start formatting the OS partition.
Permanently deleting files
In this article we will talk about programs designed for secure data deletion. Information erased using such programs is absolutely irrecoverable.
In modern digital world There are a thousand ways to accidentally leak personal information. One of the most likely sources of your information leakage is deleted data. Having erased files from a flash drive or hard drive, as a rule, the user considers them irretrievably destroyed.
In fact, after normal deletion, the information remains on the media, safe and sound, and anyone can restore it if desired. The fact is that deleting files using the operating system or using any other program not designed for securely deleting files does not destroy information from the media. Simple deletion is the destruction of information about a file from the file system of the storage medium, while the space that was occupied this information, is marked as free for rewriting. So, if no new information was recorded after deletion, the probability of successful data recovery is close to 100%. Therefore, before transferring the storage medium to another user, you must take care of the secure destruction of personal data.
For more reliable data erasing, we are developing special programs, destroying information by repeatedly rewriting it. Below short review advantages and disadvantages of some specialized programs for deleting information.
Safe Erase 4.0
- A large number of multiple rewriting algorithms;
- Possibility of using a paranoid algorithm with 35-fold rewrite;
- Ability to destroy data on various types of media;
- Russian-language interface;
- Payment;
- Slow operating speed;
HDShredder 3.6 Basic
- Support for deleting data from any type of media;
- The program uses its own, unique rewriting algorithm;
- There is no way to delete files individually, only the entire media;
- Paid;
Disk Wiper 10 Professional
- The program uses its own unique algorithm for rewriting information four times;
- Simple and convenient interface;
- A large number of functions for customizing the rewriting process;
- Slow operating speed;
- Paid;
DBAN 1.0.7
- Simple, minimalistic interface;
- Using a seven-fold rewrite algorithm;
- Free;
- Slow operating speed;
- Unstable work;
True Image Home
The main function of the program is to create backup copies, however, the program can not only store data, but also destroy it using the built-in DriveCleaner utility.
- High speed of the application;
- User-friendly interface;
- Reliable rewriting;
- Does not work with flash media;
- Paid;
Data Destroyer
- Simple and intuitive interface;
- Ability to work with individual files and folders;
- Average operating speed;
- Shareware;
- Using seven times rewrite;
File Shredder
- Ability to customize the rewriting process;
- Launch from the context menu;
- Free for non-commercial use;
- Unstable operation with flash drives is possible;
Clean Unused Disk Space
- High speed of the application;
- Supports any type of media;
- Completely free;
- Lack of settings;
There are a huge number of ways to delete a file without the possibility of recovery.
Tip 1: How to permanently delete files
Some of them are convenient, some not so much, but the easiest option is to use the well-known CCleaner program.
The main advantage of the CCleaner program is that this product has long managed to establish itself among users only on the positive side. And also, the file deletion tool is present in free version programs.
How to fill the drive with zeros or destroy files.
CCleaner – Capable of filling free space with zeros or completely deleting all data from a disk or flash drive. If you need to delete a specific file, then “CCleaner” is not entirely suitable, since the program does not have the ability to delete certain files without the possibility of recovery.
Go to the “Service” section and select “Erase disks” and then, depending on the situation, select the necessary options.
If the HDD or USB is put up for sale: In this case, it makes sense to completely format the drive. All files on the entire HDD or USB are completely destroyed.
Select - Entire disk (all data will be lost)
If you are selling a computer or laptop: In this case, you need to fill the free space on the disk with zeros to avoid the possibility of recovering files that were deleted in the usual way.
Select - Only free space.
The optimal cleaning method is “7”; if you want to play it safe, choose 35.

In this case, the free space on the USB drive will be filled with zeros, and those files that were previously deleted will be impossible to recover. Current files will not be deleted. If you select the “Entire disk” option, you can delete all files from the flash drive without the possibility of recovery!
Disk cleaning takes quite a long time, it all depends on the read speed of the drive, free space and the selected number of passes. As soon as the program finishes working, you can safely sell the drive, without fear that someone might restore the files and use them for personal gain.
CentOS Windows 10 Windows 7 Windows 8 Security Blog Virtualization Gaming Internet and networks Command line Answers to questions Sandbox Programs Tips and instructions Articles Linux Electronic money
Ghost files: how do forensic scientists recover securely deleted data?
Guttman method- securely delete data (for example) from your computer. The method was developed by Peter Gutman and Collin Plumb. The method consists of 35 passes aimed at destroying records encoded by methods and various modifications of RLL.
The selection of passes assumes that the user does not know the encoding mechanism used by the drive and therefore includes passes designed specifically for three different types of drives. If the user knows what type of encoding the drive is using, they can select only those passes that are intended for their drive. A disc with different encoding mechanisms requires different passes.
Most passes were designed for discs encoded using MFM and RLL schemes. Relatively modern disks do not use these older encoding methods, making many passes of the Guttmann method redundant. In addition, since about 2001, hard drives have been designed to support the “Secure Erase” standard, which eliminates the need to use the Guttman method when wiping the entire drive.
The method was first presented in the work “Securely deleting data from magnetic and solid state drives"in July 1996.
Read, how to quickly and easily clean the system disk of your computer or laptop from unnecessary files. Built in Windows tool Disk Cleanup can quickly clean up system files and thus free up hard drive space. But not all files need to be deleted (although this option is present). For example, temporary files Windows installations 10 is not advisable to delete, although the system says that they can be deleted without consequences.
For the most part, using the tool you can safely delete all the files specified in it. On Windows work it won't show up at all. But, this may make it impossible to install updates or rollback in case of system failures, as well as diagnose and solve problems and errors. Therefore, it is always necessary to understand which files to delete and for what purpose, and also weigh the importance of freeing up disk space and the files that can be deleted for this.
To launch the tool, right-click on the system drive and click the button. The tool will immediately scan the disk and display a list of files that it can delete. But exactly the files that can be deleted using the access of the current user account will be displayed.


In order to be able to clean up system files, the account must have administrator rights.

To delete one of the proposed groups of files, select it. To avoid deleting, remove the selection. The total volume of files that can, in principle, be deleted is indicated at the top of the window. At the bottom, the volume that will be freed as a result of deleting selected groups of files is indicated. Click "Ok", and will delete the selected groups of files.
How important are temporary Windows installation files (ESD)?
Windows 10 has temporary installation files that can also be deleted using the . They usually take up quite a lot of space - it can be more than 5 gigabytes. But this group of files is very important and deleting them can cause problems for the user over time.

These files are used by the system to reset the system to factory settings (function "Return the computer to its original state"). If you delete them, you can free up quite a lot of disk space, but then you will not be able to reset the system if necessary. To do this, you will definitely need to use the installation disk. Therefore, it is not recommended to delete such files.
Other files that can be deleted using Disk Cleanup
Let's also look at other groups of files and what functions they perform. But keep in mind that this list files was compiled on a specific Windows 10 computer, it may differ slightly on other computers. Some files may be present on one computer but not on another.
- Windows Update Log Files. When you install updates using Windows Update, Windows retains older versions of system files. As a result, the user can delete installed updates. But if the system update function is disabled or you do not plan to remove installed updates, then these files can be deleted.
- Windows Defender. This is a group of non-critical files that are used by Windows Defender. Microsoft does not explain the purpose of these files, but they are most likely temporary files. You can safely delete them; this will not affect the operation of the antivirus built into Windows 10.
- Downloaded program files. This folder temporarily stores ActiveX controls and Java applications, automatically downloaded from the Internet when viewing certain pages.
- Temporary Internet files. The folder contains web pages stored on your hard drive to speed up browsing. They can be deleted, but this folder will again be filled with the browser cache. This applies to the built-in Microsoft browser Edge. Google Chrome or Mozilla Firefox have their own cache stores. It is worth noting that clearing the browser cache slows down the browser.
- Memory dump files for system errors. If a blue screen error (BSoD) occurs, the system creates a memory dump file that can be used to determine the cause. If the error problem is resolved or you do not plan to deal with it (for example, it no longer occurs), then these files can be deleted.
- System archives of error reports. If the software crashes, Windows creates a bug report and sends it to Microsoft. Using these reports, you can identify and solve the problem. If the user does not intend to look for solutions to system errors, then he does not need report archives.
- System error reporting queue. The same as , only with a queue of reports that have not yet been sent to Microsoft.
- Windows installation temporary files. Most important group files. These files are used for the “Reset the computer to its original state” function. If you remove them, you can return the computer to its original state only by using the Windows installation disk.
- Delivery optimization files. These are files that were previously downloaded to your computer and may be deleted if they are not used by the Delivery Optimization service. Delivery Optimization from Windows Update allows you to receive Windows and application updates Windows Store from additional sources, except Microsoft. This feature helps download updates and applications faster in case of limited or unreliable Internet connection.
- Device driver packages. Windows retains all old driver versions. Using this package you can remove old unnecessary versions of drivers. Only current versions drivers.
- Previous versions Windows. If you update Windows 7/8 to 10, the system creates a folder on your hard drive with the old version of Windows, which it will delete after 30 days. Using this folder, during this time the user can return to old version Windows. If you do not use the return, the folder itself will be deleted after 30 days. If you don't need to go back to the pre-upgrade version of Windows, you can delete these files using "Disk Cleanup".
- Basket. Mark this folder, and among other things, it will empty the Trash.
- Temporary files. Programs sometimes store temporary information in the TEMP folder. Before closing such programs, this information is usually deleted. Temporary files that are stored for more than a week will be deleted.
- Sketches. Windows creates page thumbnails for images, videos, or documents so they can be quickly displayed when you open a folder. Once these thumbnails are deleted, they will be automatically restored if necessary.
Also, when cleaning the disk, you can see others in the list of files to be deleted. They are not always present, but may appear if they are present on the computer or in other versions of Windows (for example, Windows 7):
- Temporary installation files. Sometimes programs create installation files during installation and then do not automatically delete them. By checking this option, such files will be deleted.
- Offline web pages. Offline web pages are web pages that are stored on your computer. They can be viewed without an Internet connection.
- Debug dump files. These are debug files that are created after a crash to resolve the cause.
- User Archives of Bug Reports. Same as "System error report archives"
- Bug reporting user queue. Same as "System error reporting queue", but saved in the user account and not in the system.
- Old CHKDSK files. The CHKDSK tool runs when the file is corrupted. hard systems disk. Fragments of damaged files are stored in this folder.
- Game statistics files. Statistics of games built into the operating system.
- Installation log files. These files are created during program installation. They can help identify the problem if it occurs.
- Minidump file system errors. These are smaller memory dump files that are created when errors occur blue screen(BSoD). They take up less space, but can carry important information about identifying the problem.
- Files delayed by Windows update. These are system files that are no longer needed as a result of a Windows update.
In conclusion, we can say that using the tool "Cleaning" disk, you can delete all offered files if you do not plan
Storing confidential data on a hard drive and removable media is, as a rule, always considered in the context of general information security. This is a fairly large topic, covering many various aspects Not the least of which is secure file deletion.
There may be several reasons for this - transferring a computer, disk or flash drive for temporary use to another person, handing over a computer or media for repair, as well as selling them. Simply deleting data using the operating system or even completely formatting the media does not ensure permanent deletion of information.
In most cases, deleted data can be recovered using data that can be easily found on the Internet. One hundred percent guaranteed destruction of data can only be achieved by demagnetizing the media or its complete physical destruction. These are the measures that are taken in relation to data stored under the heading “Top Secret”. To destroy data of a lesser degree of secrecy, utilities are used that use algorithms for repeated rewriting of the entire media or a specific area of it.
Currently, there are many programs for secure data deletion. There are just as many opinions regarding the effectiveness of this or that utility. In reality, claims that one shredder program deletes data better than another is nothing more than a myth. It is not the program itself that deletes information, but the rewriting algorithm built into it, and these algorithms are the same in all these utilities; it’s just that one program may have a wider range of algorithms than another. According to experts, Peter Gutman's algorithm, which uses 35 rewrite cycles, is considered the most effective. Here is a small list of utilities that will help you to ensure that your personal information is deleted.
CCleaner
This popular free cleaner can be used not only to remove file junk and fix errors in system registry, but also for guaranteed formatting of hard drives and removable media, as well as clearing free disk space. In this case, four deletion methods are available: simple overwriting in one pass, DOD 5220.22-M (three cycles), TSA (7 cycles) and the Peter Gutman method already known to us.
Eraser program
A simple and free program for securely deleting data. With its help, you can delete not only individual folders, but also entire partitions, as well as clear free disk space. Despite the lack of Russian language, using the program is very simple. Deleting files and folders is done by simply dragging them onto the Eraser workspace; in addition, objects can be deleted from the Explorer context menu, where the program is built in during installation. There are 14 deletion algorithms to choose from, including the most reliable - Peter Gutman's algorithm.


File Shredder
Another one free utility, simple and convenient. Deleting data from and also from removable media is supported. Adding files to the list to be deleted is done through the main menu, or by directly dragging them onto the working window of the program. File Shredder can also be used to wipe free disk space. It is also possible to delete through the Explorer context menu. Unlike Eraser, File Shredder has only five built-in deletion methods.


Secure File Vault Program
Multifunctional program for protecting confidential information. This application is intended primarily for data encryption, but can also be used to permanently delete files and folders. Secure File Vault has a built-in File Shredder utility for this purpose. When deleting data, you can choose a security level from 10 to 110. Secure File Vault is a commercial program, and quite expensive at that - its cost is $49.95.

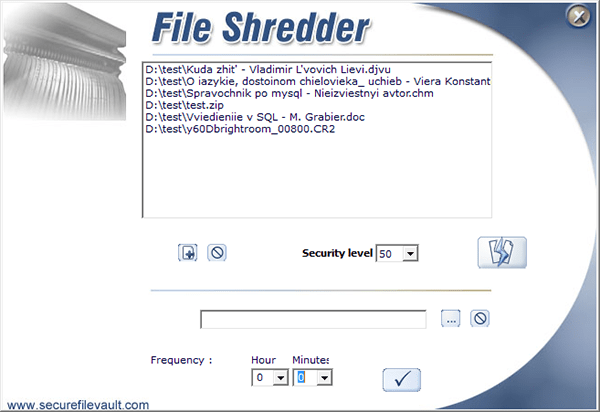
Download Secure File Vault: http://www.securefilevault.com/
Freeraser
A free, simple and convenient program for deleting any user files with support for the Russian language. There are three main removal modes available in Freeraser - fast, reliable and uncompromising. Fast corresponds to one rewrite cycle, reliable – to three, and uncompromising – to 35 consecutive passes. and folders is done by dragging them onto a special trash can from the standard “Browse” window. The utility supports configuration appearance baskets, autostart, work from the system tray. Russian language available.

Download Freeraser: http://www.freeraser.com/home/82-freeraser.html
Conclusion
All five of these programs, on the whole, do their job very well. If you want to be sure that your personal files cannot be restored, then use any of these programs. Of course, this list is far from complete; many utilities for secure data deletion are included in other programs, as is the case with Secure File Vault. Built-in stripping tools AusLogics BoostSpeed, Acronis True Image, TuneUp Utilities, Glary Utilities and many other applications for working with the file system.
Among the five programs described above, we decided to give Eraser first place. This program undoubtedly deserves to be called a professional tool for effectively destroying confidential data.
The rewriting methods used by the program are based on the most well-known standards for removing magnetic traces from hard drives and removable media.
Wide range of tools flexible settings, the use of additional “deceptive” technologies, as well as a friendly user interface make this program one of the most convenient and popular tools for securely deleting files.