After installing a new motherboard, no. How to prepare your computer for replacing the motherboard
A motherboard or Motherboard is one of the main elements of a system unit, the capabilities and characteristics of which determine the choice of other components for a computer. Many novice users encounter next problem: tens of thousands of rubles spent and purchased full set components, but they do not fit together.
So how can you choose the right motherboard for your future system unit or make a replacement? motherboard?
How to choose a motherboard
When selecting a motherboard, it is very important to consider the type of supported video cards. All modern models connect to the PCI-Express connector, however, on older models it is possible to use AGP video adapters. Basically, these are motherboards based on socket 478. If at the selection stage you correctly determine the type of all components that you are going to use, then in the future you can completely eliminate unjustified spending and save yourself from the need to exchange purchases in the store.
Processor sockets
The first thing you need to consider when buying a motherboard is the socket. The type and power of the processor used on the PC depends on it. Today the following types are actively used: Socket 478, Socket 775, Socket 1155 or 1156 and Socket 1366 for processors from Intel and AM2 or AM2+ for processors from AMD.
Processor Socket 478
 Allows the use of legacy processors such as Intel Pentium 4, Intel Pentium D, Intel Celeron, Intel Celeron M410, M420 and M430. Although this technology is already very outdated, many organizations and individuals still have computers equipped with motherboards based on socket 478.
Processor Socket 775
Used for the following Intel processors Core 2 Duo Intel Core 2 Quad, as well as some modifications of Intel Pentium D and Intel Celeron. Today, motherboards based on socket 775 are the most common. This is due to the fact that for quite a long time developers and manufacturers of processors concentrated their efforts to increase power and performance on these models. Most computers in various organizations and individuals are equipped with motherboards based on socket 775.
Processor sockets 1155 or 1156
Intended for the latest processors from Intel, such as Intel Core i3, Intel Core i5 and Intel Core i7. This is a line of the latest processors that allows you to achieve much greater performance compared to its predecessors. Today, sales of the i-series are increasing significantly, which allows us to confidently say that in the near future they will completely replace the popular Socket 775.
Processor Socket 1366
Allows use the most powerful processors Intel Core i7. The main advantage of these processors is maximum performance. Computers for processing graphic applications, performing complex engineering calculations or for modern games are equipped with these processors. The only drawback of the i7 is its too high price, which prevents their widespread use on home computers.
Processor Socket AM2
For AMD processors such as Athlon and Phenom. Despite quite attractive prices compared to its main competitor, AMD has not been able to achieve the same widespread adoption of its products. This is due to the inherently lower performance and tendency of these processors to overheat.
Types of RAM in PC
In addition to the socket, you should pay attention to the type of supported chips random access memory. On this moment Three types of RAM are widely used in desktop computer: DDR1, DDR2 and DDR3.
Memory type DDR1
It is an outdated type of RAM chip, and is used mainly on motherboards that have long been discontinued. Despite the fact that this type of RAM is very outdated, you can still find computers equipped with these particular chips. This type of RAM is already difficult to find, and it will be expensive. If your computer breaks down due to the failure of such RAM, then it is more profitable to purchase a new one than to buy old memory from the same old PC.

Memory type DDR2
Mainly used on socket 775 motherboards. This is currently the most common type of RAM. But it has long been replaced by motherboards with DDR3. Most manufacturers have already stopped mass-producing motherboards with DDR2 RAM, which will most likely lead to a shortage of such motherboards in the future.
Memory type DDR3
Used on new motherboards equipped with 1155, 1156 or 1366 socket. At the moment, motherboards of this type have maximum performance at relatively low prices.
Replacing the motherboard
Unfortunately, like any high-tech device, the motherboard sooner or later becomes unusable. The first question that many users ask in this situation is what to do: repair the old motherboard or replace the motherboard with a new one?
It can be answered unequivocally that if we're talking about about an outdated model, discontinued or not widely used in Russia, then it is not advisable to repair the device, since the cost of repair can be many times higher than the price of a new model with better characteristics.
The main difficulty when replacing or installing a new motherboard is connecting it to the computer's power supply. Despite the fact that this process is described in sufficient detail in the instructions, connecting the motherboard can be extremely difficult for novice users.
How to connect the motherboard
 The process of connecting a motherboard includes many sequential steps. First of all, you need to install the processor and RAM on the motherboard itself. If there is a separate sound card, it should also be enabled when connecting the motherboard. Next, you need to correctly connect the special connectors that are responsible for correct operation: the computer on/off buttons, the reset button.
After this, you need to connect the power hard drives and DVD-RW drive, power supply to the video card. Some system units have a separate connector for connecting the backlight of the case itself. In addition to connecting the power supply, you must correctly install and connect additional USB ports and an audio input on the front panel of the computer. All stages are not difficult, and with some effort you should succeed. If any technical issues, we will try to answer them!
If you are going to update/replace the motherboard, but do not want to reinstall Windows, drivers, programs, or you want to switch the operating modes of the SATA controller from IDE to AHCI or RAID (or vice versa), then this article is just for you!
Often, when changing the motherboard and starting the PC without restarting Windows installations you can see " blue screen death" (BSOD) with error STOP 0x0000007B INACCESSABLE_BOOT_DEVICE.
The reason for this unpleasant picture is the inability of Windows to find the appropriate drivers for the SATA controller. This problem can be easily eliminated without Windows reinstallation. To do this, you just need to “order” operating system so that it uses the standard SATA controller driver at startup, which is loaded after a clean reinstall of Windows. And the registry editor will help us with this.
Running “old” Windows on a new motherboard
To make changes to the Windows registry, simply follow the instructions below:
Before you start further actions, you need to decide on the following:
1. You are just going to replace the motherboard or change the IDE/AHCI operating mode and your PC is working normally normal mode, Windows starts
2. You have already replaced the motherboard and Windows will not start. In this case, you will have to use the offline registry editor.
1. Changing the registry before updating the motherboard or controller settings
This section is suitable for those whose PC starts normally and you are just going to replace the motherboard. Open, to do this, press the buttons " Win+R” and in the window that appears, type ““, then click Enter.
The Registry Editor opens for us. It looks like a “tree” with a bunch of folders and settings:

We need to go to the branch:
HKEY_LOCAL_MACHINE\SYSTEM\CurrentControlSet\services\msahci
We find the Start parameter there and set it to “ 0 " (zero) and press the button " OK»

HKEY_LOCAL_MACHINE\SYSTEM\CurrentControlSet\services\pciide
and do the same with the Start parameter

If you use Raid (if not, skip this step) then you need to do the same in the next branch:
HKEY_LOCAL_MACHINE\SYSTEM\CurrentControlSet\services\iaStorV
This completes the preparation. Now you can install a new motherboard or change the parameters of the SATA controller. Next time Windows startup will boot with standard sata controller drivers. After startup, the drivers for the new controller will be automatically installed. After downloading, don't forget to install new drivers from the motherboard that come with the kit, or download them from the Internet. It's best to download original drivers from your motherboard manufacturer's website.
2. Changing the registry after updating the motherboard (windows does not start)
If you have already changed the motherboard and there is no way to boot Windows, for example, the old one has failed, then in this case you need to use an offline registry editor. To solve this problem, I prefer to use a recovery environment, which can be accessed, for example, using an operating system installation disk.
To open Registry Editor using the installation DVD or USB storage, boot your computer using installation disk. You may need to select DVD/CD or USB as the first boot device in BIOS settings.
After loading, on the very first screen, click “Next” and then select “System Restore”.

If you have Windows 7, then on the first screen click next, then launch the command line

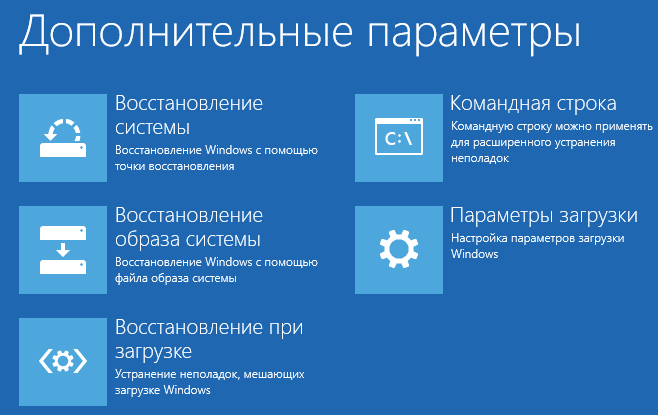
If you are using Windows 8.x or Windows 10 then you need to select Diagnostics -> Extra options» — > « Command line».
In the command line, enter and press Enter.

In the registry editor, select the branch HKEY_LOCAL_MACHINE, and from the File menu, click Load Hive.

Open the drive on which the operating system is installed.
Go to the Windows\system32\config directory, select the file system and click "Open".

Enter a name for the section (for example, Offline) and click OK.

By expanding the HKEY_LOCAL_MACHINE branch, you will see the created section (in our example it is called Offline).

Expand new section and go to the next subsection:
HKEY_LOCAL_MACHINE\Offline\ControlSet001\services\msahci
Open the Start parameter, change its value to 0 (zero), click OK.

Perform the same operation in a subkey:
HKEY_LOCAL_MACHINE\Offline\ControlSet001\services\pciide
Close Registry Editor, Command Prompt, and restart your computer. Remove the installation disc so that the operating system can boot into normal mode. Windows should now start without any problems and then install the necessary drivers controller hard disk. Don't forget to install the drivers for your new motherboard later!
Conclusion
Not like that complex method You can save your working Windows operating system and all programs installed on it when changing the motherboard or changing the parameters of the sata controller without reinstalling the system.
I hope this article was useful!
Sooner or later, each of us thinks about a complete upgrade of our computer, or a partial upgrade by replacing its individual components. The main advantage of such a “point update” is that the user does not need to reinstall Windows OS after the upgrade (provided that the user does not change the system hard drive). However, when changing the motherboard, some difficulties may arise, since it is a fundamental link in the operation of the entire PC. Therefore, before upgrading the motherboard, it is necessary to carry out a kind of “preparatory stage”.
What problems does the user face after upgrading the motherboard?
As already mentioned, the motherboard is a kind of “central link” of the entire computer, where data about all devices connected to the PC is concentrated. During the installation of the Windows 10 OS, the motherboard’s “database” receives information about the installed ATA/SATA drivers for hard drives (especially the system one), but during an upgrade this data is lost, which ultimately leads to problems starting the Windows OS. Such as - BSOD error or "blue screen of death":
How to keep Windows 10 working when upgrading your motherboard
To protect your computer from BSOD errors and ensure Windows 10 starts correctly after upgrading your motherboard, you need to do a little preparatory work- make certain data adjustments in the system registry.
"Preparatory stage" of the Windows registry
To prepare your PC for component upgrades, follow several steps step by step:
- Open the task bar (WIN+R) and type regedit in it.
 The “task bar” can also be launched through the “Task Manager” of Windows
 - Then in the root directory of the registry, find: HKEY_LOCAL_MACHINE\SYSTEM\CurrentControlSet\services\msahci.
 The directory path is also displayed at the bottom of the registry window
 - In the working field ( right column) select the line “Start”. Double-click on it with the mouse to open the parameters and set “0” in the “Value” field.
 You can also open the Start parameter settings by right-clicking on it and selecting “Change”
 - Then navigate to the directory: HKEY_LOCAL_MACHINE\SYSTEM\CurrentControlSet\services\pciide.
 It doesn't matter what order you change the registry settings in.
 - Find the “Start” line again, and similarly set the “Value” to “0”, saving the data.
 Even if in the “Value” parameter settings is “0”, still write zero again and save the data
 - Done, you can now exit system registry.
The “preparatory stage” is over. You can turn off your PC and upgrade the motherboard. The next time you start your computer, Windows 10 should boot without critical errors.
Based on my personal experience regarding upgrading the motherboard on a PC, I would like to note that even after completing the “preparatory stage” of changing the system registry settings, there is still a small probability of a “blue screen of death” appearing after the upgrade. This can usually happen due to differences in chipset versions on motherboards. A way out of the situation may be to “brute force” the PC startup settings in the BIOS. You just need to load the BIOS and in the Configure SATA As tab (Main category) set the available boot modes one by one. Go through them until the Windows OS boots.
 The Configure SATA As setting category may also be called SATA Mode
 How to restore Windows 10 after replacing the motherboard
Do not forget that it is not always possible to complete the “preparatory stage” before upgrading your computer. What to do if the motherboard has already been replaced and it’s too late to edit the system registry settings? Don't worry, you can still adjust the registry and "return" Windows performance 10, thanks to the “system recovery” mode. All you need to have is this Bootable CD/USB drive with Windows 10 OS.
- Before starting the PC, insert a bootable CD/USB media into the drive/slot. After turning on the computer, enter the BIOS settings (which button to press is written in information certificate start window).
 Call key BIOS settings depends on the PC motherboard model
 - Next, in the window BIOS settings select the Boot tab.
 Navigation through the BIOS settings menu is carried out using the arrow keys.
 - In category Hard Disk Drives, highlight 1st Drive, press Enter and set the CD/USB device value. Press F10 to accept the changes.
 If boot device is not a USB drive, but a CD or DVD, then you need to highlight the corresponding drive
 - After restarting your computer, you will see a black screen with a notification: Press any key to boot from CD/USB. Press Enter.
- Next, the “installer” will autorun the “Windows Installation Wizard”. Go to the System Restore settings.
 Through the "System Restore" function you can access the offline Windows registry
 - In the subsequent Diagnostics window, go to Advanced Options.
 You don't need to restore Windows 10 itself
 - Click on the "Command Prompt" icon.
 If you accidentally went to the wrong settings section, you can always go back a step by clicking on the “arrow” icon at the top of the window
 - After activating the “command line”, enter the value regedit. Press "Enter".
 Command Prompt automatically runs as administrator
 - In the root directory of the registry, select the HKEY_LOCAL_MACHINE subdirectory, click on the "File" tab/"Load hive" option.
 You need to select the entire folder, not individual files.
 - Specify the path to the installed Windows OS on your hard drive, namely: Drive\Windows\system32\config. Open system file.
 You need to open the system file (refer to the “file type” description), and not its text document
 - Give the new hive a name.
 The name can be anything (in Latin)
 - After this, follow the root directory of the registry to the branch: HKEY_LOCAL_MACHINE\Name of the created “hive”\ControlSet001\services\msahci. In the properties of the “Start” parameter, set the value = 0.
 To open the parameter settings, right-click on it and select “Properties”
 - Then similarly change the “Start” value in the pciide folder, which is located along the path: HKEY_LOCAL_MACHINE\Name of the created “hive”\ControlSet001\services.
 The route taken root directory The registry is displayed at the bottom of the window
 - Select the “hive” folder you downloaded, click on the “File” / “Unload hive” tab.
 You only need to select the “hive” you created, and not the entire HKEY_LOCAL_MACHINE folder
 - Done, now you can close the registry and restart your PC. After this, your Windows 10 OS should boot.
Restoring a Windows 10 license after upgrading the motherboard
No less important issue After changing the motherboard, the license of your Windows 10 OS may become “unexpectedly reset”, i.e. After booting the system, a notification about the lack of activation will appear on your desktop.
 “License reset” can happen even if you made all the necessary adjustments to the registry before changing the motherboard
 In order to prevent and quickly correct this kind of trouble, you will need to perform a number of specific actions, which can be divided into two stages.
The first stage is “preparatory”. Before upgrading your motherboard, you need to “link” a licensed copy of your “Ten” to account Microsoft. For this:
- In Windows 10's Settings, go to the Update & Security settings.
 You can access Settings through the Start menu by selecting the appropriate tab
 - Next, go to the “Activation” tab, where in the “Add Microsoft account” section, select the line of the same name.
 Make sure your Windows 10 OS is activated with a digital license
 - Then enter your account details in the form provided and click the “Login” button.
 If you do not have a Microsoft account, then create one by clicking on the line “Create one!”
 - Done, now license ( digital key) Windows 10 is tied to your Microsoft account. You can start replacing the motherboard.
 After logging into your Microsoft account, a message will appear in the OS activation field stating that Windows 10 is activated and linked to your account
Second stage - recovery Windows licenses after a successful upgrade of your PC components.
- Go back to Settings/Update and Security/Activation, where you will find and click on Troubleshooting.
 When changing hardware component an entry will appear in the activation section warning that your OS version is not activated
 - Wait until the scanning process for problems is complete, and then select the line “Hardware changes have recently been made to this device.”
 You will also be prompted to go to windows store for purchase new version OS (no need to do this)
 - Next, you will be asked to sign in to your Microsoft account, do so.
 If you are already logged in, this step will be automatically skipped.
 - After successful authorization, select the replaced components (motherboard) from the proposed list and click on the “Activate” button.
 If you changed several hardware components at once, then you must select them all from the list presented.
 - Done, Windows 10 is now activated on your PC again.
 After troubleshooting, a success message will appear in the settings Windows activation 10
If you do not have a Microsoft account or you have not previously “linked” a Windows 10 OS license to it before changing the motherboard, then you may have problems with reactivation systems. In this case, I will advise you only one the only way out- contact Microsoft support: either in writing through the official website or by phone hotline 8–800–200–8001. You should absolutely not use other solution options, as this may lead to permanent loss of your license.
Upgrading PC components can often bring a number of inconveniences associated with correct operation Windows systems. The most “problematic” problem is replacing the motherboard. The result of such an upgrade may be a BSOD error (“blue screen of death”) when trying to start the computer. However, if you approach the replacement of components correctly and first carry out the “preparatory stage”, then such errors and inconveniences will not bother you.
In most cases after replacing the motherboard Windows stops loading. When loading windows, a blue screen (BSOD) appears with an error STOP 0x0000007B. This is due to changing the ATA/SATA bus controller.
The fact is that Windows cannot independently change the controller driver when loading. As a result, when loading, the operating system simply loses HDD and cannot continue downloading.
The question arises: how to produce replacing the motherboard without reinstalling Windows? After all, reinstalling Windows is not difficult, but all programs and settings will be lost. And this is often unacceptable!
Method replace motherboard without reinstallation OS three. If you have Windows 7, go straight to option 3
Option 1 - the old motherboard is working (Windows XP)
If with the old one motherboard If it is possible to boot into Windows XP, then you need to replace the IDE and SATA controller drivers with standard ones.
For this purpose in device manager open the properties of the controller (the name depends on the motherboard model). On the tab Driver press the button Update.

We answer the question about connecting to the Internet to search for a driver No, not this time and press Further. In the next window select Installation from a specified location and click Further. In the driver search options window that appears, select Don't search. I will choose the right driver myself and press Further.
In the window that appears, select from the list Standard two channel PCI controller IDE and press Further.

After the driver installation is complete, click Ready and restart the computer.
After loading, check in Device Manager what is installed standard IDE controller driver and turn off the computer.
If there is no driver in the selection list Standard IDE Controller Driver(for example in the case of SATA controller), you can simply delete installed driver controller of an old motherboard. To do this, in Device Manager, click right click mouse on your device and select context menu Delete. After uninstalling, turn off your computer.
Now produce motherboard replacement to a new one. Windows XP should boot without any problems. After that, all that remains is to install all the drivers on the new motherboard from the disk and that’s it!
Option 2 - booting with old motherboard is not possible (Windows XP)
Second option replacing the motherboard without reinstalling Windows XP longer than the first and should be used if a computer with an old motherboard does not turn on or booting is impossible. We will need a Windows XP installation disk. If there is no disk, you can download a disk image (WinXP Professional SP3 with an integrated package of hard disk controller drivers) and burn it to a CD-R, for example, using the DeepBurner 1.9 program (the distribution kit can be downloaded for free).
For restoring Windows XP after replacing the motherboard you need to do the following:
Install the new motherboard and connect all devices.
Start downloading from installation Windows disk XP. On the first installation screen (image below), press ENTER to begin installing Windows XP.

On the next screen, press F8 to accept the license agreement.
The installer will then search for installed operating systems and display a list of them.

Select the operating system to restore and click the button R . Further process not much different from normal installation Windows XP. The differences are that the installer won't ask which one hard section disk install OS and will not prompt you to enter your computer name and username. Be ready to enter your license Windows code XP and activate it after installation via the Internet.
After the installation is complete, you need to install all the drivers on the new motherboard. All programs, user files and operating system settings will remain the same.
Option 3 - Fixing the IDE Controller Driver in the Registry (Windows 7)
If you replace the motherboard without reinstalling Windows 7, things are a little more complicated. The previous 2 options do not work. It will also not be possible to restore Windows 7 by updating it from the installation disk, since this function can only be launched from an already loaded OS.
But don't be upset! ERD Commander will help us (download a CD image, or make a bootable USB flash drive ERD Commander). With its help we will make adjustments to Windows registry 7 required to boot on the new controller.
Let's get started! We boot from a burned disk or flash drive. In the boot menu select version ERD Commander 6.5 for Windows 7.

Selecting the ERD Commander version to download
To the question "Initialize a network connection in the background?" we answer No.
We answer the question “Reassign drive letters...” Yes.
Select the keyboard layout and press the button Further. Then select our operating system from the list and click Further.

Selecting the operating system to which ERD Commander will be connected
failed, the search for boot problems will begin.
Finding problems booting Windows 7
Click Cancel, so as not to waste time, since this startup recovery tool will not help if the motherboard is changed. To the question "Stop troubleshooting?" we answer Yes. The next message that the problem could not be resolved, do not be alarmed and press the button Ready.
In the window that appears, select the item Microsoft Diagnostics and Recovery Toolset.

Now launch the registry editor.
First of all, you need to delete the registry branch HKLM\SYSTEM\MountedDevices

Now you need to enable the launch of services that load standard drivers IDE and SATA controllers.

Opening a thread HKLM\SYSTEM\CurrentControlSet\services on the left side of the Registry Editor. Now check the following sections in this thread: amdide, amdsata, amdxata, atapi, intelide, msahci, pciide. Parameter Start everyone should have equal 0x00000000 (0). The value Start=0 - starts the service when Windows boots. If it is equal to 0x00000003 (3) double-click on the parameter name (Start) and change the value to 0 (picture below) and click OK.

After start will be set to 0 for all of the above registry keys, close the registry editor and restart the computer in normal mode. In most cases this is enough for successful download Windows 7. Now you need to install drivers on the new motherboard.
If it doesn't help
If the steps taken did not help and Windows 7 still does not boot and displays the error STOP 0x0000007b, then required driver controller does not load. Let's try to enable the loading of all drivers known to the operating system.
To do this, set the parameter value Start equal to 0 in the following services: adp94xx, adpahci, adpu320, aic78xx, amdsbs, arc, arcsas, elxstor, HpSAMD, iaStorV, iirsp, LSI_FC, LSI_SAS, LSI_SAS2, LSI_SCSI, megasas, MegaSR, nfrd960, nvraid, nvstor, ql2300, ql40xx, SiSRaid2, SiSRaid4, vhdmp, vsmraid, alide, cmdide, nvraid, viaide .
Reboot the computer in normal mode. The OS should boot.
Booting Windows XP can also be restored in a similar way, but everything is more complicated there and I will not describe it in this article. Those who are interested can read it.
Instructions
To begin, disconnect all wires from the system unit, including the power cable. Now inspect the system unit to understand how it is disassembled, because with all the variety of modern system units, it is impossible to predict in advance the fastening system of a particular one. Most system units can be unscrewed by unscrewing a few screws on it back cover. Some are equipped with special latches instead of screws, and in order to disassemble, you do not need to unscrew anything. Either way, you need to remove both side covers to get full access to the insides.
After the covers are removed, depending on the size of your system unit, you will understand whether it is necessary to remove the hard drive. So, if the block is large enough, then the motherboard can probably be pulled out without removing the hard drive and optical drive, and if the system unit is compact, these actions cannot be avoided. Let's say your case is complicated, and you have to additional actions. If this is the case, use a screwdriver to remove the screws that secure the hard drive, optical drive, and possibly the floppy drive, if you have one. The cables and wires that connect them to the motherboard should be disconnected from the motherboard side, remembering the contact location.
Now you need to disconnect it from the motherboard, unscrew the screws securing the power supply, and remove it from the system case. Before you can have full access to the board, you will need to unscrew all the screws on the back of the system unit that secure the sound card, LAN card and, whose fastenings are located on the rear side of the system unit. Now the only things that prevent you from removing the motherboard are a few screws or latches that secure it to the system unit case. You should find the mounting points and disconnect the board from the case.
The penultimate step remains - disconnect the cooler, processor, and RAM sticks from the motherboard. The cooler is usually secured with latches, and removing it is not difficult. Under the cooler there is a processor attached to the motherboard with a special mount. Remove the processor and set it aside. All that remains is to remove the RAM sticks, and the motherboard can be retired. To put new board, it is enough to follow the entire sequence in reverse order - it will not be difficult if you managed to get to this point.
Video on the topic
note
Technically, replacing a motherboard is easier than replacing a case. Well, let's start: Disconnect everything that is connected to it from the computer: power cords, keyboards, mouse cables, monitor cables, printer cables, scanner cables, etc. Remove the charge of static electricity from yourself. Even a small discharge can damage the board.
Replacing the motherboard involves removing almost all devices from the system unit, actually replacing the board and connecting all the devices again. Essentially, you need to completely disassemble your computer and put it back together again. Installing a motherboard is a fairly complex procedure that requires experience and necessary tools.
Sources:
- computer motherboard replacement
You can save a lot on buying a computer if you purchase all the components and assemble it yourself. There is nothing particularly difficult about this. Of course, you need to take the time to study a little PC architecture. But you can learn how to assemble a computer yourself. In addition, in the future you will not have problems replacing any PC component. You need to start assembly by attaching the motherboard to the case wall.
You will need
- - computer case;
- - screwdriver.
Instructions
In the world computer equipment everything is standardized. This does not mean that all motherboards have the same form factor. But there are certain standards. The same goes for computer cases. Each of them has a mounting standard for all motherboard form factors.
First, you need to remove the cover from the computer case. After this, it is best to lay it on its side. In this position it will be most convenient for you to work. On the back of the case there is a place for interface output motherboard. Put fee in such a way that its interfaces are brought outside the system unit.
Now carefully examine the device. You will see that there are holes on the sides for mounting screws. On the computer case in the same places there are special “legs” that just fit into the holes on the board. Using the mounting screws, fasten the system fee to the computer case. The screws must be screwed in tightly so that the device is ultimately firmly fixed in place. system unit. The motherboard itself weighs a little, but you need to take into account that a video card, a processor, and a heavy radiator will also be attached to it.
Now you need to connect the wires that come from the computer case to the system board. In the lower right corner of the motherboard there are interfaces for connecting the power button, reset button, sensor work hard disk. Nearby are the wires that come from the front panel of the computer case. Each wire has a connection connector, which has an inscription on it.
The instructions for the motherboard contain a description of each interface. For example, if the diagram says Power SW, then this means that among the wires you must find the one whose connector also says Power SW and connect it to this interface. If you connect incorrectly, nothing will burn, the computer simply will not start.