After updating, applications are moved to the device memory. How to make sure everything is saved to a memory card
The green robot's "stomach" is smaller than a thimble. Especially on devices with little memory. I fed him a dozen or two super-mega-needed programs - and the place ran out. But... many of us have the opportunity to install a second “stomach” in the gadget and continue feeding.
Today we’ll talk about transferring applications from internal memory to an SD card in Android smartphones and tablets.
Which apps can be transferred and which ones can't?
Among mobile applications, there are those that can be transferred between drives and those that cannot. When you transfer a program to external media, some components remain in the same place - in the permanent memory of the device.
If the program is relatively autonomous and not too fussy in terms of the location of files and data, it will remain operational. And if it is deeply rooted in the operating system, when the work of other structures depends on it, the transfer can end disastrously - not only this program will stop working, but also everything that interacts with it. For this reason, you should absolutely not try to move system applications.
The ability to transfer third-party products to microSD varies. It depends on whether the program author has provided for this possibility. They don’t write about this in the characteristics - everything is learned experimentally, but such experiments do not threaten serious consequences. If after transferring the program does not work, it is enough to return it to its place or reinstall it into the device’s memory.
Moving by system means
Modern versions of Android, starting from 6.0, support transferring software to cards without additional funds. They use a micro SD card as an extension of the internal storage, and the movement function is built into the firmware.
To transfer a program from the memory of a smartphone or tablet to a card in Android 6.0 and higher, do the following:
- Open system settings and go to " Device» – « Applications».
- Open the menu (properties section) of the desired program with a short touch.
- Tap " Storage", then " Change».

- In the window " Changing storage location» select « Memory card».

The instructions are applicable to devices of many brands and models, but adjusted for individual characteristics. Some manufacturers, for example, Samsung, instead of " Storage"You need to go to the section " Memory" Others have a button Move toSD" is located in the menu of applications that support this function. Well, others... simply didn’t bother and refused to implement the transfer function into the firmware of their devices.
The ability to transfer applications to SD cards “without intermediaries” also exists in very old versions of Android - 2.2 and lower, and everything that appeared later - up to the sixth version - requires third-party tools, which will be discussed further.
Mobile software for moving applications to SD
AppMgr III

Utility AppMgr III (App 2 SD) it is convenient in that it makes it possible to perform similar operations with several objects at once (batch management of installed software). This is not only a change in the installation location of the software, but also:
AppMgr III simplifies and speeds up many tasks for maintaining a mobile gadget, supports all versions of Android starting from 4.1, but is officially incompatible with devices from certain manufacturers, in particular Xiaomi. Operations with some objects require root rights.
Link2SD
Exclusive feature of the utility Link2SD– moving absolutely all user applications to SD cards, even those that do not allow this. The truth is, nothing is said in the description about whether the developer guarantees their continued performance.
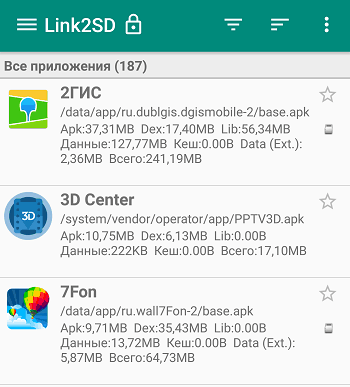
Other functions and features of Link2SD:
- Changing attributes of user software to system software and vice versa.
- Freezing unused software.
- Batch transfer of software to SD cards and device memory.
- Batch removal and reinstallation of programs, batch clearing of cache and data. Clear the cache of all installed software with one touch.
- Removing potentially malicious software.
- Manage device reboot.
- Create custom shortcuts.
- Sorting installed applications by various parameters, search and much more.
Link2SD is more omnivorous than AppMgr III: it runs on any version of Android, starting from 2.3, and generally supports Xiaomi devices (although, according to user experience, not all). Most operations require root rights; it does not work on some firmware without root. The free version of the utility is quite good - functional and convenient, but annoying with intrusive advertising.
Files To SD Card

A simple utility FilesToSDCard designed for transferring files of various types to a memory card - graphics, video, music and, of course, applications. In addition, it allows you to choose an SD card as the location for saving new files (by default, Android saves everything on the device).
Files To SD Card is used to unload the memory of mobile gadgets and backup data. Despite the fact that the manufacturer claims support for a limited number of devices: Lenovo A2010 LTE, Samsung GalaxyCore, Moto G, Vodafone Smart Prime 6, Nokia One and Sony Xperia M4, the utility runs on almost any smartphone and tablet running Android 5.0 and higher. On most firmware everything works without root.
Move to SDCard

A program with a simple name " Move to SDCard» pleases users with its simplicity and good results. In addition to the main function, which coincides with the name, the utility can:
- Move software from the card to the device memory.
- Sort applications by name, size, installation date.
- Display information about applications: installation location, date, time, size, name of the executable file (apk).
- Search for software on your device and on the Internet.
The utility is compatible with most brands and models of mobile gadgets, including very Chinese and very old ones (supports Android 2.3 and higher). Some features require root privileges.
File manager
File manager from the developer Best App is an improved explorer, a replacement for the standard file manager on Android smartphones and tablets. Changing the installation location of applications is just one of its functions.
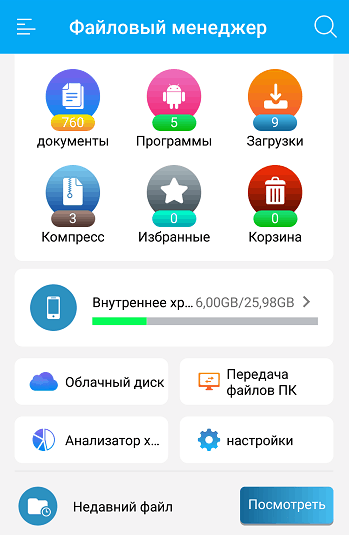
Other features of the File Manager include:
- Copying, pasting, cutting, moving, deleting, renaming, downloading - that is, all standard operations with files and folders.
- Integration with , OneDrive and DropBox.
- Access to open resources on the local network.
- Clearing cache, junk data, duplicates.
- Sorting objects into categories.
- Transfer files via Wi-Fi to other mobile devices, computers and Smart TV.
- Analyze and graphically display storage space usage.
- Archiving and unarchiving files. Supports all major compression formats: rar, zip, 7z, 7zip, tgz, tar, gz.
- Organizing and storing documents of various formats: doc, ppt, pdf and others.
The explorer is very lightweight and easy to learn, is not overloaded with redundant functions, and is undemanding in terms of hardware resources. Runs on Android 4.2 and higher. Some functions require root rights, but everything basic works just like that.
All-In-One Toolbox
All-In-One Toolbox– a utility for comprehensive optimization and maintenance of a mobile system. Painless transfer of applications from internal memory to SD card and vice versa is also one of its functions.
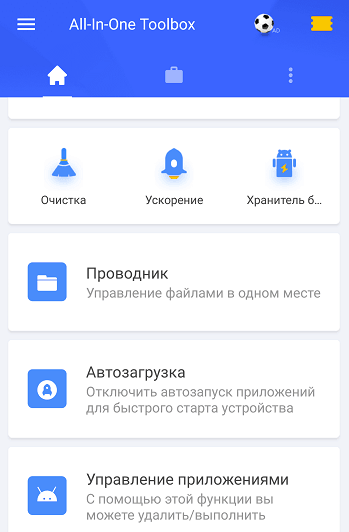
Other useful features of All-In-One Toolbox:
- Management of startup software (user and system).
- Removing unnecessary data (cleaning up garbage, caches, duplicates).
- Complete removal of programs with clearing of remaining files.
- Speeding up the device by freeing RAM from running services and programs.
- Reduced battery consumption.
- Encryption of personal data.
- Display a list of large files.
- Explorer with the function of sorting objects by category.
All-In-One Toolbox is a good tool for speeding up and maintaining smartphones and tablets with limited resources - small amount of storage and RAM, not the most productive processor, weak battery. Runs on devices of any brands and models, perhaps with a few exceptions. Some functions require root rights and depend on the Android version.
As most often happens, this is not an exhaustive list of utilities with the ability to transfer applications to an SD card and back. There are hundreds of them, but each with its own quirks and character. I hope this short review will help you find exactly what you like, and will also be tough for your Android device.
The memory on smartphones is not rubbery, despite the huge amount of information that many of us store on them. That is why some manufacturers to this day do not refuse the possibility of expanding the built-in memory using MicroSD cards.
Current flagships support cards with a capacity of up to two terabytes, which greatly increases the internal reserves of smartphones. However, this does not solve another problem - all applications are automatically installed in the internal memory, and its quantity cannot be expanded. In this regard, we decided to write an article on how to make sure that everything is saved to a memory card. It offers several methods for owners of different devices - from budget models with 4-8 GB built-in to flagships on the latest versions of the Android operating system.
We save applications to a memory card using standard means
In most modern smartphones, the procedure for transferring applications (games and programs) can be carried out using several taps. Unfortunately, there is no way to activate their automatic installation on MicroSD. Therefore, we will have to be content with manual transfer. So, for this you must follow these steps:- Go to the “Settings” menu;
- We find the “Applications” item there. In some sections it may be referred to as "Application Manager";
- We select the application we need there. In our case, the game “CSR Racing”;
- The information in the window is updated. Now you need to tap on the “Move to SD card” button;
- After a few seconds, the text on the button will change to “Transfer to device,” which tells us that the application has been successfully transferred and internal memory has been freed up.
Using Clean Master to transfer data to a memory card
As noted above, this method is analogous to the previous option of transferring to an SD card. We invite you to immediately begin reviewing the instructions:Ready! The memory on the device itself is freed. By the way, if you compare the two methods already presented, we recommend choosing the second one - using the Clean Master application. This way you will spend significantly less time due to the fact that you can select several games and programs at once.
Connecting the memory card with internal memory
In Android 6.0+, a way to expand memory using an SD card became available. However, we would like to warn you right away that it only works on some devices - not all manufacturers have implemented this function in their shell. So let's get started:
It is also worth noting that not all SD cards are suitable for this type of operation. It is important that the external memory card belongs to class 10 and corresponds to the declared speeds of reading and writing data.
Swap internal Android memory with a memory card (Root required)
Another well-known method, most used on devices with a small amount of built-in memory, is replacing the internal memory with an SD card. You should already be rooted and the Root Explorer application installed. You must follow these steps:
Ready! From now on, everything you download will be automatically installed on the SD card. As you can see, there are quite a large number of ways to make sure that everything is saved to a memory card; you need to choose only one of them depending on what version of the OS you have installed, what exactly you want to get and whether the device has Root.
Instructions for transferring programs from the internal memory of an Android device to a removable memory card.
Typically, the memory card in a tablet or phone has one partition with the FAT or FAT32 file system. In order to be able to move and then run a program from a memory card, the card must contain two sections. One of them will be used as usual for storing data, and the other will be used for programs moved to the card.
Important! It is the second of the partitions that will be used to move programs to it. This must be taken into account for further work.
IN Android version 2.2 and higher, the ability to transfer applications to a memory card is already available in the system, but for those who have a tablet or phone with an earlier version Android, and there is no opportunity or desire to update the firmware, there is nothing left to do but use third-party applications.
So, to transfer programs already installed on the internal memory to a memory card, we need two programs. A program for creating and deleting file system partitions, and a program for transferring programs to a memory card.
Preparing the map
Let's start with the first program. There are many programs that allow
manage partitions on physical storage media, but we will probably focus on the simplest and most convenient of them. This program .
You can download it from the following link: download
The program works with operating systems Windows 2000/XP/Vista, and Windows 7.
To work, we need two things - the program itself and a card reader.
Let's get started with the program MiniTool Partition Wizard Home Edition.
Attention! Before working with the program MiniTool Partition Wizard Home Edition, save everything that is recorded on the memory card, since all data on the card will be destroyed.
1. Download and install the program. We remove the memory card from the device and insert it into the card reader. Windows will detect the new drive and display it as a "removable drive." 2. Delete partitions on the memory card. To do this, we launch the program. At the bottom of the program window, all drives that are currently connected to the computer will be displayed. This is a hard drive, a USB flash drive, if connected, and our SD card.
The picture shows an example. We see two hard drives, 465 and 74 gigabytes in size, and a 3.8 gigabyte SD card with two partitions on it:
Right-click on each section and select the option “ delete" - delete the section.
Before this step, you should make sure that you are selecting partitions on the memory card, and not on the hard drive or other drive!
1. Create a section for your data. To do this, right-click on the free space of the memory card and select the option “ create».

2. In the window that opens, in the drop-down menu “ Create As:» select « Primary", and in the menu " File System:» select the file system type FAT, if the partition is less than 2 gigabytes in size. If you want to create a partition larger than 2 gigabytes, select the file system type FAT32. Use the slider to set the partition size and click “ OK».
3. Create a section for programs that we will transfer to the memory card. To do this, again right-click on the free space of the memory card and select the option “ create" In the drop-down menu " Create As:» select « Primary", and in the menu " File System:» choose FAT32 as a file system. Using the slider again, set the partition size and click “ OK».
4. We apply all the changes we made. To do this, click the button in the upper left corner of the program window. Apply" After this, the program will create and format the partitions.
Important! Program MiniTool Partition Wizard Home Edition does not make any changes to the memory card until you press " Apply" Until this point, you can cancel operations using the " Undo", or completely discard all changes by clicking " Discard »
Now that the card is prepared, you can install it in your tablet or phone and begin the process of transferring programs to it.
Transfer of programs.
To do this, we need to download and install the program on your tablet or phone. Link2SD.
Link to download the program: Link2SD market.android.com
Attention! To work with the program you will need Root rights. How to get a license Root on your tablet, described in the corresponding thread of our forum.
When you turn on your phone or tablet, the program mounts a second partition on the memory card and makes it available to the operating system.
Working with the program is very simple. After the first launch of the program, a window for selecting the type of file system on the second partition of the memory card will appear. Select the type of partition that you created in the first part of our instructions. Then a window will appear asking you to grant Root rights to the program, and they should be granted to it. After which the program will create a mount point in the system for the second partition of the card and ask you to restart your phone or tablet.
After rebooting the tablet, you can begin transferring applications from the internal memory to the card.
1. Launch the program Link2SD. A list of installed applications will appear on the tablet screen.

2. Select the program that needs to be transferred to the card. In the window that opens, click “ Create Link»
3. The following window will open. If we want to transfer temporary files (cache) to the card, check the box next to “ Link davlik-cache file too" and click " OK»

4. The program will “think” for a while, and if the application is successfully transferred, it will display the message “ application linked to SD card.»

5. Click " OK", we leave from Link2SD, and now we can run the moved program.
Applications that have already been moved to the memory card in the Link2SD program list contain a corresponding mark.

Questions and answers:
-Can all programs be transferred to a memory card?
No, some programs can only work correctly when installed in the internal memory of the device.
-Can I cancel the transfer of the program and return it to the internal memory of the device?
Yes, just select it in the list and click " Remove Link»
-What happens if I update a program that has been moved to the card?
When updating a moved program, the application file itself and data files will first be saved in the internal memory of the device, and then the program Link2SD will automatically transfer them to the memory card in the background. No need to manually move the updated application.
-How much space does the program take up in the device’s RAM during everyday use?
The program only starts the process of mounting partitions on the memory card, and is not itself located in the device’s memory during normal use.
Some comments.
Program Link2SD itself detects applications that were moved using the Android operating system itself (in versions Android 2.2 and higher)
System applications cannot be transferred to a memory card. Program Link2SD will not give you this opportunity.
When you connect your device to your computer, the OS Android unmounts the first one FAT file system section of the memory card. However, the second partition will remain mounted and you can run programs from it.
Program Link2SD does not move the program folder itself from the internal memory, only the program and cache files themselves are transferred.
Normal 0 false false false RU X-NONE X-NONE MicrosoftInternetExplorer4 MiniTool Partition Wizard Home Edition
Probably, each of us has encountered the problem of insufficient memory or simply wanted to transfer applications to a flash drive, since the memory was already full, and games and applications cannot be transferred to MicroSD and the notification “Insufficient memory on the device, some functions may be limited” was annoying.
Even if I deleted many applications and games, there was still not enough memory. But how to increase memory without losing everything? Later in this article we will look at and find out how to solve this problem.
I want to warn you right away that neither I nor the site administration are responsible for your actions. You do everything at your own peril and risk.
P.S. The article uses the most simplified words for better understanding.
To continue you will need:
- MicroSD Card with at least class 6 (preferably class 10) and larger than 4 GB in size
- (To create a second partition)
- (For transferring applications and games)
- (For transferring games with cache)
To increase memory, we will have to transfer your applications to the so-called second partition of the MicroSD card (for transfer you need ), and we will create it ourselves. If you already have a second section on your map, you can skip this item.
Creating a second MicroSD partition
1. Save all files on another medium (For example, on a computer)2. Disconnect the MicroSD card along the path “Settings/Memory/Disable memory card”

3. If you have ROOT rights, install, if not -

4. After starting, click on “+” twice  5. Select “Ext4” in Part 2. If you have a device running Android 2.2-2.3, select “Ext 3”
 6. In Part 2, select the size, how much memory you want to allocate in MB from the card for applications and games (The more the better)
  7. Look at the first graph with a white bar, with the amount of memory remaining and enter these numbers in Part 1
 8. Check if you did everything correctly. If everything is correct, click on the menu button or the so-called “three dots in the corner”, and click on “Apply changes”
  The hardest part is over, you can reconnect the memory card (Settings/Memory/Connect memory card), transfer files back to the flash drive, but before that you can notice that the size of the memory card has decreased. This is how it should be, because we created the second section.
Setting up transfer to the second partition
We need to install the program (Google Play)
After installation, open the application. You should see a window like this. Select "Ext 4" or "Ext 3" for Android 2.2-2.3 and click on "OK".


After rebooting, open the application. You should see a list of applications.

Now we will look at what can be transferred and what is better not to transfer.
Let's just say that system applications should never be transferred. You never know what will happen. Therefore, it is better to transfer custom applications (those that you installed yourself). I do not recommend transferring those applications that you actively use (For example, Browser or WhatsApp and the like).
And to make it more convenient, the application has sorting. To do this, click on “Exact three stripes” and select “Custom”.


A list of your applications should appear in front of you. Now you can select the applications that you want to move to the second partition and link them there. Click on “Three Dots”, then on “Several”, select the applications to transfer and click on “Send”.


A few minutes of waiting and you're done! You have more memory, and you can still download games and applications and transfer them. If you delve into the Link2SD settings, you can enable auto-link. This is a function that automatically transfers the application to the second section of the card, thereby making your life easier.

You can also change themes in the settings, buy the Pro version, and so on. But that’s not about that now. In general, we figured out the main problem. But, I want to tell you, Link2SD does not transfer game cache (Game cache is files in .obb format along the path Android/obb/“game package name”). So what should we do? Let's talk further.
Transferring game cache and data to a MicroSD card
Game caches can be transferred using a great program called . I’ll say right away that the cache is transferred to the flash drive itself, and not to the second partition.
Open the application, and swipe from the left edge of the screen to the right edge (Swipe) and tap on “Application Analyzer”


The internal memory on your device may not be enough for all the applications you need. Modern programs and especially games can be very voluminous. This problem can be resolved by moving them to an SD card.
But there are also pitfalls. Cards are slower than internal memory. Therefore, games and other resource-intensive applications may slow down after transfer. To reduce performance loss, preferably with a minimum speed of 10 MB/s. The higher the better.
In addition, moved applications will stop working as soon as you remove the memory card. And when you insert it back, it is possible that some of them will begin to glitch and produce errors.
So, it's worth moving apps if you're willing to sacrifice speed and stability for free space.
Will you be able to transfer applications to a memory card?
It is important to understand that not all devices provide this opportunity. There is no list of models that support transfer. To find out if your device is one of them, you just need to try moving applications to the card. This process is reversible and uncomplicated.
In addition, even if yours allows you to transfer, you will not be able to do this with all applications. Some games and programs only allow part of their data to be transferred to the card, and many do not support transfer at all.
How to move apps to an SD card
Although the process of moving games and programs on different firmware is slightly different, the procedure is similar everywhere. This generalized instruction should suit everyone.
Manually
First, make sure that the memory card is inserted into the device. Then open Android settings and select the Applications section. In the list of games and programs, click on the one you want to transfer to the card.
When the menu of the selected application appears on the screen, find the navigation button and use it. After the transfer, in the same menu you can return the application back to the internal memory.
If the button is missing or not clickable, the program may not support movement. Repeat these steps with other games and applications. If you can't transfer anything, the option is likely not available on your device.
Automatically
Some devices running Android 6 or later OS versions allow you to use the card as part of the internal memory. This option allows you to transfer all applications at once.
To make the card work as part of the internal storage, go to settings and open the section dedicated to memory management. Find the SD card menu in it. Use the “Format” command, select the “As internal storage” option and follow the system prompts. If this option is not available, this feature is not available on your device.
Formatting will erase all data from the card. After this, it cannot be used on other devices until you format it again.
Then confirm the transfer of applications to the card. From this moment on, the device will begin to perceive it as part of the internal storage, transfer old applications and install new ones on the card.
To return the program back to the device’s memory, you need to use the “Format” command again, selecting the “As portable storage” option. Before formatting, the system will prompt you to transfer applications to internal memory.
Using third party programs
If your device does not support any of the listed methods, but it is unlocked, you can try to transfer applications using third-party programs. For these purposes, there are, for example, utilities Link2SD and App2SD. But even their creators do not guarantee the performance and stability of this method. So be careful.