Php authorization script. Building an Incredibly Simple Registration System in PHP and MySQL
Not long ago, one of my visitors asked me to write an article on how to register and authorize users on the site. Actually, I am fulfilling his request, and in this article I will talk about how this is done.
There are several ways to create user registration and authorization, but in this article I will analyze my favorite - through the session or cookie mechanism.
First of all, if you want to register on your website, then you need to understand where user data will be stored. Can be stored in normal text file, in an XML file, or in a database. The first two options are very dangerous, so I do not recommend you use them. But the third option - storing information about users in a database - is the most popular, and it is this method of storing information that I advise you to use.
We have decided on the storage location. Now let's move directly to the authorization algorithm:
That's the whole process of registering a user on the site. That is, registration is saving information about the user on the site.
The next point is user authorization on the site, however, before moving on to it, I’ll tell you about one thing important point in the registration form - password. I strongly recommend that you do not store passwords in clear text (for example, “123456”). Be sure to encrypt them, at least using the md5() function. And store the encrypted password in the database.
Now authorization. The first thing you need to understand is that authorization information must be stored somewhere. The simplest option is to store information in a session (or in a cookie). And now the algorithm:
Now you have necessary information about the user's authorization, which is stored in his cookie or on the server (if a session). In fact, now you need to check this information on each page of the site and verify it in the same way as checking the authorization form. That is, you read the login and password from the cookie (session) and check it. If they are correct, then show one page (for registered users), and if they are incorrect, then show another page (for guests).
And one last thing. How is the "Exit" button made? Very simple. When you click this button, the cookie or session is erased. Thus, the user is automatically kicked out of the site.
As you can see, everything is elementary, but when implementing this algorithm you will definitely have many questions. For example, what to do when registering a user whose login is already in the database. Implementing various input data checks, implementing e-mail existence checks, etc. - all this is quite complex if you are doing it for the first time. However, I gave away the juice. If you have questions during implementation, ask either on the forum or in the comments.
The function of registering and authorizing users on the site is implemented as follows: when a user registers on the site, he fills out a registration form in which he indicates various data, including login and password. The form sends this data to the server and it is written to the database.
In the session, you can not only indicate the fact of authorization, but also record some user data to display on the page, for example, a name or nickname. The decision on whether to use sessions or cookies is made on a site-by-site basis. If the site contains important information, then it is better to use sessions, because it is much more difficult to find out someone else’s registration data.
Authorization and registration formsThe authorization form is usually located on the main page, or it can be on all pages of the site. For the registration form, it is mainly created separate page. We will create just one page, which will contain both forms, and the user data will be displayed on it. For now it will only contain HTML code, but we will do it right away PHP file, because in the future it will be a script. Let's call it formreg.php. The page code will be like this:
formreg.php:
RegistrationWe will record user registration data in the users table. If you do not have such a table yet, then create it. It should contain the fields id, login and pas. We will not use other fields. If they are in the table, they will remain empty.
registration.php:
|
In my case it looks like this:
Save bd.php . 3. Create a reg.php file with the contents (all comments inside):
Your login: Your password: 4. Create a file that will enter data into the database and save the user. save_user.php (comments inside):
5. Now our users can register! Next, you need to create a “door” for already registered users to enter the site. index.php (comments inside) :
Your login:
Your password:
OK it's all over Now! The lesson may be boring, but very useful. Only the idea of registration is shown here, then you can improve it: add security, design, data fields, loading avatars, logging out of your account (to do this, simply destroy variables from the session with the unset function) and so on. Good luck! I checked everything, it works properly! Everyone who develops web sites sooner or later faces such a task as authorization and authentication of users, implemented precisely using a programming language, and not using a standard. http protocol. Today we will look at an example of creating a simple authorization using the language PHP programming, and user data will be stored in MySQL database. The method below is simple or, as it were, the basis for creating a normal authorization, but you can easily use it, since it works quite well, and you can also improve this method yourself and implement it on your website. This method is based on sessions, but I also use cookies here, so that the browser remembers the user who authenticated last time, so as not to enter the login every time, you can, of course, store the password in cookies, but this is not secure, even if it is encrypted. To end the session, simply close the browser and open it again. Creating objects in the databaseLet's move on to practice. First, let's create a table for storing user data in the MySQL database. I suggest using simple structure tables ( Of course, you can supplement it with something, my database is called test, and the table is users): CREATE TABLE test.users(user_id INT(11) UNSIGNED NOT NULL AUTO_INCREMENT, user_login VARCHAR(30) NOT NULL, user_password VARCHAR(32) NOT NULL, PRIMARY KEY (user_id)) ENGINE = MYISAM CHARACTER SET utf8 COLLATE utf8_general_ci; And let's immediately add one entry to this table: Insert into test.users (user_login, user_password) values ("mylogin","202cb962ac59075b964b07152d234b70") In total we got:
We will, of course, store the password in hashed form, since storing the password in clear text is, to put it mildly, not safe. Our above password hash is 123, so when we enter the password into the form, we will enter exactly 123, and not. Creating a registration formIn order for the user to register himself, make a form, the data from which will be sent to the registration processing file, i.e. be recorded in the database. For example, here is the simplest way:
By the way, with this method it is best to use letters (those. English), if you want to write a login in Russian, you will have to slightly adjust the code. You can name the file whatever you want ( for the test I used reg.html). Note! For testing, I use only one file, I called it mylogin.html (file code below). You can use it in your files and call them whatever you want, I describe the authorization process itself here, so you can apply it everywhere. By the way, in all files you will have to use the session_start() function; so that you can check whether the user is authorized or not. And one more thing, of course, write down your settings for connecting to the database. Creating an authorization form
Note! If suddenly your php parser refuses to work, i.e. it will appear on your screen php code, then you just don’t have everything turned on php processing V html files. Settings are made in the web server configuration file httpd.conf (if apache): AddType application/x-httpd-php .php .html In IIS, in the Add Module Mapping window, add *.php to *.html, separated by commas. This is if you do it at home on your web server, and if you do all this at the hoster, then you will have to write to them and ask them to make the necessary changes; some hosters have already made them. I commented the code, so I think everything should be clear. Once again, I remind you that in all files whose contents you do not want to show to unauthorized users, you must write session_start, and, well, that’s probably all. If you have questions, ask in the comments. Good luck! Reg.ru: domains and hosting The largest registrar and hosting provider in Russia. More than 2 million domain names in service. Promotion, domain mail, business solutions. More than 700 thousand customers around the world have already made their choice. *Mouse over to pause scrolling. Back forward Creating a simple user registration system in PHP and MySQLCreating a registration system is a lot of work. You have to write code that validates email addresses, sends an email confirming registration, and also validates other form fields, and much more. And even after you write all this, users will be reluctant to register, because... this requires some effort on their part. In this tutorial, we will create a very simple system registration that does not require or store passwords at all! The result will be easy to modify and add to an existing PHP site. Want to find out how it works? Read below. Here's how our super simple system will work: We will combine the authorization form and registration. This form will have a field for entering your email address and a registration button; After this, a random unique set of characters (token) is created, which is sent to the email specified by the user in the form of a link that will be relevant for 10 minutes; Advantages of this approach: There is no need to store passwords or validate fields; Flaws: User account security. If someone has access to the user's mail, they can log in. Comparing the advantages and disadvantages of our system, we can say that the system has high usability (maximum convenience for the end user) and, at the same time, has a low security indicator. So it is suggested to use it for registrations on forums and services that do not work with important information. How to use this system In case you just need to use a system to authorize users on your site, and you don’t want to take this lesson to pieces, here’s what you need to do: You need to download the sources attached to the lesson Require_once "includes/main.php"; $user = new User(); if(!$user->loggedIn())( redirect("index.php"); ) For those who are interested in how it all works, read on below! The first step is to write the HTM code for the authorization form. This code is located in the index.php file. This file also contains PHP code that processes form data and other useful features authorization systems. You can find out more about this in the section below on PHP review code. index.php Tutorial: Super Simple Registration System With PHP & MySQL Login or Register Enter your email address above and we will send In the head section (between the and tags) I included the main styles (they are not covered in this tutorial, so you can look at them yourself. Folder assets/css/style.css). Before the closing tag I connected jQuery library and a script.js file, which we will write and analyze below. 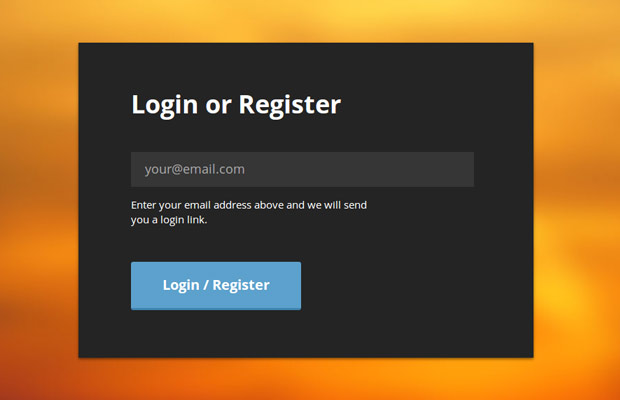
JavaScript jQuery tracks the state of the "Register/Login" button using the function e.preventDefault() and sends AJAX requests. Depending on the server response, it displays one or another message and determines further actions/ assets/js/script.js $(function())( var form = $("#login-register"); form.on("submit", function(e)( if(form.is(".loading, .loggedIn"))( return false ; ) var email = form.find("input").val(), messageHolder = form.find("span"); e.preventDefault(); $.post(this.action, (email: email), function (m)( if(m.error)( form.addClass("error"); messageHolder.text(m.message); ) else( form.removeClass("error").addClass("loggedIn"); messageHolder. text(m.message); ) )); )); $(document).ajaxStart(function())( form.addClass("loading"); )); $(document).ajaxComplete(function())( form. removeClass("loading"); )); )); was added to the form to display the current state of the AJAX request (this was made possible thanks to the methods ajaxStart()) And ajaxComplete(), which you can find towards the end of the file).This class displays a spinning animated gif (to let us know that the request is being processed) and also acts as a flag to prevent resend forms (when the register button has already been clicked once). The .loggedIn class is another flag - it is set when the email was sent. This flag immediately blocks any further actions with the form. Database schema Our incredibly simple logging system uses 2 MySQL tables (the SQL code is in the tables.sql file). The first stores data about user accounts. The second stores information about the number of login attempts.  User table schema. The system does not use passwords, as can be seen in the diagram. On it you can see the token column with tokens adjacent to the token_validity column. The token is installed as soon as the user connects to the system, sets his email to send a message (more about this in next block). The token_validity column sets the time 10 minutes later, after which the token is no longer valid.  Table schema that counts the number of authorization attempts. In both tables, the IP address is stored in processed form, using the ip2long function in a field of type integer. Now we can write some PHP code. The main functionality of the system is assigned to the class User.class.php, which you can see below. This class actively uses idorm (docs), these libraries are minimally necessary tools, for working with databases. It handles database access, token generation, and token validation. It provides a simple interface that makes it easy to connect a registration system to your site if it uses PHP. User.class.php Class User( // Private ORM case private $orm; /** * Find a user by token. Only valid tokens are accepted for consideration. The token is generated only for 10 minutes from the moment it was created * @param string $token. This is the one we are looking for token * @return User Return the value of the User function */ public static function findByToken($token)( // find the token in the database and make sure the correct timestamp is set $result = ORM::for_table("reg_users") ->where ("token", $token) ->where_raw("token_validity > NOW()") ->find_one(); if(!$result)( return false; ) return new User($result); ) /** * Authorize or register a user * @param string $email. User email address * @return User */ public static function loginOrRegister($email)( // If such a user already exists, return the value of the User function from the specified email address stored in the database if(User::exists($email))( return new User($email); ) // Otherwise, create a new user in the database and return the value of the User::create function from the specified email return User::create($email ); ) /** * Create a new user and save to the database * @param string $email. User email address * @return User */ private static function create($email)( // Write a new user and return the result of the User function from these values $result = ORM::for_table("reg_users")->create(); $result->email = $email; $result->save(); return new User($result); ) /** * Check whether such a user exists in the database and return the Boolean value of the variable * @param string $email. User email address * @return boolean */ public static function exists($email)( // Does the user exist in the database? $result = ORM::for_table("reg_users") ->where("email", $email) ->count(); return $result == 1; ) /** * Create a new user object * @param instance $param ORM , id, email or 0 * @return User */ public function __construct($param = null) ( if($param instanceof ORM)( // ORM check passed $this->orm = $param; ) else if(is_string($param))( // Email check passed $this->orm = ORM::for_table ("reg_users") ->where("email", $param) ->find_one(); ) else( $id = 0; if(is_numeric($param))( // the value of the variable $param is passed to the user identifier $id = $param; ) else if(isset($_SESSION["loginid"]))( // Otherwise, see session $id = $_SESSION["loginid"]; ) $this->orm = ORM::for_table( "reg_users") ->where("id", $id) ->find_one(); ) ) /** * Generate a new SHA1 authorization token, writes it to the database and returns its value * @return string */ public function generateToken( )( // Generate a token for an authorized user and save it to the database $token = sha1($this->email.time().rand(0, 1000000)); // Save the token in the database // And mark it so that it is only valid for the next 10 minutes $this->orm->set("token", $token); $this->orm->set_expr("token_validity", "ADDTIME(NOW(),"0:10")"); $this->orm->save(); return $token; ) /** * Authorize the user * @return void */ public function login())( // Mark the user as logged in $_SESSION["loginid"] = $this->orm->id; // Update the value of the last_login database field $this->orm->set_expr("last_login", "NOW()"); $this->orm->save(); ) /** * Destroy the session and log out the user * @return void */ public function logout ()( $_SESSION = array(); unset($_SESSION); ) /** * Check if the user is logged in * @return boolean */ public function loggedIn())( return isset($this->orm->id) && $_SESSION["loginid"] == $this->orm->id; ) /** * Checks whether the user is an administrator * @return boolean */ public function isAdmin())( return $this->rank() = = "administrator"; ) /** * Find the user type, can be either administrator or regular * @return string */ public function rank())( if($this->orm->rank == 1)( return "administrator" "; ) return "regular"; ) /** * Method that allows you to get the user's private information as * properties of the User object * @param string $key The name of the property that gets access * @return mixed */ public function __get($key)( if(isset($this->orm->$key))( return $this->orm->$key; ) return null; ) ) Tokens are generated using the SHA1 algorithm and stored in the database. I'm using MySQL's timing functions to set a 10-minute time limit for a token's validity. When a token is validated, we directly tell the handler that we are only considering tokens that have not yet expired, stored in the token_validity column. Please note that I am using the magic method __get docs library at the end of the file to intercept access to the properties of the User object. Thanks to this, it becomes possible to access information stored in the database thanks to the properties $user->email, $user->token, etc. In the next code fragment, we will look at how to use these classes as an example.  Protected page Another file that stores useful and necessary functionality is the functions.php file. There are several so-called helpers - assistant functions that allow you to create cleaner and more readable code in other files. functions.php Function send_email($from, $to, $subject, $message)( // Helper that sends email $headers = "MIME-Version: 1.0" . "\r\n"; $headers .= "Content-type: text /plain; charset=utf-8" . "\r\n"; $headers .= "From: ".$from . "\r\n"; return mail($to, $subject, $message, $headers ); ) function get_page_url())( // Determine the URL of the PHP file $url = "http".(empty($_SERVER["HTTPS"])?"":"s")."://".$_SERVER ["SERVER_NAME"]; if(isset($_SERVER["REQUEST_URI"]) && $_SERVER["REQUEST_URI"] != "")( $url.= $_SERVER["REQUEST_URI"]; ) else( $url. = $_SERVER["PATH_INFO"]; ) return $url; ) function rate_limit($ip, $limit_hour = 20, $limit_10_min = 10)( // Number of login attempts in the last hour to this IP address $count_hour = ORM: :for_table("reg_login_attempt") ->where("ip", sprintf("%u", ip2long($ip))) ->where_raw("ts > SUBTIME(NOW(),"1:00")") ->count(); // Number of login attempts in the last 10 minutes at this IP address $count_10_min = ORM::for_table("reg_login_attempt") ->where("ip", sprintf("%u", ip2long($ ip))) ->where_raw("ts > SUBTIME(NOW(),"0:10")") ->count(); if($count_hour > $limit_hour || $count_10_min > $limit_10_min)( throw new Exception("Too many login attempts!"); ) ) function rate_limit_tick($ip, $email)( // Create new entry in the table that counts the number of login attempts $login_attempt = ORM::for_table("reg_login_attempt")->create(); $login_attempt->email = $email; $login_attempt->ip = sprintf("%u", ip2long($ip)); $login_attempt->save(); ) function redirect($url)( header("Location: $url"); exit; ) Functions rate_limit And rate_limit_tick monitor the number of authorization attempts over the elapsed period of time since the first attempt. The login attempt is recorded in the database in the reg_login_attempt column. These functions are called when the form data is processed and submitted as you can see from the following code snippet. The code below is taken from the index.php file and it handles the form submission. It returns a JSON response, which in turn is processed by jQuery in the assets/js/script.js file that we looked at earlier. index.php Try( if(!empty($_POST) && isset($_SERVER["HTTP_X_REQUESTED_WITH"]))( // Output a JSON header header("Content-type: application/json"); // Is this email address valid if(!isset($_POST["email"]) || !filter_var($_POST["email"], FILTER_VALIDATE_EMAIL))( throw new Exception("Please enter a valid email."); ) // Check. Is the user allowed to log in, has he exceeded the number of allowed connections? (functions.php file for more information) rate_limit($_SERVER["REMOTE_ADDR"]); // Record this authorization attempt rate_limit_tick($_SERVER["REMOTE_ADDR"], $_POST["email"]); // Send a letter to the user $message = ""; $email = $_POST["email"]; $subject = "Your Login Link"; if(!User::exists($email))( $subject = "Thank You For Registering!"; $message = "Thank you for registering at our site!\n\n"; ) // Attempt to authorize or register a user $user = User::loginOrRegister($_POST["email"]); $message.= "You can login from this URL:\n"; $message.= get_page_url()."?tkn=".$user->generateToken()."\n\n"; $message.= "The link is going to expire automatically after 10 minutes."; $result = send_email($fromEmail, $_POST["email"], $subject, $message); if(!$result)( throw new Exception("There was an error sending your email. Please try again."); ) die(json_encode(array("message" => "Thank you! We\"ve sent a link to your inbox. Check your spam folder as well."))); ) ) catch(Exception $e)( die(json_encode(array("error"=>1, "message" => $e->getMessage()))); ) After successful login/registration, the code above will send the user a login link. The token becomes available because it is passed as a variable in the generated link by the method $_GET with tkn marker index.php If(isset($_GET["tkn"]))( // Is this token valid for authorization? $user = User::findByToken($_GET["tkn"]); if($user)( // Yes , is. Redirect to a protected page $user->login(); redirect("protected.php"); ) // No, the token is not valid. Redirect to a page with an authorization/registration form redirect("index.php "); ) $user->login() will create the necessary variables for the session, so that the user, viewing subsequent pages of the site, will remain authorized at all times. The processing of the function to exit the system is arranged in a similar way. index.php If(isset($_GET["logout"]))( $user = new User(); if($user->loggedIn())( $user->logout(); ) redirect("index.php") ; ) At the end of the code, I again set a redirect to index.php, so the parameter ?logout=1 transmitted via URL is not required. Our index.php file requires additional. protection - we don't want people who have logged into the system to see the registration form again. For these purposes, we use the method $user->loggedIn(). index.php $user = new User(); if($user->loggedIn())( redirect("protected.php"); ) Finally, here is a piece of code that allows you to protect the pages of your site and make it accessible only after authorization. protected.php // To protect every page on your site, include a main.php file // and create a new User object. That's how easy it is! require_once "includes/main.php"; $user = new User(); if(!$user->loggedIn())( redirect("index.php"); ) After this check, you can be sure that the user was successfully authorized. You can also access stored information in the database using object properties $user. To display the user's email and status, use this code: Echo "Your email: ".$user->email; echo "Your rank: ".$user->rank(); Method rank() used here because numbers are usually stored in the database (0 for regular user, 1 for the administrator) and we need to convert this data into the statuses to which they relate, which is what this method helps us with. To make a regular user an administrator, simply edit user entry via phpMyAdmin (or any other program that allows you to manage databases). Administrator status does not provide any privileges, including in this example the page will display that you are an administrator - and that’s it. But what to do with this is left to your discretion; you can write and compose code yourself that sets certain privileges and capabilities for administrators. We're done! We're done with this incredibly super quasi simple shape! You can use it in your PHP sites, it's quite simple. You can also modify it for yourself and make it the way you want. The material was prepared by Denis Malyshok specifically for the website P.S. Do you want to move further in mastering PHP and OOP? Pay attention to premium lessons on various aspects website building, including programming in PHP, as well as a free course on creating your own CMS system in PHP from scratch using OOP: Did you like the material and want to thank me? 2024 gtavrl.ru.
|