Setting up the system after installing the SSD. How to install an SSD as a boot disk ⇡ Flash drives are flying...
Recently, solid-state drives have been gaining considerable popularity and becoming more affordable. Considering that the speed of SSD drives is much higher than the speed of conventional HDD drives, it is quite logical that many people decided to increase the performance of their computer by purchasing this miracle of modern technology. A solid-state drive can really help your computer think faster, but there are a few things to consider that we'll talk about now.
Make an SSD your system drive
Performance gains can only be achieved by installing a solid state drive as a system drive. Otherwise, the speed will increase only in those applications that are installed directly on the SSD, and then not by much.
Update the drive firmware
The newer the firmware version, the faster your SSD drive will work. The latest firmware version can always be found on the manufacturer's official website. Download the driver and install it according to the instructions (must come with the driver).
Install the system from scratch
It is best to install the operating system on a new SSD drive from scratch rather than restore it from an image. This will help avoid compatibility conflicts in future operation.
Disable other drives
Before installing the operating system on an SSD drive, it is recommended to turn off the power or unplug the SATA cables from all other drives. This is necessary for Windows 7 to accurately determine the type of drive and reconfigure services to work with the SSD drive.
Install a clean image
Only the original and complete image of Windows 7 should be installed on the SSD drive. “Optimized” builds of Windows certainly take up less disk space, but they may disable or even remove services and functions that are vital for the stable operation of the operating system on the SSD.
Activate AHCI mode
Before installing Windows 7 on your SSD, enable recognition of SATA devices in AHCI mode in the BIOS settings. This option allows you to activate some new Windows features aimed at speeding up the disk subsystem.
Format the drive
If your SSD drive has been used before, you will need to completely format it before installing the operating system. Since the principle of recording data on HDD and SSD is significantly different, quick formatting for an SSD drive will not be enough
Mark up wisely
Partitioning a solid-state drive into partitions is more convenient and reliable using utilities from third-party developers, such as Acronis Disk Director.
Check
After installing Windows 7 on your SSD, it doesn’t hurt to check how correctly it is recognized by the system. To do this, it is best to use the free CrystalDiskInfo program. We launch the program and look at information about our disks. In line Rotational speed The disk type must be specified - SSD. Also in line Possibilities The TRIM function must be specified.
Now let's check if AHCI mode is active. We go to the Task Manager and in the item IDE ATA/ATAPI controllers We are looking for a controller called AHCI. If there is none, then restart the computer, go to the BIOS settings and try to activate the AHCI mode again.
Disable indexing
The indexing feature helps speed up searches in the Windows operating system environment. However, this option increases the load on the disk, thereby accelerating its wear and slowing down its operation (a little, but still). In addition, the solid-state drive, due to its high speed and without indexing, quickly finds the necessary files. Therefore, you can safely disable indexing. To do this, go to Explorer, right-click on the icon of our SSD drive and select the item in the context menu Properties. Then uncheck the option Allow the contents of files on this drive to be indexed in addition to file properties.
Disable the defragmentation service
Due to a different operating mechanism than HDDs, the defragmentation service is not needed for solid-state drives and is even contraindicated (NAND memory used in SSD drives has a limited number of rewrite cycles). As a rule, Windows 7 automatically disables the defragmentation service during installation on an SSD drive, but if this does not happen, then we can disable it manually. Open the menu Start, press Execute and write in the line: services.msc. Now we find the service in the list Disk Defragmenter, double-click on it with the mouse and in the field Startup type select a parameter Disabled.
Disable creation of restore points
When the function of creating Windows restore points is active, the TRIM function, which is very important for SSDs, is blocked, which ultimately leads to a gradual decrease in the speed of the SSD disk. To disable the function of the operating system creating restore points, right-click on the icon My computer, go to Properties and go to the tab System protection. Click on the button here Tune and select the item disable system protection.

Still have questions? - We will answer them for FREE
With the readers of "KV" about the experience of purchasing at an eBay auction using a Visa plastic card. Now it’s time to talk about my experience of creating a solid-state hard drive based on a CompactFlash-miniIDE adapter from the Chinese manufacturer noname and a four-gigabyte CompactFlash card.
It's been a while since I repaired my Dell Latitude LS, but the hard drive in my old Compaq 3250 work computer is dead. The problem with the repair turned out to be that for such an ancient laptop (Pentium120 manufactured in 1996) it was impossible to find a 4 or 6 GB hard drive (the BIOS 3250 did not understand a larger disk capacity).
An intermediate solution to the problem was found simply: a 540 MB laptop IDE hard drive was removed from old supplies, a system with a minimum of necessary programs was installed on it, and additional memory was implemented using a 4 GB CF card connected via a CF-PC Card Type II adapter. Everything would be fine, but the good old 540 MB hard drive turned out to be extremely noisy for a laptop.
Hoping to find a small SSD hard drive to replace its noisy counterpart, I turned to the Internet. A quick search among stores on shop.open.by did not yield anything, so I had to turn to eBay.com.
There were no solid-state hard drives at an affordable price, but during the search I found a Chinese seller of various adapters from standard memory cards to miniIDE and IDE interfaces. Among the adapters was the CF-miniIDE adapter for 2USD. Noticing that there were only a few minutes left until the end of the auction, without hesitation, I clicked the “Place Bid” button and turned out to be the happy buyer of this device.
The payment problem surfaced a little later, when I discovered that the Chinese seller only accepts PayPal, and my Visa International will not help me, since PayPal fundamentally does not work with citizens of Belarus.
For some time I had to forget about my purchase, but the eBay service carefully reminded me of the need to fulfill the buyer's obligations. After a little googling, I found the office WMBelarus.com, which provides intermediary services, including purchases on eBay via PayPal.
I filled out the order form on the intermediary’s website, reluctantly gave them my account password, paid for the order via WebMoney and a few hours later received an email with a successful PayPal transaction number. This number was entered into the field for resolving payment conflicts between the seller and the buyer, after which I received a joyful message that the purchase was on its way.
A week later I received a notification from the post office that the parcel could be collected. On the envelope with the adapter there were stamps with the time of dispatch and arrival of the parcel. It turned out that the parcel traveled from China for 24 hours and was checked by our customs for about 5 days.
After fiddling around a bit with a miniIDE-IDE adapter and a CF-miniIDE adapter, I managed to connect a 4 GB CF card to my desktop computer. The shamanism involved removing one extra leg on the CF-miniIDE adapter, due to which the adapter refused to be inserted into the block (this fact indicates that the Chinese have already crossed the threshold of maximizing the cost of devices - with two thousand legs they could save almost a kilogram of copper: ).
The card was immediately identified as a PATA hard drive, which made it possible to format it as a DOS boot disk for the FAT32 system without any problems. The flash drive was also loaded with the Windows95 distribution.
The system launched perfectly on a large computer, but the old laptop refused to work with the newly made SSD hard drive. Using the "scientific poke" method, the flash drive was inserted into a Dell Latitude LS, where it also worked like a charm.
For me, what happened turned out to be a small surprise; while searching for a solution to the problem, I came across an interesting fact on the Internet: CF cards contain controllers that are not entirely compatible with older versions of IDE, similar to those in large hard drives. And the higher the speed of the CF card (mine is marked as 133x), the smaller the number of devices that support it.
Despite the partial failure, I tested the performance of my SSD. Under Windows95, the speed of system installation and operation turned out to be slightly slower than on a standard hard drive. When working with many small files or loading large ones, the homemade SSD HDD began to noticeably “slow down”.
Concluding a short excursion into the world of homemade solid-state hard drives, I would like to note the amazing silence that accompanies the operation of the Dell Latitude LS with an SSD HDD. If it weren't for the hard drive's activity LED, you might sometimes think that the computer was frozen. For those readers who dare to repeat my experiment, I advise you to choose a memory card with the maximum available speed for your quiet hard drive. I wish good luck and direct hands to the experimenters!
Dmitry SPITSYN
Based on the size of SSD drives, they can be divided into two unequal groups: 2.5" and 3.5". 3.5-inch ones are practically never found in stores (only hybrid solutions). You can additionally purchase a special container for installation in the case of the computer system unit, or simply place it carefully inside and secure it with 2-sided tape wherever you want: the SSD does not heat up, does not vibrate, and the working position does not matter for it. You will also need a SATA interface cable to connect the device to the motherboard. To power an SSD drive, a standard flat connector on the power supply (SATA Power Connector) is usually used. Description of power supply connectors.
A method for transferring an operating system (OS) from an old HDD to a new one is described. The link to the article also discusses our option: transferring the OS from an IDE or SATA drive to an SSD drive using the special program Paragon Drive Copy 11 Professional and the included Paragon Migrate OS to SSD 2.0 (there is a link to the program), it is necessary, since most backup utilities save the clone in accordance with the old sector logic (the next paragraph discusses preparing an SSD drive for OS transfer in an alternative way if you do not want to use Paragon Drive Copy 11). After transferring the system to the SSD, you will only need to change the boot sequence in the BIOS. We set the SSD as the second device, and the CD/DVD as the first. After this, the operating system should boot. If you plan to install the operating system from scratch, then you will not need to transfer the OS.
Preparing the SSD for OS migration (alternative method)
 Acronis Disk Director - this program will help you perform any hard disk operations described below. (Attention! A small feature of this program is that you must click the “perform operation” button after changing the disk settings [marked with a finishing flag]).
First, you need to initialize the SSD to create the MBR (Master Boot Record). You can do this using the above program. Next, you need to partition the SSD disk and create an active partition on it. In Windows 7, the active boot partition can be as small as 100 MB. So we'll use the section you just created. In the next step, you will need to reduce the original partition size to 100 MB (and not a byte less). This will be quite difficult to do using Disk Management, so I again recommend Acronis Disk Director 11.
In the free space of the hard drive, you need to create a partition C on which the operating system will be located. This partition should not be active and should not be the primary partition (because the previously created 100 MB partition already includes the operating system boot loader). After this, create drive C from the remaining disk space. It can be a simple logical partition. Also, your old HDD may have more than one partition, but several, which imposes certain restrictions due to inconsistencies in free disk space. Some information, including the factory reset section, can simply be burned to DVD.
After all the preparatory procedures are completed, you can proceed directly to copying the operating system. Next we will work with the hard disk image (system image). There are many imaging programs available (choose ) or you can use the standard Windows 7 tools (pretty easy, but a little more time consuming). Control Panel\All Control Panel Items\Backup and Restore - Create a system image (in the left column).
Now you need to copy the system image to an external hard drive (you will probably have to assign a drive letter to the 100MB partition so that the program can identify it), and then to the SSD drive (using a bootable disk image program). Restore this way, section by section. Thus, you will have to perform recovery for the 100 MB partition and drive C.
Attention! Most free imaging programs do not know how to reduce the size of the source partition in order to rewrite it to the allocated space on an SSD, which has a very limited data capacity, even if the amount of recorded data corresponds to the allocated space. In this case, drive C on the HDD must be reduced to the appropriate size. For this work, I again recommend Acronis Disk Director, since it is more difficult to achieve the same effect using only seven.
The amount of data on your HDD on drive C should not exceed the capacity of the created drive C on the SSD. If the source partition contains a lot of user data, then you can simply try to move it to another partition of the hard drive or even write it to optical drives. When the system is written to the SSD, right-click on the user folders on the disk and include them in the appropriate library. With this approach, you won't be required to copy your folders later.
Now change the boot sequence in the BIOS (Boot section). We set the SSD as the second device, and the CD/DVD as the first, or vice versa. After this, the operating system should boot.
Attention! Before booting the operating system from the SSD, it is recommended to set the BIOS to AHCI mode. It is better to do this before you change the boot sequence of devices, and then set the appropriate settings in Windows 7.
Defragmenting partitions on SSDs makes no sense and, moreover, is very harmful. In the case of a laptop, go to Services, find Disk Defragmentation in the list, right-click on the entry, and the Properties window will open. Just disable this service.
In the case of a desktop computer, you can disable defragmentation only for the SSD drive, so that the HDDs running in the system do not lose performance.
While the defragmentation service is disabled, you will not be able to resize the partition. This process requires the operation of this service.
Hibernation Mode – Most of us do not use hibernation mode but prefer standby mode. However, the file still takes up precious space on your SSD, and its size depends on the amount of RAM in your computer. To get rid of this misunderstanding, enter the following at the command prompt:
powercfg –h off
If you need to return everything to its original state, then enter:
powercfg - h on
Copying user folders to your hard drive
This process is very simple. Create a partition on the HDD. Create appropriate folders on it (Documents, Music, Photos, and so on). The name can be anything, the system will rename them anyway.
Open Explorer and right-click on, for example, the My Documents folder on the left. Go to properties and click on the Location tab. Click Move and select the folder on the HDD in which you would like to store your documents.
Attention! You need to select a folder directly on the partition. You cannot select the root directory, otherwise there will be confusion.
The advent of solid-state hard drives, or SSD for short, can certainly be considered a breakthrough in the development of technologies for creating devices for recording and storing digital information. The first SSDs to hit the market, with the exception of high speed access to arbitrary blocks of information, were in many ways inferior to traditional HDDs. Not only could their volumes, without exaggeration, be called more than modest, they also had low fault tolerance and cost a lot of money.
What's wrong with SSDs?
The high speed, quietness and low power consumption of solid-state drives have served as good drivers for their development. Modern SSD drives are lightweight, very fast and quite reliable from a mechanical point of view, devices used in tablets, ultrabooks and other compact devices. The price of SSDs has also dropped significantly. But still, they cannot be called perfect. All SSDs have a significant drawback - a limited number of rewrite cycles.
The flash memory of most SSDs is of the MLC type and allows data to be written approximately from 3 to 10 thousand times, while conventional USB exhausts its resource in 1000 or less rewrite cycles. There are also SSDs, for example, with SLC memory type, which can withstand several hundred thousand rewrite cycles. There are many nuances, so it is not surprising that it is precisely this feature of SSD drives that raises a lot of questions among ordinary users regarding their operation, and most importantly, extending their service life. Is SSD optimization necessary in Windows 7/10 or is this just another myth created by the manufacturers and developers of commercial software themselves?
Basic training
Yes, you can leave everything as is on a PC with an SSD, and you might be right, but if you really care about your drive and want it to last as long as possible, it's worth considering customizing it. Let's start with whether you bought a computer with an integrated SSD or just the drive itself, which you want to replace the HDD with, transferring Windows from it. In the first case, you can limit yourself to setting up the system. If you install the SSD yourself, be sure to check whether the AHCI connection mode for the SATA controller is enabled in the BIOS.
There are two points here: after enabling AHCI and transferring Windows to the SSD, the system may not boot, since it will not have the appropriate drivers. Therefore, either install drivers ahead of time, or reinstall Windows from scratch. Second. The BIOS of older PCs may not have AHCI mode. In this case, the BIOS will have to be updated. Now regarding the firmware of the SSD controller. Owners of solid-state drives often ask whether the drive will run faster if they install the latest firmware. Yes, it will, but if you decide to update it and in general, if the need arises, it is better to contact the service center for help.
System settings. Disabling defragmentation
Defragmentation is a useful thing for HDDs, but it can harm SSD drives, so Windows usually automatically disables it. However, it's worth checking to see if it's actually disabled. Run with the command dfrgui Disk Optimization Utility and click Change Settings.

Make sure the “Run on a schedule” checkbox is unchecked. If it is there, be sure to remove it.

Enabling TRIM
The TRIM mechanism optimizes the SSD drive by clearing memory cells of unnecessary data when removing them from the disk. Using TRIM ensures uniform wear of the disk cells and increases its speed. To check whether TRIM is active on your system, run the command in a command prompt running as administrator: fsutil behavior query DisableDeleteNotify.

If the value of the returned parameter DisableDeleteNotify will be 0, it means everything is in order and the trim function is enabled, if 1 it means it is disabled and should be enabled with the command fsutil behavior set DisableDeleteNotify 0.
This SSD setup is only applicable to Windows 7/10, while Vista and XP do not support it. There are two options: either install a newer system, or look for an SSD with hardware TRIM. Please also note that some older models of solid-state drives do not support TRIM at all, however, the likelihood that they are still sold in digital stores is very small.
During the process, a significant amount of data, comparable to the amount of RAM, can be written to the hiberfil.sys file on the system disk. To extend the service life of the SSD, we need to reduce the number of write cycles, so it is advisable to disable hibernation. The downside to this SSD setup is that you will no longer be able to keep files and programs open when you turn off your computer. To disable hibernation, run the command running with administrator privileges powercfg -h off.

Restart your computer and make sure that the hidden system file hiberfil.sys is removed from the C drive.

Disable file search and indexing
What else can be done to properly configure an SSD drive for Windows 7/10? The answer is to disable indexing of the disk contents, because the SSD is already fast enough. Open the disk properties and uncheck “Allow file contents to be indexed...”.


But here's the thing. If in addition to an SSD you have a HDD, then you are unlikely to want to disable indexing on it. What will come of this? By default, the index file is located on drive C and data from drive D will still be written to the solid-state drive.
If you do not want to disable indexing on the user volume, you will need to move the indexing file from the system SSD to the user HDD. Open with command control /name Microsoft.IndexingOptions indexing options.

Now click “Advanced” and specify your index location, having first created a folder on the user disk.


If your PC only has an SSD, you can completely disable indexing and search by opening the service management snap-in with the services.msc command and stopping the Windows Search service.

Disabling system protection
Controversial point. By disabling the creation of system shadow copies, on the one hand, you will reduce the number of write cycles, on the other hand, you will increase the risk of getting a non-working system in the event of some unexpected failure. Using rollbacks is one of the most effective and simplest ways to return Windows to a working state; for this reason, we would not recommend disabling this function, especially since points are created infrequently and do not take up much space.
It does not recommend disabling system protection for your Intel SSDs; Microsoft shares the same opinion. However, it's up to you to decide. If you use other backup tools, such as Acronis True Image, system protection can be disabled. To do this, go to system properties, on the “System Protection” tab, select the SSD drive and click “Configure”. Next, in the recovery options, activate the “Disable system protection” radio button, move the slider to zero and click the “Delete” button.

Should I disable the page file or not?
An even more controversial solution is to disable the page file. Some people advise moving it to the HDD, others completely disabling it, but it’s not that simple. The paging file is necessary to optimize the performance of the system and programs that require significant RAM resources. Disabling paging can indeed reduce disk load, but the resulting effect will be very small. In addition, this shutdown can significantly reduce the performance of the computer.
There is also no particular point in transferring the swap file to a hard HDD, since it is many times slower than an SSD, and the system’s constant access to it will slow down its operation. Disabling, or better yet, reducing the paging file is only permissible in one case - if your computer has more than 10 GB of RAM, and you do not use resource-intensive applications. And so, of course, it’s better to leave everything by default. You can perform all manipulations with the paging file in the performance parameters window, called up in the “Run” window with the command systempropertiesperformance(hereinafter Advanced – Change).

Prefetch and Superfetch
In theory, it’s also better to leave everything here as default. The function does not affect the durability of solid-state drives in any way, since it does not produce any records. Moreover, when installing Windows on an SSD, the system automatically disables it. Want to make sure it's disabled? Go to Registry Editor at HKEY_LOCAL_MACHINE/SYSTEM/CurrentControlSet/Control/Session Manager/Memory Management/PrefetchParameters and look at the parameter value EnableSuperfetch. It should be set to 0. You can also disable it through the service management snap-in.

As for Prefetch, the disk writes it produces are so insignificant that it can be ignored. However, you can turn it off, nothing bad will happen. To do this, in the same registry key, set the value of the parameter EnablePrefetcher 0.

The same can be said about disabling the additional Prefetch ReadyBoot feature, which logs the process of downloading applications. The volume of records it produces in the folder C:/Windows/Prefetch/ReadyBoot is negligible, but if you want to disable them too, set the Start parameter in the key to 0 HKEY_LOCAL_MACHINE/SYSTEM/CurrentControlSet/Control/WMI/Autologger/ReadyBoot.

Programs for optimizing SSD disks
Almost everything that was shown in the examples above can be done using special utilities. How to configure an SSD under Windows 7/10 using third-party programs? Very simple. Most of them have an intuitive interface, presented with a set of options that can be turned on or off. There are many SSD optimizers, but we will focus only on the most popular ones.
SSD Mini Tweaker
The most convenient portable program for optimizing solid-state drives. The utility supports work with the functions of defragmentation, hibernation and system protection, Trim, Superfetch and Prefetcher, management of the paging file and Layout.ini, indexing, file system cache and some other settings.

The SSD Mini Tweaker interface is represented by a window with a list of functions available for management. After applying the new settings, you may need to restart your PC.
A shareware utility for optimizing and tuning the performance of an SSD drive. There is no Russian language in Tweak-SSD, but there is a convenient step-by-step wizard that offers optimal settings. Features of this program include disabling file indexing, Program Compatibility Assistant, hibernation, paging file, defragmentation, recording the last access time of a file, working with TRIM, increasing the file system cache, removing the NTFS memory limit, and moving the kernel into memory instead of unloading parts of modules to disk.

SSD Fresh Plus
Another SSD optimizer. Unlike analogues, it supports working with S.M.A.R.T. data. With Abelssoft SSD Fresh Plus, you can disable defragmentation, the use of short names for folders and files, timestamps, Windows log, and prefetch services.

In total, the utility supports nine different settings that optimize the operation of the SSD. Additional features of the program include viewing detailed information about the disk. Distributed in paid and free editions.
Conclusion
That's probably all. There are also other recommendations for optimizing SSDs, but for the most part they are either dubious or harmful. In particular, it is not recommended to disable write caching for the SSD disk and the USN journal of the NTFS file system. You should also not transfer programs and Temp temporary folders, browser caches, etc. from the SSD, because then what is the point in buying an SSD drive? We need programs to run faster, but transferring them to the HDD will only slow down the system.
And finally, here's some good advice for you. Don't bother too much with SSD optimization. It will take you at least a dozen years to reach the lifespan of even a budget 128GB solid-state drive, unless you write and delete terabytes of data every day. And during this time, not only the disk model, but also the computer itself will become hopelessly outdated.
Solid state drives are much faster and quieter than traditional hard drives. Now you can get such a drive practically for free. All you need is a few flash drives and a little perseverance.

If you have a few unused USB flash drives, you already have almost everything you need to create your own high-speed storage medium, since “flash drives” are essentially based on the same technology as SSDs, that is, flash memory. The volume should also be quite sufficient, since modern PCs usually have up to 14 USB ports, most of which are most often not used. The main costs will be the purchase of the necessary cables. You can purchase them in specialized stores at a price of about 150-200 rubles.
We will tell you how to turn your flash drives into an SSD drive that you can use in Windows and install any software on it. We offer two configurations - to increase memory capacity and to achieve maximum performance. Thus, you get a drive that can outperform any hard drive in response speed. We'll also show you how to embed a USB drive with Windows recovery tools into your PC so you always have them at your fingertips.
RAID DP: Capacity SSD
If you want to achieve maximum volume with your flash drives, then the FlexRAID program is best for you. This tool connects all the “flash drives” into one large drive (RAID DP). The advantage of this option is that you do not have to have media of equal size: the data is not distributed between them when saved, but is written sequentially. When one of the “flash drives” is full, the utility automatically moves on to the next one. You will find the FlexRAID program on our DVD.
Configuration with its help is not entirely obvious and is carried out mostly on the command line, but the necessary commands are quite simple, which allows you to configure everything quite quickly. It is important that the FlexRAID components are installed in the correct order, otherwise the utility will fail with an error message.
The first thing you need to do is disable UAC in Windows Vista or 7, as you will have to perform all actions with administrator rights. To do this, go to the Start | Control Panel | User accounts". Then, in the User Account Control Options menu, move the slider to the down position. Don't forget to return it back after the USB drive setup is complete.

Perform the initial system setup using FlexRAID-client and FlexRAID-host After that, begin installing FlexRAID-host, during which you need to check the “As a service” checkbox, which will allow the program to automatically start when Windows boots. Now you can proceed to install FlexRAID Basic CMD Client in a similar mode. Before you begin setup, make sure that the FlexRAID folder is writable. Navigate to the Basic CMD Client and Basic Host Service directories, which are usually located in the C:ProgamFilesOpenEgg.org folder, and open their Properties. The checkbox next to the “Read Only” item in the “Attributes” section should be unchecked. Save your changes and confirm them for all subfolders and files in the dialog box that appears. Reboot your PC and launch FlexRAID. A command prompt window will open where you need to enter the command “localhost” to connect to FlexRAID. At this point, the installation is almost complete - all that remains is to enter the “view install” command and restart the computer.
If you have Windows 7 installed, after restarting your PC you will need to install two patches. To do this, enter “patch install view-sys-patch” and “patch install view-cl-patch” at the command line.
Running the script: integration of flash drives
Now you can integrate flash drives into FlexRAID. To tell the program which ones to use, you will need a script, which must be placed in the “Basic Host Service” folder. To do this, right-click on an empty space in this directory and select “Create | Text document" and name the created file "ViewConfig".

The configuration file provides extensive customization options, but for normal work it is enough to understand the basic principles of its structure (see screenshot).
The first line designates the virtual drive into which the “flash drives” are combined - in our example it is assigned the letter Y:. In the second line, enter the letters of the volumes under which the media is displayed in Explorer (in our case, these are G: and I:). You can specify any number of paths and “flash drives”, for which you need to separate them with semicolons (;).
Now rewrite all other lines from our screenshot up to “REMOVABLE=false”. Combine the “flash drives” into a virtual disk under the letter Y:. In our case, we wanted not only to combine storage media, but also to define a specific folder for them. If you want, for example, to create a music collection on flash drives and place it in a specific directory on a virtual disk, enter “|-
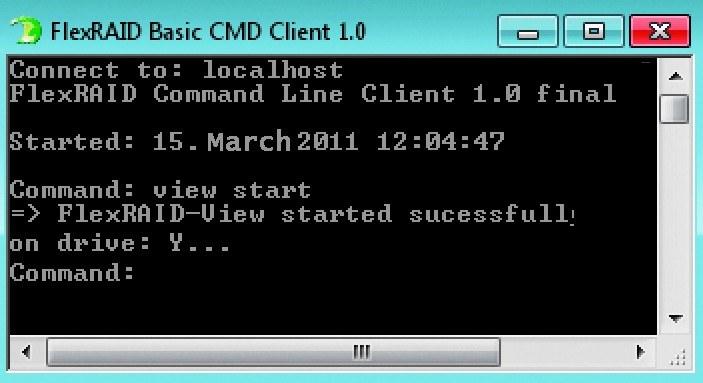
The virtual drive is now ready for a test run. Open the FlexRAID client and enter the commands "localhost" and "view start". The FlexRAID-View volume (Y:) appears in Explorer. In order for FlexRAID to start automatically in the future and the drive to be seamlessly connected when the OS boots, you will need to perform a few more simple steps. Open the FlexRAID Basic Host Service folder and create the Autostart.txt file in it. In it, you only need to enter a value that determines the number of milliseconds from the moment Windows boots until the program starts. The program's manufacturers advise setting the value to "5000", but for our test PC this was too low, which is why FlexRAID tried to attach the virtual volume before Windows services started. For our computer, the optimal number turned out to be “12,000”. After saving the file and restarting the PC, volume Y: will be displayed in Explorer automatically.
RAID0: SSD with maximum speed
With FlexRAID, you can make Windows treat multiple flash drives as one large drive. But, if you want to get maximum performance from your flash drives, you will need to create a RAID0 array.
This method allows you to distribute one file across all drives, thereby increasing the read and write speed: using conventional flash drives, we were able to achieve a figure of approximately 50 MB/s, despite the fact that for each of them separately it was only 20 MB /With. However, to create RAID0 you will need drives of the same size, otherwise the total capacity of the SSD will be limited by the capacity of the smallest drive used. The simplest solution is to create a virtual machine, install Linux OS on it, create a RAID0 array from flash drives and make it available in Windows as a network drive, since Microsoft's OS does not have tools for creating RAID arrays from USB devices.
Unfortunately, the virtual machine has its drawbacks: it requires at least 512 MB of RAM and some CPU resources, so it is not the best solution for older PCs. As the most convenient means of managing a virtual machine, we recommend using VMware Player (can be downloaded from the official website www.vmware.com). The Linux distribution of Ubuntu (www.ubuntu.com and on our DVD) already has all the necessary tools for building a RAID0 array, so the setup will be as simple as possible. To install the OS on a virtual machine, save the ISO image to your hard drive and select “Create a New Virtual Machine” in the VMware Player interface. In the installation wizard, select “Installer disk image file” and specify the path to the ISO image. A 4 GB virtual disk will be sufficient to install the system. Don't forget to install "VMware Tools", otherwise you will not be able to integrate flash drives into the system.
After installing Ubuntu, you will need to update the system so that no errors occur during further setup. To do this, open the Terminal (you can find it in the Applications | Accessories menu) and enter the command in it: sudoapt-getupdate If error messages occur during the process, you can resume the update using the command: sudoapt-getupdate-fix-missing Then perform a software update: sudoapt-getupgrade Reboot the virtual machine. Next, you need to integrate the “flash drives”, that is, activate these media in the VMware Player program (menu item “Virtual Machine | Removable Devices”) and use the Terminal to find their mount point: dmesg|grep “AttachedSCSI” 
Creating RAID0. To write the correct RAID script, you need to find out how your “flash drive” was detected by the system. The result will look something like this: “2:0:0:0 Attached SCSI removable disc.” Important information is enclosed in square brackets - in our case it is “sdb” (as can be seen in the screenshot). Now install the necessary tools to create a RAID array: sudoapt-getinstallmdadm All that remains is to configure the RAID. In our example, we combined two four-gigabyte “flash drives” into an array, which were identified by the system as “sdb” and “sdc”: mdadm-create-verbose /dev/md0-level=0-raid-devices=2/dev/sd(b ,c) Now you have a single storage medium created from two. It needs to be formatted. Since Windows does not access the disk directly, you can use the EXT4 file system, which is more suitable for running Linux, instead of NTFS. Formatting can be started directly from the Terminal: sudomkfs.ext4/dev/md0 After this, determine the volume's mount point: sudomount/dev/md0/mnt If the installation was successful, the high-speed RAID0 array is ready for use. You also need to create a script that will allow the system to recognize the drive after a reboot without re-configuring it. To do this, you will need to determine the media identification number (UUID) - you can find it using the command: mdadm-detail/dev/md0 Next, create a text file on your desktop and enter the following lines in it: #!/bin/bash mdadm-verbose–A /dev/md0–uUUID_of_your_media 
Folder integration. To use your SSD in Windows, simply open network access to it. Save the file, right-click to open its properties and on the “Permissions” tab, check the “Allow file execution as a program” checkbox. Now you don't have to enter commands - just run the script.
And the last step is setting up network access to the media, which will allow you to access it from Windows. Create a folder in the root directory of the drive, right-click on it and select “Sharing”, after which a dialog box will appear. During the process of setting up network access, Ubuntu will automatically install the required Samba packages. After rebooting the session, enter the folder sharing menu again and complete the setup. Now this directory should appear among the network folders in Windows.
Just in case you are a firefighter: we are creating means for recovery
Problems with Windows? Can't access your data? This solution offers recovery capabilities in case of unforeseen situations.
If you still have a few unused USB headers left on your motherboard, they can also be put to good use. Take two flash drives and copy the files from the “seven” installation disk to one of them, and some Linux distribution to the other. After this, you will not need to look for system recovery tools - they will already be ready for use.
To run Windows from a flash drive, you will need a medium with a capacity of at least 4 GB, an installation DVD and the HP USB Storage Format Tool utility (available on our DVD), with which you can format the flash drive to FAT32. Next, simply copy the files from the OS installation disk to it. For Linux, a gigabyte flash drive is sufficient, which also needs to be formatted using the HP USB Storage Format Tool.

System installation. UNetbootin allows you to create a boot image with two clicks. Run the UNetbootin utility (available on our DVD) and specify the path to the installation disk image of any Linux distribution. To start from a flash drive, you will need to change the order of devices from which to boot in the BIOS settings.
Attention. When installing, do not mix up the media, otherwise you risk losing important data.