Writing and running scripts in PowerShell. Running a program from PowerShell
Experienced users of the Windows 10 operating system may have heard of the PowerShell command line utility. Those with experience working with Windows 7 and 8.1 may also be familiar with it. After years of using the Windows command line application and .bat files, it's time to get acquainted with a more powerful tool.
PowerShell is a valuable addition to the list of Windows tools, and its scope may be intimidating for some users. What is it - a scripting language or a command shell? Don't worry: despite the extensive capabilities, anyone can master PowerShell.
Step 1: Installation
First, we need the PowerShell utility itself. If you're running Windows 10, you already have version 5 of PowerShell installed. The Windows 10 Anniversary Update uses version 5.1, but the difference is not noticeable. Windows 8 and 8.1 use PowerShell 4, which is also quite sufficient. Installing PowerShell on Windows 7 will not cause problems, but you will still have to take a couple of extra steps. In particular, you need to additionally install the .Net Framework. You can install the Windows Management Framework, which includes PowerShell.
PowerShell has two interfaces. Advanced users can opt for a full GUI interface known as the Integrated Scripting Environment (ISE). For beginners, it's best to use the PowerShell console, a simple text-based Windows command line-style interface, or even DOS 3.2.
To run PowerShell as an administrator in Windows 10, click the Start button and scroll down to Windows PowerShell. On Windows 8.1, look for Windows PowerShell in the System folder in Windows. In Windows 7, the shell is located in the Accessories folder. As a regular user, PowerShell can be launched in the same way, using the left mouse button instead of the right one.
You can use search on any version of Windows. For ease of future use, you can pin PowerShell to the taskbar.
Step 2: Old Windows Commands
The Windows command syntax in PowerShell works as usual. For example, CD changes folders, dir shows a list of all files and folders inside the current folder.
Depending on how you launch the PowerShell console, you might start in c:\Windows\system32 or in c :\Users\
Step 3: Install Help Files
Teams like CD And dir are not active PowerShell commands. These are so-called aliases - replacements for real PowerShell commands. Aliases are useful for those who have extensive experience with the command line. However, they don't touch the depths of PowerShell.
To get started with PowerShell, type help and the command you need. The screenshot shows the command .

Team help says that dir is an alias for the PowerShell command Get-ChildItem. If you type get-childitem V PS C:\>, you will see the same thing as when using the command dir.
As noted at the bottom of the screenshot, help files for PowerShell are not installed automatically. To get them, run PowerShell as administrator and type update-help. Installing the help files will take several minutes; a number of modules may be missing - for example, in this case, Help for NetWNV and SecureBoot were not installed. When everything is ready, the complete help system will always provide the necessary tips.
Now type the command get-help and any command you are interested in (“cmdlet” in PowerShell, cmdlets in Russian), its description will be shown. For example, get-help get-childitem displays a list of options get-childitem. You can also display different possible options. For example
get-help get-childitem -examples
provides seven detailed usage examples get-childitem. Team
get-help get-childitem -detailed
includes these seven examples and detailed explanations of each parameter in the cmdlet get-childitem.
Step 4: Get help with settings
In the screenshot you may have noticed two lists under SYNTAX For get-childitem. Having two different syntaxes means there are two ways to run the cmdlet. How to keep the syntax separate from each other and what do the parameters mean? The answer is simple if you know the trick.
For details regarding cmdlet parameters get-childitem or any other use parameter -full:
get-help get-childitem -full
This gives you a list of what you can do with the cmdlet and what will happen. Look at the screenshot.

Reviewing the parameter descriptions, you will notice that get-childitem makes it possible to get an object child(such as a subfolder name or file name) in a specified location, with or without matching certain characters. For example:
get-childItem “*.txt” -recurse
returns a list of "*.txt" files in the current folder and all subfolders (due to the parameter -recurse). Whereas
get-childitem “HKLM:\Software”
returns a list of all top-level registry keys in HKEY_LOCAL_MACHINE\Software.
If you've ever tried to get into the registry using the Windows command line or .bat files, you'll appreciate the functionality of this access option.
Step 5: Learning Names
There's a reason why the cmdlets shown so far look similar: get-childitem, update-help, get-help use a single verb-noun pattern. All PowerShell cmdlets use this convention; they use a verb before a single noun. This will appeal to those who once suffered from inconsistent command names in the VB and VBA languages.
Take a look at the most common cmdlets:
set-location: sets the current working location to a specific location
get-content: Gets the contents of the file
get-item: Receives files and folders
copy-item: copies an object from one location to another
remove-item: Deletes files and folders
: Gets processes running on a local or remote computer
get-service: Gets services running on a local or remote computer
invoke-webrequest: Retrieves content from a web page on the Internet
To view how a specific cmdlet works, use get-help as in the case
get-help copy-item -full
Based on the description in the help, you can understand what the cmdlet needs. For example, if you want to copy all files and folders from Documents V c:\temp, use
copy-item c:\users\ \documents\* c:\temp
By typing this command, you'll see several interesting features of the PowerShell environment. For example, if you type copy-i and press the Tab button, PowerShell will fill in Copy-Item. If you type a cmdlet incorrectly and PowerShell cannot recognize it, a full description of what was done wrong is given.
Try this cmdlet:
invoke-webrequest askwoody.com
You'll get a short list of the web page's titles, images, links, and other content. Please note in get-help to the list invoke-webrequest, which “returns a collection of forms, links, images, and other important HTML elements”—exactly what should be shown on the screen.
Some cmdlets help you manage PowerShell itself:
get-command: list of all available cmdlets
get-verb: list of all available verbs
clear-host: Clear the host program screen
Different parameters allow you to reduce commands and narrow down the range of useful options. For example, to see a list of all cmdlets that work with Windows services, type
get-command *-service
All verbs available with the noun will be shown service. Here is their list:
Get-Service
New-Service
Restart-Service
Resume-Service
Set-Service
Start-Service
Stop-Service
Suspend-Service
You can combine these cmdlets with others.
Step 6: Using Pipes
If you are familiar with the Windows command line or batch files, then you know about redirection and pipes. Redirection (> symbol) and pipes (| symbol) take the result of an action and attach it to another location. For example, you can redirect the result of the command dir to a text file or pass the result of the command ping to the team find to filter interesting results like
dir > temp.txt
ping askwoody.com | find “packets” > temp2.txt
Here on the second team find searches for a string packets, taken from the address askwoody.com by the team ping and concatenates all matching lines into a file called temp2.txt.
The first of these commands works fine in PowerShell. To run the second command you would need something like
ping askwoody.com | select-string packets | out-file temp2.txt
Using redirection and pipes greatly expands the capabilities of the Windows command line: instead of endlessly scrolling down the screen to search for a text string, you can filter the Windows commands you need.
Powershell has support pipe, and it is not limited to text. PowerShell allows you to pass an entire object from one cmdlet to another, where the object is a combination of data (called properties) and actions (methods) that can use that data.
The tricky part comes when lining up the objects. The objects supplied by one cmdlet must match the type of objects accepted by the receiving cmdlet. Text is a very simple object type, so if you're working with text, aligning objects is a simple task. The remaining objects are not so basic.
How to understand this? Use cmdlet get-member. If you want to know what type of object a cmdlet is processing, run it through get-member. For example, if you are trying to understand the processes running on a computer and have narrowed your options down to cmdlets , here's how to find out the result of the cmdlets:
get-process | get-member
Running this cmdlet produces a long list of properties and methods for , but at the very beginning of the list you can see the type of object that creates :
TypeName: System.Diagnostics.Process
The below screenshot also shows the properties entitled get-process Handles, Name, NPM, PM, SI, VM And W.S..

If you want to manipulate the result To work with this cmdlet (instead of displaying a long list of active processes on the monitor), you need to find another command that takes as input System.Diagnostics.Process. To find the cmdlet you need, use PowerShell again:
get-command -Parametertype System.Diagnostics.Process
This cmdlet provides a list of cmdlets that can process System.Diagnostics.Process.
Some cmdlets are known for accepting almost any kind of data. Chief among them is . This cmdlet passes through each object sent through the pipe, one by one, and applies the specified selection criteria to it. There is a special marker called $_ , which allows you to use each item in the pipe, one at a time.
Let's say you want to get a list of all processes running on a computer with the name "svchost", that is, you want to match the property Name process svchost. Use the command:
get-process | where-object ($_.Name -eq “svchost”)
Cmdlet looks at every object System.Diagnostics.Process, compares .Name this object with "svchost"; if there are matches, they are displayed on the monitor. Look at the screenshot.

Step 7: Analyze Useful PowerShell Commands
By now you already know enough to be able to damage the computer, so be careful. Let's look, for example, at frequently requested PowerShell commands.
These commands only work on Windows 10 and only when you run PowerShell as an administrator. They are designed to reinstall pre-installed Windows 10 applications and can be useful for those who first uninstalled these programs and then decided to return them. The commands look like this:
Get-AppXPackage | Foreach (Add-AppxPackage -DisableDevelopmentMode -Register “$($_.InstallLocation)\AppXManifest.xml”)
If you run this command, ignore the red warnings and when the command completes, restart your computer; all pre-installed programs in Windows 10 will appear in their places.
Here's how this command works. Get-AppXPackage checks all application packages in the user profile. Even if you delete the application, it remains in the user profile list.
Cmdlet Get-AppXPackage returns an object TypeName Microsoft.Windows.Appx.PackageManager.Commands.AppxPackage, which includes the fully qualified name of the application package and the location of the corresponding XML manifest file. If you run the cmdlet get-appxpackage, you will see a long list of application packages. The screenshot shows the description of the Xbox app.

Cmdlet Foreach loops through each object in AppXPackage by sending them to the cmdlet Add-AppxPackage. According to get-help For Add-AppxPackage, there are two key switches:
- Switch -Register used to register existing installations of application packages, you can set parameters DisableDevelopmentMode And Register
- Switch -DisableDevelopmentMode tells Windows to re-register an existing application package that has been disabled, unregistered, or corrupted.
Line " $($_.InstallLocation)\AppXManifest.x ml" describes where the file is located manifest.xml. If you look at the files AppXManifest.xml, you'll see a complex list of application IDs, executable files, and a large number of visual elements associated with the application.
After the reboot, all added application packages are downloaded and installed from the Windows Store.
After switching to the Windows 10 operating system, many users noticed the “Run PowerShell” button in the Explorer interface. In this regard, many questions appeared on the Internet, users were interested in what kind of Windows PowerShell program it was and what it was needed for. If you are also interested in this issue, then this material should help you.
What is Windows PowerShell
Windows PowerShell is a scripting language and command-line program for executing these scripts. This language was released in 2006 as part of the second service pack for Windows XP and since then PowerShell has been part of all Microsoft operating systems. In 2008, the second version of this language appeared, and starting from Windows 7 it is this version that is used. Files with Windows PowerShell scripts have a PS1 extension and can be run as familiar BAT and CMD files.
Windows PowerShell is a scripting language designed primarily for Microsoft business customers who need powerful tools to automate the tasks of managing Windows-based servers and computers. The .NET platform, developed by Microsoft since 2002, was used as the basis for this language.
Windows PowerShell allows you to automate a wide variety of tasks. With it you can manage files, services, processes, accounts and settings. The PowerShell language understands many of the commands found in the regular Windows Command Prompt (CMD), but it also has its own language consisting of its own commands, which are called cmdlets.
Cmdlets (in English cmdlets) are formed according to the Verb-Noun rule, for example, Get-Help. You can learn the basics of Windows PowerShell using Help (the Get-Help cmdlet). For general information, simply enter the command “Get-Help”; for help about a specific cmdlet, enter “Get-Help Cmdlet-name”. For example, if we enter the command “Get-Help Get-Process”, we will get help about the Get-Process cmdlet.
How to run a Windows PowerShell program
The Windows PowerShell program can be launched in different ways. The easiest option is to simply use the search in the Start menu. To do this, open the Start menu, enter the search query “Windows PowerShell”, and then open the found program.
You can also use the Windows key combination-R and enter the command “powershell”.

In Windows 10, PowerShell can be launched from any folder. To do this, click on the "File" button in the upper left corner of Explorer and select "Run Windows PowerShell."

How to use Windows PowerShell
As we have already said, using the PowerShell program you can automate many routine tasks in the Windows operating system. As an example, we will demonstrate some of the capabilities that this tool has to make it clear how to use it.
Emptying the Trash. There is a special cmdlet for clearing the recycle bin called “Clear-RecycleBin”. This cmdlet is useful when writing scripts for servicing computers. When you run the cmdlet, you must specify the drive on which you want to empty the Recycle Bin. Example:
Clear-RecycleBin c:
The screenshot below shows how this cmdlet is executed. After entering the command “Clear-RecycleBin c:” a confirmation request appears. In order to continue executing the cmdlet, enter the letter “Y” and press Enter.

If you add “-Force” to the “Clear-RecycleBin c:” cmdlet, the recycle bin will be cleared without asking for confirmation. Screenshot below.

Archiving files. For archiving and unpacking files, the cmdlets “Compress-Archive" and "Expand-Archive" are provided. For example, in order to archive the “C:\test\” folder into the “C:\archive\test2.zip” archive, you need to run the following cmdlet:
Compress-Archive -LiteralPath C:\test\ -DestinationPath C:\archive\test2.zip
As a result of executing the command shown above, a file “test2.zip” will appear in the “C:\archive\” folder, in which the contents of the “C:\test\” folder will be archived.
List of cmdlets for Windows PowerShell
There are a huge number of different cmdlets for Windows PowerShell and it will not be possible to describe them all in one article. Therefore, we suggest that you familiarize yourself with the most popular of them:
- Get-Help – getting help;
- Update-Help – help update;
- Get-Command – search for cmdlets;
- Get-Alias – search for aliases for cmdlets;
- Get-PSDrive – view connected drives;
- Get-Member – view the properties and methods that an object has;
- Get-WindowsFeature – view information about available server roles and features;
- Install-WindowsFeature (analogous to Add-WindowsFeature) - installs roles or components on the desired server;
- Uninstall-WindowsFeature (analogous to Remove-WindowsFeature) – removes server roles or components;
- Get-History – viewing the history of commands that were entered in this session;
- Get-Variable – view a list of variables and their values;
- New-Variable – creating a new variable;
- Set-Variable – setting the value of a variable;
- Clear-Variable – deleting a variable value;
- Remove-Variable – removing a variable and its value;
- Format-List – viewing the result of the command as a list of properties, where each line contains a separate property;
- Format-Table — view the command result in table format;
- Format-Wide - view the result of the command in the form of a wide table, which shows only one property for each object;
- Format-Custom – view the result of the command using a custom view;
- Export-Csv – export data to CSV format;
- Import-Csv – import data from a CSV file;
- Export-Clixml - export data to XML format;
You can get a complete list of cmdlets for Windows PowerShell by running the Get-Command -CommandType cmdlet.
Hi all! Today a short note on the topic, how to open powershell as administrator. Let me remind you that PowerShell is a powerful programming and administration language from Microsoft; every year it acquires an increasing number of cmdlets and functionality. Essentially, it is a replacement for the Windows Command Prompt. Below we will consider methods that allow you to open and configure it.
.
Methods for opening a PowerShell snap-in
Powershell is developing very well and with the release of Windows 10 it has already received version 4, but our topic is different. So how to open powershell? Everything is simple if in Windows XP, then nothing. Since it is delivered separately, in all subsequent releases it comes as a built-in component. The most universal way to open powershell is to click
Win+R and enter powershell

By pressing enter, the PowerShell console will launch, the only problem is that it will not open as administrator. And as a result, many commands will not be executed; below we will see how to do this on behalf of the administrator.

How to open windows powershell as administrator in Windows 8.1 and Windows 7
You can open Windows Powershell through Start. In Windows 8.1, Windows 2012 R2, go to System Tools - Windows and right-click and select Run as administrator.

In Windows 7 and Windows 2008 R2 it looks like this Start > Accessories > Windows PowerShell

You can also create a shortcut in the task item and right-click on it and select the appropriate item

It would be convenient if PowerShell always opened as administrator, let's implement it. This is done the same way in all versions of Windows. Opening the control panel


Right-click on it and select Properties. You can immediately see the path to the file where it is located in the system.

Click the "Advanced" button. You will see additional properties. where you need to check the box Run as administrator.

Everything is very simple. I am sure that now you will not have a question about how to open Windows Powershell. Another useful thing is to change the font in the powershell window.
How to Open PowerShell from the Start Button Context Menu in Windows 10
Microsoft is increasingly focusing on its powerful language (PowerShell) from the command line, and this is logical, since its capabilities for managing operating systems of the Windows family are almost limitless, if not more than in the graphical interface. Starting with version 1709 of Windows 10, in the context menu, PowerShell replaced the usual cmd. Right-click on the start button in Windows 10 and from the context menu, select the appropriate item:
- Windows PowerShell
- Windows PowerShell (administrator) is exactly the mode with maximum rights in Windows 10.

Launch Windows PowerShell using Search in Windows 10
In Windows 10 and older versions, you can find the PowerShell shell using a regular search; there is a special section for this. Click next to the Start button, the magnifying glass icon. In the search form that opens, enter the word PowerShell. You will search for all options, among which you will find the shell. If you right-click on it, you can open it as an administrator.

Launching Windows PowerShell from the Start menu in Windows 10
To open PowerShell from the Start menu, open it and find the Windows PowerShell item, it will be in the form of a folder, open it and run the appropriate version.

If you right-click, you can run the Vershel shell as an administrator with administrator rights.

Additional and generic shell launch methods
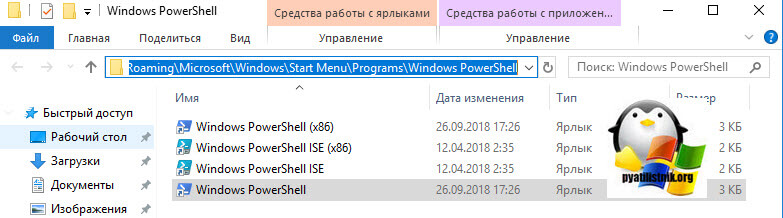
There are also very specific methods for opening a shell with a powerful language from Microsoft. The most clumsy one is to simply find the executable file and run it directly from its location on the system. Let's go to your Windows 10 along the following path:
C:\Users\username\AppData\Roaming\Microsoft\Windows\Start Menu\Programs\Windows PowerShell
As a result, you will see a folder with shortcuts that are present in the Start menu, you can launch them.
You can also run the original executable file, which is located along the path:
C:\Windows\System32\WindowsPowerShell\v1.0
And by right-clicking on it, you can download it as an administrator, with maximum rights.

You can also launch Windows PowerShell from the command line window; to do this, simply enter the magic word in it and press Enter.

Well, let me also remind you of the method for launching a new task from the “Task Manager” snap-in. Open "Task Manager", select menu item "File - Run new task"

In the window that appears, enter PowerShell.

Well, the last method known to me is to launch PowerShell through Windows 10 Explorer, to do this, open Explorer, select the menu item “File - launch Windows PowerShell”, there will be both modes.

What is PowerShell ISE
You've probably noticed that the PowerShell ISE shortcut is everywhere, and you'd like to know what it is. In a nutshell, this is a special shell in which you can write scripts and scenarios in PowerShell, using all the variety of cmdlets that Microsoft offers you.
Powershell changing the font is very simple, go to the Font tab in the properties, where you can set the size from 5 to 72.

You can also get to properties from the utility window itself, click on the icon in the upper left corner and select properties

Here the font settings are slightly different, and as they change, the size of the console also changes.

On the Colors tab, you can set the font color in Powershell and the window itself. By making it black, for example, like the command line.

I also advise that if you are an active console user, set the buffer size not to 50 commands, but at least to 100.

Thank you for your attention. These are the methods for opening the Power Shell console in Windows. Site material
1. Writing a script
A PowerShell script (no matter what version) is a text file with a *.ps1 extension.
Here is an example of a simple Power Shell script (file systemInfo.ps1):
# Retrieve WMI object for the operating system
Get-WmiObject Win32_OperatingSystem
This file can be created and edited, for example, in FAR Manager.
notethat FAR Manager, although it can work in the Power Shell console, executes scripts from under itself in the environment of a regular Windows console cmd . That is, FAR Manager can only be used to create and edit PowerShell scripts, but not to run them. But before you get disappointed, read point 3.
2. Running the script
The script must be executed from the Power Shell console, and not from the regular Windows console. In the Power Shell console, you need to go to the directory where the script is located (with the commands CD ), and then run the script itself, making sure to include the characters in front of it".\" . For example, we have the path to the script file d:\work\systemInfo.ps1 . Then the launch commands will look like this:
cd\
cd work
.\systemInfo.ps1
or like this (just specify the full path to the script):
d:\work\systemInfo.ps1
Most likely, the following error will appear when running the script:
The file D:\work\systemInfo.ps1 cannot be loaded because script execution is not allowed on this system. Type "get-help about_signing" for more information.
line:1 character: 18
CategoryInfo: NotSpecified: (:), PSSecurityException
FullyQualifiedErrorId: RuntimeException
The error appears because by default Power Shell has the maximum security policy enabled, which allows you to run PowerShell commands on the command line, but does not allow you to run a script with PowerShell commands on the same command line.
To enable execution of PowerShell scripts, you need to create a *.bat file, for example enableScript.bat with the following content:
powershell -Command Set-ExecutionPolicy RemoteSigned
This *.bat file can be executed in any console: either in PowerShell or in a regular console cmd . After executing this file, PowerShell scripts will run in the PowerShell console.
3. Running a PowerShell script from a regular Windows cmd console
The PowerShell script can also be executed from a regular Windows console. To do this you can use the command:
Powershell -File ./systemInfo.ps1
This way you can execute scripts directly from FAR Manager and they will work.
But there is a slight subtlety here. Parameter-File only fires on local paths, even if the path is relative"./" . That is, if *.ps1 - the file is on the local disk C: or D: , then such a call will work. But if you try to execute a script located on a domain resource, the script will not be found. Perhaps this will be fixed in future versions of PowerShell.
There are several different ways to run the script, the main ones are below:
- Launch PowerShell and run the script in it (enter the path to the file and the file name, for example, like this: C:\Scripts\test.ps1, or go to the script folder with the command cd C:\Scripts and run it with the command.\test.ps1) The shell can be found and launched in many ways. One way is through the Start menu. For Windows 7 - you need to go to "All Programs" - "Accessories" - "Windows PowerShell" and launch the "Windows PowerShell" shell. For Windows 10 - you need to find the group with the letter "W" and in it you will find "Windows PowerShell".
- Launch "Windows PowerShell ISE" is a program - a development environment that allows you to edit and debug PowerShell scripts, which is also available by default along with PowerShell itself. Having launched it, you just need to click the "Open" button or go to the File - Open menu and select the desired script, then press F5 or the "Run Script" button. You can find Windows PowerShell ISE in the same place as the PowerShell shell - in the Start menu .
- Launch standard command line and write in it:
powershell -file<имя_скрипта> (example: powershell -file myscript.ps1)
If you haven't run PowerShell scripts before, you'll likely receive the following message: Can't download file<имя_скрипта>, since script execution is prohibited for this system. Type "get-help about_signing" for more information. This is due to the fact that for security reasons and to prevent accidental execution of malicious code, all scripts must be digitally signed.
How to allow execution of an unsigned PowerShell script?
1. In PowerShell, before running the script, run the command to allow execution of unsigned scripts for the current shell session:
Set-ExecutionPolicy RemoteSigned -Scope Process
2. At startup from the standard command line use the -executionpolicy parameter, i.e. run the script like this:
<имя_скрипта>
Both methods set the policy only for the current session, while the security policy for executing PowerShell scripts written in the registry will not be changed and will remain the same. If you want to change the script execution security policy to “permanent”, then use this method:
3. Allow launch forever: Launch PowerShell as Administrator, then run the command:
Set-ExecutionPolicy RemoteSigned
Note: If the script was downloaded from the Internet, then in order to avoid a request to confirm the launch, you need to use Bypass instead of RemoteSigned - completely disabling any requests and warnings.
How to run a PowerShell script in the background?
To do this, just use the launch parameter -WindowStyle, which can take the following values: Normal, Minimized, Maximized and Hidden. Thus, to run an unsigned script in the background, you need to run the command:
powershell -executionpolicy RemoteSigned -WindowStyle Hidden -file<имя_скрипта>
You can also add -NonInteractive if you wish, so that the script does not ask any questions. Thus, the script will be executed unnoticed by the user. Be careful when using this method.
Running a PowerShell script with parameters
The actual launch should be done as if you were launching a regular program or a bat file with parameters. For example, to run a script with parameters from the command line, you can write the following command:
powershell -executionpolicy RemoteSigned -file<имя_скрипта>param1 param2 "another text parameter"
In the script itself you can get these parameters like this:
Param ($var1, $var2, $var3) echo $var1, $var2, $var3
In PowerShell ISE, you can run a script with parameters in the same way using the command pane.
How to run a PowerShell script using a shortcut?
This task can be accomplished in two ways:
- Create a bat/cmd file in which to write a command to run the script (you have read the parameters above)
- Create a shortcut to PowerShell, which can be found in the c:\Windows\System32\WindowsPowerShell\v folder<версия>\ and in the shortcut properties in the "Object" field, add the necessary parameters.
Thus, for example, to run a powershell script when the user logs in, you can simply create a shortcut as described in point 2 and place it in startup. Also, creating a shortcut using one of the methods above will allow you to easily run the script as an administrator or as any other user as a regular program.
The PowerShell scripting language is quite a powerful tool for solving various problems, but it can be used not only for good things, but also for bad things, so use it wisely ;)