Is it possible to install Windows on . How to reinstall Windows: step-by-step instructions
Hello, dear users!
Surely many of you are interested in how to quickly and without errors install the Windows 7 operating system on your computer using a boot disk. We can say in advance that this operation is much simpler than it might seem at first glance - in just a few minutes you will learn how to configure the BIOS boot loader to install the system from various media and perform initial setup OS.
Immediately after reading, you can easily install a fresh system on your PC - step by step installation Windows 7 from the disk will become simple and as accessible as possible for you.
PREPARE THE LOADER
To ensure that when you turn on your computer, it starts to boot from the media on which the OS you need is installed, you need to correctly configure the bootloader. To do this, follow these simple steps:
1. Turn on your laptop, insert the disk into the drive, and then restart the device.
2. When the PC boots, press the key DEL. IN different versions BIOS these could be keys F2 or F11.
3. In the window that appears, select the item called Boot, located in the top menu.
4. Select the position “Boot Device Priority” in the list that opens
5. In line 1 Boot Device— click Enter and select CD-ROM Drive - this is your media for Windows 7.
After setup BIOS menu you need to press a key F10 and confirm saving the actions. As soon as you do this, the device will reboot and the download process will begin, in other words, the installation begins.
INSTALLING OS ON PC
The Windows 7 installation program is designed in such a way that it does not cause problems for most people - this is facilitated by intuitive interface and step-by-step structure. Despite this, you can get confused in some points, and to prevent this from happening, carefully study the presented order:
1. After booting your PC, wait until a black window appears with the words “Press any key to boot from CD or DVD.” To continue the process, press any key on the keyboard and wait for the OS files to load.

2 On the program page that opens, select the desired language, currency format, and keyboard layout (default parameters). After that, click on the “Next” button.

3. In the page that opens, select “Install”. If you are an advanced user who needs to restore the old OS rather than install a new one, pay attention to “System Restore”.

4. Select Windows version in the next window, then confirm the action with the “Next” button.

5. Read the license agreement software and continue.

6. On new page Click “Full installation”, then select the drive partition for subsequent installation of Windows 7. Before doing this, do not forget to format the desired partition.

After confirming the disk selection, the operating system will begin to install on the device. Progress will be displayed as a percentage. When the installation is complete, the program will require a reboot, which, in the absence of user action, is performed automatically. Now let's move on to the setup.
BASIC SETTINGS
The following instructions for setting up the OS installed on your PC will help you understand the basic parameters:
Fill in the lines with user and computer names - here you can show your imagination.

In the next window, set a password to access the PC and a hint. You can also skip this point.

Enter the activation code to confirm OS registration if you have a licensed version.

Select the system security options that suit you in the next window.

Set the time, time zone and current date.

The last point is selecting Internet connection parameters. For a home PC, it is advisable to select settings home network. After this, the OS saves the settings and can be considered installed. You can also install Windows directly from the working system.
To do this, just insert the media with the “seven” into the drive and follow the program instructions. Remember that you cannot format the drive this way, so it is not recommended to choose this method - it is better to prefer installing Windows from the BIOS.
Reinstalling Windows 7 is carried out in the same way as described above - there is nothing complicated in this process. After you have done all this, it will be useful for you to read the article: .This is where I end.
Let's digress a little from the topic. Guys, a cool clutch-wallet, a great option for a gift or for personal use. Of course there are sections for money, many sections for cards, you can put in a driver’s license. Positive reviews, great price!
Many novice users personal computers or laptops sooner or later face the need to install or reinstall operating system. And not every newbie knows how to install Windows 7 system. Someone acts at random and installs a system without the slightest idea; as they say, he learns from his mistakes, losing a lot of time. Some people pay a lot of money to hire specialists to install and configure Windows. I strongly recommend that you master all the intricacies once and for all. self-installation system, which will allow you to save a lot of time and money in the future.
Immediately before installing the operating room Windows systems 7, like any other versions of Windows, you should perform the following preparatory operations:
- create or purchase boot disk or a USB flash drive with Windows 7, from which the installation will be carried out;
- read the instructions for setting boot priority in the BIOS and installing Windows 7;
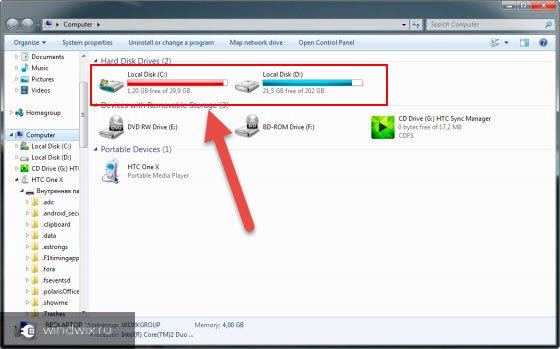
- save from “Local Disk C” to some other, for example, “D” or “E”, all the necessary data.
If the above is completed, you can proceed with the installation itself. I draw your attention to the fact that I myself installing Windows 7 on a computer from a flash drive no different from installing from disk. So, as soon as the computer started booting from bootable flash drive or disk, the message “Press any key to boot from CD or DVD” will appear in white letters on a black background. You need to immediately press any key on the keyboard for the installation to begin. This must be done immediately after this message appears. Otherwise, after a few seconds it will disappear and you will need to reboot. 
Installation starts with download necessary files, as shown in the picture below. 
Once the download is complete, the message “Starting Windows” will appear. 
After this, the start window for configuring the installation parameters of the Windows 7 operating system will appear. Here you can select the system installation language, time format and keyboard layout. You can leave everything as shown in the picture. 
Then a window will appear in which you need to click on the “Install” button. 
A window will appear with the message “Starting installation”. 
The system will prompt you to familiarize yourself with the terms of the license agreement. If you agree, check the “I accept the license terms” checkbox, and then click the “Next” button to continue installing Windows 7. 
The next step is to select the installation type. The system will prompt you to restore your existing operating system and install a new one. We need the second option - “Full installation”. We choose it. 
Now you will need to select a section ( local disk), on which Windows 7 will be installed. As a rule, this is “Local disk (C:)”. However, it needs to be formatted, that is, cleared of existing unnecessary information. To do this, click the “Disk Setup” button. 
Now left-click once on “Local Disk (C:)” so that it becomes active (selected), and then on the “Format” button below. Please note that out of almost 70 Gigabytes on this disk, only 24 Gigabytes are free. That is, 46 Gigabytes are occupied by various files of the old operating system. 
A message will appear warning you that formatting will delete all files stored on this local drive. We agree by clicking the “OK” button. 
Formatting will complete in just a few seconds. You can find out about the completion of formatting by the updated readings free space on "Local Disk (C:)". As a rule, the free disk space after formatting should be 0.1 Gigabytes less than the total disk space. In my case, out of 69.9 Gigabytes, 69.8 are free after formatting. It turns out that 100 Megabytes are somehow reserved by the system. So, make sure that “Local Disk (C:)” is selected and click the “Next” button. 
If you installed a new hard drive (hard drive), it will not be marked, as shown in the picture. Click the Disk Setup button. 
Select the unallocated space and click the Create button. 
A small field will appear in which you need to specify the size of the new local disk. For the Windows 7 operating system, I recommend choosing about 60-70 Gigabytes. But since the size is in megabytes, 70 must be multiplied by 1024, because one gigabyte contains 1024 megabytes. I got 71680 Megabytes. Enter this value on the keyboard in the “Size” field and click the “Apply” button. 
You can use the remaining unallocated space to create other local disks, the size of which you can choose as you like. So, highlight the created 70 GB local disk and click “Next” to continue installing Windows 7.
A window will appear showing the currently running this moment Windows 7 installation operations. Unpacking files takes from 3 to 20 minutes, depending on what storage media the Windows 7 operating system is installed from. As I already said, with solid state drives installation will be much faster. 
A message will then appear stating that you will need to restart your computer to continue with the installation. You can wait 10 seconds, and the system will do it itself, or you can save precious seconds and click on the “Restart now” button. 
The computer will begin to reboot. And here I recommend that you immediately go into the BIOS to configure the computer to boot from your hard drive (hard drive), and not from a flash drive or DVD. This can be done according to the principle described in the articles “How to configure the BIOS to boot a computer from a disk” and “How to configure the BIOS to configure a computer to boot from a flash drive.” Only in this case, instead of a DVD drive or flash drive, you will need to choose a HDD. Once you have installed in BIOS loading computer from the hard drive, press the “F10” key and agree to save the changes by pressing “Enter”. The computer will start rebooting from the hard drive - it will continue installation of the Windows 7 operating system from the "Starting Windows" message. 
The message “Setup is updating the registry settings” appears next. 
And behind it - “The installer is starting services.” 
Windows installation 7 is nearing completion, as evidenced by the information in the following picture. 
The system will need another reboot. The next time you start your computer, you will see the message “The installer is testing video performance.” 
This will be followed by the initial setup of the Windows 7 operating system, which requires your participation. You must enter a user name, for example, your own, and the computer name. To change the language from Russian to English, you can press the “Shift” and “Alt” key combination on the keyboard (that is, pressing these two keys simultaneously) or with the mouse on the panel at the top. If you entered necessary information, click the “Next” button. 
The system will prompt you to set a password for your account, without which no one will be able to boot your computer. You can create it right away, or you can do it later, after installing the Windows 7 operating system. I usually do not create passwords, since I am the only user of the computer. To continue setting up, click “Next”. 
This time you need to enter your Windows license key. If you purchased a disc, the key will be indicated on the package. If you downloaded Windows 7 from the Internet, do not enter anything; I suggest you activate the system after installation. Also uncheck the box “Automatically activate Windows when you connect to the Internet” and click “Next”. 
In the next window, if you have a licensed system with a key, select the first item “Use recommended settings.” If you purchased Windows 7 for free, for example, downloaded it from the Internet, that is, although your version is original, it is still pirated, hacked, select the last option “Delay decision”. Most people, including me, have just such a system. Click "Next". 
Now configure the date, time and time zone, then click Next. 
If your computer has LAN card or Wi-Fi, the installation system will prompt you to select the network to which your computer will be connected. I usually select "Home Network". 
The computer will begin to connect to the network. 
After this, the message “Preparing the desktop” will appear. 
And finally, the Windows 7 operating system you installed will boot for the first time. 
Congratulations, the installation is completed successfully. The next step is to activate the system, which you can learn about in the article “How to activate Windows 7.”
Greetings, friends.
Probably every computer or laptop user has encountered a situation when he realizes that it is time to reinstall the operating system. This is due to the emergence of difficulties at work, frequent mistakes and other unpleasant moments. But what if you don’t have a USB flash drive, a plastic disc to burn the image on, or the drive refuses to work? No need to worry. Today I will tell you how to hard drive install Windows. Many people don’t even suspect that such tools even exist.
It must be said right away that this option is only suitable for operating systems that are in working condition, since many movements will need to be made using the shell. That is, if you suddenly have blue screen– this method will not help.
Also, it's worth noting that this guide should only be applied to future installations of Windows 7 and above. modern versions. Moreover, it does not matter at all on what device the operation is performed. Therefore, it will not be possible to place Windows XP on a computer or laptop in this way. Because other mechanisms are used there.
For the procedure itself we need several tools:
A program for working with images - usually this DAEMON Tools . Personally, I generally use the built-in capabilities of Win.
Utility EasyBSD.
The very image of the operating system.
Step-by-step instruction( )
Important! It is advisable that before this moment your hard drive has already been divided into at least two partitions - for the system and files.
So, to install Windows 8 from an HDD, you need to perform a number of steps. First, let's create separate section for installation files:

Now to install Windows 10 or early version you need to properly prepare the files themselves:


Now you need to do this, the computer understands where it needs to boot from. This is exactly what the app is for. EasyBCD. The order of actions is as follows:

If in some situation you don’t understand something, you can just watch the video:
If you select "", you will see whether the entry appeared or not. In your case it should already be in place.

After the work has been done, close the application and restart the computer. As a result, a menu should appear from which users can select the right system. Then specify the installation disk "". As a result, the standard operating system installation procedure should start.
Bootice( )
The last chain of actions can be performed via Bootice. The program allows you not to create additional disk, but installs everything available.
We do the following:

It is worth noting that there is no need to indicate exactly where the file responsible for the correct loading of the system is located, since the application will find it itself.
Installation( )
This method does not require setting boot parameters through the BIOS, as is the case with using a plastic disk or USB drive. This approach is useful if suddenly the buttons on your keyboard do not work, allowing you to get to the right place.

In general, regardless of the version of the future OS, the process is almost the same.
It is important to remember that it is best to have one hard drive connected before starting the process. This will simplify the partition selection process. In addition, the equipment will consume less resources, which will generally have a positive effect on performance. Therefore, you should not install the OS on another one in this way HDD. The same can be said about placement on an SSD. Of course, if each action is performed correctly, no problems should arise. But even with the slightest mistake, there is a possibility of losing all the data on any of the partitions.
It is also worth noting that a similar procedure is possible with external hard disk. True, for this you will still need to run Win to set all the parameters. However, again, such procedures are not recommended, since by mistake you can simply delete data.

If you are using a connected device, you can set the boot setting from it in the BIOS and simply place a new shell on your laptop or computer. True, for this it is necessary to correctly record the OS on the external component. More details are available.
In any case, regardless of the chosen method, anyone can place a new one if they already have Windows on their computer.
Well, I hope this article will help you deal with problems on your device.
In general, I would like to recommend finding a compact portable USB device(today they cost minimal money) and write down the right system. Personally, I have three of these - for each latest version OS from Microsoft Corporation. Thus, I can insert a flash drive into the port at any second, and within two hours completely restore the computer’s functionality, while having a brand new shell.
I wish you good luck in your difficult work! Subscribe and tell others about the blog.
Turn off your computer and start it again. During the download process, press Delete key, F2, F10 or other (depending on the type motherboard). As a result, you will end up in BIOS settings computer. Go to the Boot section and select Boot Device Priority. You will see a list that determines the order in which your computer will boot. In the 1st Boot Device line, select the CDROM device, this way you indicate that the computer should first try to boot from a CD or DVD. When finished with the settings, press the F10 key and confirm saving the changes by pressing the Ok button. Wait until your computer restarts.Start installation
Insert the Windows 7 OS disc into the drive and restart your computer again. The Install Windows operating system installation program window will appear on the screen. Select Language to install, Time and currency format, and Keyboard or input method. Click Next.Selecting OS type
Select the type of operating system you want to install. It depends on the architecture of your computer (x86 or x64). This step is not always present during installation, its presence depends on the build installation disk Windows 7.Terms of use and installation method
In the Please read the license terms window, you can familiarize yourself with the terms of use of the Windows 7 operating system. After reading them, check the I accept license terms box and click Next. Next, you need to choose how to install the system. The Upgrade item provides for upgrading an already installed OS to new version. The second item – Custom (advanced) is intended for installation on a computer new system. Choose the second item. Please note that before installing a new operating system, it is recommended to do backup copy all data available on the hard drive.Installation process
Select hard section drive where you want to install the operating system and click Next. Next, the automatic system installation process will begin, during which the computer may be rebooted several times. This concludes the main part of the system installation.Additional settings
Once the installation of the operating system is complete, you will be prompted to additional settings: user credentials and passwords for them, a key for activating the license of an installed copy of the system, method of protecting the system, time and time zone, type of used computer network etc. All these settings are carried out sequentially, following simple instructions, displayed onTo boot from disk and install, you need to go into the BIOS of your computer, to do this you need to reboot and almost immediately press the DEL button; on some motherboards it is replaced with the F2 button, and even less often with some other buttons.
After the BIOS has opened, you need to install boot from your OS media (DVD or flash - depending on what media you use to install Windows 7). This section may be located in different sections - it depends on the manufacturer of the motherboard and BIOS, but it must contain the word BOOT: look for FIRST BOOT DEVICE, BOOT or BOOT DEVICE. As soon as you find it, install your media there first - either DVD or fLash disk- depends on what you have the Windows installer on.
After this, exit the BIOS, saving the changes (F10 key, then Y (confirming saving changes)).
If everything is done correctly, then after restarting the computer you will see:
- if you have the installer on DVD media, you will see the inscription " Press any key to load from CD…" (press any key to boot from a CD). When you see this message, you must press any key, otherwise Windows installation will not be started.
- if you used a flash drive, the installation will begin immediately
Start installing Windows 7.
If the installation has started, you will see the following picture:
Figure 1. Installer Windows 7 copies files from the media for further installation of the OS.
Afterwards the installation window will appear Windows 7 :

Figure 2. Starting installation windows 7: Select the language, time format and layout to be installed.
Here we choose necessary options, or leave everything unchanged and click Next).
The following window appears " install"Press the button.

Figure 3. Starting installation windows 7.
You can read the license agreement here Microsoft and press the button again Further"(Figure 4).

Figure 4. License agreement use windows 7.
The installer will now prompt you to select an installation type.
- System update will allow you to install windows 7 on top of the existing operating system.
- A full installation will allow us to choose existing section to install or reinstall separation of hard disk. The system will be completely installed, so this option more acceptable to us.
Therefore, let's choose " Full installation ( Extra options) " as shown in Figure 5.

Figure 5. Selecting the operating system installation type.
After going to full installation we will be presented with a list hard drives, on which you can create or select partitions for installation. In Figure 6 you can see the disk size 35 Gigabyte.
Personal experience suggests that for the section with windows 7 it is better to use a partition with a volume of at least 50 gigaby t - so to speak" for the future".

Figure 6. Selecting hard disk for further installation windows 7.
By going to the hard drive on which the installation will be performed, the operating system will offer you a list of partitions created on the disk. In our case, no partition has been created yet, so we click on the " create" (Figure 7) then indicate the volume of the created section (Figure 8) and click on the button " apply".

Figure 7.
Figure 8.
After this the installer windows will notify us that it will be created additional section for storage system files windows(Figure 9)

Figure 9.
Now you can click on the " Further", then Windows 7 installation will begin (copying all system files and the OS setup process).
As before, you can follow the stages of copying and installing the operating system (Figure 10)

Figure 10. Installing Windows 7.
After the OS component installation process is completed, the computer will restart. At this point you should remove DVD disk or Flash drive from the computer, since the installation will continue from the hard drive to which the necessary files were copied.
After reboot you will see a window indicating the installation is complete windows(Figure 11)

Figure 11.
In a few minutes, the installation will be completed and the initial setup of the operating system will begin.
When the setup process is complete, you will be prompted to enter a username to create your account, as well as the computer name for subsequent network identification(under this name your computer will be visible in local networks windows) (Figure 12).

Figure 12. Entering username and network name computer for the installed system.

Figure 13. Setting a password for the account (optional).
The next step is to activate your version windows using what you received from the site Microsoft(or another Internet resource from which you downloaded the distribution windows 7) key.
It is advisable to activate your copy the first time you connect to the Internet. windows 7.
If at the time of installation you do not have license key (Figure 14) - you can click "Further", after which it will continue initial setup OS, but you will have to activate windows within 30 days. Because windows 7 rc is available to users for free, license keys for installation are published on many sites, and you can also get a key on the site microsoft, along with the product distribution.

Figure 14. Entering license windows key 7.
The next step will be to offer to accept the recommended settings windows 7(Figure 15): automatic installation important updates etc.
In this case, it is better to select the “defer decision” option, after which you will be able to make a decision in the future automatic updates, and also select operating parameters Internet Explorer (if you use this browser).

Figure 15. Selecting initial windows settings 7.
Now all that remains is to check the time zone and date (Figure 16).

Figure 16. Setting the date and time.
In case if windows will detect and install successfully network adapters, then you will be asked to select the type of your network: read the proposed options and select the most suitable option for you (Figure 17)

Figure 17
After finishing this process the system will become available for operation (Figure 18). Installing windows 7 will be finished.

Figure 18. Desktop installed windows 7.
Download Very high quality version of Windows 7- simultaneously 32 and 64 bit, with a bunch of design themes you can right here:
This assembly is technical reasons It’s not downloading right now, but you can download it in flash drive format:
This version is from a friend of Idimm, everything unnecessary is cut, everything necessary is left, everything weighs 4 gigs, uploaded to a fast file hosting service, was installed on several dozen machines, no glitches, problems with drivers, etc. were observed on this build. So I highly recommend downloading this image, although old, updates can always be downloaded by Windows itself, and you will have 32 and 64-bit seven on your disk at the same time, which is very useful.
Now you have learned all the basic information about how to correctly install WINDOWS 7 on any computer. If you have any questions, or some point seems unclear to you, please write in the comments or on the forum.
Partially taken from esate.ru