Apache configuration. Installing and configuring the Apache server
Apache is the most popular free web server. As of 2016, it is used on 33% of all Internet sites, which is approximately 304 billion sites. This web server was developed back in 1995 as a replacement for the popular NCSA that server and fixed many of its problems. Rumor has it that his name comes from a patchy, as he was fixing NCSA errors. Now, it is a cross-platform program that supports Windows, Linux and MacOS and provides sufficient flexibility, customization and functionality. The program has a modular structure, which allows you to expand its functionality almost indefinitely using modules.
You can install Apache on Linux using a few commands, but the program provides a very large number of settings that can be changed, as well as modules that, when enabled, will work better. This article will cover installing and configuring Apache, we will use Ubuntu as the main system, but you can repeat these steps in any other distribution. We will look at not only installing the program itself, but also how to configure it, setting up apache virtual hosts, as well as the most useful modules.
On this moment, the most a new version programs 2.4; therefore, setting up Apache 2.4 will be considered. As I already said, on Linux the program is installed in literally a couple of commands. To install on Ubuntu, first update the system to the latest version:
sudo apt update
$ sudo apt upgrade
Then install apache2:
sudo apt install apache2
In other distributions, the program package is called either this or httpd and installing it will not cause you any difficulties.
After installation is complete, you need to add the web server to startup so as not to start it manually after turning on the computer:
sudo systemctl enable apache2
Apache setup
Gone are the days when Apache configuration was stored in a single file. But it’s correct: when everything is distributed in its own directories, it’s easier to navigate the configuration files.
All settings are contained in the /etc/apache/ folder:
- File /etc/apache2/apache2.conf responsible for basic settings
- /etc/apache2/conf-available/*- additional web server settings
- /etc/apache2/mods-available/*- module settings
- /etc/apache2/sites-available/*- virtual host settings
- /etc/apache2/ports.conf- ports on which apache runs
- /etc/apache2/envvars
As you noticed, there are two folders for conf, mods and site. These are available and enabled. When you enable a module or host, a symbolic link is created from the available folder to the enable folder. Therefore, it is better to perform settings in the available folders. Generally speaking, you could do without these folders, take everything and dump everything into one file the old fashioned way, and everything would work, but no one does that now.
First let's look at the main configuration file:
vi /eta/apache2/apache2.conf
Timeout- indicates how long the server will try to continue the interrupted transmission or reception of data. 160 seconds will be enough.
Keep Alive On- a very useful parameter, it allows you to transfer several files in one connection, for example, not only the html page, but also images and css files.
MaxKeepAliveRequests 100 - maximum amount requests per connection, the more, the better.
KeepAliveTimeout 5- connection timeout, usually 5-10 seconds are enough to load a page, so you don’t need to set any more, but you also don’t need to break the connection before all the data has loaded.
User, Group- user and group on behalf of which the program will run.
HostnameLookups- record domain names in logs instead of IP addresses, it is better to disable it to speed up work.
LogLevel- level of error logging. By default, warn is used, but to make the logs fill out more slowly, just enable error
Include- all include directives are responsible for connecting the configuration files discussed above.

Directory directives are responsible for setting access rights to a particular directory in the file system. The syntax here is:
Parameter value
The following basic options are available here:
AllowOverride- indicates whether .htaccess files should be read from this directory; these are the same settings files and have the same syntax. All - allow everything, None - do not read these files.
DocumentRoot- sets from which folder documents should be taken to be displayed to the user
Options- indicates which web server features should be allowed in this folder. For example, All - allow everything, FollowSymLinks - follow symbolic links, Indexes - display the contents of the directory if there is no index file.
Require- sets which users have access to this directory. Require all denied - deny everyone, Require all granted - allow everyone. You can use the user or group directive instead of all to explicitly specify the user.
Order- allows you to control access to the directory. Accepts two values: Allow,Deny - allow for everyone except those specified or Deny,Allow - deny for everyone except those specified..ru.
All these directives are not used here, since we are happy with the default values, but in .htaccess files they can be very useful.
We are left with the /etc/apache2/ports.conf file:
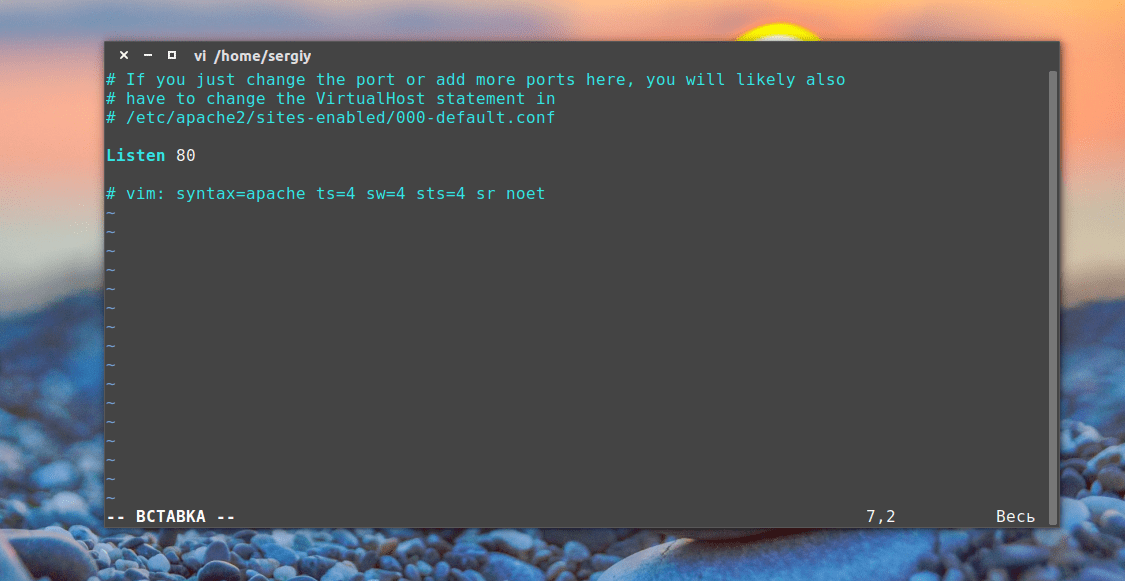
It contains only one directive, Listen, which tells the program which port it should work on.
The last file is /etc/apache2/envvars, you are unlikely to use it, it contains variables that can be used in other configuration files.

Setting up an Apache server via htaccess
.htaccess files allow you to configure your Ubuntu web server to behave in a specific directory. All instructions specified in this file are executed as if they were wrapped in a tag
It is important to note that in order for the server to read instructions from .htaccess, the settings for this folder in the main or virtual host file must not contain AllowOverride None for all settings to work you need AllowOverride All.
Otherwise, any configuration of the Apache server can be done here, from enabling modules to simply changing folder access. Since we have already considered all the parameters, let’s just give a couple of examples:
Order Deny,Allow
Deny from all
Denies everyone access to this folder, important to apply for configuration folders. Most often, .htaccess is used to work with the mod_rewrite module, which allows you to change requests on the fly:
RewriteEngine on
RewriteRule ^product/([^/\.]+)/?$ product.php?id=$1 [L]
But this is a very broad topic and is beyond the scope of this article.
Configuring Apache Modules
As I already said, Apache is a modular program, its functionality can be extended using modules. All available loader modules and module configuration files are located in the /etc/apache/mods-available folder. And activated in /etc/apache/mods-enable.
But you don't have to analyze the contents of these folders. Configuring Apache 2.4 by adding modules is done using special commands. You can view all running modules with the command:

You can enable the module with the command:
sudo a2enmod module_name
And disable:
sudo a2dismod module_name
After enabling or disabling modules, you need to restart apache:
sudo systemctl restart apache2
When one of these commands is executed, a symbolic link to a module file with the extension load is created or deleted in the mods-available directory. You can look at the contents of this file, there is only one line. For example:
vi /etc/apache2/mods-available/deflate.load

This means that the module could be activated simply by adding this line to the apache2.conf file. But it is customary to do just that to avoid confusion.
The module settings are located in the same folder, only in a file with the .conf extension instead of load. For example, let's look at the settings of the same module for deflate compression:
vi /etc/apache2/mods-available/deflate.conf

Files in the conf-available folder, these are the same modules, only they are installed separately from apache, these can be configuration files for inclusion php module or any other programming language. Everything works exactly the same here, only the commands for enabling and disabling these modules are slightly different:
a2enconf module_name
a2disconf module name
As you have seen, enabling modules is very simple. Let's enable a few necessary but not enabled by default modules:
sudo a2enmod expires
$ sudo a2enmod headers
$ sudo a2enmod rewrite
$ sudo a2enmod ssl
The expires and headers modules reduce the load on the server. They return a Not Modified header if the document has not changed since the last request. The expiries module allows you to set the time for which the browser should cache the received document. Rewrite allows you to change requested addresses on the fly, very useful when creating CNC links, etc. And the last one to enable support for SSL encryption. Don't forget to restart apache2 after completing the settings.
Configuring Apache Virtual Hosts
It would not be entirely convenient if only one website could be hosted on one physical machine. Apache can support hundreds of sites on a single computer and serve the correct content for each one. Virtual hosts are used for this. The server determines which domain the request is coming to and serves the required content from the folder of this domain.
Apache hosts settings are located in the /etc/apache2/hosts-available/ folder. To create a new host, just create a file with any name (it’s better to end with the host name) and fill it with the necessary data. You need to wrap all these parameters in a directive VirtualHost. In addition to the parameters discussed here, the following will be used:
- ServerName- primary domain name
- ServerAlias- additional name by which the site will be accessible
- ServerAdmin- administrator email
- DocumentRoot- folder with documents for this domain
For example:
vi /etc/apache2/sites-available/test.site.conf

Website hosting
Can be implemented in four ways:
By default in the /var/www/html folder. Access is http://localhost/
Main hosting settings. For example, http://localhost/phpmyadmin
In any folder using the virtual hosts module. For example, http://mysite/
In the user's public_html folder (userdir module). For example, http://localhost/~username
Installation
To install Apache, run in a terminal:
sudo apt-get install apache2Settings
To apply changes in settings, you need to restart the Apache daemon: sudo service apache2 restart
In Ubuntu final file settings (apache2.conf) is divided into several files located in different subdirectories. More details are written in the file comments. apache2.conf.
/etc/apache2/ |-- apache2.conf | `-- ports.conf |-- mods-enabled | |-- *.load | `-- *.conf |-- conf-enabled | `-- *.conf `-- sites-enabled `-- *.conf
Module settings are located in the directory /etc/apache2/mods-available. To enable or disable modules (module settings), use the appropriate a2enmod or a2dismod commands. Example of module connection:
sudo a2enmod< mod-name>Your settings should be saved to files located in the directory /etc/apache2/conf-available. To enable or disable your settings, use the appropriate a2enconf or a2disconf commands. An example of connecting a file with your own settings:
sudo a2enconf< config-name>Virtual host settings should be saved to files located in the directory /etc/apache2/sites-available. To connect virtual hosts, use the appropriate a2ensite or a2dissite commands. Example of connecting a virtual host:
sudo a2ensite< site-name>Default encoding
To specify the default encoding, use the AddDefaultCharset directive in the file /etc/apache2/conf-available/charset.conf(or uncomment the corresponding line):
AddDefaultCharset UTF-8
Virtual Hosts
Virtual host configuration files are stored in /etc/apache2/sites-available/*.conf. By default, Apache already has one configured virtual host. Its settings are in the file 000-default.conf. You can use this virtual host as an example.
Example of setting up a virtual host:
Name the configuration file with your host name host1.server1.conf and save.
After creating the settings file, add your host name to /etc/hosts:
127.0.0.1 host1.server1
To enable the created virtual host, use the a2ensite utility:
sudo a2ensite host1.server1The host is disconnected similarly to the a2dissite utility:
sudo a2dissite host1.server1Modules
mod_userdir
The mod_userdir module allows you to use directories located in users' home directories to store web pages. By default, Apache looks for requested pages in the directory ~/public_html
mkdir ~/ public_htmlTo enable mod_userdir run:
sudo a2enmod userdirand add required user to the www-data group:
sudo adduser $USER www-datathen restart Apache:
The pages will be accessible at http://localhost/~username, where username is the username.
CGI
If you want to run cgi scripts on the server, connect the cgi module with the command
sudo a2enmod cgiBy default, cgi scripts are placed in the directory /usr/lib/cgi-bin, but you can place them anywhere by specifying this in your virtual host settings, or globally for all hosts in the file /etc/apache2/conf-enabled/serve-cgi-bin.conf.
If your server operates on an external network, then for security reasons it is strongly recommended to place cgi scripts outside the root directory of the virtual host
Setting up HTTPS in Apache
The Apache web server fully supports HTTPS. To enable HTTPS support on an already installed Apache, you must do the following.
Creating a key and SSL certificate
The use of self-signed certificates, although it protects against passive eavesdropping, does not guarantee clients that the server is exactly the server they need. The advantage of self-signed certificates is that they are free. A certificate signed by a Certificate authority costs money.
To create a key and certificate, enter the command:
Openssl req -new -x509 -days 30 -keyout server.key -out server.pem
To the question “Enter PEM pass phrase:” we answer with the password, confirm and remember.
We answer all subsequent questions randomly, you can simply click on Enter, agreeing with the proposed options, only answer the question “Common Name (eg, YOUR name):” with the name of the site for which we are creating a certificate, for example www.example.com.
After answering all the questions, two new files should appear in the directory - server.pem (key) and server.crt (certificate).
To use the generated key, we need to know the password we entered, and Apache will ask us for it when loading, but why do we need unnecessary questions from the daemons? :) Therefore, we remove the password from the key:
cp server.key( ,.orig) openssl rsa -in server.key.orig -out server.key rm server.key.origLet's copy them to /etc/ssl and assign read rights to the key file only to the administrator:
sudo cp server.pem / etc/ ssl/ certs/ sudo cp server.key / etc/ ssl/ private/ sudo chmod 0600 / etc/ ssl/ private/ server.keyApache setup
First you need to activate mod_ssl:
sudo a2enmod sslAnd then enable the site's default HTTPS settings:
sudo a2ensite default-sslNow you need to edit the file with HTTPS settings default site, indicating in it the paths to your certificates. The file itself is called /etc/apache2/sites-enabled/default-ssl (or /etc/apache2/sites-enabled/default-ssl.conf).
SSLEngine onadd line
SSLProtocol all -SSLv2to disable the use of the legacy SSLv2 protocol.
# Server public certificate SSLCertificateFile /etc/ssl/certs/server.pem # Server private key SSLCertificateKeyFile /etc/ssl/private/server.keyNow just restart Apache:
sudo service apache2 restartAnd if all parameters are specified correctly, your sites will become accessible via HTTPS.
The HTTPS protocol operates on port 443, so if the server is located behind a gateway, then you need to forward this port to it.
Redirecting HTTP requests to HTTPS
If you want to disable the use of HTTP, then the most sensible thing to do is to redirect all HTTP requests to pages to their HTTPS address. Let's do this using mod_alias. If it is not enabled, enable it:
sudo a2enmod alias sudo service apache2 restartThen we change the file /etc/apache2/sites-enabled/000-default , which is responsible for the default virtual host for HTTP requests. Add a directive to this file
Redirect / https://example.com/In this case, all directory settings can be deleted, since your sites will still not be accessible via HTTP.
That's it, now restart Apache again and make sure that when you access via HTTP you are automatically redirected to the HTTPS page.
Apache is the most popular web server on the Internet, serving more than half of active sites.
In this article, we will look at common configuration files and basic Apache settings in Ubuntu system/Debian
Note: Apache files differ depending on the distribution, so this article is not suitable for RHEL users.
Installing Apache on Ubuntu/Debian
If the Apache web server is not yet installed, use the commands:
sudo apt-get update
sudo apt-get install apache2
To verify that the installation was successful, open your browser to the IP address of your server. The Apache welcome page should appear on your screen:
It works!
This is the default web page for this server.
The web server software is running but no content has been added, yet.
Apache File Hierarchy
In Ubuntu and Debian Apache stores configuration files in the /etc/apache2 folder.
cd /etc/apache2
ls -F
apache2.conf envvars magic mods-enabled/sites-available/
conf.d/ httpd.conf mods-available/ ports.conf sites-enabled/
This folder contains a number of simple text files and subdirectories. The most important of them:
- apache2.conf: main server configuration file. Almost all configurations can be performed in it.
- ports.conf: This file specifies the ports that virtual hosts listen on. Check this file when setting up SSL.
- conf.d/: This directory controls certain aspects of Apache configuration. For example, it is often used to define SSL configuration and standard security policies.
- sites-available/: This directory stores all available virtual hosts, which determine what content will be served on the site. These hosts are not active.
- sites-enabled/: This directory defines active virtual hosts. Typically it contains symbolic links to files defined in the sites-available directory.
- mods-/: These directories work in the same way as sites-available and sites-enabled. They store modules.
As you can see, Apache configurations are not limited to the main configuration file, but are distributed across several files and directories. This configuration structure can be expanded with new files.
Apache configuration file
Basic Apache settings are stored in /etc/apache2/apache2.conf.
This file contains three main sections: Apache global settings, default server settings, and virtual host configurations.
On Ubuntu and Debian, most of the file is dedicated to global settings, and the default server configuration and virtual host settings are handled at the end of the file using the Include directive.
At the end of the file you will find many Include settings. They define modules, add a ports.conf document, certain files from the conf.d/ directory and setting up virtual hosts from the sites-enabled/ directory.
Let's focus on the global settings of the Apache web server.
Apache Global Settings
This section examines important parameters global Apache settings.
Timeout
By default, this parameter is set to 300. This means that the server has a maximum of 300 seconds to complete each request. In most cases, this value is very large, and it is recommended to reduce it to 30-60 seconds.
KeepAlive
If this setting is On, the server will allow the client to request multiple objects within a single connection. If the parameter is set to Off, then each new request will create a custom connection. This behavior can lead to overload of a site with high traffic.
MaxKeepAliveRequests
This setting allows you to define the maximum number of requests per connection. This allows you to increase Apache performance.
A value of 0 will allow the web server to process an unlimited number of requests within a single connection.
KeepAliveTimeout
This parameter sets the time interval between requests. If the client has not created another request within the specified time. The web server will terminate the connection. If this client subsequently makes a request, the server will create a new connection.
MPM Settings
To find out which modules Apache was compiled with, open a terminal and type:
apache2 -l
Compiled in modules:
core.c
mod_log_config.c
mod_logio.c
prefork.c
http_core.c
mod_so.c
As you can see, in this case the web server is compiled with the prefork.c module and the apache2.conf file.
Virtual Host Configurations
The default virtual host is located in the default file in the sites-available directory.
To get acquainted general format virtual host, open this file:
sudo nano /etc/apache2/sites-available/default
ServerAdmin webmaster@localhost
DocumentRoot /var/www
Options FollowSymLinks
AllowOverride None
Options Indexes FollowSymLinks MultiViews
AllowOverride None
Order allow,deny
allow from all
. . .
By default, the virtual host processes requests on port 80.
This does not mean that the web server will necessarily process every request on that port. Apache can override configurations.
Top Level Virtual Host Settings
These settings are set in the Virtual Host section and apply to the entire virtual host.
The ServerAdmin parameter specifies the contact address Email, which will be used in case of problems on the server. This address can be pasted into the error page. To do this, the ServerSignature parameter (in the /etc/apache2/conf.d/security file) must be set to Email.
The ServerName directive specifies Domain name or server IP address. This is a per-virtual host setting that can override the default settings if it matches the ServerName value.
The ServerAlias parameter allows you to add site aliases - alternative names and paths leading to the same content. For example, a domain alias is often set to www.
DocumentRoot specifies the directory in which the web server stores the content of this virtual host. On Ubuntu, the default for this is /var/www.
Directory settings
The virtual host configuration has a special section for configuring the processing of individual file system directories. These settings can also be overridden.
First, the virtual host proposes a set of rules for the / directory (root directory). This section will provide basic virtual host configuration as it relates to all files that are served on the file system.
By default, Ubuntu does not impose any restrictions on the file system. Apache recommends adding a few standard access restrictions, for example:
Options FollowSymLinks
AllowOverride None
Order Deny,Allow
Deny from All
This will block access to all content unless subsequent directory definitions indicate otherwise.
The AllowOverride parameter allows you to override configurations using .htaccess files. To override settings, the .htaccess file must be in the content directory. By default this feature is disabled.
Alias and ScriptAlias settings
Sometimes the Alias and ScriptAlias parameters appear before the Directory section.
The Alias directive allows directories outside of DocumentRoot to be added to the content being served.
ScriptAlias works in a similar way, but contains the path to the directories with executable files.
For example, such a line in the virtual host for example.com will allow access to content in the /path/to/content/ directory when requesting example.com/content/.
Alias /content/ /path/to/content/
Remember that when opening access to additional directories, you need to set limited privileges on them.
Enabling Sites and Modules in Apache
Once you have created the virtual host file, you can enable it. To do this, you need to create a symbolic link to a file in the sites-enabled directory:
sudo a2ensite virtualhostfile
Once your site is enabled, restart Apache to allow the web server to re-read the configurations:
sudo service apache2 reload
To disable the virtual host, you need to remove the symbolic link from sites-enabled:
sudo a2dissite virtualhostfile
After this you need to restart the web server again:
sudo service apache2 reload
You can enable and disable the Apache module using the following commands (respectively):
a2enmod
a2dismod
They work the same as the previously mentioned a2ensite and a2dissite commands. After enabling or disabling the module, you need to restart the web server.
Conclusion
This article only covers the basic configuration of Apache web server files. Apache's feature set can be greatly expanded using modules.
If you need more information about the web server, please contact
Professional development always focuses on its own tools - this is a guarantee of reliable and efficient fulfillment of obligations. Own hosting and servers for various purposes in a range of popular configurations expand the scope of tasks solved, increase the security and confidentiality of developments.
Native HTTP: Apache, PHP, MySQL
Apache web server has been firmly in the lead since the last century, as it provides fast, reliable and safe operation. A physical machine and server running Linux or Windows is the foundation, HTTP is the add-on, although essentially it is a data transfer protocol. A Windows machine can be used as a server, but preference is given to the Linux family.
Apache on Windows is local option, used on a single computer to duplicate the development of resources hosted on external servers. Setting to is acceptable, but not very popular. Configuring Apache on CentOs gives more options and is used to organize servers on local and global networks.
It is believed that Apache servers serve more than 50% of all active web resources, the remaining share comes from similar products from Microsoft, Sun, etc. Actually, the physical server and its operating system can be anything. The HTTP server is installed on a ready-made platform and runs in parallel with other applications on it. Apache is considered native to the entire Linux family, but in each specific case it has its own characteristics.
Freeness, simplicity, and reliability distinguish Linux systems and their applications. It doesn't matter what you use: installing and configuring Apache on Ubuntu is not much different from CentOs, Debian or FreeBSD. The saturation of a particular operating system with additional software often plays a role.
The Linux family is small in terms of the number of “relatives” on the line of one or another system kernel. The differences are greater social character- in the sense of developers' attachment to the formulation and implementation of the operating system's capabilities.
In reality, to solve a specific problem of raising hosting, you need to decide on the necessary functionality, required performance, conceptual priorities and a specific choice of Linux representative, or choose Windows Server.
Shifting local development priorities
Difficult to evaluate the role global network in the development of programming, but it is easy to notice the real shift in the center of gravity: local applications It has become customary to execute as a web resource. Just write a program for local computer- these are drivers, antiviruses, small projects with simple functionality. Programming language... VBA, although C/C++ or C# can be used.
Any information project is a web resource in local network company, which may be partially accessible from the global network, for example, to coordinate the actions of employees outside the office who are on the road or on a business trip.
MySQL, PHP, Apache: setting up for a local application means a completely different dynamic of the application and the required functionality. Modern companies, regardless of size, number of employees and field of activity, are seriously considering Internet programming, both local and global.

At the same time, the local can be distributed: the company’s offices can be located anywhere, but this is not the Internet, but a distributed local network of the company.
MySQL, PHP, Apache setup in local form:
- easily duplicated across network computers;
- provides the ability to dynamically change the active component or compare it with a sample to evaluate hacking attempts;
- gives reason to develop a security system that is free of the risk of being attacked by classical network methods.
Considering that MySQL and Apache in a Windows environment are services, and PHP code is plain text processed by a tool (PHP interpreter) called in right moment time by an HTTP server, then the level of changeability, mobility and portability of the code will be significantly higher than that of local development tools.
Preparing to install Apache
Back in the era of the “beginning of the beginning,” the operating room Unix system defined unspoken principles of loyalty. Since then, everything that was done on Unix-like systems was automatically translated to other platforms. Setting up Apache on Windows is extremely simple, but solving serious problems will require good qualifications and a detailed understanding of the HTTP server configuration.
First of all, you need to download the latest version of the server (today it is version 2.4.33 dated March 17, 2018) from the official website in zip archive format. It should be borne in mind initially that server versions are numerous and offered on many third-party resources, so it is important to choose an official implementation hosted on a trusted web resource.

Previously, it was popular to install a server using a special installer. Now it is common practice to simply deploy a zip archive. This is simpler and makes it possible to understand the essence of the configuration process, which is very important and subsequently allows you to optimize the server for the required load and functionality.
Editing a Configuration File
The server configuration is determined by a set of configuration files located in the conf folder. Apache's main configuration file is httpd.conf.
In the vast majority of cases, it is necessary to make changes to the main file, clarify the contents of the files responsible for ssl and virtual hosts. Other adjustments are usually made along the way as problems arise or problems are solved. Basically, further settings are related to optimizing the operation of Apache or expanding its capabilities.
To successfully launch the server, it is enough to edit only one line (in order - 38th) - and the Apache setup is complete.

In previous versions of the server configuration, it was necessary to make numerous changes to suit the real situation, but now there is a “universal” SRVROOT variable. It's worth pointing it out correct value(path to the server location), and everything will work immediately.
Server placement procedure
The location of the server needs to be considered carefully. Apache itself is interesting, but when it is equipped with PHP and MySQL, it is doubly interesting. It's better when everything related to web development is in one place. You can agree to the default paths, but modern programming is not so ideal in its implementation, so you will have to keep your finger on the pulse clearly and often. In addition, when choosing a convenient location, all initialization and configuration files, as well as logs on the operation of installed products, will be available.
The downloaded official Apache zip archive needs to be deployed in the selected location, placing the tool and the job separately. IN in this example the C:\SCiA folder is a tool (Apache24, PHP, MySQL, ...), and the SCiB folder is the work, in fact, of sites that are created, maintained or modernized.

As a result of the first stage of work, only the subfolders bin, cgi-bin, conf, error, ... with all their contents end up in the C:\SCiA\Apache24 folder.
Editing the hosts file
The second step is to properly configure hosts file- an indication of which IP addresses are on this computer mapped to which names. If only one website is being developed or maintained on a computer, then you don’t have to change anything.
Base IP - 127.0.0.1 usually always points to localhost. The working hosts file is located at c:\Windows\System32\drivers\etc and looks like the one shown below.

To place the hosts file in the right place, you need to use the command line in administrator mode. You can prepare the correct contents of the file anywhere in the computer’s file system, but you can write it to the address c:\Windows\System32\drivers\etc only with a tool that has administrator rights. The easiest way to do this is through the command line.
Installing Apache Server
Nothing could be simpler. Just run the command line as an administrator and go to the C:\SCiA\Apache24 folder. Because this is the way to Windows system, then forward slashes are used. In a specific case, the path may be different. But if you can still somehow experiment with the name of the folder to host the holy trinity - Apache, PHP and MySQL, then changing the folder names for each of them is impractical.

In this case, the server archive is deployed in the C:/SCiA/Apache24 folder, therefore, you need to write the command in the bin folder:
- httpd.exe -k install
The server will test the configuration file and install itself. Most likely, there will be minor errors, but if you edit the configuration file correctly, then all errors will be insignificant and can be quickly corrected.
Command line window (1) - installation of the service, window (2) - list of services in which the server is declared, window (3) - source file index.html, located at C:/SCiB/localhost/www, window (4) - the result of the server's operation.
In this example, an intentional mistake was made: instead of setting the value of the SRVROOT variable, numerous edits were made “the old fashioned way”: everything was changed manually. This is not the best solution. Before applying knowledge, you should familiarize yourself with current version product. As a rule, things change quickly, and knowledge should be applied “with skill and understanding of the current situation.”
Practice of deploying a zip archive
Modern websites are not always written using content management systems. There is a lot of manual labor. The problem of transferring the site to another hosting caused good decision- zip archive. We collapsed the content in one place and expanded it in another.

Having an installer is a good practice, but the dynamics of modern information technologies do not allow time for writing beautiful installations. Using the installation via zip archive deployment is modern, practical and convenient. In this option, configuring Apache is limited to changing the configuration files.
When installing the server, it is important to specify:
- Where is he located;
- where the web resource is located (localhost);
- using ssl;
- virtual hosts.
The last position is relevant when the server is supposed to develop or maintain several resources at once. For a real developer, this is a mandatory decision: even if he ensures the operation of one site, it would not be superfluous to have a backup option.
Gentleman's sets
The ease of deploying a zip archive is obvious, Apache (installation and configuration) is just two or three clicks. However, the result when installers were popular was equivalent. The developer simply spent more time developing the next version of his product. Installing the server, server language and database is essentially just a collection of files, starting services, a hosts file and default paths in the operating system path variable.
The appearance of "Denver" and similar gentleman's development kits was a revolutionary step in the area of simplicity and convenience, but one should not be mistaken. Revolution and programming are absolutely incompatible things. The first is the child of a conflict and its stormy resolution, the second is a serious matter that requires absolute calm, punctuality, accuracy, consistency, attentiveness, safety, and reliability.
Setting up an Apache server is a serious procedure that needs to be treated extremely carefully and everything done so that tomorrow you can change and clarify something.
In most cases, the development of web resources is a fairly lengthy process in which the requirements for services (Apache, PHP, MySQL, ...) change quickly, but there is always time to understand the next task and its optimal solution. But this is not a reason to go along with gentlemen's sets. Time flows, but the gentleman does not change, this is a much more compelling argument than the “Denver” declaration - it is simple, fast and accessible.
Multiple sites - one server
Configuring Apache 2.4 for the sake of one host is an unjustified luxury. Despite its compact design, this server bears a huge weight of responsibility for most of the active web resources on the Internet. In addition, not all resources have a representative part and are visible on the network.
The server can be used as a database, as a point of information transfer, as a filter, as a parser, as a working mechanism in a more global information process. As a result of the above, setting up Apache virtual hosts is almost always a mandatory procedure.
One server can support as many web resources as you like; to do this, you need to uncomment line 501 in the httpd.conf file:
- # Include conf/extra/httpd-vhosts.conf
and describe all the necessary hosts in the file
- extra\httpd-vhosts.conf.
You may need to clarify which ports and IP the server listens to, but this is a separate topic; for the first time you can limit yourself to what you have.

It should be noted that in the example, for the convenience of describing real virtual web resources (and there are many of them), a variable (DOCROOT) with the path to shared folder all web resources accessible through the installed server.
Setting up Apache SSL is available in a similar way. In the httpd.conf file, you just need to leave “as is” lines 524 to 531, which are responsible for the operation of SSL.
The Simplicity and Complexity of Apache
The times when setting up a server was truly a difficult task are long gone. Today, setting up Apache is a very simple procedure that does not require special qualifications from the developer.
Three simple steps:
- expand archive;
- change the configuration file;
- install the server.
As a result, Apache is fully functional. If you do not take into account the intricacies of the process of running a server at maximum load or perform local development on a Windows computer, no additional knowledge is required.
Difficulties may arise on Linux systems. Significantly different understanding of the file system, user and group rights, as well as the organization of the process of interaction with other applications require greater competence and understanding from the developer of how Linux computers work.
Setting up Apache on any Linux system opens up much more possibilities for the developer and gives access to the local network and the Internet. According to established tradition, a Windows computer is a local workstation, and the server is internal. A Linux computer is a local network node or a point in the Internet space.
Professional developer environment
Apache is a fundamental building block of the Internet that can be easily configured, used, and becomes the backbone of a company.
This logic assumes the presence of at least one server on the network on the CentOS, Ubuntu, FreeBSD platform, and Windows workstations. It is optimal to have two Linux servers (main and auxiliary), Apache setup for a local computer in a Windows environment. In the event of a virus attack or an unforeseen situation, the auxiliary server will replace the main one, and the main one will be used for repair and restoration. Replace local Apache installation with workstation(under Windows) can be from the archive.
This trivial solution can be clarified and supplemented in real practice. The size of a company's information flows can determine the desired configuration and number of servers required. Actually, Apache is designed to work under load, but nothing prevents you from distributing the responsibilities of one server over several. A solution that takes into account the characteristics of a specific company is always more promising than adapting a third-party option.
andew
2016-07-23T17:54:43+00:00
2017-08-25T04:44:37+00:00
6254
This article provides an overview of the configuration web server Apache in Ubuntu server with the standard LAMP installation in Ubuntu. The logic and structure of organizing web server configuration files is given. The purposes of the main server configs are described. Basic ones are given Linux Ubuntu commands for manipulating the configuration, configuring and managing the Apache web server. Considered the default site, which is created during the Apache installation process. This article will be useful to you when setting up and administering your LAMP server.
How to add support PHP as a script processor in Apache on Ubuntu or Windows described in detail in the article Installing PHP7 on Windows In chapter Settings.
Apache Default WEB Page
During a standard web server installation Apache V Ubuntu server a test site is created, which serves to test the functionality of the web server after its installation. This site, by default, is configured to allow browser access only to files and directories within /var/www directories Ubuntu server. If, upon completion of installation Apache, you will open a web page in your browser at the address IP your web server, you will see home page servers - Apache2 Ubuntu Default Page. This will, first of all, say that Apache installed successfully and works. This page is physically located on the server in a file /var/www/html/index.html and the default virtual host config is responsible for its configuration and output in the browser ( /etc/apache2/sites-available/000-default.conf), which defines the virtual host (site) for the directory /var/www/html and is created during server installation Apache. Accordingly, if you place your files in this folder, they will be processed by the web server. Also on this Default Page in section Configuration Overview you will see a schematic representation of the server configuration file structure. Here you need to understand that the structure, names and locations of configs Apache V Ubuntu differ from the generally accepted scheme, which is done for the convenience of server management. But there is one caveat here, which is that if you were not previously familiar with organizing directories in the home directory Apache on Ubuntu, then this diagram can only confuse you, because it does not represent all folders, but only the directories in which symbolic links to activated configuration files. Therefore, for a more correct understanding, see the complete directory and file diagram of the home directory of the Apache web server located below in this article. Among the valuable things in the Apache web page section are links to man"s Debian for teams a2enmod, a2dismod, a2ensite, a2dissite, a2enconf, a2disconf, which are used to activate and deactivate certain types of configuration files and will be described in detail. It also says here that to send commands to the web server ( started/stopped etc.) need to contact /etc/init.d/apache2 or to apache2ctl, which is also a feature of the server in Ubuntu. On the Ubuntu server in the file /usr/share/doc/apache2/README.Debian.gz you can find complete documentation for Apache.
Apache Home Directory on Ubuntu
Default, home web server directory Apache V Ubuntu be on /etc/apache2/ paths in the file system. All configuration files are located in this directory and its subdirectories. Apache. You can change the path value of the web server's home directory using the ServerRoot "/etc/apache2" directive in the main config apache2.conf. There, by default, the ServerRoot directive is commented out, which is equivalent to its value as "/etc/apache2" ( There should not be a trailing slash in this directive!). Home directory path value Apache(ServerRoot) is necessary for the server to know where in the file system it should look for its configuration files. Also, the ServerRoot value can expose oneself by the server in some directives expecting as an argument path in the file system Ubuntu. Therefore, in such cases, if the path is specified without primary slash, then Apache will take it as relative path towards your home directories. So, for example, if you specify the AuthUserFile .htpasswd directive, then in this version Apache will interpret the specified path as relative and turn it into /etc/apache2/.htpasswd, substituting in front the value of your path home directories.
Apache Home Directory Structure on Ubuntu
In progress standard WEB installations servers Apache V Ubuntu The following structure of files and directories in the home directory of the web server is created:
/etc/apache2/ ...................................Apache home directory in Ubuntu - ServerRoot |-- conf-available...................directory, contains different configs | `-- charset.conf ...................file for specifying encodings | `-- localized-error-pages.conf .....file for setting error pages | `-- other-vhosts-access-log.conf ...file for specifying virtual host logs | `-- security.conf ......file for security directives | `-- serve-cgi-bin.conf ......file for CGI configuration directives |-- conf-enabled activated configs from conf-available| `-- @ ........................... LINKS to activated configs from conf-available |-- mods-available...................directory, contains configs of installed Apache modules | `-- ...........................available configs of Apache modules |-- mods-enabled........................ directory, contains LINKS to activated module configs from mods-available| `-- @ ..................... LINKS to activated configs of Apache modules |-- sites-available....................directory contains available virtual host configs | `-- 000-default.conf ...............default virtual host file for port 80, created when Apache installations| `-- default-ssl.conf ...............default virtual host file for port 443, created during Apache installation |-- sites-enabled.......................directory, contains LINKS to activated virtual host configs from sites-enabled| `-- @000-default.conf ...............link to the activated virtual host config |-- apache2.conf........................MAIN config of the Apache web server in Ubuntu |-- envvars .............................file with path settings for the Apache environment |-- magic ...............................Script file for the module mime_magic(this module is not active by default) |-- ports.conf ........................... file for the task ports on which Apache connections will be acceptedThe examples given are presented from OS Ubuntu server 16.04 LTS, however, the same will happen in other versions and Ubuntu distributions both in the server version and in the desktop version.
Apache configuration logic
As mentioned above, in Ubuntu used excellent from the original organizational structure of configuration files and directories for the web server Apache.
Firstly, V Ubuntu, configuration Apache divided into a bunch of different configs according to their functional purpose. For example, directives specifying port for the server, placed in a separate file ports.conf. Directives responsible for certain server security parameters are placed in a file security.conf. Thus, the directives are grouped according to their own sense into separate configuration files. This is quite logical and convenient when reading, editing, activating and deactivating configs. With this approach, each individual file becomes smaller and is highly specialized part of the configuration. However, you need to understand that such fragmentation is done solely for convenience and automation of setup and technically, if you want, you can write all the directives and settings in one file, it’s just that working with such a file will not be so convenient.
Secondly: center the entire configuration is main config Apache web servers - apache2.conf file. It is this file in first queue searches and reads web server Apache at startup or reboot. And already in this file using directives Include, where they are specified, all other specified configs are connected and loaded. This way all configuration files are combined into single web server configuration and this happens when Apache reads files by in order their connections, starting with main config. An important note follows from this - order following the directives in the configuration Apache and correspondingly, order connecting config files is important, since directives read by the server later can override directives read by it earlier. You need to remember this when setting up the server.
Third: if you look at the directory structure home directories Apache, then you will see three couples directories with names like: directory_prefix-available/enabled. This logical structure is designed to distribute your configs across three groups, based prefix directory names, where conf-* these are directories for your other configs, mods-* these are directories for Apache module configs and sites-* these are the directories for your configs virtual hosts. The second part of the name of these directories -available/-enabled logically indicates those available in general and only active at the moment the configs. Yes in directories *-available everything is stored available to use configuration files, and already in directories like *-enabled symbolic links (shortcuts) only to those configs from *-available directories that should be read by the web server when loading the configuration. Apache reads only directories like *-enabled, therefore, only those configs for which there are in these directories are applied links. This approach provides an additional level of convenience in that it allows you to store all your configs in directories in the server's home directory, and only use necessary into current coins.
Fourth: web server configuration directives Apache have context() in which they operate. Concept context directives indicates where, at what level and in what config this directive is Maybe be used. The same directive can be allowed for use in only one type of context, or in several types of context. If a directive is used/written in a context that is invalid for it, then there will be error Apache web server when loading configuration, which will cause it to stop. Therefore, when writing your directives, always pay attention to the context of their application, which is always indicated in the documentation for the directive on the Apache website.
Fifthly: you need to understand that Apache reads and applies all active configs only when start or reboot. After startup, Apache no longer rereads the configuration. The exception is the file .htaccess, which is a local level file catalog site and re-read when everyone appeal to this catalog site. Accordingly, if you have made configuration parameter changes outside .htaccess file, then for them to take effect it is necessary reboot web server Apache.
Types of directive context:
- server config - global directive level for use in general server configuration files outside
- virtual host- level virtual host to apply the directive in
- directory- level catalog, the directive must be used inside containers
- .htaccess- level local directory site, the directive can be applied in a .
Configuration Management Commands
For convenience and automation of configuration management Apache V Ubuntu There are special commands, using which you can include or exclude certain configuration files from the server configuration, start and reboot the server, view and change the settings of environment variables Apache and much more.
Configuration Enable/Disable Commands
To activate and deactivate certain configs in Ubuntu are provided teams assistants in tune with available/enabled And prefix catalogue. For example, the command a2enconf, which can be deciphered as apache2-enable-conf, activates the configuration file specified in its argument from conf-available directory by creating a symbolic links in the catalog conf-enabled. Team a2disconf performs the opposite action, i.e. removes this link. Similar logic applies to other commands: a2enconf/a2disconf, a2enmod/a2dismod, a2ensite/a2dissite. But you can also manually create/delete symbolic links to the configs you need in directories like *-enabled.
Attention: for config changes to take effect, you need to execute reboot WEB server configuration Apache.
a2enconf/a2disconf
To enable or disable the desired config from the directory conf-available In the server configuration use the commands:
Enable config:
sudo a2enconfDisable config:
sudo a2disconfa2enmod/a2dismod
To activate the installed Apache module from the directory mods-available
Enable Apache module
sudo a2enmodDisable Apache module
sudo a2dismoda2ensite/a2dissite
To activate the virtual host configuration from the directory sites-available and deactivate it use the commands:
Enable Virtual Host in Apache
sudo a2ensiteDisable virtual host in Apache
sudo a2dissiteApache Control Commands
IN Ubuntu, thanks to the use environment variables, to contact to the demon httpd web server can use calls like: /etc/init.d/apache2 or apache2ctl or apache2:
sudo/etc/init.d/apache2 sudo apache2ctl sudo apache2