How to log into the server after installing VPN. How to set up a VPN to work correctly
When it comes to installing a VPN on Windows, there are several paths to take. You can download your provider’s application specifically, you can install a third-party OpenVPN application, or you can use dial-up to configure everything manually.
Installing a VPN on Windows is a very easy process and will not take more than a few minutes. We will explain each of the three methods so that by the end of the article, you will be able to surf the web safely, even if someone is spying on your online activity.
What you will need
You'll need an account from your provider, so be sure to set one up before you begin. The VPN company may ask you for confirmation via email, so be sure to do this.
If you are not yet ready to switch to paid subscription, then in this case most VPN providers are ready to provide free trial period, which is also great for work. ExpressVPN offers a 7-day trial. To do this, you need to register through the app and not through the website.
We will show the installation process on Windows 10. This article was written under Windows control 10 Home. If you have a different version of OS installed, then you have nothing to worry about. Try installing the software using Method 1 (below), and then we'll move on to a little more difficult ones.
Method 1: VPN provider software
All popular VPN service providers provide a dedicated application for Windows. Usage similar applications is usually the most in a fast way connecting your devices. You will also have access to all servers at once without additional settings everyone.
In our example, we are using ExpressVPN as an example, however, the installation process is not much different from other providers, so you should just take the gist from the screenshots included here. If you still couldn’t, then your provider’s technical support will help you.
So, let's begin:
- Download the installer from your provider's website. If you have an activation code, copy it to your clipboard.
- Double click on the installer. Next, give permission to the application to make changes to the system.

- Click "Sign In"

- Paste the activation code that you copied above in step 1. If you don’t have it, we advise you to return to the provider’s website and do a good search.
- Click on "Sign In" again.

- Click Allow if you want ExpressVPN to start when you turn on your computer. This option is optional, but can be very useful.

- Click Allow if you wish to share information about crashes and others technical information. If you are very concerned about your privacy, then click on Don’t Allow to skip the step.
- Click on the big round button to connect to the location you selected Smart system Location ExpressVPN.

Usage special application when installing a VPN on Windows, it gives superior protection, speed and ease of access to some useful features:
- Click the Choose Location button on the connection screen to easily switch between the servers that ExpressVPN provides. All information about connections is already preinstalled in the application, so you do not need to download it additionally.
- A network lock or Killswitch prevents your computer from accessing the Internet if the VPN connection is lost. This will protect you from accidentally neglecting the VPN. You can find the switch by clicking on the burger menu (three horizontal lines) in the top left corner and then clicking on Options.

There is another one on the screen useful feature. If you want all your computers and printers to have access to your network, then check the box next to Allow access to local network devices such as network shares or printers

This comes in handy when you are using a VPN in office network or at the business center when traveling. Your internet traffic is still tunneled, but you can access local network, if you need it. This is the only option you need to change to get your VPN to work the way you want it to.
Method 2: OpenVPN
Your provider's app should work well. But as an alternative, you can use OpenVPN, which is a third party application with open source code. This means that the code this application accessible to anyone who wants to study it. This fact gives a little confidence in the security of this application.
OpenVPN is an extremely minimalist program; it doesn’t even have an interface. Most settings are done through the tray, which is hidden behind the arrow in the lower right corner of your screen.
Here's how to quickly get to grips with your VPN. We're using ExpressVPN again, but the steps are similar for most providers:
- Download software OpenVPN from the OpenVPN website https://openvpn.net. Don’t forget to check the site address, its security and other nuances before downloading. The fastest and easiest option is the installer file.

- Double click on the downloaded file to begin the installation.
- Click Next.

- Review the terms of the agreement, and if you are happy, click agree.

- Available on the component selection screen custom installation. As shown by default on the screen, this build works great. Click “Next”.

- Select the installation path. Again, the default path is fine. So you shouldn't change it without good reason. Click “Install”.

The installation process may stop and ask you to install TAP. This is a natural part of a VPN connection, so you don't have to worry about it. Click "Install".
Note: If you click "Don't install", your OpenVPN connection may not work.
Completing the installation:- Once the installation is complete, a corresponding message will appear in the installation log window. Click Next.

- Installation completed. The last window will present an item that, if desired, will show you text file ReadMe. It contains brief information. If you don’t want to open it, just uncheck the box before clicking “Finish.”

At this step, you need to log into your provider account on the site. You should find the OpenVPN connection details and accompanying files.
Here's a screenshot of what you should look for in ExpressVPN, for example. To find this, click Set up ExpressVPN on all your devices, then Manual config. Make sure OpenVPN is selected on the right side.
Scroll down a little and you will find necessary information: username and password for your Open VPN connections, as well as a list of available servers. Each location has a special downloadable file called a configuration file. You need to download by at least one of them. If you are not sure which one you want to download, we recommend choosing the one that is closest to you.
We continue the process:- Find the files you just downloaded and move them to C:\Program Files\OpenVPN\config

- Go to the OpenVPN GUI, which is located in your startup menu. You should also have a shortcut on your desktop. Launch from wherever is convenient.

- In the tray you will find a small OpenVPN icon; click right click mouse over it and you will see the name of the configuration file(s) you moved to the desired folder. Move the cursor a little to the right and click “Connect” in the menu that appears.


- You will be asked for a username and password. Return to your browser and copy the input data from the OpenVPN setup page. Don't use the credentials you use to log into a website, that's different.

- Click OK.
The tray icon is lit green, this means we are connected. To view the connection status, just hold the cursor over the icon and right-click to disconnect.

Method 3: Manual setup using Dialer
In our connection example via manual setting We are using Windows 10. This method does not require downloading any VPN software. Instead, we use L2TP/IPSec using Dialer.
In others Windows versions and for other providers the requirements will differ from step to step. But you must understand the main idea of the whole process.- Log in to the ExpressVPN website. Click Set up ExpressVPN on all your devices, then Manual Config. Now on the right side, select and click the PPTP & L2TP-IPSec button.

- Scroll down, skip the username and password, and the list of servers. Below them you will find a button that says Download Windows Dialers. Click on it and keep your browser open.

- Locate and extract the zip file to a folder.
- Find the file called ExpressVPN Windows L2TP and double click on it.
- After a short pause, you will see the network connection window. Click on Properties.

- Go to the Security tab and make sure that the Microsoft CHAP Version 2 checkbox is checked. It is by default, but this is very important point, so it's better to double check.

- Once verified, you should select the encryption level you prefer. Select Optional…, Require encryption…, or Maximum strength. Just don't select "No encryption allowed..." because this will break your connection.
- Click on the Advanced settings button, which is located directly above the drop-down list of encryption levels. In the pre-shared key field, write 12345678 and click OK.

- Click OK again to close the Properties window.
You should have been returned to the window Network connections. All available servers are shown in the drop-down list. Select one below to test your connection. It doesn’t matter which one you choose, but it’s still better to start checking with the one that is closer to you geographically to know for sure that everything works.
The last step is to fill in the login details for L2TP. This data is located in your open browser.
Click "Connect" to make sure everything is working. That's all!
Need more help?
If the connection fails, the best thing to do is take a few steps back and try the easiest method: opening your provider's app. If everything works, it means you configured something wrong somewhere in OpenVPN or in the settings manually.
If your provider's application does not work, then perhaps you forgot to confirm your account. Check your email for emails with verification links. If you are still unlucky, then contact their technical support department, this is the most easy way obtain the necessary information.
- Select the installation path. Again, the default path is fine. So you shouldn't change it without good reason. Click “Install”.
- Available on the component selection screen custom installation. As shown by default on the screen, this build works great. Click “Next”.
- Review the terms of the agreement, and if you are happy, click agree.
The best VPN services for Windows in 2018:
Denial of responsibility: This article is written for educational purposes only. The author or publisher did not publish this article for malicious purposes. If readers would like to use the information for personal gain, the author and publisher are not responsible for any harm or damage caused.After setting, click Next. Created VPN connection can be found in the window Network connections . There you can create a shortcut for this connection. What I mean is that many people have a shortcut for connecting to the Internet on their desktop. It's the same issue here. The VPN connection is connected in the same way as all other connections.
During this setup, the user does not have access to most VPN connection settings. Therefore, after creating a connection, you can log in VPN connection properties and change the necessary parameters. But basically, these parameters should not be changed.
What is VPN Reconnect?
VPN Reconnect is new Windows function 7. And as you might guess, this function belongs to VPN technology. We have already learned what a VPN is.
What is VPN Reconnect? VPN Reconnect is a feature that can initiate a reconnection to the VPN server when disconnected. With traditional VPN connections, if the connection was lost, you had to manually re-establish the connection. At the same time, any process that was taking place at this moment will have to be started again.
But times are changing. The new VPN Reconnect feature allows you to automatically re-initiate a broken connection without re-authorization. All this is possible thanks to the new IKEv2 tunneling protocol with the MOBIKE extension. And since we’re talking about protocols, it’s worth noting that other protocols (PPTP, L2TP/IPsec, SSTP) that are also supported in Windows 7 are not compatible with the VPN Reconnect function. And given the fact that the IKEv2 protocol is the most secure of all the protocols listed above, it follows that using the new IKEv2 protocol is not only secure, but also convenient.
The IKEv2 protocol with the MOBIKE extension allows you to automatically re-initiate the connection even after 8 hours of interruption. More precisely, the maximum gap period is 8 hours. You can leave the computer for a couple of hours, turning off the Internet, then come back, connect to the Internet and continue working on remote computer. Also, this protocol Allows VPN clients to change their Internet addresses. So, you can safely move from one location to another, while disconnecting the previous connection and connecting to a new Internet connection, but you will still be connected to the VPN. Although in truth, you will first be disconnected from the VPN connection, but VPN Reconnect will immediately return it to you. So you won't notice anything.
I recently introduced readers to new technology Direct Access, which bypasses in several ways VPN technology. So, one of the advantages of DirectAccess is permanent connection- can easily compensate new feature VPN. The main thing here is to keep up with fashion and use new software: I have already mentioned Windows 7 (by the way, in the article Why Windows 7 is better than Windows XP you can find other examples of the fact that XP has really lagged behind advanced operating systems), but about Windows Server I forgot 2008 R2. This means that the IKEv2 protocol only supports VPN servers running Windows Server 2008 R2 or later.
Well, in the end, I’ll indicate the place where you can configure the maximum time for disconnecting the connection. To do this, you need to go to Network connections, find the created VPN connection there and log into it Properties A. Next, on the tab Safety find and press the button Extra options . In the window that opens Additional properties go to tab IKEv2, check the box Mobility and specify the maximum break time. This is how the VPN Reconnect function is configured.
IN Lately Methods of accessing the Internet through VPN networks are becoming increasingly popular. This allows you to maintain maximum confidentiality, as well as visit web resources blocked for various reasons by providers. Let's see what methods you can use to set up a VPN on a computer running Windows 7.
Setting up a VPN in Windows 7, like most other tasks in this OS, is carried out using two groups of methods: by using third party applications and using only the internal functionality of the system. Next, we will consider in detail these methods for solving the problem.
Method 1: Third Party Programs
Let's look at the algorithm right away VPN settings using third party applications. We will do this using the example of the popular Windscribe software. This program good because, unlike others free analogues can provide quite quality level connections. But the limit of transmitted and received data is limited to 2 GB for anonymous users and 10 GB for those who provided their email.
- After downloading, run the program installer. In the window that opens, you will be offered two installation options:
- Express installation;
- Selective.
- The installation procedure will start.
- After its completion, the corresponding entry will be displayed in the installer window. If you want the application to launch immediately after closing the window, leave a checkmark in the checkbox "Launch Windscribe". Then click "Complete".
- Next, a window will open asking if you have a Windscribe account. If this is your first time installing this program, then click "No".
- The browser that is assigned by default in the OS will launch. It will open the official Windscribe website in the registration section.
In field "Choose Username" enter the desired account. It must be unique in the system. If you choose a non-unique login, you will have to change it. You can also generate it automatically by clicking on the icon in the form of arrows forming a circle on the right.
Into the fields "Choose Password" And "Password Again" enter the same password that you created. Unlike a login, it does not have to be unique, but it is advisable to make it reliable, using generally accepted rules for composing such code expressions. For example, combine letters in different cases and numbers.
In field "Email (Optional)" enter your address Email. This is not necessary, but if this field is filled in, you will receive as much as 10 GB of Internet traffic instead of the basic 2 GB.
Once everything is filled in, click "Create Free Account".
- Then go to your email, find the email from Windscribe and sign in. Inside the letter, click on the element in the form of a button "Confirm Email". By doing this, you will confirm your email and receive an additional 8 GB of traffic.
- Now close your browser. Most likely, you will already be logged into Windscribe under the current account, which has just been registered. But if this is not so, then in the window with the inscription "You already have an account" click "Yes". In the new window, enter your registration data: login and password. Next click "Entrance".
- A small Windscribe window will open. To start the VPN, click on the large round button on the right side of it.
- After a short period of time during which activation is carried out, the VPN will be connected.
- By default, the program selects the best location with the most stable connection. But you can choose any other affordable option. To do this, click on the element "Connected".
- A list will open with a list of locations. Those marked with an asterisk are only available for a paid premium account. Select the name of the region of the country through the IP of which you want to present yourself on the Internet.
- A list will open settlements. Select your desired city.
- After this, the VPN will be reconnected to your chosen location and the IP will be changed. You can easily see this right in the main window of the program.


As you can see, the procedure for setting up a VPN and changing the IP address using the Windscribe program is quite simple and convenient, and specifying your email during registration allows you to increase the amount of free traffic several times.
Method 2: Built-in functionality of Windows 7
You can also set up a VPN using exclusively the built-in tools of Windows 7, without installation third party software. But for implementation this method you must be registered on one of the services that provide access services for the specified type of connection.
- Click "Start" followed by transition to "Control Panel".
- Click "Network and Internet".
- Open the directory "Control center…".
- Go to “Setting up a new connection...”.
- Displayed "Connection Wizard". Select the option that involves solving the problem by connecting to the workplace. Click "Further".
- Then a window for selecting a connection method opens. Click on the element that suggests your connection.
- In the window that appears in the field "Internet address" Enter the address of the service through which the connection will be made, and where you registered in advance. Field "Destination name" determines what it will be called this connection on your computer. You don’t have to change it, but you can replace it with any option convenient for you. Check the checkbox below "Don't connect now...". After that click "Further".
- In field "User" Enter the login for the service you are registered with. In the form "Password" enter the login code and click "Create".
- The next window will display information that the connection is ready for use. Click "Close".
- Back at the window "Control Center", click on the element on the left side "Change settings…".
- A list of all connections created on the PC will be displayed. Find a VPN connection. Right-click on it ( RMB) and select "Properties".
- In the shell that appears, move to the tab "Options".
- Uncheck the checkbox here "Enable domain...". It should be checked in all other checkboxes. Click "PPP Settings...".
- In the window interface that appears, uncheck all checkboxes and click "OK".
- After returning to the main connection properties window, move to the section "Safety".
- From the list "VPN Type" stop by position "Tunnel Protocol...". From the dropdown list "Data Encryption" select an option "Optional...". Also uncheck the checkbox "Microsoft CHAP Protocol...". Leave other parameters in default state. After completing these steps, click "OK".
- A dialog box will open warning you that if you use the PAP and CHAP protocols, encryption will not occur. We indicated universal settings VPNs that will work even if the service providing the corresponding service does not support encryption. But if this is critical for you, then register only with the external service that supports the specified function. In the same window, click "OK".
- Now you can start the connection VPN made simple by left-clicking on the corresponding element in the list of network connections. But every time go to this directory will be inconvenient, and therefore it makes sense to create a launch icon on "Desktop". Click RMB by VPN connection name. From the list that appears, select "Create shortcut".
- A dialog box will prompt you to move the icon to "Desktop". Click "Yes".
- To start the connection, open "Desktop" and click on the icon you created earlier.
- In field "Username" Enter the login of the VPN service, which you already entered at the stage of creating the connection. In field "Password" Enter the appropriate code expression to enter. To always avoid having to enter the specified data, you can check the checkbox "Save username...". To start the connection, click "Connection".
- After the connection procedure, the network location settings window will open. Select a position in it "Public Network".
- The connection will be completed. Now you can send and receive data over the Internet using a VPN.


You can set up a network connection via VPN in Windows 7 using third party programs or using only the functionality of the system. In the first case, you will definitely need to download the application, but the actual settings procedure will be as simple as possible; you will not have to look for any proxy services that provide the corresponding services. When using built-in tools, you do not need to download anything, but you will need to first find and register on special VPN service. In addition, you will still need to perform a number of settings, which are much more complicated than when using software method. So you need to choose for yourself which option suits you best.
A private virtual network (VPN) is good because it provides the user with a secure or trusted channel with another PC without the need for a dedicated communication channel. It is created on top of another network - the Internet, for example.
Windows has built-in tools for establishing a VPN connection between computers located on long distances. Let's set up a VPN tunnel between two PCs that are controlled by the Windows environment.
Let's create the server part
Connection of remote clients to the VPN network is organized through special server access. It may require an incoming connection to go through identification and authentication procedures. It knows which users have access to virtual network. It also has data about allowed IP addresses.
To set up a VPN access server in the Network Control Center, you need to open the applet for changing adapter settings. If the applet's main menu is not displayed, press the Alt button. A main menu should appear at the top of the applet, in which you should find the “File” item, and then select “New incoming connection”. Let's take a closer look.
In the control panel, go to “Network and Internet”.
In the next step, we will open the network center.


Let's create a new incoming connection.

The window that appears will prompt you to select from existing users or define a new one who will be allowed to connect to this PC.

When adding a new “user”, you need to specify a name and password with which he will be allowed to connect to the VPN access server.

In the next step, the Private Network Setup Wizard will ask how users will connect.

It is necessary to indicate that they will do this over the Internet, so let’s check the required option.

The next step involves setting up network applications that need to accept incoming connections. Among them is the Internet Protocol Version 4 (TCP/IPv4) component. You will need to open its properties and manually enter the range of IP addresses that are allowed to access the server.

Otherwise, leave this matter to the DHCP server for automatic detection"IPs". In our case, we had to manually determine them.

After processing the entered data, the access server will receive the required information to provide necessary permits authorized users. At the same time, the system will prompt you for the computer name that will be needed in the future.

As a result, we will get the following result. There are no connected clients yet.

Let's set up the client
Modern networks are most often built on a client-server architecture. It allows you to highlight main computer V network environment. Clients initiate requests to the server and make the first attempt to connect to the server.
We have already configured the server part of this architecture. Now all that remains is to get the client part working. Another computer must act as a client.
We will establish a new connection in the network center of another PC (client).

We need to connect directly to the workplace.

Again, let's turn to the network Windows Center only now another PC. Let's select the option to set up a new connection. The applet that appears will offer several options to choose from, but we will need the option to connect to a workplace. The wizard will ask you how to make the connection. We need to opt for setting up an Internet connection (VPN).

In the next step, the wizard will ask you to specify the IP address of the VPN access server and assign a destination name. The IP address of the access server can be found on our first computer by entering command line ipconfig command. The IP address of the Ethernet network will be the address you are looking for.


Then, the system will apply all entered settings.

Let's make the connection
Time X for our experiment is when the client connects to the server side of our network. In the network center, select the “Connect to a network” option. In the window that appears, click VPN-Test (we specified the destination with this name) and click the connect button.


So, we will open the VPN-Test connection applet. In the text fields we indicate the “user” name and password for authorization on the access server. If everything goes well and our user not only registers on the network, but is also able to fully connect to the access server, then the designation of the connected “user” will appear on the opposite side.
But sometimes, this kind of error can happen. The VPN server is not responding.

Click on the incoming connections tab.

On the marked tab, open the properties of the IP protocol.

Let's set the option to specify IP addresses explicitly and specify which IP addresses need to be served.

When we reconnect, we will see this picture. The system shows us that one client is connected and this client is vpn (SimpleUser).

Brief summary
So, to establish a VPN network between two PCs, you will need to decide which of them should become the “master” and play the role of a server. Other PCs must connect to it through an authorization system. Windows has tools that enable the creation of a server part for our network. It is configured by creating a new incoming connection, specifying the user, and the applications that should accept the connection. The client is configured by establishing a connection to the workstation, specifying the user and server data to which this user should connect.
Modern technologies are improving at tremendous speed, opening up an amazing breadth of new opportunities for us. Not long ago, Internet users began to use private network– VPN. It allows you to create a secure connection between remote PCs, providing:
- anonymity of work on the World Wide Web;
- the ability to download applications when the IP address is located in a different regional zone;
- high safety of work in a corporate environment;
- high transfer speed without interruptions;
- the ability to create a channel protected from hackers.
Let's look at how to connect to the Internet via VPN on different OSes.
OS is more complicated previous versions. But setting up a connection via VPN turns out to be very simple. Follow the step by step instructions below.
Open Start. From the drop-down list, go to “Settings”. This subsection may be called "Options".
Where can I find “Options”?
When the window “ Windows Settings", you will see the item "Network and Internet". Open the content. There is a “VPN” item here. Make one click. Click "Add VPN connection". In the new window, set the following parameters in order:
- Windows (embedded);
- Business Communication;
- L2TP protocol;
- . Required information are specified in your agreement for the provision of Internet services.
Check that the fields are filled in correctly and click “Save”.

Setting up a VPN on Windows 7
Here the phasing has no fundamental distinctive features. The only difference is the location of the sections that interest us. Proceed to the "Control Panel".

Where is the Control Panel located?
We will need “Network and Internet”.

We need a control center. From here you can manage networks and access. You will need to configure the connection. This will be a new direction.

You will need an active “Connect to workplace” button. Go ahead. “Use my Internet connection” will appear at the top of the form. Let's make a selection. A form will appear where you enter in the stated sequence:
- Business Communication;
- Check the "Don't connect now" checkbox. You will be prompted to simultaneously check for future connections;
- move on.
On the page that opens, enter your username and password. This information is provided when signing an agreement for the provision of communication services. Place a marker in the box that asks you to remember your password. Next, a working connection will be displayed. The form can be closed.
While in Control Center, continue working with custom metrics. In the form, click on “Change adapter settings”. The active and passive connections will be highlighted. Click on the configured option and select Properties. This is done through the right key.
You will be on the General form. Here the address information regarding the VPN server is checked. The right look: inter.net.
In the “Security” form, you also need to make certain settings. Place here VPN type. There is no need to register anything. It is enough to use the drop-down list. Select the item: L2TP/IPsec. In the “data encryption” line, enter: optional. Click OK.

Stay in the connections tab. Here you will need to create a shortcut for “Business Connection”.
When you see a message that an icon cannot be created in this folder, agree to move it to your desktop.
Go to the main screen. Here you will find the corresponding label. Double-click with the left mouse button. A window will appear where you should select “Connection”.
You can check this point by following this path:
- go to “Network and Internet”;
- specify the section you are interested in. This is the control center;
- you need to check the configured indicators. Go to the form where the adapter settings are changed;
- Before finding the information you are interested in, read the sections. You will need “Network Connections”;
- we require “Local Area Connection”;
- go to “Properties”, open “Network” and select “TCP/IPv4”;
- click on “Properties”;
- clause on obtaining an IP address in an automatic way must be activated, click OK.
Now we can say with confidence that the connection to the VPN is complete.
How to connect a VPN on Windows XP
Getting started is exactly the same as in version 7 of the OS. After activating the creation of a connection, the Connection Wizard will automatically launch. With it you will resolve the issue faster and more conveniently. After following “Next”, find the second item. It will allow you to connect to the network on your desktop.


Keep tuning. You will see the “Connection name” window. Specify Business Connection. Proceed to the second stage.
Stop at “Select VPN Server”.
You will be taken to the last page of the wizard. Check the box where you are offered to display a shortcut on the desktop. Complete the procedure.

Confirming settings and creating a shortcut on the desktop
Click the right mouse button on the window that appears. Go to "Properties". In the first tab, check the VPN server address. It should be written here: inter.net. Go to "Options". Mark with the marker “Call back when connection is lost.” Then open “Security”. Remove the checkbox from “Data encryption required.”
The connection window appears. It asks for a username and password. Enter the information provided by your Internet service provider when completing the contract. Place a marker next to the prompt to save passwords. Start connecting.

As in the option discussed above, double-check that you received the IP address. It should be done automatically. This is done through Start. Find "Network and Internet Connections". From the suggested sub-items, select “Network connections”. Find “Local Area Connection”, right-click to get to Properties. Here you need to highlight TCP/IPv4. Then you need to go to Properties again. Now check for the checkbox next to the offer to register your IP address automatically.
Setting up mobile equipment on Android OS
If you need to set up a VPN on mobile technology, use the one below step by step instructions. It will create a secure channel connecting separate networks and providing access to them for people who regularly change their location.
Important! For the setup to be successful, you need to know the address of the server to which you will connect, your login and password.
Open the Settings menu on your device.

In the column " Wireless network» Click on the “More” sub-item, select “VPN”.
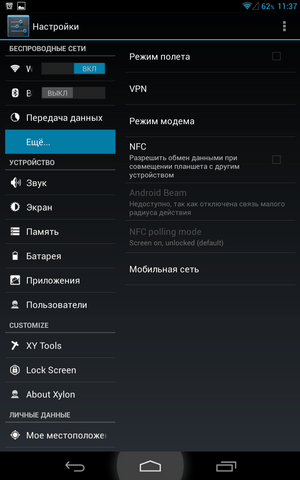
Check the box to add a VPN connection. It may be called that or designated as “+”.
A form will open in front of you where you need to enter the settings:
- “Network name” - any name. You decide what name to give your new VPN connection;
- "Type" - "PPTP";
- “Address”—VPN server address;
- click on the “Save” button.
find out detailed instructions for settings home internet in the article -
When you first start, the system will ask for your username and password. To avoid having to enter them again next time, check the box next to the prompt to remember user data.
The VPN connection is configured and ready to use. You will learn about this thanks to the corresponding notification. By clicking on the icon that appears, you will see detailed information by connection.