How to upload files to ftp. How to upload a file to ftp
FTP or File Transfer Protocol- one of the protocols in order to be able to transfer files on the network between computers. Using this protocol, you can connect to FTP servers and view their contents without any problems, see the directory tree, upload files from your computer to these servers and vice versa download. Essentially the same thing you do when you copy or move files on your computer between drives. Just copy and paste. 🙂
To work via FTP, you will definitely need a client program. Such a program establishes a connection to the FTP server and provides the user with the ability to work with files. There are a lot of such programs on the Internet, each of them has its pros and cons. I want to offer you the program that I personally use and many other web developers use. This program - FileZilla. It has become the main tool for many.
Below, I want to show you how to get started with this client and make it easier for you to work with your site.
To get started, you need to download FileZilla. You can do it from the official site - filezilla.com/get. After downloading, install the program and run it to work.
First of all, you need to add your website for FTP access. To do this, in the window that opens, select the menu item - "File" after in opened context menu choose - "Site Manager".
A window will open in front of you. Here you can add sites to which you can connect via FTP. You can create as many sites as you like. In order to create a new site, select the item - at the bottom left.

Above will appear new entry and you can add a name to it.

On the right, you need to fill in all the necessary data in order.

Let's take a look at these fields in order and how to fill them out. There is essentially nothing complicated.
- 1. Host- here you need to enter the server name or IP of your hoster, which the hoster will send you in a letter when you buy hosting. If there was no such thing or you have already deleted it, then write to technical support or look at the hoster's website, perhaps there is information about this.
- 2. Login type- select "Normal", then it is possible to enter a name and password.
- 3. User- username, which the hoster will also indicate to you in the letter.
- 4. Password- the same as with the user.
Your hosting provider may have special settings, so it is important not to delete the emails that he sends you for settings and access to his accounts. Following his instructions, you will be able to set up access via FTP. Also, sometimes you can create users through the site control panel on the hosting site.
If Everything is filled in correctly, then click the button OK. You will save your settings and establish a connection to your FTP server.
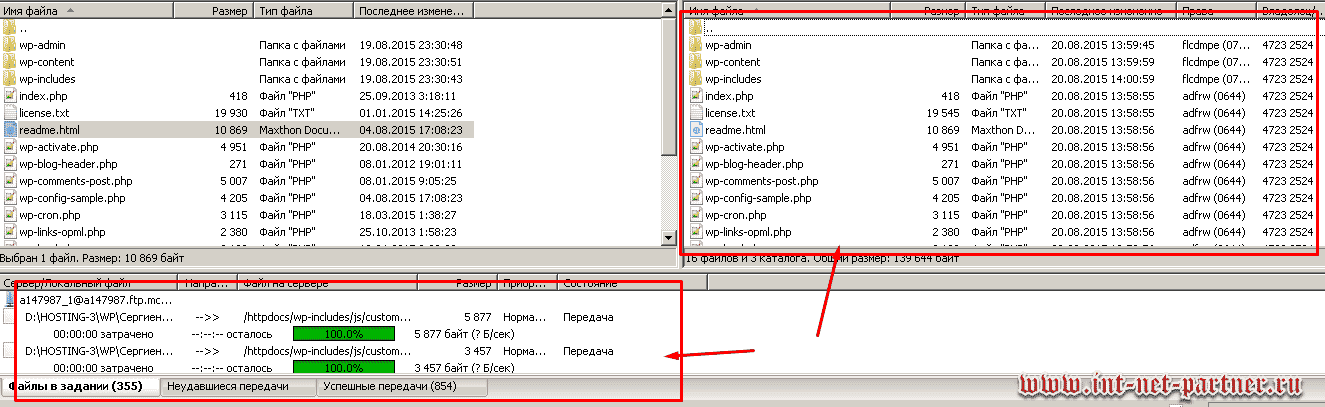
At correct connection in the program window in the windows on the right side, the server directory tree will open. On the left side, you can also configure the directory tree, but already on your computer. For example, open a folder that contains files to write to your site. Also, to send files to the server, you can simply drag them from other windows on your desktop to the desired folder in the windows on the right side of the program FileZilla.

Now you will be able to work with your website files. it basic settings and the minimum you need to know to work with this program.
If you need more in-depth program settings, the program has many settings. I think you can do this using the help of the program or just following the logic.
The program is constantly updated and its developers make sure that it always meets the standards and is a reliable assistant to the webmaster. I hope this article will help you improve your work with the site.
What FTP client do you use to work with your website?
That's all, thanks for your attention. 🙂
Good afternoon! Today's article is dedicated to TOTAL COMMANDER and Fizilla , or rather, how to upload files through them via FTP.
What is it for?
Many novice bloggers, and I at one time faced a lot of problems. For example, I registered on a hosting to create a blog, but how to upload files there is not clear, or even worse, how to upload files, you figured it out, but hosting functions (according to at least in many) I have not seen such a function as downloads whole folder with entire files (it takes a long and tedious time to download one file at a time), and the browser usually works with slight delays (while the page is loading, plus navigation is not very convenient). Therefore, in such cases, it is recommended to use an FTP server to upload files.
FTP (File Transport Protocol) the most common protocol for uploading files to a server. To download files using this protocol, a special software. For operating systems Windows families, use such as: Total Commander , FAR, FileZilla other.
For now, how it is done with an example Total Commander and FileZilla .
Let's start with TOTAL COMMANDER.
To begin with, we will need to download this program and install it. After installation, launch it. Let's move on to setting up an FTP server.
The first thing we need to do is create a new FTP connection. See the picture below.
In the appeared window "Connection to FTP server" click the "Add" button. See the picture below.

After clicking the "Add" button, a new window will open for us, in which we need to enter data (you can find them on your hosting) to connect to the server (hosting) - which stores your site files.

Connection name- this is the name of your connection, enter any.
Server:[:Port]:, Account and Password- we find out on our hosting and enter in these lines.
Leave everything else as it is and click OK.
In the FTP Server Connection window, we see that the connection we created has appeared. See the picture below.

Select a ready connection and click the "Connect" button. If you entered everything correctly, then a connection will be made to the server, after which you can start downloading and changing files.
With the program FileZilla work even easier.
Download this program from the Internet, install and run.
A program window appears in front of us, where you need to specify in the fields at the top your data for connecting to the FTP server. See the picture below.

After entering data in the marked red fields, press the button " Quick connection”, after which you should connect to the FTP server.
There are many other programs for uploading files to the server. I told you about the most famous.
Good luck with your work!
Related materials:

Backup and restore Windows program R Drive Image
R-Drive Image for Windows backup Creation Windows image Creation bootable media R-Drive Image Windows Recovery Restore Everything hard drive...

How to remove extraneous noise from the microphone
Hello. In today's article I will talk about one problem that occurs in a large number PC users. Namely, a problem when recording a desktop or ...

How to create bootable flash drive with Windows
Quite often, many have to reinstall the operating system on their computer. And there are always problems with finding a good version of windows. On your...
FTP (File Transfer Protocol) - network protocol, designed to transfer files to computer networks. FTP protocol allows you to connect to FTP servers, view the contents of directories, and upload files from or to a server.Connection information
FTP accounts are managed in the section FTP and SSH. To go to the FTP user settings, click on its name.
On the page Properties the main parameters for connecting to the server via FTP are indicated.
.png)
- Server address (host): ftp.login.nichost.ru, where login- a unique hosting service name (indicated in the upper right part control panels).
- FTP username (login): login_ftp.
- To change the FTP user password, click the button Reset the password. New password will be displayed in a pop-up window. To send a password to your contact email address, check the box Send password to email.
Uploading files to the server
After creating the site in the section Sites The hosting control panel will display a directory with its name. Files must be uploaded to the root directory of the site your_domain/docs. This can be done using one of the programs below or the hosting control panel.
Program settings
Information on setting up popular FTP clients (FileZilla, FAR, Total Commander, iWeb, etc.) is available in the article.
Hosting directory structure
When you connect to a hosting via FTP, you get into your home directory. It contains the following files and directories:
- directories with site names (for example login.nichost.com) - appear when creating a site in the control panel,
- etc- contains configuration hosting files,
- tmp- for temporary files, backup copies are loaded into it,
The site directory that appears when you create it in the control panel has the following structure:
- your_domain/docs- site root directory. Site files (html documents, php scripts, pictures) should be uploaded to it. Full path to the root directory of the site on the server: /home/identifier/your_domain/docs;
- your_domain/cgi- for cgi scripts, its content is available at http:// your_domain/cgi-bin/;
- your_domain/php- for php plugins, the path to it is set by the parameter include_path;
- your_domain/errordocs- contains standard pages mistakes;
Be careful when working with files. Do not delete service files and directories - this may disrupt the hosting.
An FTP user can only be granted access to a specific hosting directory, such as the files of a single site. For this:
- log in to the hosting control panel using your contract number and password;
- go to section FTP and SSH where you will see FTP usernames;
- select required user, edit the field Access, click the link Change and save your changes.
For example, in order for the FTP user to have access to the files of the site example.com, in the field Access enter / home/login/example.com/ docs, where login- hosting service identifier, docs- site root directory.
You can find out the full path for a directory using the section File manager hosting control panel. The path is displayed at the top of the page.
FTP Restrictions
- No more than 10 simultaneous connections from one IP address and no more than 5 simultaneous connections from a single FTP user.
- Connection is only possible using FTP users created in the control panel. Anonymous access is not provided.
About using SFTP
SFTP (SSH File Transfer Protocol) is a protocol that allows you to transfer files using encryption. SFTP connection is more secure and has additional functionality (working with symbolic links).
Troubleshooting and Troubleshooting FTP
If you encounter FTP connection errors, we recommend that you perform the following steps.
1. Get up-to-date hosting connection parameters
First of all, in case of connection errors, please make sure that the FTP connection details have not been changed. You can do this by checking the mail specified as the contact under the contract for relevant notifications. We recommend that you change your FTP access password and retry the connection.
2. Check your FTP client settings and operating system
- Make sure your FTP client is configured according to our instructions. We recommend using an FTP client to connect and passive mode work.
- Check the anti-virus software, firewall settings installed on your computer, and network equipment(for example, a router). The FTP client must be allowed to access the network.
3. Check network connection
If there are technical problems on the communication channel from your ISP to the hosting server, connection errors may occur or low speed data transmission. You need to run diagnostics with .
If connection problems persist, please report it to . In your email, include the text of the error message, its screenshot, the result of the network connection check using WinMTR, and the time when the problem occurred.
Hello, friends!
You have probably already prepared your site files for uploading to hosting and want to know: how to do it quickly and easily?
You got right on desired topic! But first we will install special software, and then we will talk about how to upload a site to a hosting via ftp? Begin!
Installing a file manager
In order to download the manager for transferring files, go to the filezilla.ru resource and click " Download FileZilla ».
On the loaded page, select the version of the operating system that you have, respectively.

We download it. Find the resulting file:

And we click on it. The program will be installed.
Uploading WordPress to Hosting
After the installation is complete, launch Filezilla.
In the program that opens, at the very top you need to fill in three fields.
We take the data that the hoster provided when you made out tariff plan.
Look: among them there should be information for FTP access. This is what we need.
In field " Host»We write the address data (in MacHost I have a123456.ftp.mchost.ru) or IP addresses (for example: 77.221.323.71). No difference. Filezilla "digests" everything normally. The main thing is that the data is entered exactly the same as that given to you by the service provider.
In the second field, Username ”, write the login (username) for FTP.
Third, " Password”, fill in the password.
Then we press the button " Quick connection (As you can see, everything is in order).
When the connection is made, you will see that files will appear in the windows on the right. Finding the root folder httpdocs) of your sites (after all, in the future you will put several of them):

And click on it (actions occur in the same way as in a computer explorer).
ATTENTION! Your root folder name may differ. It depends on the hosting. For example, there is also such a name "public_html". Check with tech support! I wrote about the root folder in the article ""
Remember that our task was to upload WordPress content to the server? Have you already seen in the screenshot above that in the program there are computer files on the left side, and servers on the right?
So now the right side is empty. Everything you see inside the (httpdocs) folder you don't need. You can delete.
STOP! Be careful! Make sure you are in the right place (httpdocs). Convinced? Now delete.
We pass to the left. Our mission is to open desired folders right and left. On the right we have already opened. And on the left, find the unzipped WordPress installation package. I remind you that the folder is called wordpress-4.2.4-en_RU (your numbers may be different, as versions are constantly updated).
Download current version you can from the official Russian site wordpress.org
Come inside. There is another subfolder. We open it. As a result, we see the following picture in Filezilla:

Everything didn’t fit on the screen, but the main thing: you noticed three characteristic folders, the name of which begins with the letters “ wp". Select all the content in the same way as in the explorer, and "throw" it to the right side of the program, i.e. to the server.
For example, I do this: I click on any file on the left, I do it on the keyboard " Ctrl+A »:

Then I click on right button mouse and select Upload to server ».
The download process begins, which you can watch in the lower window:
Soon you will have the same files on the right as on the left. When the bottom box becomes empty, the process is over. Congratulations! You have uploaded the site to the server!
AT this case we have downloaded the WordPress CMS, for the functioning of which a simple download is not enough. For CMS work WordPress needs to create a database, make changes to the wp-config.php file and other nuances that we will not touch on in this article. You can read about these nuances in.
At the end of the article, you can watch a video where I spoke in great detail about installing a site on WordPress and this moment of loading was considered.
A simple site consisting of an html document and files loads in the same way.
After loading the site, whether on a CMS or consisting of simple document, you need to bind a domain to it and the installation of the site will be completed.
Now, friends, you have got acquainted with one more procedure necessary for the site administrator. Through filezilla, you can both upload files to the server and upload them to your computer. This can come in handy when you learn how to edit the content of your site. Remember that your colleagues communicate in my VK group and are waiting for you too!
And so that I know what is interesting for you and wrote the corresponding article - subscribe to blog updates. Your comment on the article may be useful to other visitors! Grow with your web resource! Good luck!
Video on installing a website on WordPress (one of my first videos):
Domains for 99 rubles hosting
P/S
Sincerely, Alexander Sergienko
How to upload files viaFTP.
Hello dear blog readers! Today we will look at this important question how to work with files through programFTP. How to upload files to hosting?

This article is for beginner webmasters who are going to upload their site to the Internet. And now we are faced with the following question: how to work further on your resource in order to fill it with materials and gradually bring it to the top?
Let's assume that you have been studying with us, studying joomla lessons, made your site yourself, and now it is not on local server, but on hosting . Previously, all the files were on your home computer, and everything was simple.
Through "My Computer" you opened the folder you needed and could easily upload any files to it. After the resource is on the Internet, this will no longer work.
How to send pictures, photos or screenshots now? How can you get to your own site?
To work, you need the File Transfer Protocol or for short FTP.
If you're not already familiar with this terminology, don't be put off by this strange name because it stands for File Transfer Protocol.
Working with him is quite simple, the main thing is to be careful.
Where should you start?
We are interested in the Total Commander program, it must be found on the Internet and purchased from the authors. Then install on your computer.

After you do this, you need to get some data. You already have this data in the very letter that was sent to you from the hosting. Now they will come in handy.
Therefore, this letter must be found in your e-mail and open.
Let's take a look at your steps in detail.
Open Total Commander, find the "Network" tab.

Connect to the FTP server.
Click "Add". And now it will be necessary to configure a new connection.

Connection name - choose any.
Server (port) - here you simply rewrite the numbers from the letter.
An account is a login from a letter, you also have a password.
Now the connection name you wrote will appear in the window in the list of servers. And you will work with him.
Further, everything will be very simple. You could read about this in the article “Moving a site to a hosting. Continuation" . I will write again for those who do not understand.
When you need to upload some file that is on your computer to your site, do the following.
Come in Total program Commander and click on the "network" tab - "connect to FTP server" and select the connection that you just created. Just click on its name, it will turn blue, and then select the "Connect" command. This button is at the top of the column on the right.
The workspace will be divided into two parts. On the one hand, this is your home computer, and from another site that is hosted.
Look carefully where everything is located, and do not confuse. The color on top gives you a clue.
(Blue bar at the top: this part contains data on your computer. Blue bar: this is where you will need to drag and drop files).
Therefore, in the part of the working field where folders with files are located on the hosting, open sequentially: www - the name of your site - images - stories.
In another part of the working field, where all the files on your computer are located, open the folder where your pictures that you prepared in advance are now located.
It can be: Documents and Settings\ desktop\folder name.
Select the file (picture name) in this part and simply drag it with the mouse from left to right or vice versa, from right to left. It depends on which side your computer is on and which side is hosting. In other words, move from one half to the other. Don't forget to click ok.
If the connection is suddenly interrupted because the Internet is gone, start all over again.
Open the program - Network - connect to the FTP server.
It also happens that you do not understand whether the file has loaded or not. Then you do everything again, and if given file is already hosted, a window with various questions will appear. For example, should I replace an existing file? Or rename it?
Choose the option you want or click "cancel".
The system message "99% completed" pleases only the first two hours!
How to upload pictures to the gallery.