How to create a system in virtualbox. Creating virtual hard drives with Disk2vhd
To have several operating systems at hand with a separate workspace and applications, you do not need to buy a second (third, fourth, etc.) computer. Because all this will fit in your only PC. How? Thanks to virtual machines (VMs) - special programs that create (emulate) imaginary (virtual) computers inside the main operating system.
Virtual PC is almost like a real one. It has its own processor, memory, hard drive, network adapter and everything else. Of course, these are not physical devices, but they are made in such a way that operating systems consider them to be exactly that - real.
Several virtual computers can run on one physical computer at the same time. How much depends on hardware resources: the faster the processor, the larger the RAM, the more spacious the drive, the more. A typical Windows 10-based mid-range home PC can handle three to five lightweight operating systems (such as Windows XP, Android, and Lubuntu + main system) at the same time. Or two or three relatively heavy ones (for example, the main Windows 10 + virtual Windows 7 and Mac OS X). As you already understood, virtual desktop emulator applications allow you to install and run a wide variety of operating systems on them.
General-purpose virtual machines (as opposed to specialized ones, such as, for example, Java VMs), use:
- To run applications that the main system does not support.
- To protect the system from potential harm from unverified programs.
- As an additional barrier against viruses when visiting dubious web resources.
- To create an isolated environment for studying malware activity.
- As a testing ground for debugging your own developments.
- To master the technologies of building networks.
- For double authorization on some game portals and much more.
And of course, virtual machines are widely used to distribute the working resources of servers.
Today we will not touch on the industrial use of VMs, but will only consider what may be useful to home users of Windows.
Oracle Virtual Box
Consider the process of creating a new virtual machine and starting to install Windows 10 into it.
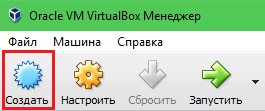
- Click the "Create" button on the top bar.
- In the first window of the VM creation wizard, specify the OS name (it will be displayed in the list of guest systems), its type (Windows, Linux, etc.) and version. In our example, this is Windows 10 32 bit (you can also install 64 bit, but it will require more resources). To go to the next step, click Next.

- Next, specify the size of the VM RAM. Windows 10 x86 defaults to 1 GB, but you can increase this amount by moving the slider to the right. If your PC does not have a lot of RAM, do not give the VM more than 2-3 GB, otherwise the main system will slow down due to lack of memory.

- Next, create a virtual hard disk. If you are installing the system for the first time, select the "Create new" option.

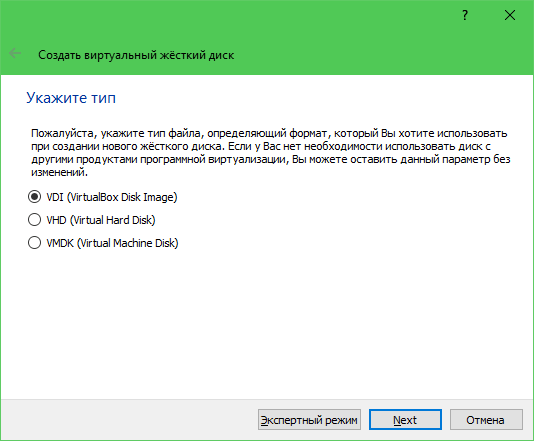
- Leave the virtual disk type as default.
- A storage format is an area on your computer's physical storage that is allocated to a VM. It can be fixed or dynamically expandable within the limits you define next. To save space, we will choose a dynamic format.

- Next, specify the name of the volume (virtual disk C) and its size. The default is 32 GB.

- After clicking the "Create" button in the last window, a new virtual machine will appear in the list. The frame on the right shows its parameters.
- To proceed to the installation of Windows, click the "Run" button in the top panel.

- In the window that opens after that, the window "Select a boot disk" will appear. Click on the folder icon and specify the path to the system distribution kit. It can be an image in .iso format or physical media (DVD, flash drive). Once you've selected your distribution, click Continue.

- The further course of installing the OS into a virtual machine does not differ from installing it on a physical computer.

Some VM and guest system settings
A click in the virtual machine window captures the mouse cursor (i.e. it will only move within the virtual screen). To return the cursor to the main OS, press the Ctrl + Alt combination.
To access the entire feature set of the guest OS, you need to install special add-ons. Go to the "Devices" menu, click "Mount Guest Additions Disk Image" and follow the instructions.

To connect a folder to the guest system for exchanging files with the main one, click the “Shared Folders” item in the “Devices” menu. Click on the “folder+” icon in the window that opens and, through the “folder path” field, specify it in Explorer (it shows the directories of the main system).
If you want the setting to work all the time, check "Auto-connect" and "Create a permanent folder". The shared folder will be available from the virtual machine explorer as a network folder.


To change the order in which boot devices are polled (for example, to boot a virtual machine from a DVD), shut down the guest OS, open its settings (in the main Virtualbox window) and go to the first tab of the "System" section. In the "Load Order" list, select the desired media and use the arrow buttons to move it to the top.

VMware Workstation Pro
Some options for Hyper-V virtual machines
To take a snapshot of a running guest OS, Open the top menu of its Action window and click Checkpoint. Or press the combination Ctrl+N.
Access to the settings of an individual virtual machine is opened from its context menu in the list of the main dispatcher window and is hidden behind the "Settings" button.
Other features of the program are also very straightforward and mastered without much difficulty.
Oracle Corporation's free VirtualBox hypervisor includes support for virtual machines based on EFI software, essentially emulating physical computers based on the UEFI BIOS. In this article, we will talk about the features of EFI virtual machines and consider the process of creating them in the VirtualBox program.
1. EFI virtual machines: specifics
Like computers based on the new firmware format - EFI virtual machines support working with GPT virtual hard disks, start up, reboot, enter and exit sleep mode faster. The performance improvements for EFI VMs will be more noticeable on physical machines running UEFI BIOSes and operating systems installed on GPT disks.
As with computers with UEFI BIOS, only 64-bit editions of operating systems can be installed on EFI virtual machines. And only digitally signed operating systems that can pass Secure Boot verification. Like a real UEFI BIOS, the EFI interface emulated by VirtualBox only allows booting from UEFI boot devices - bootable ISO images and . Speaking of booting from USB devices.
VirtualBox and EFI virtual machines have different firmware emulators - called by the F12 key when starting environment machines like BIOS on physical computers. The firmware emulator for conventional virtual machines is primitive: the firmware is just a list of boot devices, moreover, relevant for old computers - a floppy disk, an optical disk, a network, a hard disk.
The EFI firmware emulator contains some settings for the emulated components,

and in the boot priority, instead of the abolished floppy disk, a virtual machine is launched from devices that are more relevant today - bootable flash drives and other USB media.

In all other respects, virtual machines work in the same way as regular ones - they are installed on a virtual hard disk, provide for setting up hardware emulation, when installing add-ons for the guest OS, they provide the latter with the main OS (the host system installed on the physical computer) in the form of an opportunity drag and drop objects, shared clipboard and data folders. As for ordinary ones, for EFI virtual machines in the VirtualBox program, export-import of the configuration is implemented for cases of transfer to another computer or reinstallation of the operating system.
2. Create an EFI virtual machine
The process of creating an EFI virtual machine from creating a regular machine will differ only at the configuration stage. The first steps to create a virtual machine will be the same in both cases.
In the VirtualBox main window, click the "Create" button. In the wizard window that appears, select "Expert Mode".

We select the operating system, its version, specify the name and path for saving the folder with the virtual machine configuration data. Specify the allocated amount of RAM. And set the hard disk settings - either specify an existing one, or, as in our example, create a new one.

Next, we set the detailed characteristics of the virtual hard disk: specify the location for storing its file, determine the size, we can leave the "native" VirtualBox VDI file format and dynamic type preinstalled. Click "Create" at the end.

After the virtual machine has been created, in the main VirtualBox window, click it and click the "Configure" button.

In the settings window, switch to the vertical tab "System" and in the first horizontal tab "Motherboard" check the box "Enable EFI". Click "OK".

We start the virtual machine.

A window will appear for selecting a bootable ISO image for the virtual drive, from which the virtual machine will be booted. Clicking on the folder icon will open Windows Explorer, where you can specify the path to the installation disk image with the desired operating system.

If the computer does not have a bootable ISO image of the desired operating system, but the distribution kit is written on a bootable UEFI flash drive, you can boot the EFI virtual machine from this flash drive.
3. Starting an EFI virtual machine from a bootable UEFI flash drive
To start the EFI virtual machine from a bootable UEFI flash drive, go to the settings of the turned off machine. In the "USB" section, check that the checkbox for enabling the USB controller is checked. Then select either a USB 2.0 or USB 3.0 controller (3.0 is compatible with 2.0). Next, connect the USB flash drive: press the button with the plus sign and select the USB flash drive from the list of USB devices connected to the computer. Apply all this with the "OK" button.

We start the virtual machine and immediately press the F12 key to enter the firmware. Now it remains only to set the boot priority from the USB device, as shown in the second and third screenshots at the beginning of the article.
It may be that without installing the plug-in for VirtualBox (Extension Pack), the work of virtual machines with USB devices will be incorrect. How to install the plugin? It must first be downloaded from the official VirtualBox website.


Confirm plugin installation.

We agree to the terms of the license.

We are waiting for a message about the successful completion of the operation and with the "OK" button we confirm the saving of the settings made.

Have a great day!
A virtual machine is a program that allows you to work in an isolated operating system without the risk of modifying your main operating system in any way. This is a kind of “sandbox” in which you can do whatever you want.
For example, you have Windows 7 installed, but you need to run an application that only runs on Windows XP. Installing two operating systems is not economical, because you need to buy another expensive license, clog up your hard drive, and in general, the idea is not the best. But you can run a virtual machine with Windows XP and work with the necessary software without any problems. Some even try to split one physical computer into several virtual ones in this way, but this looks a little silly, there are other, more adequate technologies.
What is a virtual machine for?
We list:
- Running other operating systems without installing them on the computer
- Testing programs that may contain viruses
- Testing for viruses that you can build into programs
- To emulate something. For example, other hardware devices (developing Java applications for phones)
- Checking and acquiring skills in creating / using a local network
I have listed the main tasks for which you can use virtual machines. You can customize them to suit your needs, all you need is an idea and a little thought, and of course you need to know how to create a virtual machine.
Virtual Machines for Windows
To create a sandbox on your computer/server, you can use one of the five most popular virtual machines: VirtualBox, QEMU, Parallels Desktop Microsoft Virtual PC, and VMware Workstation. We will focus on VirtualBox, as it is not inferior to its competitors in terms of performance and speed, and in some moments even surpasses them.
VirtualBox is a virtual environment that can emulate different operating systems and applications. It installs without problems on Windows, Linux or Mac OS. It was developed on January 15, 2007, changed developers 3 times, is now being developed by Oracle. A distinctive feature is that this environment can work with several operating systems simultaneously.
So, for example, you can run Windows and Linux on your Mac, or you can run Windows Server 2008 on a Linux server. If you need to run Linux on your Windows machine, and so on, all along with your existing applications.
Installing the VirtualBox virtual machine
To get started, you need a Windows distribution. This example uses XP, so I downloaded Windows XP Professional SP3 with the latest updates. VirtualBox for Windows download on the official website. Both 32 and 64-bit operating systems are supported. During installation, you will be asked to install drivers, in all dialog boxes, select "Install".
We start, the program window looks like this:
Click Create and select Windows XP.

We set the RAM according to your needs. I needed to run just one application, so I chose 256 megabytes. We press "Next".

We create a virtual disk on which files for our virtual OS will be stored. Type - VDI (VisualBox Disk Image). 10 GB dynamic hard drive.


Here is our virtual operating system and created.
To install the OS from the image, we need to go to Settings / Media and do as shown in the screenshot below:

Select the Windows XP image that we downloaded:

In the same settings, you can make a shared folder in which we will store files for work. In the settings, go to the Shared folders section, click on the Add icon:

Now everything is ready to start, exit the settings and double-click on the name of our created virtual machine to launch it. Once launched, the download will start automatically.

Note: When the machine starts up, it may not see the shared folder and you will need to install an add-on. This can be done by selecting Install/Install Guest Additions from the top menu:

Now you know how to install a virtual machine, and you can put this knowledge into practice. Good luck with your virtualizations, dear readers.
With the free VirtualBox program, you can create a virtual machine on your computer with a different guest operating system. The VirtualBox virtualization program creates virtual machines in which you can install different operating systems: Windows, Linux, Mac OS X, etc.
In Virtual Box, your computer will be installed as if a virtual computer with another (or other) operating system, which will not affect the main OS installed on your computer in any way. With this program, you can simultaneously work on two different operating systems, for example, Windows and Linux Mint, or Windows 10 and Windows 8.1.
In such a virtual operating system, you can perform various actions: learn to work in a new OS, test new versions of Windows, try unfamiliar programs, run outdated applications that no longer work on your system, etc. You can do with a virtual ( guest) operating system, whatever, without any risk to the host system.
To do this, you will not need to create new partitions on your hard drive and install another OS there. Everything you need to create a virtual machine will be done by the VirtualBox program.
You can read more about installing the VirtualBox program and the add-on package here. Next, we will look at the process of creating a virtual machine and its configuration. The VirtualBox program is completely Russified.
Creating a virtual machine in VirtualBox
To start the process of creating a virtual machine, in the main window of the VirtualBox program, click on the "Create" button.
In the "Specify the name and type of OS" window, you will need to enter the name of the new virtual machine, then select the type and version of the operating system. The created virtual machine will be identified by this name, so I recommend making clear names.
In this case, I have Windows 10 installed on my real computer, and I want to install Windows 7 on a virtual machine. In order to avoid confusion between versions (it will be possible to install several identical systems of different editions), I gave the guest system a detailed friendly name.

It will be possible to install the virtual machine in expert mode (all settings will be grouped in several windows), or in detailed mode, which we will now consider.
VirtualBox recommends a minimum amount of RAM for this virtual machine. You can choose the amount of memory you need. Here you should adhere to the following recommendation: you must not exceed the amount of allocated memory, which is marked in green on the scale, so that in the end, you do not have problems with the operation of the created virtual machine.
Virtual memory is the portion of your computer's physical memory that will be used in a virtual machine. Virtual memory is allocated from the disposal of the main (host) operating system for the operation of the guest operating system on a virtual machine. The allocated RAM will only be used when the virtual machine is running.
My computer has 8 GB of RAM, so I can allocate half the amount of 4 GB to the virtual machine. You can choose your own amount of RAM by moving the cursor on the scale, or enter the amount of memory in MB. In the future, if necessary, you can change the amount of allocated RAM in the settings of this virtual machine.

In the next step, you will need to create a virtual hard disk, since the virtual machine will not be able to work without such a hard disk. A virtual hard disk is a special type of file that is stored on your computer's OS file system.
This window offers three options to choose from:
- Do not mount a virtual hard disk - you can mount a virtual hard disk after creating a virtual machine
- Create new hard disk - a new virtual hard disk will be created
- Use an existing virtual hard disk - a previously created virtual hard disk will be connected to the virtual machine

In the next window, you will need to select the type of virtual hard disk. You can choose from the following disk (virtual container) formats:
- VDI (VirtualBox Disk Image) - VirtualBox disk format
- VMDK (Virtual Machine Disk) - VMware disk format
- VHD (Virtual Hard Disk) - Microsoft disk format
- HDD (Parallels Hard Disk) - Parallels disk format
- QED (QEMU enhanced disk) - format for QEMU/KVM
- QCOW (QEMU Copy-On-Write) - format for QEMU (qcow2)
If you will use only the VirtualBox program to create and run virtual machines, then you can leave the default choice: the VDI format. Discs of this format will be opened in Virtual Box.
The VMDK format is suitable if you will be using a VMware Player or VMware Workstation virtual machine. After creating a virtual machine in VirtualBox, selecting the virtual disk type VMDK, you can later run this virtual machine with the operating system installed, not only in VirtualBox, but also in another VMware program.
After selecting the disk type, click on the "Next" button.

The dynamic hard disk file will take up little space on your computer's physical hard drive. As it fills with data, it will increase in size up to the maximum volume.
The fixed hard disk file immediately takes up the entire volume of the virtual hard disk.

In a new window, you will need to specify the name and size of the virtual hard disk file.
In the name field, you will need to write the name of the virtual hard disk. I always provide meaningful names for virtual machines so that I can easily distinguish virtual container files from each other.
By default, all virtual machine files will be saved in the user profile on the C drive of your real computer. I recommend doing it differently: create a special folder (I have it called Virtual Machines) in another (non-system) disk partition of your computer, in which you can store virtual machine files.
If the virtual machine files are stored in the user profile on the system disk, then in the event of an operating system reinstallation, the previously created virtual machines will be lost. You will need to re-create the virtual machine and then install the operating system there.
Files saved on another partition of the hard disk, or on another hard disk, will be saved if the system is reinstalled. After installing a virtualization program (VirtualBox or VMware) on your computer, you only need to connect and run the previously created virtual machines with operating systems.
To select a virtual machine storage folder, use the folder button icon. In the Explorer window, select the drive and folder to store the virtual machine data.
Then, on the scale, indicate the size of the virtual hard disk in megabytes. To do this, drag the slider to the desired location that suits your needs. After selecting the settings, click on the "Create" button.

The virtual machine has been created. This will open the main window "Oracle VM VirtualBox Manager" with the newly created virtual machine. In the right part of the window, you can see some parameters of the virtual machine.

Now you will need to make additional settings before installing the operating system on the virtual machine.
Virtual Machine Settings in VirtualBox
In the main window of VirtualBox, highlight the virtual machine (if there is more than one), and then click on the "Configure" button to enter the settings for that particular virtual machine.
In the "General" section, in the "Advanced" tab, you will need to select a storage folder for system snapshots (a very useful feature). By default, system snapshots will be saved in the "Snapshost" folder in the user profile on the system drive "C". You can create a folder with this name in the place where you store the files of this virtual machine in order not to lose snapshots when you reinstall the system.
You will also need to select a shared clipboard in order to exchange data between the main real operating system and the guest virtual OS. There are several options to choose from:
- Off - default setting
- From main to guest OS - you can move information from the main system to the virtual OS
- From guest to host OS - you can move data from virtual OS to host system
- Bidirectional - data can be exchanged in both directions
It makes sense to choose a bi-directional shared clipboard for the greatest convenience when working.

In the "System" section, in the "Motherboard" tab, you can configure the boot order of the virtual machine. Use the up and down arrow buttons to select the virtual machine boot sequence. It makes sense to make an optical disk the first boot device, it will be possible to uncheck the floppy disk altogether due to the irrelevance of this method.
When you select an optical disk as the first boot device, the system can boot both from the real drive of your computer, where the bootable DVD with the operating system will be inserted, and from a disk image, for example, in ISO format, which is physically located somewhere on the disk your computer.
After applying the new settings, do not forget to click on the "OK" button.

In the "Processor" tab, you can enable additional cores if your computer's processor is multi-core.
In the "Display" section, in the "Screen" tab, you can select the amount of video memory that the virtual machine will use. Here you can enable 2D (required) and 3D (optional) acceleration.

In the Video Capture tab, you can enable the video capture feature in the virtual machine.
In the "Media" section, you will need to select a virtual drive. The virtual disk file is already displayed here, but it is almost empty, since the operating system has not yet been installed. Therefore, to install the system, you will need to select an ISO image file with the operating system.

Click on "Empty", in the right part of the window opposite the "Optical drive" item, click on the button with the image of the disk, and then in the context menu select "Select optical disk image ...". Use File Explorer to find the desired operating system image on your computer.

In the sections "Audio", "Network", "COM ports", "USB" you can leave the default settings, in many respects these settings depend on the hardware of your computer.
There is nothing in the "Shared Folders" section yet, since the guest system has not yet been installed. For the functioning of shared folders, you need to install Add-ons for the guest OS (VirtualBox Guest Additions). You can read more about installing the system in a virtual machine and installing add-ons here.
If necessary, you can change the settings for a specific virtual machine to others. For each virtual machine, all settings are individual.
Deleting a virtual machine in VirtualBox
To delete a virtual machine, in the main window of Virtual Box, you will need to enter the "Machine" menu, and then select the "Delete" context menu item.

After deletion, all files and data of the virtual machine will be deleted from your computer.
Article Conclusions
In the free VirtualBox program, you can create a new one, or connect a ready-made virtual machine, apply the necessary settings for more convenient use of the virtual machine.
How to install the software product itself Oracle Virtual Box, with which we will create a virtual machine, read in.
In order to create a virtual machine, for example, Windows XP, you need (the instruction is described for Virtulbox version 5.0.2 installed on Windows 8.1 x64):
1. Run (Start -> Programs -> Oracle VM Virtualbox)
2. Press the button Create
Fig.1 - Oracle Virtualbox - create
3. In the next window, specify the name of the virtual machine, its type and version:
 Rice. 2
 Push button Next
4. Set the required amount of RAM for the normal functioning of the virtual machine:
 Fig. 3 - Oracle Virtualbox - creation - determining the amount of RAM
 Push button Next
4. In the next window, select Create a new virtual hard disk:
 Fig.4 - Oracle Virtualbox - creating a new virtual hard disk
 Push button Create
5. Select the type of hard drive:
 Fig.5 - Oracle Virtualbox - virtual hard disk type selection
 Click the button Next
6. Specify the format for storing data on the virtual hard disk:
 Fig.6 - Oracle Virtualbox - choice of data storage format on a virtual hard disk
 Click the button Next
7. Specify the name and size of the virtual hard disk:
 Fig.7 - Oracle Virtualbox - configuring the name and size of the new virtual hard disk
 Push button Create
8. On the left side of the window Oracle VM VirtualBox Manager The Windows XP system image will appear:
 Fig.8 - Oracle Virtualbox - manager
 Now you need to configure the virtual machine to be able to install Windows XP on it.
9. First of all, you need to specify the source from which the operating system will be installed. To do this, select the desired one in the list of virtual machines (in this case, Windows XP, see Fig. 8) and press the button Tune
10. Select in the panel on the left carriers and in the attributes we specify the device (disk) from which the operating system will be installed. In this case, we will be installing Windows XP from a CD (‘D:’)
 Fig. 9 - Virtualbox - media setup - OS installation source selection