How to connect an old webcam. Connecting a webcam to a computer
Today, technological progress has reached such a level that sometimes you just want to play God. Of course, we are not yet able to create people, but it is quite possible to interact with pieces of equipment. This article will discuss the theoretical possibilities of connecting to various webcams. Please note that the content of this article is for informational purposes only, so remember that invading the personal space of another person, especially in this way, is punishable by law.
general information
Many people are afraid that the camera built into their laptops or connected to the computer can spy on and eavesdrop. It should be noted that for good reason. Moreover, not only they can do this, but also mobile devices, TVs and even Appliances like irons (there was a scandal with them in the Russian Federation several years ago). And now we will look at how to connect to someone else's webcam.
Choosing a tool
The necessary tools can be provided by the fourth version of the .NET Framework and VS2010. DirectDraw and MSDN technologies are also suitable for connection. But to solve the problem within the framework of the article, the main attention will be paid to Video technology For Windows(VFW). In this case, WinAPI functions are widely used. Of course, these are not all the available technologies with which you can access the camera. But they are the most developed and perfect of those widely known and accessible to people.
Begin
So how to connect to someone else's webcam? Initially, it should be taken into account that the device may have several devices for recording images and sound. Therefore, you should take care of the possibility of choosing the tool with which you will work. To solve this problem, we use the capGetDriverDescription() function.

It can accept five parameters:
- wDriverIndex is the index of the video capture driver. It can take values from zero to nine.
- lpszName - the parameter points to the buffer that contains the corresponding driver name.
- cbName is used to specify the size in bytes of the lpszName buffer.
- lpszVer contains a pointer to a buffer where a description of a particular driver can be found.
- cbVer is the size in bytes of the buffer where the driver description is stored.
How to connect to someone else's webcam? Ipb image can show camera activation. Therefore, we need to work on this as well. You can, of course, write a small code here that allows you to connect and control the operation of the device, but since this is an invasion of privacy, only a description will be provided. For creating necessary program you can use C#.

When working, you must indicate the name of the function that is connected, and also write the name of the DLL where it is defined. A class should be used to assemble all the individual work.
What should you do next?
We continue to figure out how to connect to the webcam of someone else's computer. To a specialist, the code may seem very simple to implement. What should be done? Above we wrote about the first parameter of the capGetDriverDescription() function, which can take a value from zero to nine. Therefore, you should run a loop that will purposefully work in this range to search for the required values. So, we have a list of devices. Now you need to take care of transmitting the video stream. The capCreateCaptureWindow() function will help with this, the main purpose of which is to create a capture window. What should be done in this case? It all sounds trivial - you only need to send messages to the capture window. The well-known SendMessage() function will help with this. But let's return to capCreateCaptureWindow().
Capturing the image
The capCreateCaptureWindow() function has the following arguments that are of interest to us:
- lpszWindowName is a null-terminal string that contains the name of the capture window;
- x - location of the X coordinate;
- y is the location of the Y coordinate;
- nWidth - window width;
- nHeight - window height;
- dwStyle - window style;
- hWnd - access to the parent window;
- nID - window identifier.

As a result of the function execution, NULL will be received (in case of an error) or the connection will be successfully created. But keep in mind that since it belongs to WinAPI, you need to import it. With all this data, you can already start the camera initialization process. Immediately after creating the window, you can already try to send a message. If the result is distinguishable from zero, this means that the attempt was successful. Messages on which a number of operations depend must then be defined and sent. So, in order of priority:
- connect to the device driver, which provides video capture;
- make a break;
- copy frame to clipboard;
- if necessary, enable preview mode;
- if necessary, activate the overlap;
- if necessary, adjust the preview speed;
- enable scaling if necessary;
- if necessary, set the call function for preview;
- receive a single frame from the video capture driver;
- save the frame received from the camera to a file.
Well, that's basically it.
What about other devices?
There are not only computers in the world. If you are interested in how to connect to the webcam of someone else’s laptop, then the described method is perfect for this purpose. Of course, if the Windows operating system is installed there. This is not suitable for Penguin fans. After all, there, as a rule, the user’s permission is required for any action. And if you want to connect to Linux, you will have to ask the person to allow him to monitor him.

Of course, purely theoretically, he can resolve it out of stupidity or accident. But in reality there is no need to rely on this. If the question is how to connect to someone else’s iPhone or Android webcam, then a lot depends on the operating system used. And talk even in general outline very difficult due to their wide variety.
Conclusion
But nothing is impossible if you set yourself a goal and work hard to achieve it. Let's take the iPhone for example. Phones in this series are considered well protected. And hack programmatically om them (by at least officially) impossible. But in practice it is possible to find a gap. The main thing is to search well. Let's say we make an application that transmits video to us. And under the guise of something, we will force the user to download and install it. At the same time, we will register the creation of a secret copy, which will not be displayed in the registers. That's all. Even if the user deletes the application, we will still monitor him.
If you have just decided to purchase a web camera, but don’t know how to set it up, then it doesn’t matter. The most important thing is not to be upset, everything will work out for you.
Purpose of the WEB camera: The camera is used to shoot video and can only be controlled via a computer. Its main task is video chat, where you can communicate with friends, or record a video presentation on a blog.
WEB camera installation
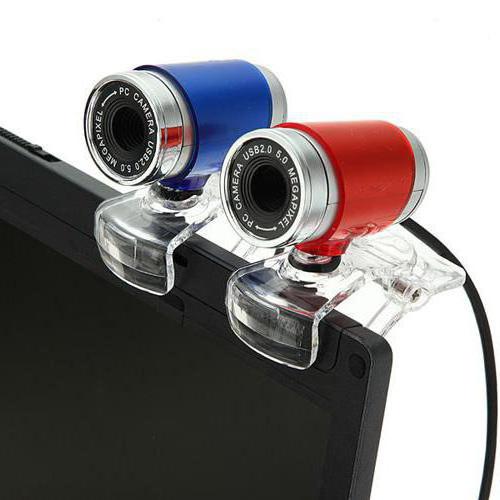
You can install the camera in different ways: if you have a narrow LCD monitor, then you can use grips to attach the camera to the monitor. If WEB cameras have a platform or a leg, then place them under the monitor or on the table.


And accordingly, the WEB camera has USB cord, which will need to be connected to the USB input.
WEB camera settings
In order for the operating system to see your camera, you will need to install drivers.
- When purchasing a WEB camera, a driver disc must be included.
- Please read this instruction manual very carefully. It may say that you first need to install the drivers and then connect the camera, or maybe vice versa. It won't be that difficult for you to install the driver data from the disk. If it still doesn't open boot disk, then go to the disk and find boot file"SETUP".
- But sometimes there are cases when the camera comes without an included disc. Then where can you get the drivers? The answer is obvious on the Internet download. I don't usually buy a camera like this.
- But if, after all, you purchased such a camera, then first look at the company, and then on the official website find drivers for your model and download.
- Perhaps this method did not help you, then enter the company and model on the Internet, and then download it elsewhere.
- You can also find drivers by identification number. You will need to right-click on “My Computer”, then click on properties.
- You will see a window similar to this, here you need to click on “Device Manager”

- In the “Device Manager”, find the webcam; the camera can be located either in “USB controllers” or in “Sound, video and gaming devices”. If the camera does not have drivers, there will be an exclamation mark. Click on the name right click mouse and go to properties.

Then go to the “Details” tab and select “Hardware ID” in the properties. Here you copy the first line and enter it into a search engine. Use a search engine to find drivers by identification number and download.
 If you did everything correctly, then you should install a special application with drivers, then launch it on the desktop this application. In this application you can adjust the width, height, brightness, quality, tone, sharpness, etc.
In Skype, MailAgent and other video chats, the camera is configured separately.
How to set up a webcam on a laptop
Well, everything is simple here, the laptop already has a built-in camera. You will need to install Windows correctly (preferably Windows 7), then connect to the Internet and it will find the software itself. If the camera still does not work, then you need to install drivers. Drivers can be installed via the disk that comes with the laptop.
How to set up a webcam in Skype
To set up a camera on Skype, you need to enable Skype (register) accordingly; if you have already registered, then simply enter your username and password.
Then you need to go to the “Tools” tab and select “Settings”

You will see the “Settings” window; in the “General” section, go to the “Video Settings” item. In this window you configure video chat as you need.

Sincerely, Roman Rvachev!
PS. Subscribe to update the article, and you will find out when there will be a competition with cash prizes, as well as a lot of cool chips and useful tips to your email.
xpert-pc.ru
How to connect and configure a webcam to a laptop or computer on Windows 7, 8, 10
The first thing you need to do is make sure that your webcam is turned on and the necessary drivers are installed. In the case of a laptop, we will talk about integrated, and with a computer, we will talk about connected via an external USB port.
Open the Manager by right-clicking on the Computer icon - Properties, then Device Manager.


Pay attention to the Imaging Devices section. 
As can be seen, in in this case The integrated webcam is disabled. To enable it, right-click on the camera icon and select “Enable”.
If you have Windows 10 installed, the next thing you need to do is check whether the camera is enabled in the privacy settings.
Start / Settings / Privacy
Camera section - just move the slider to the right if the camera was disabled there before.
If we're talking about About drivers, then usually for a built-in camera they are installed along with the system installation, but if this is not the case, then you will need to download them from the official website and install them.
Using a webcam on a computer
Using the cord that usually comes with the kit, we connect the device to a free USB port on the computer. 
The system can pick up the device automatically (by installing drivers from its database), in which case you will see a notification about successful installation in the lower right corner.
Or you will see a notification in the center of the screen that it is ready to use.
Otherwise, you will need to install camera drivers. They should also be included in the kit (on CD), if not, download from the official website and install. Installation, in both cases, should not raise any questions - everything is extremely simple.
For example, for modern Logitech webcams, the installation wizard software is as follows. 
The user agrees to the license agreement and selects a location to install the drivers. Then, after waiting for the installation process to complete successfully, you may be asked to restart your computer. After a reboot, all changes will take effect. 
Cleaning your computer or laptop keyboard
If you couldn’t find drivers by model on the network, you can search by device ID (identification number), this often gives positive result.
To find it out, you need to go to the manager - right-click on the icon of an unidentified device - Properties. 
On the Details tab, select Hardware ID from the drop-down list. 
Below in the value field you will see the PID, use it in the search to try to find the required drivers.
As is the case with the built-in device in a laptop, you should also check in the manager whether the device is turned on. If disabled, enable it. 
If something goes wrong and the device is not detected by the computer, first check the condition of the wire; during operation it may become worn out and produce a poor-quality connection. Test it on other USB devices. If there is still no connection, you should change the wire.
If everything is fine with the wire and the latest drivers are installed, but the camera is not active, check in the manager to see if there is an exclamation mark next to the webcam icon - if so, then you should try restarting the device and reinstalling the drivers. 
Webcam settings
If there is sound, but no picture, the settings of applications that use the camera will help.
Often, when installing drivers, a special program is installed in which you can configure device options. You can find it in the Start button - Programs or using a shortcut on the desktop.
You can adjust some parameters using standard application Camera integrated in latest versions windows.
To launch it, simply enter the word “Camera” in the search. 
On the right top corner In the working window of the application you will find a button with settings, by clicking which you will be able to adjust them. Unfortunately, there are not as many options as we would like. For more options, third-party software is used.
Ways to unlock your iPhone if you forgot your password
The most popular of third party applications to work with the webcam is Skype. Here, in the main, select video settings. Then go to your webcam settings. 
There is an opportunity to increase contrast, hue, saturation, brightness, clarity, and gain. 
There are many more special programs for working with the camera that have wide functionality. For example, Webcam Plus Lite, WebcamXP (free), WebcamMax (paid for professionals).
To go to options, click the Program Settings button. Next, select Image.
Then Camera settings.
Here you can change many different camera options, customizing it for yourself. 
composs.ru
How to set up a webcam on Windows 7?
Useful computer tips» Tips » How to set up a webcam on Windows 7?
 By the phrase “set up a webcam,” many users mean putting it into working mode for further use, for example, for holding online conferences. In this article we will look at the main ways to do this.
 Connection to the system unit
All web cameras are connected to the system unit using USB cable. It can be either integrated (where one end of the cable is built into the camera) or removable. Most often there are webcams with an integrated cable. Therefore, you just need to install your camera on the table, or attach it to the monitor body and connect the cable to the USB connector, which is located on the system unit.  If nothing happens after connecting the webcam (no errors or warnings appear), this means that you have problems either with the USB port or with the cable itself. It’s very easy to check if a port is working - insert any other port into it. USB device, for example a flash drive. If it appears in "My Computer" or the indicator on it blinks, this means that the port is working. Accordingly, your camera is not working properly or its cable is damaged.
Drivers
When purchasing a webcam, a disk should have been included with it. Without drivers, the webcam will not work. Therefore, carefully check the box from under the camera, perhaps the disk is lying around somewhere. If it is not there, then return to the seller and ask him to provide the drivers.  If you have it, be sure to install all the software components that it contains. After which your camera should already be working.
Don’t worry about the version of your operating system, all drivers for webcams are installed the same way on both Windows XP and Windows 7. And they work flawlessly.
If the seller doesn’t have the disk, then don’t despair, try looking for drivers for your webcam model on the Internet. Also on some website pages you can find not only drivers, but also detailed instructions about setting up your webcam model for the operating room windows systems 7.
Programs
Let's consider two best programs for setting up webcams that work on Windows 7.  This program has quite a lot of functionality. In it you can record videos using the camera, zoom the image (zoom in or out), you can take screenshots streaming video, impose various effects and much more. It is with the help of the last tool that you can edit the color of the image, light, brightness, shades, etc.
A little similar program with Splitcam, but it puts more emphasis on video effects. There are very, very many of the latter in the WebcamMax database.
vgtk.ru
How to correctly and quickly configure a webcam in Windows OS
Communication via the Internet is becoming more convenient and simpler every year. One of the devices that is an integral part of organizing video communication is the webcam. However, before you set up your computer's webcam on Windows, you need to answer some questions.  Absolutely anyone can figure out how to connect a webcam to a computer. This is a very simple device. Connecting a webcam to a computer does not require any special skills or knowledge.
The issue of connecting it is more relevant for owners of personal computers, since laptops are usually equipped with cameras. The built-in camera is ready to use by default, so you don’t need to install or update anything to use it. But despite this, sometimes it makes sense to equip a laptop with more quality option webcams.
IMPORTANT. Sometimes Windows “does not see” the laptop’s built-in webcam. This indicates that it is disabled. To enable it, you need to use a key combination by simultaneously pressing the Fn button and one of the F1-F12 buttons. The icons shown on them will help you figure out which key to select from the F row. There should be a picture of a camera, camera or something similar there.
The process of connecting a webcam to a personal computer and laptop is the same. To do this, you need to take the USB cable that comes with the kit and connect one end to the corresponding connector on the camera, and the other end to a free USB port. After this you will hear a characteristic windows sound, indicating that a new device is connected. After waiting for the device to fully initialize, you should restart the computer to correct operation cameras.
Some webcams, in addition to a USB cable, are also equipped with a 3.5 mm mini-jack cable. This indicates that the device has a built-in microphone. The plug of this wire should be inserted into the appropriate connector. It is similar and is located next to the connector for speakers. Most likely, both the 3.5 mm mini-jack wire coming from the camera and the connector for it on the computer will be red or Pink colour.
How to install drivers and make the webcam work
If the kit includes an installation disk
In most cases, setting up a camera on a computer ends at the previous step. Drivers for most webcams are installed in automatic mode. If this does not happen, a CD will come to the rescue, which should be included in the kit. Insert this disc into the drive, the installation menu will appear. Next, following the prompts of the explorer, you need to install the device drivers. For proper operation webcam, you need to restart your computer.
IMPORTANT. To check the functionality of the webcam in the WindowsXP version, it was enough to open “My Computer” and find the USB device there. More later versions The operating system no longer has this feature. In Windows 7, for example, you can see the image from the camera only in specialized programs, for example, Skype.
But how to set up a webcam on a computer running Windows if there is no disk included with the camera or it is lost and the drivers are not installed automatically? In this case, there are three ways to solve the problem. The first is to install a special program that will find suitable drivers on the Internet and automatically install them. There are a lot of such programs, the most popular are DriverBooster and DriverPack. These utilities are very simple and intuitive clear interface, so any user can understand them.

The second way is to search for drivers on the network using built-in windows tools. To do this, right-click on the Start menu. In the menu that opens, click “Device Manager” (for Windows 8 and lower versions, the path is as follows: “Start” - “Control Panel” - “System and Security” - “System”).
Next, you need to identify devices with uninstalled drivers by icon yellow color, standing on the right. Among them we find a webcam. After right-clicking on such a device and selecting “Update drivers” in the pop-up menu, in the new window you need to click “Automatically search for updated drivers.” The drivers will be installed and the camera will work after rebooting.
The third way to solve the problem is to manual search necessary files on the camera manufacturer's website.
Setting up a webcam for Skype
Skype is the most popular program in the world for video communication via the Internet. Most users do not know how to install a webcam on their computer for Skype correctly. In fact, this program does not require special settings webcams. The whole setup is correct connection cameras to computer and correct installation drivers. Therefore, if the user has completed all the previous steps correctly, then Skype will inevitably broadcast the image from the device.

To check whether the image is being transmitted, you first need to launch the program and log in to your account. Next, you need to select the “Tools” tab at the top of the window, and click “Settings” in the menu that opens. After this, select the “Video Settings” item. If an image from the camera appears, then everything is in order and you can make video calls. If the screen displays text message, which means there is a problem. Most often it occurs because the camera is being used by another application. Therefore, in order to make calls on Skype, you need to close other similar programs.
Thus, installing a webcam is not difficult. Everything is very simple: connecting cables, installation necessary drivers, installation of a program for video communication. Leave your comments and ask questions that you couldn’t find answers to in the article. Feedback from readers is very important for us. It will improve the project and the quality of articles on it.
NastroyVse.ru
How to easily connect a webcam to your computer
With increased access to high-speed Internet networks, instant messengers with video and audio communication capabilities have become very popular. Free programs similar to Skype, Imo, Viber, Jitsi, Google Hangouts, etc. allow you to connect relatives, acquaintances, friends who are located different sides globe almost instantly and with sufficient quality.
The Internet is also littered with applications for video recording, motion detection, security systems video surveillance, image streaming. All these programs have one element in common - a video camera. The most convenient and cheapest type of cameras is WEB cameras.
If you do not quite understand how to connect a webcam to a computer, then this information will be useful for you.
Connecting the camera
The device connects to USB port via wired or wireless interface. For it to work, just insert the cable or receiver connector into the corresponding socket on the computer case.

Please note that cameras can connect to a computer using USB 2.0 or USB 3.0 protocols. This means that a USB 2.0 gadget will work with any protocol, and USB 3.0 only with the appropriate one.
If the motherboard does not support USB 3.0, then connecting a camera with the 3.0 protocol will not be possible.
If everything fits together for you, you need to install the appropriate driver.
Driver installation
Typically, the system independently determines the device type and installs a support program. As evidenced by the notification in the lower right corner. Sometimes the software is missing, then you should use the disk that came with the camera. As a rule, no difficulties arise at this stage. Follow the prompts and the driver will be installed safely.
If there is no disk, then you will have to look for the driver yourself. To do this, you need to go to Device Manager. Windows 10 allows you to do this in a simplified way. Just right-click on the Microsoft icon in the lower left corner of the screen and select the appropriate menu item.

Open Device Manager, and in the window that opens, select Imaging devices - USB camera. At this point, right-click on the Refresh inscription. And choose automatic update. The system will automatically detect the driver, install it, and connect the device.

It happens that the driver is not automatically detected, how to connect the webcam to the computer in this case? You need to search for the program on the manufacturer’s website or on the driver.ru resource by model.
Settings
Once the driver is installed, you can configure the gadget. To do this, a focusing ring may be installed on it, which should be adjusted. The device also has a mount with which you can set its position relative to the object being photographed. If Skype is installed on your computer, the image is configured in this program. Open the settings window: Tools - Settings. Video settings.

Now you can set the position of the device, adjust the focus and adjust the video signal parameters.

If Skype is not installed and you do not want to install it, then use any of the applications that support web cameras, for example, Webcam Surveyor, AbelCam, Active WebCam, etc.
Video on the topic
Today two types of equipment are called cameras: webcams and equipment for amateur photographers. The first one is used so often that many people forget to add "web". The second is not called a camera for the same reason. Both can be connected to a computer to perform certain tasks. If you are reading this article, it means that you cannot connect a web camera to your computer. There can be quite a few reasons for this, here are the main ones:
- Your operating system is too outdated. Agree, Windows 95 will not be able to support a webcam (there was no Skype in the 90s).
- Your operating system does not have the required software. Windows cannot pull up all drivers from the Internet.
- A damaged USB socket or cord will prevent you from connecting any external device to a PC, including a web camera.
- Performance is impaired motherboard for any reason. For example, if the provider's equipment is not properly grounded at network input potential may come.
There are usually no problems connecting cameras; any of them is displayed in Explorer, being connected by a cord to USB connector. You just need to turn on the camera's power after connecting.
Standard instructions
First of all, you need to find out the model of your webcam. Even if you have a driver disk on hand, this does not mean that the software is fresh. Webcams are not serious equipment, although their prices could be quite high. And therefore the manufacturer is limited to an often obscure sticker that is easy to lose. While the sticker is in place, read the device model. Let's assume this is CNR-WCAM113.
First of all, we make sure that drivers for the device can be found in open access(assuming the manufacturer is unknown). The Internet helpfully suggests that the manufacturer is Canyon. We go to its website in search of software. Why not just plug the cable into USB? Because then there’s nothing to write about – stick it in and use it! Let every lamer be able to solve a trivial problem technical problem connecting equipment after reading this note.

We enter through the main gate - technical support manufacturer. Nothing was found on the official website. Using a search engine from the Canyon archive, we managed to find an ancient note with a football player in a Gazprom uniform. It outlines the key features:
- Resolution 1.3 MP.
- Built-in microphone.
- Button for snapshots.
- Support for special effects in real time.
- Features of removable clothing and installation possibilities.
All this really excited me, because I urgently wanted to try the effects. But there is stubbornly no desire to download the 2009 driver. Let's try Google in English... In general, I had to download it from some site. The disk image that opened in .iso format was encouraging, because somewhere at home there was this piece of aluminum lying around, but it was not possible to find it. We open the archive, inside there is an executable installer. Let's launch. Meanwhile, Omsk Gazmyas...
While the virus software was being removed, we found time to put the kettle on and found original disc to the webcam, completely by accident. And while Doctor Web is checking the disks, we will copy the original content and install the driver. Conclusion: not every software on the Internet can be trusted. Even if it is taken from a foreign site.

Webcam without driver
In the meantime, we try to turn on the webcam without a driver. If only to see how Windows responds to this. At the very end of the list of equipment in Device Manager, our webcam appeared.

Let's explain our actions: we'll check how the gadget functions without a driver, and then install the original software and compare. Let's go to Devices and Printers from the Control Panel to check the newly installed hardware.

Choose from context menu Troubleshooting, and after some Windows time gives this message.

The brainchild of Billy Gates is 100% right. Used USB 3.0 port in hopes of backwards compatible. Let's change the connection interface to the one specified by the operating system. After that, Windows issued a message that everything was fine.

A check via Skype showed that our device sees this article.

The picture is not very clear, but now is not the time to deal with this problem. Doctor Web I found and removed 5 Trojans, and the disk with the official software was copied. Rather, we put it on the computer.
Webcam operation with standard software
After autostart, a delightful picture with terrible buttons appeared.

The installer quickly finished his job, it's time to see what has changed.

There is now a shortcut with the official software on the desktop, let’s feel the difference. But this didn’t change anything.

Another webcam

Modern laptops have built-in webcams. Now it is impossible to find a model on sale that does not have a camera. But, like any other module, this one can also be faulty. Or users often simply don’t know how to turn on the webcam on Windows 7. We will try to solve this problem once and for all.
How to enable a webcam on a Windows 7 laptop?
Let's start with the fact that the webcam on a laptop works with pre-installed drivers by default. That is, when you buy a laptop in a store, it already has Windows 7 (or another version) with drivers for the webcam. If you have reinstalled the OS or there is some kind of malfunction in the camera, then the drivers must be installed again. But we'll talk about this later.
The easiest way to turn on a webcam on Windows 7 involves using Skype. Everyone has this program, and if not, then downloading it is easy. In Skype's settings there is a section called "Camera Settings". Already there, in the settings, you can turn on the camera and see your image. However, if you want to know how to turn on the webcam on Windows 7 without Skype, then there are other ways.

Alternatively, you can do this on a specialized website for testing webcams. Just go to webcammictest.com and click the "Test Webcam" button. If everything is fine with it, it will start and you will be able to see yourself in the image. In case of malfunction or any problem, the message “Webcam is not connected or is faulty” will be displayed.
Checking the camera on social networks
The same can be done in social network"VKontakte" or "Facebook", for example. There you can create a profile photo using your webcam by clicking on the "Take instant photo" button. After this, a small window will pop up "Adobe Options" Flash Player" and will ask for permission to use the camera. You need to click "Allow" and "Close". After this, the camera will be activated and you can take a photo. It is worth noting that on Internet sites the camera can only work if the plugin is installed Adobe Flash Player. If there is something wrong with the camera, for example, the drivers are not installed, then you will see the message “Web camera not detected.”
You can also use special programs, which enable and allow you to configure the camera: Active WebCam, RGS-AvaCam, Webcamoid, etc.
Checking status
If the described methods of how to turn on the webcam on Windows 7 do not help, then you need to check its status. To do this, you need to go to the device manager and check whether this module is present in the system at all. The easiest way to do this is to write in command line: devmgmt.msc. This will immediately open the “Device Manager” window, and there we need to look for the camera in the list. It will be in the drop-down list under the "Imaging devices" line. Expand this list, and if there is a webcam there, then everything is fine with it. But there may be other situations:
- The webcam is not in the list of equipment at all. This is the worst case scenario, which means that the device is either physically broken or hardware disabled.
- There is some unidentified device. It could be a camera (or something else) that the computer simply cannot recognize. In 90% of cases this means that the software, that is, the driver, is missing.
- There is a camera, but it is marked with a yellow triangle with exclamation point. This means that the device is recognized and generally works, but there may be operational problems. This can be treated by removing the old driver and installing a new one.
Therefore, before you turn on the webcam on Windows 7, first check its condition. If it suddenly turns out that the computer simply doesn’t see it, then you won’t be able to turn it on at all.

How to enable a webcam on Windows 7 on an HP or Asus laptop?
Laptops have special functionality for quick launch camera using the Fn buttons. On laptops, these buttons allow you to slightly expand the functionality. For example, you can make the sound quieter or louder, the brightness higher or lower. You can also turn off the display and force the computer to sleep. How to enable a webcam on Windows 7 on an Asus or HP laptop in this way? Just press the Fn button and, without releasing it, click on the camera icon. Depending on the model, this icon may be located anywhere: at the top or bottom of the keyboard. It may not exist at all. When pressed, the built-in camera application is launched with different settings. On some laptops, a combination of these keys allows you to enable or disable the camera module itself. It all depends on the model.
But even if nothing worked out in this case, then your case is serious. At a minimum, you should try to install the driver.

Installing the camera driver
If you tried all the described methods on how to turn on the webcam on Windows 7, but still nothing worked, this means that you need to install a driver.
The information sticker on your laptop will indicate the model. Find this sticker and identify the model. This is important because depending on the model number, your laptop may have one or the other camera installed.
Do you recognize the model? Now go to the laptop manufacturer’s website and click on the “Support” section. All manufacturers allow users to download drivers on their website. In the "Support" section you need to select "Download software" and indicate your laptop model there. This will display full list with drivers for all devices that are used specifically in your model. You are interested in a camera driver, which may be called Camera driver or something else. After downloading the driver (or camera application), install it, restart your computer and check again using one of the suggested methods.
If the problem really was the lack or incorrect operation driver, then reinstalling it should solve the problem. But if this does not help, then the last option remains with a malfunction of the module itself. In this case, you will have to take the computer to the workshop, because the hardware problem will definitely not be solved using software.
Conclusion
Now you know how to turn on the webcam on Windows 7 on your computer, and what to do if this does not work. Unfortunately, cameras in laptops often break down in hardware, not software. However, replacing them does not involve any difficulty.
Every owner personal computer sooner or later he faces the need to purchase a web camera. After all, it allows you to communicate and see on a PC monitor a person who is several thousand kilometers away. With its help, you can record various videos, communicate and get acquainted while right in front of your computer. Moreover, all these benefits are practically free, you just need to pay for the services of your Internet provider. But how to connect a webcam to a computer if this is your first time encountering this? We will deal with this issue now. Every owner of a personal computer sooner or later is faced with the need to purchase a web camera. After all, it allows you to communicate and see on a PC monitor a person who is several thousand kilometers away. With its help, you can record various videos, communicate and get acquainted while right in front of your computer. Moreover, all these benefits are practically free, you just need to pay for the services of your Internet provider. But how to connect a webcam to a computer if this is your first time encountering this? We will deal with this issue now. A web camera is a device for capturing images in front of a computer, as well as for shooting video in real time. The main purpose is communication on the Internet, filming various videos. Web camera models are not much different from each other. The difference is optional equipment and shooting resolution. They are equipped with a microphone, infrared illumination, and different types fastenings After the buyer has purchased a new web camera, the kit must include a cable for connecting to a computer and a disk with a special software or driver. All models have a cable with USB interface, which connects to the corresponding socket on the front or rear system unit. Where to connect the webcam to your computer is up to you. Most cameras have a clip-on mount that attaches to the top of the monitor. There are cameras with a wide plastic leg; they are placed at the bottom of the monitor.

Connecting a webcam to a computer
And so, the camera cable is connected to the computer. The next step is to install the program from the disk that was included in the kit. Without this disk, the webcam will not work. This is due to the fact that the computer simply does not “understand” what to do with the connected device. In the program menu that opens, find the “Install” button. If there are none, open the drive files and there you need to find the “Install”, “autorun” file or the name of the web camera manufacturer and run it. Then specify the folder where the driver will be installed. The program interface is designed for users with minimal PC knowledge, so understanding the installation of the software will not be difficult. Details for setting up the camera can be found in the instruction manual, which should be included in the box with the camera. If all steps are completed without errors, the web camera icon will appear in the section with local disks and on the desktop.

You can check whether the camera is ready for use by opening “my computer”, or using special applications, which are already installed along with the drivers. When you start the webcam in the next session, you will not need to reinstall anything from the disk, file system installed them and remembered them.
Connection without driver
The camera is not always purchased in a package. In this case, you will have to configure the webcam without a driver.
- We need to go to the official website of the developer and find the necessary software.
- If for some reason this fails, you need to use a search engine to find alternative sites that provide drivers.
- And the third option is to find the driver by hardware ID. In this case, you need to go to the “device manager” section and find the webcam icon, which will be highlighted with an exclamation mark. Right-click on the icon and select “properties”. We find the equipment ID and copy it for searching on the Internet. You can also use automatic search drivers, in this case the system will do everything for you.

You can find a set of drivers on the Internet. This driver pack has drivers for all occasions in its arsenal. If none of the options above helped solve the problem, you can try to find required driver Here. Some editions operating systems contain in their installation package standard drivers for video equipment. Then all you have to do is connect the webcam to your computer. If the camera does not have instructions, then on the Internet you can also find information specifically for your model on how to properly connect the web camera to your computer.
Operating the web camera
When the camera is configured, you can proceed to use the device. To use Skype for free video call, you will need:
- Installed Skype program and registered account;
- Microphone;
- Web camera with installed drivers.
To check the equipment for functionality, you can use a special call by clicking in contacts Skype Echo/Test Service. Image on standard settings may not satisfy the user, so everyone can customize them for themselves. Web camera being configured different options. If it is launched from the “native” program, then it can be configured by opening the settings in the folder that you specified during installation. If the camera is running one of the programs like: Skype, ICQ, then you need to adjust the image in them. You can adjust the image quality, various visual effects, brightness, image width and more. To use the webcam there are enough a large number of additional programs, which expand the basic functionality of the device. One of them is WebcamXP, and also, especially for professionals, WebcamMax, the set of functions that they offer is quite large, and they are not worth considering here. During video recording, it may happen that the image disappears. Common reasons This is due to wear and tear on the cable that connects the camera to the computer. It is necessary to remove the USB plug from the socket and insert it into the adjacent port. If this does not help, then the entire cable needs to be replaced. Failures when communicating in real time via Skype or others similar programs may occur due to an unstable signal, in this case you should contact your Internet provider. From the article you learned how to connect a webcam to a computer. Follow simple instructions, which are described above and you will succeed.