Where to find dns settings on your computer. DHCP server: what is it and what are its features
When setting up any connection to the Internet, it is imperative to take into account the parameters of the so-called DNS servers, which simplify access by converting the current IP addresses of sites into familiar combinations consisting of letters, numbers and additional characters or symbols. Typically, the provider itself sets such parameters or provides the user with a list of addresses that must be specified in the options of the protocols used. But sometimes (especially when the provider blocks some services or when errors or failures occur) these addresses need to be set manually. How to change DNS, taking into account several possible situations, will be discussed further. However, it is immediately worth noting that in most cases for wireless connections all addresses are set to automatic mode, and, if everything works, make changes to set parameters there is no particular point (this will not increase the speed of loading pages on the Internet anyway).
How to check if DNS is working?
So, let's not get ahead of ourselves for now, but let's see whether it is necessary to change the parameters at all. Test own connection possible through command line running as administrator. The toolkit is used for this ping commands.
Let's say you decide to check whether the this moment connection to official resource Google Corporation. To do this you should enter core team, and after a space after it indicate the site address, as shown in the image above. If the exchange of packets between the resource address and your computer has begun, you do not need to do anything. If there is no connection, try checking the free combination from the same Google by entering the address in the console with four eights separated by a dot. If a successful connection is detected, you can change the current settings.
Note: you can change addresses using third party software, for example, using the program DNS Jumper, however, further we will proceed from the fact that the user does not have such applications at hand, and we will use the tools of the operating system itself.
How to change DNS on Windows 10 in the simplest way
Now about the settings directly. How to change DNS in any modification of Windows operating systems? To do this, in the “Control Panel” you need to use the section network connections. In order not to search for a long time or not go through sections, it is best to immediately use the “Run” menu (Win + R) and set the command ncpa.cpl to execute. After this, you should select the active connection, use RMB to go to its properties and access the IPv4 protocol parameters in the list. If installed automatic receipt addresses, you can enter values that you would like to immediately check with your provider. The use of free combinations, in particular from Google, is no less effective. But, speaking about how to change DNS, you should note that there are two addresses: for the main and preferred servers.

When using settings from Google, addresses should look like the image shown above.
Setting options on the command line
Now let's look at a more complex technique that involves the use of tools and tools command console. How to change DNS using it?

To perform such procedures, you first need to know correct name own connection by executing the above command (in our case " Wireless network", Ethernet). After this, you should enter the command to set the address of your preferred server (we use Google combinations):

For an alternative, the second line is used, presented in the image below:

How to change DNS on a router?
Finally, sometimes it is necessary to reconfigure addresses on the router. How to change DNS in the settings of such a device? First, log into the web interface using any Internet browser with the router address 192.168.0.1 (or 1.1 at the end), login and password (usually admin/admin).

In the WAN section, activate the option to use the specified DNS addresses and enter required values yourself, then save the changes and reboot the router.
Did you know that the quality of Internet access depends only on the communication channel. A lot also depends on DNS server and, the poor performance of which can ruin the life of any broadband user. Sometimes it is enough just to change the DNS server in the network settings and normal operation The Internet will be restored.
In some cases, you have to change network settings when changing providers, and sometimes you have to do this after the computer has been controlled by a malicious program.
IN operating system Windows 10 has two main ways to change the DNS server in the network connection settings.
Changing DNS server via GUI
This is the easiest and most understandable way, even for a beginner, to change the DNS server in Windows. The procedure is as follows. Opening Windows settings 10 and go to the section Network and Internet. Next, select the connection for which we want to change the DNS server address - Ethernet For cable connection or WiFi for wireless.

Click on the line “Configure adapter parameters”. The network connections window will open.
Note: You can open the connection list in Windows a little faster. To do this, press the Win+R key combination and in the “Run” window that appears, enter the command ncpa.cpl.
Click on connection right click mouse and select the item Properties.

In the window that opens, double-click on the line with the left mouse button IP version 4(TCP/IPv4).

Another protocol parameters window will appear, in which, on the “General” tab, you need to pay attention to the field Use the following DNS addresses.
Here you need to enter the IP addresses of the new servers in the appropriate fields. For example, public server Yandex - 77.88.8.8
or Google - 8.8.8.8
. Click on the button OK.
How to change DNS via the Windows command line
Second the method will work for more advanced users, since it allows you to change the DNS server using no GUI, and the Windows 10 command line.
Click on the Start button with the right mouse button and select the item in the menu that appears Command Line(Administrator).

In order to change the DNS server address, you must first find out exactly the name of the network connection in Windows 10. To do this, enter the following command:
netsh interface ip show config
After entering, press the "Enter" key.

The output of the command will be a list of active network connections available on the system. We find required interface and look at its name - it is written in quotation marks. In the example above, the interface is called "Ethernet".
The next step is to enter a command that changes the DNS through the Windows console:
netsh interface ip set dns "interface_name" static
In my example, the command would look like this:

Press the "Enter" key. If everything is done correctly, then the selected connection will now use the server specified in the program by default.
As a rule, the time that the system spends connecting to the DNS server when visiting web resources is small. Most often, those servers that the provider uses by default work stably and quickly. However, there are situations when standard DNS They don't work fast enough. In this case, you can try changing the server.
Google Public DNS
According to the developers themselves, this DNS can significantly speed up the loading of web pages. In order to use this server, in the connection settings you need to specify addresses 8.8.8.8 and 8.8.4.4 for the primary and secondary DNS, respectively.
If you are interested in servers or data storage systems, then Server City offers you to buy DELL, IBM servers, as well as data storage systems for favorable price. Here on the website server-city.ru you can read in more detail about all the services that the company offers.
Following suit Google, Yandex has developed its own alternative DNS server. In addition, the developers have added family control capabilities in case there is a need to block potentially dangerous resources. To use DNS without filtering functions, you must enter the address 77.88.8.8 in the connection settings. If you enter the address 77.88.8.88, you can use the filtering functions for dangerous resources. If you enter the address 77.88.8.7, you will activate filtering of dangerous sites and porn resources.
 This service is quite popular on the Internet and for good reason. OpenDNS allows you to use modern methods Internet protection, fast and has many nice features, for example, the function of correcting typos in typed addresses.
The service has paid and free modes.
Free mode with standard settings available at the following addresses:
- 208.67.222.222
- 208.67.220.220
SkyDNS
 This service is a leader on the Russian-language Internet in the field of security and filtering of unwanted content. As the developer himself assures, the service is used by tens of thousands of users, large companies, Internet providers, etc. Paid and free modes are available.
Connection to free mode available after completing the registration procedure, which does not take much time. To use SkyDNS, you will be asked to download a small SkyDNS Agent application, or provide your IP. However, you can use the service without installing the application.
To do this, you will need to specify the DNS address 193.58.251.251.
In addition, to find a suitable DNS, you can use the appropriate software, of which there is a lot on the Internet.
Do you want to quickly test your knowledge? system administrator? Ask him for the public IP address Google DNS. Any self-respecting system administrator will answer: “8.8.8.8”, and an advanced one will add “... and 8.8.4.4”.
What's happenedDNS?
DNS is an acronym for Domain Name System. Translated as a domain name system, it is a system that matches a domain name and a host’s IP address. So, knowing the host name, you can get its address and vice versa. What is it for? The World Wide Web is designed in such a way that each device (computer, phone, tablet, router) has its own unique address (in fact, addresses can be repeated if we're talking about about different LOCAL networks, but in this article we are talking about global network and we will not go into details of NAT, PAT and routing), and you can access this device only by knowing its address on the network. Working on the Internet, we access dozens of sites every day. It would be difficult to remember all their addresses, consisting of a sequence of numbers and dots, for example, what is easier to remember 77.222.61.238 or integrus.compumur.ru? Of course, the second one. And the domain name system will remember the address for you.
DNS is available on every computer, on every network and on every provider; in addition, it has a hierarchical form and in the case when the domain name system cannot determine the address of the requested resource by domain name, it forwards the request to the upstream DNS server. The request can be transmitted up to one of the 13 “world’s most important” root DNS servers.
How to install a DNS server?
The server can perform various functions, it can play the role of a global catalog, store file information, work with databases, and work with several users simultaneously. Depending on the purpose of the server, roles are installed on it - a special set of programs that allow the server to perform the necessary functions.
How to install a roleDNS servers? We will carry out the installation at Windows Server 2012 R2.
Most often, the DNS server role is installed with a domain controller. But if during installation Active Directory If you unchecked the “DNS server” checkbox, or AD is simply not needed, then you only need to install the DNS server. To do this, go to Server Manager and click the “Add Roles and Features” button.
The Add Roles and Features Wizard window opens. Read the wizard's introductory text and click Next. 
Make sure Install Roles and Features is selected and click Next. 
Select a server from the server pool. In our case there is only one server, you may have more. 
Select Role DNS Server. 
By checking the required box, we will see the “Add Roles and Components Wizard” window appear. These components are required to manage the installed role. If you are going to administer the DNS server from another server, you can skip adding these components. 
Back in the window with DNS Server checked, click Next, then Next, and Next again until the Install button becomes active. 
Click the "Install" button. 
The installation will begin. 
After the installation is completed (the installation will take less than 5 minutes), the following message will appear: “Installation completed on YourServerName.” You can click the “Close” button. Now in the Server Monitoring Panel, as well as in the Start Menu, you will see new line"DNS". If you click on this line, the “DNS Manager” will launch.
It looks like this.

There are currently no zones configured on the DNS server. Such a server is called a caching server. Zones are parts of the namespace for which the server is responsible. Zones live view involve converting a name to an IP address. A reverse lookup zone, on the other hand, matches an IP address to a name.
Let's create a direct viewing zone and make it easy setup.
To do this, right-click on the inscription “Forward viewing zones” and then “Create a new zone”.

The “New Zone Creation Wizard” window will open, click “Next”. The zone type selection window will open. If you do not have another DNS server, select “Main zone” and “Next”. 
In the next window you need to specify the zone name. It is recommended to use your domain. In our case, the name would be: . Click “Next”. 
In the next window, select the dynamic update type. It is recommended to allow dynamic updates, but only if DNS will be used exclusively in your local network. Otherwise, this item may entail security risks, which the “New Zone Wizard” will warn you about. 
Click “Next” and “Finish”. The direct viewing zone has been successfully created, let's carry out its simple configuration. Setting up a browsing zone is done by adding DNS records to the zone. There are several types of DNS records. Let's look at the main types:
- A-record. Correlates Hostname and IPV Protocol Address
- AAAA record. Correlates Hostname and IPV Protocol Address
- CNAME record. Alias, used to redirect to another name.
- MX record. Postal entry, points to mail servers.
- NS record. Points to the domain's DNS server.
Let's create an A record for our new forward lookup zone. To do this, right-click on the zone and select the appropriate item context menu, as it shown on the picture. 
In the “New Node” window that opens, enter the Node Name, for example GateWay, and its IP address, for example 192.168.0.1. Click the "Add Node" button. 
Ready! The entry has been successfully created!
In this article we have tried our best in clear language explain to the common man without deep IT knowledge, what DNS is, how to install the DNS server role on Windows Server 2012, we got acquainted with the main types of records and showed in pictures how these records are made. And if all of the above seemed difficult to you, then our specialists will set up a server for you in less than an hour.
Today I have prepared an article for you that will help you solve one fairly common error that confuses even fairly advanced users: DNS server is not responding.
In this article, I will talk about the reasons for this error, as well as several ways to solve it. I will be waiting for confirmation from you in the comments what exactly helped you, as well as new options if anyone knows. Go!
1. What does “DNS server not responding” mean?
To proceed to troubleshooting, you need to understand what it means that the DNS server is not responding.

To understand the essence of the problem, you should know what a DNS server is. When contacting any virtual page on the network, the user gains access to a specific section remote server. This section contains and stores files that are converted by the browser used and presented to users in the form of a page with text, images and other information that is familiar to the visual perception of any user. Each server has an individual IP address, which is necessary to gain access. A DNS server is a functional means of comfortable and correct redirection of requests to a domain from a specific IP address.

Often the DNS server does not respond in Windows 7/10 when connected to the network via a modem and without using network cable, as well as for users who use another wireless method Internet connections. In some cases an error may occur after installing an antivirus.
Important! Often, users take personal interest and make changes to the modem settings, which lead to a loss of connection and an unwanted error. Therefore, it is not recommended to edit working settings unnecessarily.
2. Dns server does not respond - how to fix it?
If the user observes an error, then there are four ways to eliminate it:
. Very often it is enough to reboot the modem to fix the error. During the reboot process, the device returns to its original state. initial settings and parameters, which helps to quickly and effectively solve the problem;To correct an error with a greater probability, it is necessary to consider specific situations in detail. This is what we will do below.
2.1. On Windows
There are several possible solutions problems listed in the table.
| Way | Procedure |
| It is recommended to disconnect the device from power or use the power off button, if provided in the configuration, and wait about 15 seconds. After the time has elapsed, you must turn on the device again. | |
| Using the Command Line | You should call the command line from the PC administrator. To do this, click on “Start”, then find and click on “Search programs and files” and write cmd. After these steps, a program shortcut will appear. You should right-click on it computer mouse and select "Run as administrator".Then you should print and execute certain commands, after entering each command you must press the enter key:
|
| Checking settings and options | You need to visit the control panel and find “Network and Sharing Center...”. This subsection contains information about the network. You should select the connection you are using, then right-click the computer mouse and select “Properties”. A new window will open for the user, in which you need to select in turn:
Then you need to click on “Properties”. You should check the boxes next to the items: obtain a DNS server and IP address automatically. When checking the settings, you must be very careful and take into account the information specified in the agreement with the provider, if any. This method only helps if there is no specific address specified by the provider. |
You can enter the addresses provided by Google, which, in your opinion, search engine, help speed up the loading of web pages: 8.8.8.8 or 8.8.4.4.
3. DNS server does not respond: TP-link router
Most modern users use routers and TP-link devices. Error DNS server is not responding can be eliminated in several ways:
Attention! Some, especially inexpensive models TP-link parameters are lost. In this case, you should follow the setup instructions that come with the device and enter the data and DNS addresses specified in the contract and provided by the provider.
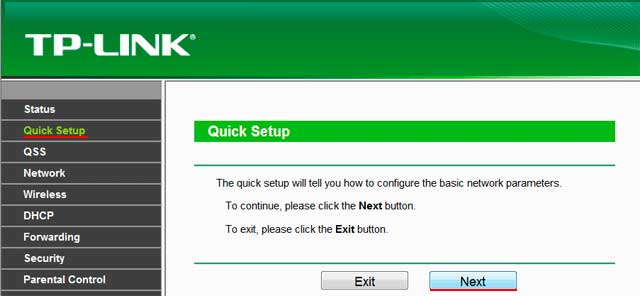
It is better to set TP-link on the router basic settings, unless otherwise specified in the agreement with the provider.
4. DNS server does not respond (Beeline or Rostelecom)
All of the listed methods for eliminating the error are designed to assume that it is the user who has the problem. But practice shows that in most cases, problems arise with the provider for a number of reasons, such as technical faults.
For this reason, if an error occurs, it is necessary not to rush, but to wait a while: during this period you can reboot the computer and router without touching any settings. If the situation has not changed, it is recommended to contact representatives of the provider company and tell about the current problem, providing the specialist with the data he requires: contract number, last name, IP address or other information. If the problem arose with the Internet connection service provider, he will report this and tell you the approximate time frame for eliminating the problem. This is especially true for Internet owners from the Rostelecom company (I myself am one of them, so I know what I’m talking about). Very useful numbers:
- 8 800 302 08 00 - Rostelecom technical support for individuals;
- 8 800 302 08 10 - Rostelecom technical support for legal entities.
If the problem did not arise with the provider, then a company specialist can, in some cases, help the user solve it by giving competent advice or recommendations.