Photo editor to remove the subject. How to remove an extra object in Photoshop
Modern technologies make life much easier for photography enthusiasts. Even if the photo didn’t turn out very well, using Photoshop you can retouch it on your computer and remove unwanted objects. With the TouchRetouch and Bye Bye Camera mobile app, editing photos and removing unnecessary things from them has become even easier - there is no need to use a computer mouse, just one finger is enough.
Modern smart algorithms allow you to improve a photo even after it is taken. But most methods involve the use of graphic editors, which are difficult for many to master. And many people simply don’t have time to delve into the settings and capabilities of numerous tools. You can quickly apply some kind of filter and change the contrast of a photo in a couple of movements, but retouching or removing details, or even people accidentally caught in the frame, will be much more difficult.
How to remove unnecessary objects from a photo using TouchRetouch
1 . Open the application, click on " Albums» and select a photo.
2 . Zoom in on the part of the image you want to remove.
3 . Press " Deleting objects". By default, the tool will open Brush" In one motion, “paint over” the extra object. Press " Forward».
4 . At this stage, the unnecessary object should disappear from the photo. If there are still any extra lines left, erase them again. You can also click on the " Back", return everything as it was and try again.

Alternatively, you can use the " Lasso”, which also very accurately marks unnecessary objects. " Quick edits" And "Deleting lines" act in a similar way.

Bye Bye Camera was created by Do Something Good to automatically remove people from photos. Special smart self-learning algorithms are used. When artificial intelligence analyzes a photo and detects the contours of a person’s body on it, the object is retouched, and the background is automatically drawn in its place. This results in a photograph with no people in it. This is very convenient, for example, when post-processing landscapes. Each of us has encountered a situation where a beautiful view is spoiled by a person accidentally caught in the frame.
The presented pictures clearly demonstrate the operation of the application - people actually disappear from the frame, but some signs of their former presence in the picture remain.

For example, algorithms have not yet learned how to remove shadows. And animals are poorly retouched. So, if there is a dog in the hands of a person, it will disappear along with the owner, but the creature standing next to the person will remain in the same place.

The background also greatly influences the quality of retouching. If it is colorful, then the algorithm has to figure out a lot of small details. Most likely, this will negatively affect the final result. But if the background is more or less complete, then after processing the photo it will be difficult to notice signs of post-processing. Whether such a result is worth the asking price for the application is up to you to decide.
How to cut out people and objects from photos
Modern technologies allow you to take instant photographs in almost any conditions and make it possible to immediately see the result. However, when viewing the resulting images, it may turn out that some fragment of the picture (for example, someone's face suddenly entering the frame) needs to be cut out so that it does not interfere with the overall composition. Often there are unnecessary objects in the photo, and sometimes it is necessary to remove a person or his shadow from the photo. How to remove everything unnecessary from a photo? We have prepared instructions for you, as well as answers to some frequently asked questions. Click on the appropriate link to jump to the desired section.
How to remove unnecessary objects from a photo
Movavi photo editor is great for removing objects from photos. It's very easy to learn, so you don't have to fiddle with settings for a long time before you get started. Download the program and see for yourself!
These instructions are suitable for both versions of the program: Windows and Mac. All you need to do is choose the version that suits you and follow the tips below.
Install Movavi Photo Editor
Open the installation file and follow the instructions of the installer.
Add a photo
After starting the program, click the button Open file and select the desired image. You can also add a file to the program by simply dragging a photo from a folder into the Photo Editor window.
Select and delete an object or person
To cut an object from a photo, open the tab Deleting objects and select the object using the tool Brush. For a more convenient selection, you can also use With a magic wand or Lasso. To adjust the selected area, use the tool Eraser. Now remove the unwanted object by clicking the button Erase.
To remove remaining fragments, use the tool Stamp, which allows you to copy any parts of the image to the selected area.
Save the corrected photo
With Movavi Photo Editor you can magically remove unwanted elements from your photos. It only takes a couple of minutes to remove an item from a photo!
FAQ
How to remove the background from a photo in Paint?
Open the image whose background you want to remove in the Paint graphics editor. On the toolbar, find the button Select and click on the arrow below it. Click on the item Transparent selection, then - by Select to select the selection method: rectangle or free-form area. Use your mouse to circle the part of the image you want to keep, then click Copy. Create a new file and click Insert. Ready! You can save your picture without a background.
If you want to not just remove the background, but, for example, make it lighter or erase not all objects, try the photo editor from Movavi. Its functionality is much wider than that of Paint, and it is easier to use.
Often, photographs taken spontaneously contain unnecessary objects, defects and other areas that, in our opinion, should not be there. At such moments, the question arises: how to remove unnecessary things from a photo and do it efficiently and quickly? In this lesson we will figure out how to quickly and efficiently clear a photo of interfering details.
Removing details from a photo in Photoshop
Today we will use two tools. This "Content Aware Fill" And "Stamp". An auxiliary tool for selection will be "Feather".
- Open the photo in Photoshop and create a copy of it using a keyboard shortcut CTRL+J.

A small icon on the character’s chest will act as an extra element.
- For convenience, we enlarge the image using a keyboard shortcut CTRL+ plus.
- Choosing a tool "Feather" and outline the icon along with the shadows.


- Next, right-click inside the outline and select "Create selected area". We set the shading 0 pixels.

- After the selection is created, click SHIFT+F5 and select from the drop-down list "Content-Based".

Click OK, deselect using the keys CTRL+D and look at the result.

- As you can see, we have lost part of the buttonhole, and the texture inside the selection has also blurred a little. It's time "Stamp".

The tool works as follows: while holding down the key ALT a texture sample is taken, and then this sample is placed in the desired location by clicking. Let's try. First, let's restore the texture. For normal operation of the tool, it would be better to reduce the scale to 100%.

- Now let's restore the buttonhole. Here we will have to cheat a little, since we do not have the necessary fragment for the sample. Create a new layer, increase the scale and, being on the created layer, take a sample with a stamp so that it includes the area with the final stitches of the buttonhole. Then click anywhere. The sample will be printed on a new layer.

- Next, press the keyboard shortcut CTRL+T, rotate and move the sample to the desired location. When finished, click ENTER.

Result of the tools:

Today, using one simple example, we learned how to remove unnecessary objects from a photo and restore damaged elements.
The extension value depends on the image size:
Open the fill dialog via Editing --> Fill (Edit --> Fill) or press Shift+F5. In the window, select Content-Aware and click OK:

Photoshop fills the selection with surrounding pixels and blends them. Filling the selection is random, so if you are not satisfied with the result, repeat the procedure again. Press Ctrl+D to deselect. This is what I got; for clarity, I didn’t deselect it:

Removing Photo Objects Using the Content-Aware Patch Tool
If the object you want to remove isn't surrounded by enough background pixels, you can tell Photoshop to use a completely different area in the photo for replacement.
Let's look at this process step by step.
STEP ONE: Open the image and press Shift+Ctrl+N to create a new layer.
STEP TWO: Take the Patch Tool. At the top, in the options bar, set the mode to Content-Aware and the sampling mode to Sample All Layers. Don't touch the "Adaptation" parameter yet:
STEP THREE: Using the mouse cursor, create a selection around the object to be deleted (in my example, a man in a green shirt). If necessary, expand the selection to include more background pixels.
Note. To create a selection, you can use any of the selection tools, such as Quick Selection, and then switch to Patch.
We have selected sample mode from all layers turned on, which means that Photoshop sees the background layer through the empty one.
Create a selection:

STEP FOUR: Left-click inside the selection and drag the cursor to the area you want to use for the pixel base to replace. Photoshop will show you a preview of what the fix will look like. Try to make any horizontal and/or vertical lines match each other as best as possible, when you're done, release the left mouse button:

STEP FIVE: Now about the "Adaptation" option located in the options panel. This lets you set the amount of blending that Photoshop will do when inserting new pixels into the target area. There are only five values, ranging from “Very Strict” to “Very Loose”, which means very little to a lot of mixing, respectively. It is always better to select these parameters experimentally. If you don't like the result, undo it with Ctrl+Alt+Z and try again. In Photoshop CC 2014, the Adaptations drop-down menu (gear icon) already has two options - the structure and color of the field, and they are changed by entering numbers from 1 to 5. 1 corresponds to “very strict”, 5 - “Very loose”. It follows that in CC 2014 you can control the mixing of not only structure, but also color. In the picture I showed this option on different versions of Photoshop:

This way you can delete the remaining shapes.
And here is the result of removing the two central figures of the photo using Content-Aware Fill, with the selection left on so that you can see which area I selected:

Not ideal, of course, but the result is quite good.
21.01.2017 27.01.2018
Hello, dear visitors of the Pixelbox website!
Many of us have had to deal with a situation where a photograph, thought out in composition and beautiful in subject, is spoiled by an unexpected person, bird, etc. wedged into the frame. What should you do - throw away/delete the damaged photo? Of course not! There are several tools in Photoshop that help you easily and simply remove an unnecessary object from a photo.
1 way
How to remove unwanted items using Content-Aware Fill
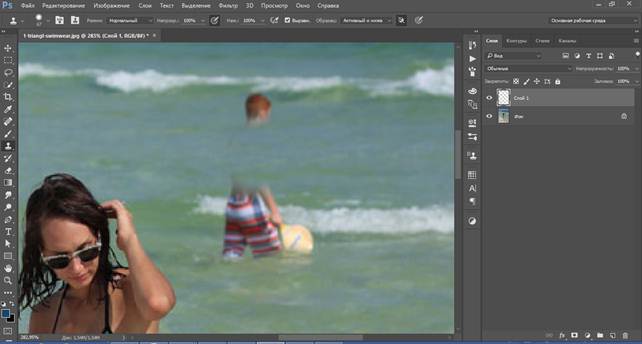
There is a photo from the sea, but everything is spoiled by the guy in the background, who, moreover, has his back turned. Opening the photo in Photoshop (Ctrl + O).
The easiest and simplest way to remove a guy from a photo (no crime, just the magic of Photoshop!) is to use the function Content-Aware Fill. This function appeared in Adobe Photoshop CS5 and peacefully migrated to subsequent versions of the program.
In order to take advantage Content-aware fill, you must first select the item you want to delete. You can do this in any way convenient for you, I used the tool Lasso, tool hotkey - L.

We circle the guy with the mouse “with reserve”, not right next to each other:

Go to the menu Edit-Fill:

In the window that appears, select WITHContent-Aware Fill:

Naturally, we press OK and this is what we get:

To remove the selection that prevents us from admiring the beauty of the water, click Ctrl + D:

Magic! Easy and fast! For those who are not looking for easy ways, I will tell you another way to eliminate any unnecessary object from a photo.
Method 2
How to remove an extra item using the Clone Stamp Tool
Tool Stamp (Clone Stamp Tool) allows you to disguise unnecessary objects in the photo, replacing the defective area with the desired area that you choose. Tool hotkey - S.

At the top settings panel tool, you can select on which layer the cloning will take place - on the active one, on the active one and below, or on all layers. If you choose the first option, on the active layer, remember - all changes will occur on the main layer. I do not recommend using such a destructive method of photo editing; it is better to create a layer on top of the main one and select "on active and below"- in this case, you can always adjust the cloning layer.
Create a new layer (click on the create a new layer icon in layers palette):

Make this layer active:

And holding down the key Alt, take the area next to the guy, release the key Alt transfer this area to the guy, and to “attach” the area in the right place, click left mouse button.
So gradually, taking areas that are located near the object to be removed, we paint over the guy:

I hope the lesson was useful to you and will help you create high-quality and beautiful photos!