Formatting the hard drive removes the OS. Formatting using a bootable USB flash drive or disk
On electronic media, be it flash drives, floppy disks or hard drives, data is stored in cells, like on a chessboard. They are created programmatically, that is, they cannot be physically viewed on disk. The process of marking media for such cells is called formatting. As a result of this operation, old data is erased.
Formatting may required, if the media is new. The newly purchased hard drive is not partitioned, so it is not suitable for storing data. Also formatting will help when the file system damaged.
Typically formatted HDD before installation new operating system on it. This is done to ensure that the OS functions correctly or to get rid of system garbage. You can also clean the media this way from malicious programs that the antivirus missed.
Why use bios for formatting?
In general, the expression “format via BIOS” is incorrect, because the BIOS itself does not have the necessary options. Formatting is carried out using third party applications, and bios is needed to change download priorities. You cannot perform such operations on a scratch disk. To clear it, you need to boot from another media.
How to install boot from disk or flash drive
Important! Depending on model motherboard and, the procedure may vary.

After these steps, the system will always boot from the selected media, but if you need to change the priority only once, you can do the following:

How to format a hard drive using a distribution kit
To format a hard drive in this way, you will need a flash drive or cd\dvd on which the Windows 7 or any other installer is recorded.
Format the hdd using third-party programs
There are other formatting options.
A non-system HDD can be formatted using standard Windows operations. To do this you need:

This method will allow you to change the file system.
You can also use the program Acronis Disc Director. In this way you can even clean system disk. To format your hdd using this application, you should:

Important! If the system partition has been wiped, Windows will not boot.
All new hard drives are already low-level formatted by the manufacturer and reinitialization not required. In practice, under normal circumstances, you are unlikely to have to do low level formatting hard drive, since purely technically, real formatting of this kind can only be performed by the manufacturer.
What computers call low-level formatting is actually more of an initialization and testing of the disk surface, as the process writes and reads to all sectors of the disk. If there are no problems with the disk, there is no need for a full initialization or surface check.
What is low level formatting?
First, let's understand the concepts of low- and high-level formatting.
Low level format- an operation during which servo marks (information that is used to position the hard drive heads) are applied to the magnetic surface of the disk. It is performed during the manufacturing process of the hard drive, using special equipment.
When the process of low-level formatting a hard drive is started for the first time, the hard drive platters are empty, that is, they contain absolutely no information about sectors, tracks, and so on. This is the last moment when the hard drive has completely empty platters. Information recorded during this process will never be rewritten again.
Old hard drives had the same number of sectors per track and did not have built-in controllers, so the low-level formatting was handled by the external hard drive controller, and the only information it needed was the number of tracks and the number of sectors per track. Using this information, the external controller could format the hard drive. Modern hard drives have a complex internal structure, including changing the number of sectors per track when moving from external to internal tracks, as well as built-in servo information to control the head drive.
Due to this complex data structure, all modern hard drives are low-level formatted only once - at the factory.
There are two types of high-level formatting:
Formatting in normal mode – a process that consists of creating a master boot record with a table of partitions and (or) empty file system structures, installing boot sector and similar actions. The formatting process also checks the integrity of the media to block bad sectors.
Quick format - the same process as formatting in normal mode, only without checking the media for bad sectors.
The use of the term low-level formatting in relation to hard drives has given rise to many myths. For example, there is an opinion that it is impossible to perform low-level formatting of a hard drive and that attempting such an operation will lead to the destruction of the disk. In principle, there is some truth in this misconception. It consists in the fact that when low-level formatting old disks from the late 1980s, the optimal settings for the bevel of heads and cylinders established by the disk manufacturer, as well as the map of disk defects, were violated.
All this had a negative impact on the performance of the devices. The problem described has long been resolved, and all devices using zone recording (with a variable number of sectors per track) are immune to any problems that low-level formatting may cause, since real markers cannot be replaced by a sector.
So low-level formatting of discs made in the 1990s and later will prevent it from disturbing its settings.
At the same time, there is often a real need to perform low-level formatting of ATA and SCSI drives. Now we will talk about programs that will help you do this.
Programs for low-level formatting of ATA disks (SATA, PATA, etc.)
ATA drive manufacturers have defined and standardized extensions to the original controller hard drives WD1002/1003, creating an AT bus interface (known as the ATA interface). The ATA specification is implemented for unique vendor-specific commands that are an extension of the standard. To avoid performing incorrect low-level formatting, many ATA devices have special teams, which must be sent to the device to unlock formatting procedures. These commands vary by device manufacturer, so you'll need to look for low-level formatting and defect management programs created by the drive manufacturer.
These programs are most often intended not only for devices specific manufacturer, but also for their individual models. So before performing a search, make a note of the manufacturer name and model number of your hard drive.
Modern hard drives are protected from the possibility of changes in the skew factor or defect map, since they are always in conversion mode. Devices with zone recording are always in this mode and are thus fully protected.
Most hard drives have an additional set of commands that are used during the formatting process, and the standard ATA specification commands do not work (especially for ATA devices with zone recording).
Spare sectors can also be allocated automatically using programs provided by the device manufacturer. Without knowing the correct manufacturer-specific commands, it is impossible to replace defective sectors with spare ones specially allocated in modern devices for these purposes. A detected defective sector is replaced in the distribution structure by the closest spare sector.
Some hard drive manufacturers offer formatting programs low level. They can be found at the following addresses.
- Seagate
ftp://ftp.seagate.com/techsuppt/seagate_utils/sgatfmt4.zip
http://www.seagate.com/support/seatools - Hitachi/IBM
www.hgst.com/hdd/support/download.htm - Maxtor/Quantum
http://www.maxtor.com/softwaredownload/default.htm - Samsung
www.samsung.com/Products/HardDiskDrive/utilities/hutil.htm
www.samsung.com/Products/HardDiskDrive/utilities/sutil.htm
www.samsung.com/Products/HardDiskDrive/utilities/shdiag.htm - Western Digital
http://support.wdc.com/download/
First of all, you should try the programs provided by the device manufacturer. All of them are free and often allow you to work at a low level in a way that large-scale programs do not allow.
If the disk manufacturer does not offer an initialization/verification/formatting program, you can use Drive program Fitness Test from Hitachi (formerly IBM). This program works great with drives from other manufacturers and performs detailed, full testing of the entire hard drive. This is one of the best programs general purpose, because it allows you to perform a non-destructive test. Although it can test any device, there is one limitation: destructive read/write tests can only be performed on Hitachi and IBM drives.
Advice!
All of the listed programs for initializing, testing and formatting a hard drive, as well as many others, can be found in the Ultimate Boot CD (UBCD) collection of utilities. This is a fantastic collection of diagnostic tools contained in one downloadable CD! A copy of this CD can be downloaded from www.ultimatebootcd.com.
Non-destructive formatting tools
I strongly advise against using BIOS-level non-destructive formatting tools such as Calibrate (formerly included with Symantec Norton Utilities) when low-level formatting is truly needed. Such funds are characterized by a number of limitations and problems that reduce their effectiveness. They perform low-level formatting on individual tracks using BIOS functions; This backs up and restores individual tracks.
These programs also do not create a defect map, as low-level formatting programs typically do. Moreover, they can remove defect map markers added by standard low-level formatting programs. As a result, it becomes possible to save data in bad sectors, which in some cases may void the warranty.
Another limitation is that these programs can only be used when working with hard drives, pre-formatted using BIOS functions.
A low-level format program created by drive manufacturers "bypasses" system BIOS and transmits commands directly to the controller. Therefore, many such programs are designed to work with specific controllers. The presence of one such program that could be used when working with different controllers, is almost impossible to imagine. Many hard drives may be incorrectly identified as defective simply because the wrong program was used.
Low-level formatting of Western Digital HDD and SSDs
I’ll say right away that in in this case, low-level formatting means testing the disk surface for bad sectors through reading and writing. As mentioned above, factory low-level formatting of a modern hard drive can only be done by the manufacturer.
Tough and solid state drives can be formatted at a low level using several methods. Let's consider one of them, applicable to PC. Mac computers are not suitable for this example.
To low-level format a hard drive we need:
- The hard drive, in this case, is from Western Digital (in this example, the Maxtor drive was tested, and the procedure was successful)
- Data Lifeguard Diagnostics Software for Windows
Before the formatting process, connect the device to the computer. This can be done either through the IDE, SATA, USB or Firefire interface. In this case, low-level formatting will be carried out in the Windows system, without first loading using special boot disks. This is the easiest method for the average PC user.
Once the device is connected:
1. Download Windows Data Lifeguard Diagnostics from http://support.wdc.com/product/download.asp?groupid=113&sid=3&lang=ru
2. After downloading the application, launch it and follow the installation wizard.


If after installation a dialog box appears with a message stating that the program cannot be started, close it and click the OK button. The program must be launched in a different way.

3. A program shortcut will appear on the desktop, double-click on it.

4. Check the box next to I accept this... and click the Next button.

The program will display all connected drives. Despite the fact that in my example, formatting was carried out on the test Maxtor hard drive, and it was successful, I recommend that you use this program only for Western Digital drives, to avoid possible problems with the media. If you have a Seagate hard drive, use a similar program from Seagate.
5. Select the disk that needs to be diagnosed and click on the to run tests button. BE SURE to double-check that you have selected the correct drive, otherwise you will lose all data on this medium, without the possibility of their restoration, since this process is destructive and irreversible.


7. In the next window, select the EXTENDED TEST option and click the Start button.

8. Close all files that are open on the selected hard drive and click the OK button.

9. The testing procedure on a 20 GB hard drive took approximately 10 minutes. At the end of testing, click on the Close button.

10. But that's not all. Now again click on the to run tests button and in the dialog box select the WRITE ZEROS option and click on the Start button. This procedure will overwrite all sectors with zeros.

10. Depending on the condition of the drive, you will receive one or two prompts reminding you that this action will destroy all data in currently on disk. Click Yes button.


10. Then choose which method you would like to use to write the zeros. The QUICK ERASE option is much faster, but does not completely erase the disk. This is suitable for users who plan to rewrite the disc multiple times. A FULL ERASE erases the disk completely. This takes longer, but ensures that no data on the drive can later be recovered using data recovery methods. This method is designed for people who need to permanently delete data from their drive, such as hackers ;).
Once you have determined which method you would like to use, select the OK button to begin the formatting process. I recommend choosing FULL ERASE.

11. Start of the rewriting process. For example, it took me about 10 minutes to overwrite a 20 GB hard drive.

12. After the process is completed, click again on the to run tests button and in the dialog box, select the VIEW TEST RESULT option and click on the Start button.

13. The window will display information about the hard drive and the tests that have passed. To be honest, the information in this report is very sparse.

14. If the process was successful, then formatted at low level hard the disk will not be available in the system. Now it needs to be initialized, partitioned, and formatted at a high level.
14. Open Start -> All Programs -> Accessories -> Run and enter the command in the window diskmgmt.msc .

15. The Disk Management program will launch and the Initialize Disks window will automatically appear, where the required disk will be selected. Specify the Basic option boot record and click on the OK button.


This completes the low-level formatting process.
A similar process can be used for media on hard drives other manufacturers. For example, Seagate offers very handy tool for diagnostics.
In conclusion, I will give an example of how it displays Data program Lifeguard Diagnostics failed drive. As an example, a Fujitsu hard drive was taken. The program has determined that the media is faulty, as indicated by SMART STATUS.

Using EXTENDED TEST, the program showed that bad sectors were found on the disk.

The program tried to fix them, but nothing worked.

There may be two reasons for this: firstly, the hard drive and the diagnostic program - different manufacturers, so some commands may not be processed correctly, and secondly, this disk cannot be restored, since it has begun to “crumble,” i.e. physical damage appeared on the surface of his discs; it was already on my inspection table before.
Hello.
Almost every user sooner or later encounters reinstalling Windows(viruses, system errors, buying a new disk, switching to new equipment, etc.). Before installing Windows, the hard drive must be formatted (modern Windows 7, 8, 10 operating systems offer to do this right during the installation process, but sometimes this method does not work...).
In this article I will show you how to format your hard drive in the classic way through BIOS (when installing Windows OS), and as an alternative - using an emergency flash drive.
1) How to create an installation (bootable) USB flash drive with Windows 7, 8, 10
In most cases, the HDD hard drive (and SSD too) is easily and quickly formatted during the Windows installation stage (you just need to go to the advanced options during installation, as will be shown later in the article). This is where I propose to start this article.
In general, you can create both a bootable USB flash drive and bootable DVD(For example). But since in Lately DVD drives are rapidly losing popularity (some PCs don’t have them at all, and some laptops install another disc instead), then I’ll focus on a flash drive...
What is needed to create bootable flash drive:
- bootable ISO image with the desired Windows OS ( where can I get it? Probably no need to explain? 🙂);
- The bootable flash drive itself, at least 4-8 GB (depending on the OS you want to write to it);
- Rufus program (office site) with which you can easily and quickly write an image to a flash drive.
The process of creating a bootable USB flash drive:
- First run the Rufus utility and insert the USB flash drive into USB port;
- then in Rufus, select the connected flash drive;
- specify the partition scheme (in most cases, it is recommended to set MBR for computers with BIOS or UEFI. You can find out the difference between MBR and GPT here:);
- then select the file system (NTFS recommended);
- the next important point is choice ISO image from OS (specify the image you want to burn);
- actually, last step- start recording, “Start” button (see screenshot below, all settings are indicated there).
Options for creating a bootable USB flash drive in Rufus.
After 5-10 minutes (if everything is done correctly, the flash drive is working and no errors occurred), the bootable flash drive will be ready. We can move on...
2) How to configure the BIOS to boot from a flash drive
In order for the computer to “see” a flash drive inserted into the USB port and be able to boot from it, you must correctly configure the BIOS (BIOS or UEFI). Despite the fact that everything in Bios is in English, setting it up is not that difficult. Let's go in order.
1. To set the appropriate settings in the Bios, you must first enter it. Depending on the manufacturer of your device, the login buttons may be different. Most often, after turning on the computer (laptop), you need to press the button several times DEL(or F2). In some cases, the button is written directly on the monitor on the first loading screen. Below is a link to an article that will help you enter Bios.

How to enter Bios (buttons and instructions for different device manufacturers) -
2. Depending on the BIOS version, the settings can be very different (and, unfortunately, there is no universal recipe for how to configure the BIOS to boot from a flash drive).
But generally speaking, the settings from different manufacturers are very similar. Need to:
- find the Boot section (in some cases Advanced);
- turn off first Secure Boot(if you created a flash drive as described in the previous step);
- then configure the download priority (for example, in Dell laptops this is all done in the Boot section): in the first place you need to put USB Strorage Device (i.e. boot USB device, see screenshot below);
- then press the F10 button to save the settings and restart the laptop.

Setting up BIOS to boot from a USB flash drive (using a Dell laptop as an example).
For those whose Bios is slightly different from the one shown above, I suggest the following article:
- BIOS setup for booting from flash drives:
3) How to format a hard drive with Windows Installer
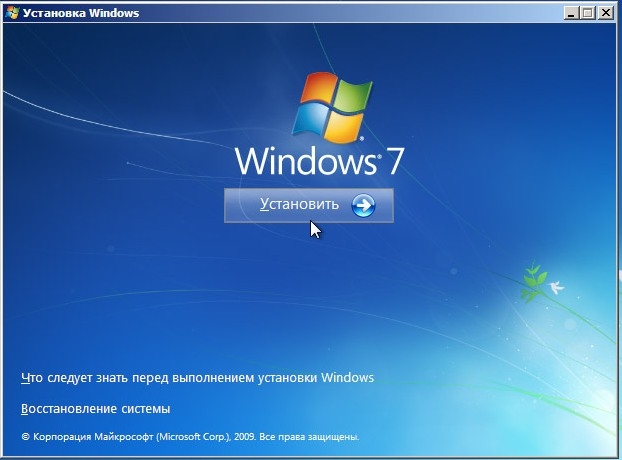
If you correctly burned the bootable USB flash drive and configured the BIOS, then after rebooting the computer a welcome message will appear Windows window(which always pops up before the installation starts, like in the screenshot below). When you see this window, just click next.
Start installing Windows 7
Then, when you reach the installation type selection window (screenshot below), select the option complete installation(i.e. with setting additional parameters).
Next, you can actually format the disk. The screenshot below shows an unformatted disk that does not yet have a single partition. Everything is simple with it: you need to click the “Create” button, and then continue the installation.
If you want to format the disk: just select required section, then click the "Format" button ( Attention! The operation will destroy all data on the hard drive).
Note. If you have a large hard drive, such as 500 GB or more, it is recommended to create 2 (or more) partitions on it. One partition for Windows OS and all programs that you will install (50-150 GB recommended), the rest of the disk space for another partition (partitions) - for files and documents. This makes it much easier to restore the system in the event, for example, that Windows refuses to boot - you can simply reinstall the OS on the system disk (and the files and documents will remain untouched, since they will be on other partitions).
In general, if your disk is formatted through the Windows Installer, then the task of the article is completed, and below will be a method of what to do if you can’t format the disk this way...
4) Formatting the disk via
AOMEI Partition Assistant Standard Edition
Program for working with drives, with IDE interfaces, SATA and SCSI, USB. Is a free analogue popular programs Partition Magic and Acronis Disk Director. The program allows you to create, delete, merge (without data loss) and format hard sections disks. In addition, in the program you can create a bootable emergency flash drive (or CD/DVD disk), after booting from which you can also create partitions and format the disk (i.e., it will be very helpful in cases where the main OS does not boot). All major Windows operating systems are supported: XP, Vista, 7, 8, 10.
Creating a bootable USB flash drive in AOMEI Partition Assistant Standard Edition
The whole process is very simple and understandable (especially since the program fully supports the Russian language).
1. First, insert the flash drive into the USB port and launch the program.
After 3-5 minutes, the wizard will finish its work and you can insert the USB flash drive into the PC on which you plan to format the disk and reboot (turn on) it.
Note. The principle of working with the program when you are using an emergency flash drive, which we took a step above, is similar. Those. all operations are done in the same way as if you had installed the program on your Windows OS and decided to format the disk. Therefore, I think there is no point in describing the formatting process itself (right mouse button on the desired disk and select what you are looking for in the drop-down menu...) ? (screenshot below) :)
Formatting a hard drive partition
This is where I end today. Good Luck!
There are times when we need to format a hard drive via Bios. This may be needed immediately after purchasing a new hard drive, when installing or reinstalling an operating system, or as an anti-virus tool. In this material I will tell you how to format a disk via BIOS and introduce the reader to various techniques this formatting, and I will also describe programs for formatting via BIOS, which will help us with this.
If you want to know how to enter the BIOS, we have collected for you all the methods for each device.
HDD
Formatting a hard drive via BIOS
Usually the need to cleanse through Bios arises in a situation where it is impossible to full access to the appropriate Windows OS tools, and everything must be done from scratch. I’ll immediately make a reservation that the companies that developed the existing BIOS versions - Award Software (AwardBios), American Megatrends (AmiBios), Phoenix Technologies (PhoenixBIOS) and others did not include a tool for formatting a hard drive in their bios version, while access to the hard drive in the BIOS is available by default.

Control via BIOS
Consequently, “formatting a hard drive through the BIOS” is only possible conditionally; in such an algorithm, the BIOS acts only as a logistics link, allowing the user to use it to perform the necessary operations to format the hard drive.
Let me make a reservation right away that formatting (especially full formatting) completely deletes all information on the disk being formatted, so if you have something valuable there, then before formatting it is better to copy it to a flash drive, another hard drive, send it to the cloud, and so on.
Supporting tools
To format, we need a program that will help format the hard drive. Such a program is usually included in boot disk(flash drive) together with the operating system installer, it is also included in the programs of the system recovery disk (Live CD), in addition, it can be separately written to a flash drive or disk.
Using the command line
Once you have decided to format your hard drive, you can select auxiliary tools. The easiest option is to use a regular Windows OS boot disk, which almost every user has. To use its capabilities we need to run it through the BIOS.
- To do this, we restart the computer (if it was turned off, turn it on), and immediately after the start, quickly press several times on the button responsible for entering the BIOS - usually this is the “Delete” key, but there are also variations with the F8, F12, Ctrl + F2 keys and Escape.
- After entering the BIOS, go to the Boot tab, select the “Boot Device Priority” item in it and press “Enter”.
- As the main boot device(in first place) install our CDROM or DVDROM, click on F10 and save our changes by clicking “OK”.
- The computer will start to boot and the message “Press any key to boot from CD or DVD” will appear in front of you. Press any key.
- On the language selection screen, press Shift+F10, which will give you access to the command line. If you are a Windows 8 user, then go to the path select language - diagnostics - additional options - command line.
- On the command line we type next command(instead of C, you can put another partition of your hard drive - D, E, etc.):
format /FS:NTFS C: /q – fast format in NTFS system
format /FS:FAT32 C: /q – fast format in FAT32
You can write it even simpler, for example: format c:/ q
Click “Ok” and wait for the end of the formatting process.

HDD cleaning
Using the Windows Installer Features
We can also use the built-in capabilities windows installer to format the hard drive via BIOS ( a new version UEFI Boot). We also launch through the BIOS as in the previous case, only in the windows installer language selection menu we click “Next”. Then select “Full installation”, select the disk to format (click on it), then click “Disk Settings” and select “Format” there.
Formatting from a flash drive
As a loading tool with Windows installation You can use a flash drive on which the Windows OS installation is recorded. In this case, the flash drive itself must be made bootable using special programs (for example, UltraISO). Although sometimes it’s enough to just copy the windows installer to a flash drive and run it from the BIOS. Don’t forget to make the flash drive the first boot device in the BIOS as shown above (sometimes in the “Hard Disk Drive” menu item you need to specify the flash drive first and the CD (DVD) second).
We use the Acronis Disk Director Suite program
This program is usually included in the LiveCD and other Windows OS assemblies, and is helper utility on working with a hard drive. After launching the application, select the hard drive you need to format, right-click on it, in the menu that appears, click on “Format”, select the type of file system and confirm the operation by clicking “Run”. After the operation is completed, reboot.
You can visually see how this program works in the video:
Paragon Hard Disk Manager
An alternative to the previous one, a program with good functionality and good experience work. The algorithm for working with it is similar to the previous program - select a disk - right mouse button - Format Partition - select a file system - Format. After completion, reboot as usual.
DBAN
You can also use free tool DBAN, which easily cleans and formats your hard drive. To take advantage of its functionality, this program needs to be made bootable from a flash drive; the appropriate software will help us with this (for example, Universal USB Loader).
How it looks is visually shown in the video:
Conclusion
As we can see, formatting a hard drive via BIOS is carried out using auxiliary tools in the form of a boot disk or flash drive on which the Windows OS installer is installed. The capabilities of the latter make it easy to install, both using the command line and using the Windows installer itself. At the same time, there is always an alternative in the form of various auxiliary programs included in various LiveCD assemblies; these tools are quite enough to easily and quickly format the hard drive we need.
droidov.com
How to quickly format a hard drive via BIOS
Often, before installing an operating system, users wonder how to format a hard drive via BIOS. This procedure must be resorted to in order to clear partitions that are inaccessible after start windows. However, it is worth remembering that it will not be possible to completely delete information from the hard drive itself in this way.

Description of the procedure
To perform this, you will need a boot device with a recorded OS (it is advisable to create it in advance). The sequence of steps to format a disk via BIOS is as follows:
- Restart the computer with the connected media and immediately after startup enter the I/O system using the appropriate key. Usually this is F12, F8 or Escape, but if the version is very outdated, other combinations may be used.
- In the window that appears, you need to open the Boot tab, then Boot Option Priorities. This section allows you to select where the OS will be loaded from (from a flash drive or other device), which is what you need to do. Depending on the removable media, mark the USB port or CD-ROM.
- Exit by saving changes made, after which the computer will reboot. Before you start formatting the disk, you will need to launch the OS from the selected device by pressing any key on the laptop.
- Call the command line. If the procedure is carried out using media with Windows 7, press the combination Shift+F10. For version 8, this method does not work; it is replaced by the user interface.
- Make sure the drive letter is correct before formatting the drive. After starting from the boot device, it may change, so in order not to delete important files, you need to enter “wmic logicaldisk get deviceid, volumename, size, description”.
- Go directly to the cleaning procedure. To do this, you need to enter “format /FS:NTFS X: /q” in the window, instead of X entering the desired designation, for example, C (the drive that most often needs to delete data from system partition).
Then all that remains is to wait for the end of the process, confirming the command by pressing Enter.
Other methods
The Windows installer allows you to do without CMD, which some people are afraid to use for some reason. Only the familiar interface will be used here, but before you start formatting the hard drive via BIOS, you will have to carry out the first 3 points of the previous section.
After selecting a language, click on “Full installation”, call up a list of available disks and configure the installation. In the parameters that open, you need to mark the “Format” item with the cursor and follow further instructions. However, this method will not work if the installation of the operating system windows systems not required.
In addition, you can use the ERD Commander program by creating a boot CD based on it. In the BIOS you will also need to select a priority device to start (in this case, the drive). When the program opens, go to the MicroSoft Diagnostic and Recovery Toolset section and click “Next” until the working window opens. In it you need to click on the “Cleaning” item, after which the hard drive will begin formatting (this is impossible through the BIOS without external means).
There is another program that allows you to do the same and burn an emergency flash drive - AOMEI Partition Assistant Standard Edition. It is a free analogue of utilities for working with various drives and has a friendly interface, so the user can understand how to format a hard drive without outside help.
In general, the algorithm of actions is almost the same for most operating systems, but the names of the items may differ significantly from each other. The same applies to the input/output system: the names of the sections may not be the same as those given above due to differences in versions. However, although it is easier to clean a Windows hard drive, it is important to remember that the use of third-party tools is mandatory. It is not possible to format via BIOS due to the lack of proper functionality, so you will have to stock up on a boot device.
Comments powered by HyperComments
HDDiq.ru
How to format a hard drive via BIOS
Situation: you turn on the computer, and there “ blue screen of death". You urgently need to format your hard drive, but there is no specialist. In this article we will look at a way to format a hard drive yourself, without outside help.
We reboot the computer and immediately after turning it on, press the Del key to enter the BIOS. It happens that instead of the Del button you need to press Insert, F2, F5, F12. The exact data can be found when the computer boots; at the bottom of the screen a message appears like “to enter the BIOS, press DEL/Insert, etc.” Immediately after these steps, the BIOS window will appear, where you can navigate through bookmarks only through the keyboard, not with the mouse. Go to the “Boot” tab.

Now you need to configure it so that when you turn on the computer, it boots not from the hard drive, but from the CD-Rjm boot sector. To do this, go to the “Boot Device Priority” item. Using the F5, F4 keys we set the CDROM value to the first position.

Exit the BIOS and save the changes by pressing the F10 key. Next, the computer will reboot and the command line will appear (a black screen for direct communication with the “brain” of the computer through commands). The easiest way to format a hard drive is to insert installation disk with windows. After the reboot, the OS installation will begin immediately and you will be asked if any partition needs to be formatted. Select drive C and the button to format in the NTFS file system (Windows 7, Figure 1) or when installing Windows XP, Figure 2.


After formatting is completed, the installation process of the Windows operating system will begin immediately. This is perhaps the fastest and useful way formatting the hard drive.
SovetClub.ru
How to format a hard drive via BIOS: the three most rational ways to format hard drives

Let’s make a reservation right away: it is impossible to format a hard drive using microsystem BIOS tools alone. As, however, it is impossible to format the system partition of the hard drive while directly in the operating room windows environment. Based on all of the above, the question is: How to format a hard drive via BIOS, you should understand the user’s desire to fully mark out the disk space, without excluding individual areas of the drive. The most common and most correct formatting tools will be discussed in this article.
How can BIOS help you when you need to partition your hard drive?
In order to format a disk drive, you will need a boot disk or flash drive, on which a special software tool is pre-recorded, through which further operations on HDD marking are performed, or a comprehensive software solution in the form of a software package, one of which is the tool of interest to us. In most cases, the user uses a regular boot disk with a Windows OS distribution, which initially contains a program capable of formatting both the entire hard drive as a whole and each individual area selectively.

However, without making some changes to the operation of the microsystem BIOS, using bootable storage media is quite difficult. Because the BIOS during the boot process uses a priority list of bootloaders, in which the computer’s hard drive is considered the main startup device. In case you need to boot from a flash drive or using optical drive To boot from a CD/DVD disk, in the basic settings you need to specify a specific boot method, changing special parameters in one or more optionally assigned sections of the microsystem. But first you need to have knowledge of how to get into the BIOS environment?
How to enter the BIOS microsystem?
Due to some differences among the BIOS systems present on the market, each individual case (meaning different versions of the basic microsystems) uses its own scheme for entering the BIOS environment. At the same time, access to the basic settings of the computer can be obtained if, during the initial boot process of the system, the corresponding service key is pressed several times.

The most common scheme for gaining access to the BSVV is considered to be the option of using one of the keys: “Delete” or “F2”. Otherwise, you can get acquainted with the information you are interested in from technical documentation to your device or use this link to an article in which in more detail Recommendations for entering the basic settings of well-known computer modifications are outlined.
Method No. 1: formatting the hard drive using the installation disk
This formatting method can be considered the simplest. All you need to do is install the optical storage medium in the drive, assign the reader as the priority bootloader equipment and carry out a few simple manipulations in the installer shell.
Let's say you are using a Windows 7 distribution:
- Once in the window for selecting the operating environment installation directory, select the required section from the list.

- Click on the "Disk Setup" button.
- After that, activate the next button - “Format”, which will appear nearby in the lower area of the window, on the left.
Method #2: Using a Recovery Disk
In the Windows operating environment, you can always create a recovery disk, which can later be used to format the system partition (C:\). You can read how to do this here, but we follow according to the schedule...
- Use the “Command Line” item, which will ultimately take you to the service console of the same name.

- It is worth noting that the letters of the sections that you certain time observed in the Windows environment and consider them to be pinned unifiers of drive partitions, they may differ in command line mode. Therefore, it is most expedient to “recognize” disks by their storage capacity, that is, by size.
- Enter the command: wmic logicaldisk get deviceid, volumename, size, description.
- Carefully study the list presented and make the right decision.
- After you enter the command: format /FS:NTFS X: /q (where X: is the drive letter) and press the “Enter” key, the immediate process of quick formatting will begin.
- In case you need to format similar method disk or partition using the FAT32 file system, then instead of the one present in the command NTFS parameter set the required FAT value
Method No. 3: formatting the hard drive using third-party software
Today, there are many different programs and utilities that cope with disk space layout tasks with great ease. However, two, let's call them, especially interesting programs, are still worthy of special mention.
So, to your attention, dear reader:
ERD Commander

So to speak, a lightweight software tool that has a separately presented “Disk Cleanup” option, with the help of which the process of formatting a certain disk space is carried out. Moreover, selecting and managing editable HDD areas is a very simple action in a few clicks.
Acronis Disk Manager

Very comfortable and, in its class, undeniably leading specialized program for managing hard disk partitions. However, despite its versatility and a number of wide possibilities for editing HDD partitions, Acronic is as easy to manage as the ascetic “ERD Comander” presented above. However, more detailed information about the program you can find here.
Correctly carried out the formatting process for you and Have a good mood!
chopen.net
How to format a hard drive through BIOS
Standard means do not imply a direct ability to format the hard drive through the BIOS. Once upon a time, when using DOS, which itself was already an operating system but booted just like the BIOS, you could type in Command line DEL plus the drive name and perform this action. Today's PCs do not provide this option. Therefore, to perform this operation you must use either the operating system or special programs. The first option is not suitable if the OS does not start. In addition, Windows protects itself. If you try to format a volume, usually drive “C” on which the OS is recorded, this action will be prohibited. Therefore, a different approach is needed. But exiting to the BIOS is mainly necessary as an intermediate stage of performing an action. Therefore, we will figure out how to format a hard drive through BIOS, taking these features into account.

What is formatting
The hard drive is structurally a plate on which a coating with special magnetic properties is applied. Initially there are no reference points for the hard drive heads on it. In order for every bit of information to be stored in a specific place, and provided fast access to it, the disk needs to be partitioned. This process is called formatting. Tracks, sectors are applied to it, and information is also recorded to identify the hard drive and control it. This operation also checks physical state surfaces, those areas that have defects that preclude reliable recording and storage are marked as inaccessible.

Formatting is carried out not only on new hard drives, for which this is almost always done at the manufacturer, but also when reinstalling the system. Disk sectors on which Windows or another OS was recorded are marked in a new way in order to eliminate conflicts between programs. In addition, deleting files from storage does not mean that they are completely erased. Quick formatting deletes only information about the location where they were located. Therefore, over time, the disk becomes filled with their fragments, which does not improve the stability of the machine. Approximately the same applies to solid-state hard drives (on chips) that are gaining popularity; the OS works with them according to the same principle.
Formatting Types
When reading files, the machine does not search for them across the entire surface of the disk. The disk has a service area in which a list of files and exact addresses, that is, track and sector numbers, are stored. The reader immediately goes there, and then precisely positions the heads in the right place. This feature is associated with the existence of two types of formatting. When considering how to format a hard drive, you need to take this feature into account.
Quick formatting takes minimal time. When executed, the list of saved files is simply erased.
Standard normal formatting- a longer operation, during which all information is erased and the disk is checked. In this case, all service information is completely rewritten, taking into account detected inoperative tracks and sectors.

When performing quick formatting, it is necessary to take into account that information previously recorded on the disk becomes inaccessible using standard methods. True, most of it can be restored using special utilities. At full formatting everything is lost forever.
Formatting a hard drive via BIOS is only possible using the boot disk of your operating system. To enter the BIOS you need to restart the computer. While loading the operating system, we press the "Delete" key. Here we are in the "BIOS" section. The BIOS system is designed to configure the performance of the entire computer as a whole. We will look at how to format a hard drive via BIOS.
Format the hard drive: BIOS menu
So, to start formatting your hard drive through BIOS you need to take the following steps:
- Open the CD drive and insert the disc containing the installation files for your operating system.
- Restart your computer.
- When you see "Press Del to run setup" press the "Del" key.
- You are now in the "BIOS" section menu.
- You need to select the "Boot" tab, where you select your disk drive as the boot device. Typically, the drive is displayed by its model name.
- After the loading principle is selected, you need to exit and save the changes.
- If you did everything correctly, the download will begin from the installation disk.
- Select "System Restore using the R key."
- Press R.
- A message will appear indicating which copy of Windows needs to be restored.
- If your computer has one operating system, then enter the number 1.
- The next message will ask you to enter your administrator password. If you don't have a password, just press enter. If there is a password, enter the password and press enter.
- We see the system prompt.
- Next you need to enter the command "format: c"
- Press enter and enter "y", which means you agree to perform the operations.
We will offer you another one good way how to format a hard drive through BIOS, which does not allow this a large number of actions:
- We will need the ERD comander program.
- You can download it from this link: download ERD comander.
- After downloading, this program must be written to a blank disk.
- Now on our disc there is a bootable installation disk.
- We put in BIOS loading from the drive.
- The "Working with Disks" section will load.
- Using this partition you can format the disk.
Formatting a hard drive: help from another computer
- Disconnect your hard drive and connect it to another personal computer.
- After connecting, your hard drive will appear in the "My Computer" section.
- You will need to click on it right click mouse and select the format disk option.
Formatting the hard drive: installing new OS files
- Place the installation disk of your OS (operating system) in the drive.
- In the BIOS, select the boot from disk option.
- Follow the instructions that appear next.
- Attention. This method will lead to complete update yours operating program. Some files and programs that you actively used may be deleted.
What is BIOS
Of course, to understand how to format a hard drive through BIOS, you need to know what BIOS is.
BIOS is basic system input and output or Basic Input/Output System. BIOS is designed to check Hardware computer. BIOS mainly consists of firmware that runs the control systems of each of the devices installed on the computer. The BIOS has a built-in speaker that sounds when the device verification process fails. The signal appears when it is impossible to display error information on the computer monitor. BIOS not only checks the functionality of the computer systems, but also sets some minimum characteristics their work. Bus frequency, for example, or some parameters of the central microprocessor. Thus, BIOS is one of the most important systems that a computer cannot do without. BIOS is a certain working minimum with which you can diagnose and correct errors in the operation of the entire personal computer system.