Android 6.0 buttons back home menu program. There are even more possibilities on mobile
In both apps and websites, users rely on menus to find content and use functionality. Menus are an essential component of any website or application, but not all menus are created equal. Very often we come across problems in the menus - some are simply confusing, others are difficult to control, and others are generally difficult to find on the screen.
The menu must be visible
Many posts have been written about the hamburger menu, and most people speak negatively about it.
That little three line button is a real problem. And this is no longer about the icon itself, but about the fact that it hides the entire navigation.
Out of sight - out of mind
Hidden navigation is a pretty logical solution for small screens - no need to worry about limited screen space, just put all your navigation in a scrollable one sidebar, which is hidden by default.
But the hamburger menu button is less effective for one simple reason: you have to click extra to see the option you want.

I see and use
Interaction theory, A/B tests, and the evolution of some of the world's top apps suggest that displaying menu options is more in a visible way increases user engagement and satisfaction.
That's why many apps are moving away from hamburger menus to more relevant navigation options that are always visible.
 Tab Bar: Instead of hiding the navigation options in a collapsible panel, you bring them out.
 YouTube always makes elements of key functionality available with one touch, allowing you to quickly switch between functions.

There are also smart ways hide the tab bar when not in use. If the screen is a scrolling ribbon, the tab bar can be hidden when users scroll to load new content, and show it again if they try to scroll back in the ribbon.

One more thing: Many designers make the mistake of hiding sorting options in a dropdown menu. But this leads to the same problem - users only see the highlighted option, and other sorting options are hidden.
 Less visibility (dropdown menu) and more visibility (toggle). Source: uxmovement.
Conclusion: Many apps still use hamburger menus because it's an easy way to put a ton of links in an app. But this wrong direction because if in the resource difficult navigation, hiding it will degrade usability mobile interface .
Current location designation
Lack of indication of the user's current location is perhaps the most common mistake in building menus for websites or applications. "Where I am?" is one of the fundamental questions that the user needs to answer for successful navigation.
Users rely on visual cues from menus to respond to this critical important question. But sometimes they see something completely different from what they expect to see.
Icons
There are universal icons that users are familiar with and that represent popular functionality such as search, mail, printing, etc. Unfortunately, “universal” icons are quite rare. And application designers often hide functionality behind icons that are very difficult to understand.
Previous version of the Bloom.fm application for Android. Very difficult to understand current location user.Colors
The current state can be directly indicated in the tab bar using contrasting colors.
 How button color controls user attention. Source: uxmovement. The selected item changes its appearance in the tab bar.
 Coordinate menus with user tasks
You should use only clear link names. Find out what the user is looking for and use category names that are understandable and close to yours. target audience. The menu is not the place to joke around with jargon. Use terminology that clearly describes your content and functionality.
Users love mobile applications, which quickly solve a specific case. And you can reduce the time the user has to spend understanding the menu.
Complex functions should always be displayed with the appropriate text label.
Takeaway: Menu items should be easy to scan. Users should be able to understand exactly what happens when they touch an element with their finger.
Keep the manipulations simple
Elements that are too small or too close to each other cause great discomfort mobile users. So make menu links large enough to be easily clicked or touched with a finger.
An MIT Touch Lab study found that the average width index finger an adult is 1.6 – 2 cm. This is equivalent to 45-57 pixels.

Control buttons are divided into mechanical and software. The first ones are located on the body of your gadget - these are the power button, the volume rocker (two buttons with one rocker key) and sometimes the Home(V Lately more often it is software.
The second ones are virtual buttons located on the screen of a smartphone or tablet and also controlled by pressing a finger, but on the screen. This soft button Home, button Back and button Latest apps (sometimes this is a context menu button). The appearance of these buttons depends on the version of Android OS used. This can be, respectively, a house, a curved arrow and two rectangles one after another (Android 4.x version) or, respectively, a circle, a triangle and a square (Android 5 version).
Let's dwell on assignment of control buttons.
Purpose of the button nutrition and swings volume obviously. However, the peculiarity is that the inclusion turned off The smartphone is started by long (more than 2 seconds) pressing the power button, followed by the OS loading process. At working smartphone short press this button calls lock screen(if it is enabled in the settings) or directly going to the desktop. When the smartphone is running, long pressing the power button brings up the Menu, which contains items Shutdown,Data transfer, Offline mode and Reboot(Restart).
Mechanical button Home when pressed briefly, it calls up the lock screen or goes to the main desktop. Long press may cause list of recent running applications , A double tap- one of the programs (for example, in Samsung smartphones S Voice application is called up).
Software button Back causes a transition to previous screen, successive clicks - respectively, on several previous screens until the application is closed. It should be emphasized here that in the latter case the application is unloaded from random access memory, while pressing the button Home causes a transition to the main desktop, but earlier open application remains in memory and continues work in the background.
Button Latest apps is very convenient, since if you need to re-launch one of the previously used applications, there is no need to look for it again in the general list of programs ( Applications Menu) or look for its icon on desktops. Applications in the list are always arranged in reverse chronological order of their launch (the most recently launched ones are first in the list). In addition, the list window contains additional buttons call the List of active tasks (running in the background of applications), the Search for applications button and the Clear the list of recent applications button.
The disappearance of a shortcut from the home screen or the program itself from the list of applications is a problem that many Android users are familiar with firsthand. But few people know how to solve it. Therefore, if you don’t want to overpay a master for trivial work, this article is for you.
Possible problems and their solutions
The screens of mobile gadgets are highly sensitive to touch. Often the user, without knowing it, by accidental pressing sends the icon or application to the trash. Therefore, before checking your device for errors, make sure that the program you are looking for is actually removed. For this:
- Open Play Market.
- Click on the icon that looks like 3 horizontal stripes in a row voice search call the side menu.
- Select “My apps and games”
- Go to the “Installed” tab and check if the application we are interested in is in the list.
- If there is, open the application page, delete it and reinstall it.
- If the application is not in the list, open its page on Google Play and install it.
- We protect ourselves from repetition of such situations: we establish automatic blocking screen while the gadget is not in use.
After reinstallation The label should be back in place. If this does not happen, or the shortcut is back, but only temporarily, you may have:
The system is infected with viruses
Today, malware is increasingly disguised as popular apps, and therefore, the number of downloads from them amounts to hundreds of thousands, or even millions of downloads. Most modern viruses do not harm the device directly (so they can collect information about you longer). However, there are also those that are aimed specifically at destabilizing the operation of the gadget. Removing programs or their shortcuts in this case is common. Therefore, when a problem arises, the first thing we do is make sure that the antivirus databases always remain up to date.
Developer problem
Application development is carried out not only by professionals, but also by amateurs. If the icon does not appear from the very beginning, most likely the author incorrectly specified the intent-filter in the manifest file. To test this theory, ask a friend (who has a phone from the same company as you) to install problematic application. Doesn't he have a label either? Write to the developer until he fixes this bug, the problem will not be solved.
Problem with SD card
Applications from Play market are automatically installed on the internal memory of the smartphone. However third party programs the user can post at his own discretion. Often, to speed up the operation of the system, they are placed on removable card memory. But after booting the device, initializing the SD card may take several minutes. Applications installed on it do not respond to system requests at this time, as a result of which the icons are not displayed.
The problem can be solved in several ways:
- Purchasing more modern map memory with accelerated processing and data recording (not the best option, since it does not guarantee 100% results).
- (the probability of success is maximum, but the smartphone may begin to slow down).
- Reboot the SD card ( optimal solution, which helps in 85% of cases).
To disable and re-enable the memory card, go to “Settings” and open the “Memory” section. There (at the very bottom), first click on the “Disable MicroSD” item, and then (when the drive is deactivated) “Enable MicroSD”. We wait a couple of minutes, after which the shortcuts should appear.

note! Perhaps the memory card itself has become damaged. If the described steps do not help, before moving on to the next steps, check its functionality on another gadget.
Firmware problem
Another option explaining why applications from Android could disappear is related to the system itself. If you recently modified your phone's firmware, the updates may not have installed correctly, resulting in the loss of some shortcuts and/or applications. To return everything as it was:
- Opening system settings phone.
- We find the section “Restore and reset” (or a name similar in meaning).
- Select the recovery option that you use (from the “cloud”, from “ internal memory" and so on).
After the system returns to the previous settings, .

The applications themselves have been moved
When applications are installed on the phone, the path to their location is immediately specified in the shortcut parameters. Therefore, when a program is removed from its installation location, the icon disappears along with it. However, the disappearance of a shortcut from the desktop does not mean that the application was actually deleted. Perhaps you accidentally moved the folder with its files somewhere when you downloaded photos to your computer or installed some application manually, and not from the Play Market.
The easiest way to solve the problem in this case is to reinstall the application. However, the moved files will remain lying somewhere like dead weight. To get rid of them, connect the gadget to the computer and start a search by the name of the application (if it consists of several words, use the first one). If the search results contain the files we need, click on them right click mouse and select “Properties” or “File Location” to find out exactly where on the phone they are stored. If it is not in its place, we delete it.
note! If it was not third-party applications that were moved, but built-in applications, the system may begin to work incorrectly. If you cannot return or reinstall them, roll back the system to previous state, following the recommendations from the previous paragraph.
The launcher is not working correctly
A launcher is a shell that makes it easier for the user to work with a smartphone. And if you changed the basic one to the option from third party developer, some shortcuts may well have been deleted or grouped into folders. To check this, we return to the basic launcher. For this:
- Let's go to settings.
- We are looking for a section dedicated to the settings of the device itself (display, memory, applications).
- Click on the item “Select launcher” (or something similar in meaning, since in the version for your device it may be called differently).
- Select the basic option from the list provided.
- Save the changes and check if the icons appear.
- If yes, the problem lies precisely in the launcher, if not, we return everything as it was and continue to figure it out.

Another option related to the launcher’s operation is grouping applications into folders for optimization free space on the screen. Check if there are folders on your desktop with multiple icons inside. If there is, the desired shortcut may well be inside one of them. To return, open the folder, hold the icon with your finger and, without releasing it, move it to the side until it appears on the desktop.
Factory reset
If the solutions listed above did not help and there are still no icons on the desktop, there is only one option left - . This can be done in different ways.
Note! The reset will delete absolutely all your data in the phone's memory, so before you start, do backups necessary files, contacts etc.
A specific combination of numbers
This option is the simplest, but may not work on all smartphones. To use it, enter one of the three proposed combinations in the dialing field and click “Call”:
- *2767*3855#
- *#*#7780#*#*
- *#*#7378423#*#*
If this method is suitable for your device, the smartphone will reboot, after which the settings will be restored to factory settings.
Through the menu of the smartphone itself
If the device is working normally, you can return its hardware to its pre-sale state through the menu. For this:
- We check that the phone is charged more than 70% (so that it does not turn off during the reinstallation process).
- Open the “Settings” section (for some models the gear-shaped icon is on the desktop, for others it is in the “Menu”).
- In the “System” subsection, look for the “Restore and reset” item (or, if your device does not have one, something similar in meaning).
- Scroll to the bottom of the list and select “Reset settings” or another phrase whose description indicates a return to factory settings.
- We start the rollback and wait for the result.
Now all that remains is to update the system to current version(“Settings” - “About phone” - “System update”) and reinstall the applications.
There are many hidden functions, which can be quite useful. System UI Tuner is one of them. After activating this menu, the user gets more customization options Android interface. In one of the articles on Trashbox we already.
Some developers have already adapted System UI Tuner to meet their needs ordinary users. For example, which was also available on previous versions Android uses UI Tuner to add custom buttons to the quick actions menu, which slides down from the top along with the notification shade. The coolest thing is that on Android 6.0 Marshmallow, using Custom Quick Settings does not require root access.
How it works
First of all, you need to activate the very System UI Tuner menu, which only works on stable version Android 6.0 Marshmallow. Some Android M preview versions did not receive this feature. You can read about activating the UI Tuner in our corresponding article, but if you do not want to go anywhere from this material, then: fully open the top “curtain” with quick action and notifications, press the gear button for 5–7 seconds, which leads to the settings menu - that’s it, System UI Tuner is activated. Now a corresponding item has appeared in the general Android settings menu, but you practically won’t need it. The Custom Quick Settings app does everything for you.Next, install the Custom Quick Settings application itself, which is available for free, but with advertising. It is removed through internal purchases- 99 rubles.


After installing the application, a custom button with an action in top menu you can add a couple of actions. By clicking on the plus Custom Quick Settings, you can select the name of the button, its action - opening any given web page, launching an application, going to some settings submenu, or activating a module. You can select an icon for the button (a total of 1,200 standard ones are available; custom ones are supported), as well as additional action by long press. For example, you can create quick link on Trashbox, and a long press will open or any other site - very convenient thing.
Possibilities
You can also make a quick action that will connect the device to a specific Wi-Fi present in the list of saved ones. Custom buttons for launching applications will be very useful - there is no need to go to the desktop to open the desired program.The possibilities for creating quick actions are very limited - you can only set a connection to a specific Wi-Fi networks or a device with Bluetooth. Here it all comes down to the functionality of the System UI Tuner.

The Pro version of the application allows you to add functional shortcuts with quick actions. There is IFTTT support. It's worth noting that all custom buttons added using Custom Quick Settings do not work on the lock screen - they simply do not appear in the curtain, which is quite expected.
Let us remind you that all these features are also available on Android 5.0 / 5.1, but are required for this. The developer notes that Custom Quick Settings does not use additional battery power - the program runs once when the system boots, and custom buttons are updated only after the user does so.
It's nice to see how the operating room Android system with each new version takes over functions that were previously only available with root rights. We hope that Google company will not delete System function UI Tuner in the future Android update 6.0.1 or 6.1. By the way, have you already updated to Marshmallow?
The main menu is one of the main tools for user interaction with the application. In Android 2.3.x and earlier, it was “hidden” on the hardware Menu button, and the developers drew the menu as best they could. But starting with Android 3.0, the flaw was corrected, the menu became a standard component on the Action Bar, and received a number of new features. At the same time, the menu development process has remained virtually unchanged. A menu in Android is not just a set of buttons on which you can attach an OnClickListener . In Android, you can do a lot more with the menu than meets the eye.
You can add shortcuts to the items you use most directly on the Home screen; This saves you from hunting through menus and apps for what you want. Consider adding the following items as shortcuts. Contacts you call often or text phone numbers from contacts you can tap and call.
- Text addresses that allow you to click and text.
- Directions to your chosen location.
Setting up your daily briefing app
- On the Home screen, press the Menu button.
- Click the "Add" button.
- Tap the highlighted keyboard shortcut.
In this article I will tell you how to make a modern menu, how to adapt it for different sizes screen, how to make radio button switches directly in the menu, as well as how to dynamically control the visibility of menu buttons, hiding those functions of your application that will not work on a particular smartphone. Throughout the article I will try to give as much as possible detailed description of certain menu options, and will also provide links to official documentation on the topic.
To find out what information is right for you, you need to customize your pages. Start by tapping the Menu button on any Daily Briefing screen, then tap Settings from the pop-up menu. In the Settings menu you can configure each section. Click the Select City link to open the Edit City List screen. Click Select Stock to add financial instruments such as stocks, mutual funds, and stock indices. Click the "Add" button to add stocks, and then enter the name of the stock you are interested in.
- Click the Add button to open the City Search screen.
- When you find the city you want, tap it.
- When you're done adding or removing cities, click Return.
- Check the box for what you want to see and then click Save.
This is how the menu of the same application can look different.
Our first button in the menu
Menus in Android are described in resource files or formed program code. The first option is recommended for a number of reasons: speed of development, clarity, ease of maintenance. Menu resources are located in the menu subdirectory of the application's res resource directory. Create a menu directory, then create a new Android XML File:
Calendar: Have your calendar app set up? You'll then see all your appointments to date in a list view. The daily briefing does not require any settings. You can read tutorial or a guide showing you how to perform a certain task on your phone and asking you to press the Menu button.
I guess you can't blame them. This physical button on the phone, not part of the screen. The Menu button icon will be different different phones. Below is the Menu button depending on the phone manufacturer. In this case, your phone should have an app switch button shown below. You can use it as a menu button. Just press the app switch button and you will get a menu.
Select the resource type Menu, enter the file name. Since in different activity menu, most likely, will be different, I recommend linking the menu resource file names to the activity names.
In the editor that opens, enter the code for the first button of our menu:
Google Search and App
Please share with some of you that this is helpful. Manufacturers may decide to change the layout and behavior of the system. Therefore, users may experience different ways performing actions. One such example is the handling of the menu button. But don't worry, it's very easy to get it by looking at the example! This will take you to the left screen below.
Factory Reset Android Lollipop
For phones with a physical or capacitive menu button, you'll tap it, then you'll be taken to the right screen where your options will appear at the bottom of the screen. A context-sensitive button will appear to navigate to the menu in the application. This means that if there are no menu options for that particular screen or application, you won't see that choice.
Let's look at the attributes used:
- We specify android:id so that later in the code we can distinguish some buttons from others.
- android:orderInCategory specifies the order of our button relative to others. Specify the order in increments of 10 or 100, this will allow you to add new elements anywhere in the future without rearranging the order of the rest.
- android:showAsAction is the most interesting parameter, since it controls the behavior of menu items in different situations. It can take a range of values:
- ifRoom - Show an element in the action bar only if there is enough space for it. If there is not enough space, the item will be automatically hidden in the additional menu (the one shown with three dots on top of each other). This is the best way to customize the menu depending on the screen size of the device. On big screens tablets, the action bar will be filled with buttons, and on small phones the most important buttons will be shown, while the rest can also be reached, but only through extra menu. Keep in mind that the additional menu is displayed in the action bar only on those smartphones that do not have a hardware menu button.
- withText - The text specified by the android:title property will be shown next to the button icon. This parameter can be specified in combination with others, separating the parameters with |
- never - The button will never be visible on the action bar, even if there is space for it. You will always have to get to such a button through an additional menu.
- always - Always show the button in the action bar. This parameter should not be abused, since on small phones the buttons may begin to creep onto other elements of the action bar, for example, onto the application title. For each activity, define at most one important button, without which it is absolutely impossible, and mark always only with her. The rest (and if possible all) should be ifRoom .
- collapseActionView - allows you to make a button that opens or hides additional element View in action bar. For example, you can set such a parameter to the search icon, and when you click it, it will show a field for entering a search query directly in the action bar.
- android:title - defines the title of the menu button. It can be displayed next to the icon in the action bar or as the name of an element in the additional menu.
- android:icon - button icon.
Menu icons
If you are developing an application in the Holo style, you can use a ready-made set of icons from Google, which is available for everyone to download from the official website completely free of charge.The set of icons is presented separately for the dark and separately for the light Holo theme, as well as for different screen sizes. If you can't afford a designer on your team, this kit is simply irreplaceable.
It is shown as 3 vertically stacked dots. You can see the OSD menu on the right top corner screen where you have three stacked dots. To see the options, you click the menu symbol and the same menu options as above will appear as a drop-down menu. As a developer, you can use the Menu button to display any options relevant to the user, often using the built-in activity options menu.
To provide the most intuitive and consistent user interface in your applications, you should move your projects away from using the Menu button and towards using the Action Bar. However, this is quite simple for most applications because you can continue to support the Menu button on pre-installed devices cellular communications, but also provide the action bar on new devices with only a few lines of code changes. 
Not only will your apps stop relying on the menu button hardware, but you have to stop thinking about your actions using the "menu button".
Connecting a menu to an Activity
Loading the menu from the resource is very fast. Open the Activity code and override the onCreateOptionsMenu method:@Override public boolean onCreateOptionsMenu(Menu menu) ( getMenuInflater().inflate(R.menu.your_activity_menu, menu); return true; )
Now the menu is displayed, but when I press the button nothing happens. You can attach a handler to a button using code or directly in the XML resource by setting the name of the handler method in the android:onClick property. To do the same with code, you need to override the onOptionsItemSelected method in the Activity:
@Override public boolean onOptionsItemSelected(MenuItem item) ( switch (item.getItemId()) ( case R.id.menuPurchasesListNewRecord: // TODO: click handler here return true; ) return super.onOptionsItemSelected(item); )
Create a submenu
A submenu is useful when we want to clarify how to perform an action presented in the action bar. For example, we have a shopping list and a “Sort” button. By pressing the button, you need to find out by what parameter the user wants to sort the list items: by product category, by name, or by the order in which they were added to the list. Let's look at the submenu code for this case:Here we have declared another tag within a tag. A submenu is a group of the same tags, which allows you to create a submenu within a submenu, and so on, if necessary.
Connecting a menu to an Activity
Your actions should provide buttons for important user actions directly in the action bar. Those that can't fit into the action bar end up in action overflow. In the screenshot here, you can see the action button for search and the action overflow on the right side of the action bar.
This may seem like splitting hairs in terminology, but the overflowing action of the name encourages different thinking. Instead of thinking about a menu that is used as a gimmick for various user options, you should think more about what user options you want to display on the screen as actions. Those who don't need to be on screen can flow off the screen. Users can identify overflow and other options by clicking the overflow button that appears next to the on-screen buttons.
Radio buttons in the menu
We just made a menu to select the sort order for purchases. It would be great to show which sorting method is used in this moment. The list can only be sorted in one of three ways possible ways, which fits perfectly with the idea of a radio button. To make a set of radio buttons from our submenu, just specify the android:checkableBehavior="single" property to the tag. Possible values for android:checkableBehavior:- single - selecting only one of the available elements, our case
- all - select any number of available elements, similar to a check box
- none - group items are normal menu items, this is the default value
The resulting menu code:
App overflow button for legacy apps
This is a compatibility behavior for legacy applications, designed to ensure that applications built to expect the menu button to remain functional. However, this button does not provide a perfect user experience. In fact, in apps that don't use the options menu anyway, this action overflow button does nothing and creates user confusion. You can do this while remaining backwards compatible with devices supported by the apps.
If you launch the application and try to select one of the sorting methods, nothing will happen. The menu does not show that any item is selected. This will have to be done manually by calling item.setChecked(true);
@Override public boolean onOptionsItemSelected(MenuItem item) ( switch (item.getItemId()) ( case R.id.menuPurchasesListNewRecord: // TODO: click handler here return true; case R.id.menuPurchasesListSortOrderCategory: item.setChecked(true); return true; case R.id.menuPurchasesListSortOrderName: item.setChecked(true); return true; case R.id.menuPurchasesListSortOrderAddTime: item.setChecked(true); return true; ) return super.onOptionsItemSelected(item); )
Recovering data after installing an Android update
Fortunately, the system provides such tools by default: the action bar. 
If these icons don't suit your needs and you need to create your own, you should follow the iconography design guide. If you don't need the action bar, you can remove it from your application or from individual actions. This is suitable for applications that have never used an options menu or applications where the action bar does not meet design needs.
If you still have questions about working with the main menu, I will be glad to answer in the comments.
Updated Android version 5 Lollipop, although similar to the previous KitKat, has some differences that may seem unusual and inconvenient. There are many settings in “Lollipop”.
Some of them (such as contrasting text or inverting colors) are needed by a few, while others are needed by almost everyone. Let's look at the question of how to set up Android 5 in more detail.
All you need is yours own theme, which you define to inherit different topics platform depending on current version platforms. For example, here's how you can declare a custom theme for your application. Or you can instead declare a theme for individual elements.
The floating action button is a unique example of a basic use in an application. Common transitions include trigger, toolbar, speed dial, and morph. This is not an exhaustive list. Floating action buttons are designed for flexibility. Experiment with the transitions that best suit your application and the screens on which the button sits.
Factory Reset Android Lollipop
One of the most important Android 5 settings is Factory Reset Protection. Activating this option will result in the fact that it will be impossible to reset the settings to factory settings without the login and password to your Google account.
A floating action button can simply trigger an action. A floating action button that returns the map view. Applications typically use a single button with a floating action. However, this example uses two floating action buttons because they perform equally important but distinct actions.
A floating action button can transform into a toolbar when clicked or from a toolbar when scrolled. The toolbar can contain related actions, text and search fields, or any other elements that are useful to have at hand.

Thanks to Android service Device Manager the owner of a lost or stolen smartphone will be able to remotely lock and wipe the device.
It must be remembered that the protection only works when the smartphone is locked with an activation screen.
Recovering data after installing an Android update
Another one useful option- ability to restore data after Android installations 5.0 Lollipop. During the initial setup, you will be offered various options for data recovery, including missed calls.
A floating action button that turns into a toolbar. The floating action button turns into a toolbar. A toolbar that disappears as you scroll is especially useful for screens where a full toolbar is needed upon initial entry or at the top or bottom of a long list. This saves screen real estate when the user has asked to scroll that they are interested in viewing the main content.
A toolbar that transforms into a floating action button when scrolling. If a floating action button turns into a toolbar, that toolbar must contain associated actions. In this example, the button allows the user to select the type of media to add.
Android 5 setting up accounts
A user account manager may come in handy - by analogy with a full-fledged desktop, it will be possible to limit access to the capabilities of a smartphone.
There are 3 types of accounts available:
- The Guest account has minimal rights. Any information is stored only temporarily. Each time you log in as a guest, the system will ask whether the user wants to start over or continue the last guest session.
- “Profile” allows you to configure access to programs and services.
- “User” is also the owner of the device. This account has the most rights. Any change to system settings, such as adding a Wi-Fi network, will apply to all other accounts on the device.
How to add users? It’s very simple - go to the settings and look for the inscription “Users”.
Don't include unrelated or confusing activities. A floating action button can remove associated actions once clicked. After calling the menu, the button should remain on the screen. Clicking in the same place should either activate the most frequently used action or close the open menu.
A floating action button that discards related actions. A floating action button can be converted into a single sheet of material that contains all the actions. Floating action button that converts into one sheet of material. As a rule, according to at least three options when pressed, but no more than six, including the original target of the floating action button. If you have two options - i.e. your floating action button only throws one other option - choose which action is most important.

Initially, you will see the profile of the smartphone owner and the guest profile. You can also add users.


Desktop, multitasking and notifications
If you have more than six, users may have trouble reaching the furthest option. Reduce decision fatigue by providing users with the best, most, and least options. The floating action button must release at least three options.
A floating action button should release no more than six options. Parameters must be specific addresses. Options should not include an overflow menu. Place overflow actions in the overflow menu in toolbars rather than in floating action buttons.
To add new users, you will need to enter their Google accounts. Each user will be able to customize the operating system for themselves. The owner of the device does not have the ability to control this process, but he has the power to allow or deny other users to send SMS and make calls.
Restricting access to Android 5 Lollipop
Another one useful feature– the so-called “Button”. If you give someone your smartphone and don't want them to rummage through it or change anything, use Button. It will limit the functionality of the device to only one application - the one on which it is installed. Access to everything else will be denied: “Enter your password.”


How to do it? Open Settings and select the “Security” option. Click on it. In the list that opens, click “Screen pinning”. Then switch the toggle switch to the “On” position. (On).


Now you can pin any application to your screen. To do this, launch the selected program and double-click on its window.
To exit a pinned app, press and hold the Review and Back buttons. In a few seconds you will be taken to your desktop.
How to set up interrupts in Android 5
Among other things, you can configure so-called “Interrupts” in Android 5.0 Lollipop - you can determine for yourself which contacts or applications can call you or send notifications.
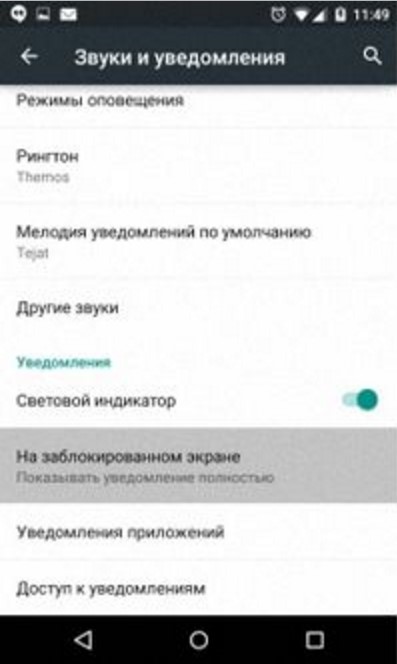
How to configure interrupts? Go to settings, select “Sound & notification” and tap on this option. Below the sound adjustment sliders there will be an “Interruptions” option - click on it.


You can only be disturbed by favorite contacts or applications. Lollipop has the ability to turn on the “Important” mode according to the schedule you set - for this there is a special option “Downtime (priority interruptions only) mode schedule”.


You can quickly change priority modes by simply tapping the volume slider. Below it, the “Do Not Disturb” (None), “Important” (Priority) and “All” modes will be available.
The first two modes can be turned on indefinitely or for a certain time. The “+” and “-” buttons allow you to adjust the time interval during which the selected mode will operate. The time period can be adjusted from 15 minutes to 8 hours.
Setting up Lollipop lock screen and notifications
In Android 5.0 Lollipop, incoming notifications are displayed on the lock screen. This is not always convenient. It’s unlikely that anyone wants to “share” personal information. For this case, there is a flexible setting in Android 5 for how notifications are displayed.
To do this, go to Settings -> Sound and notifications -> On lock screen -> Hide personal information. After that prying eyes they won't see her.


Mail in Android 5 has become more convenient
Postal gmail app, in addition to the new design, received support for accounts on other postal services, supporting IMAP and POP protocols. Now you don’t need to go into the browser to open a non-Google “box” - everything can be done from one application.


Android 5 Battery Saver Setting
If you want your smartphone to last longer on a single charge, you should learn how to set up the Project Volta battery saving mode in Android 5. According to the developers, it allows you to extend operating time by 15-20%. However, the device begins to noticeably “slow down”.
To enable this mode, go to settings, click on “Battery”, then on the menu button (three dots in the upper right corner) and select battery saving mode:

 When the battery saving mode is turned on, the navigation and status bars of the smartphone will turn orange and a message will appear indicating that the saving mode is enabled:

If you want, you can turn off this mode immediately - there is such an option in the message that appears.
Setting up the Switch Access function in Android 5
In the Lollipop settings, it became possible to connect additional external devices - keyboards or keyboard-like devices that will perform the functions touch buttons on the menu. The Switch Access utility is designed for this. It may be useful for people with disabilities.
For this option to work, you must complete the following steps.
- Connect external device via USB or Bluetooth.
- Assign the actions that the connected device will perform. To do this, you need to activate the auto search function.

When autoscan starts, options will be highlighted one by one with a rectangle, which the user can use to associate a key on an external device.
If the external device consists of 1 switch, the procedure is as follows:
- enable autoscan;
- press Key Combo for AUTO SCAN;
- when the menu opens, press the switch button. A message will appear indicating that the action has been recorded;
- click OK.
If the external device has several switches, you need to do the following:
- select Key Combo for NEXT;
- when the dialog box opens, click the button that you will use to move the cursor to the next object on the screen;
- click OK to close the dialog box;
- press Key Combo for CLICK;
- when the dialog box opens, click the button you will use as left button computer mouse.
Repeat the first three steps if you want to configure any more buttons.
To enable Switch Access, you need to exit the settings of this option to the main Switch Access screen and move the slider to the On position.
One more detail: you need to enable on-screen keyboard. The smartphone sees the connected device as an input device and therefore does not show the keyboard on its screen. To make it visible on the phone screen again, open the main settings -> Language & Input -> Current keyboard. Enable the Hardware (Show input method) option.
This is not all, but the most necessary and in demand functions that you should know when